Pumpkin Cheesecake Crumble Bars Irresistible Treat
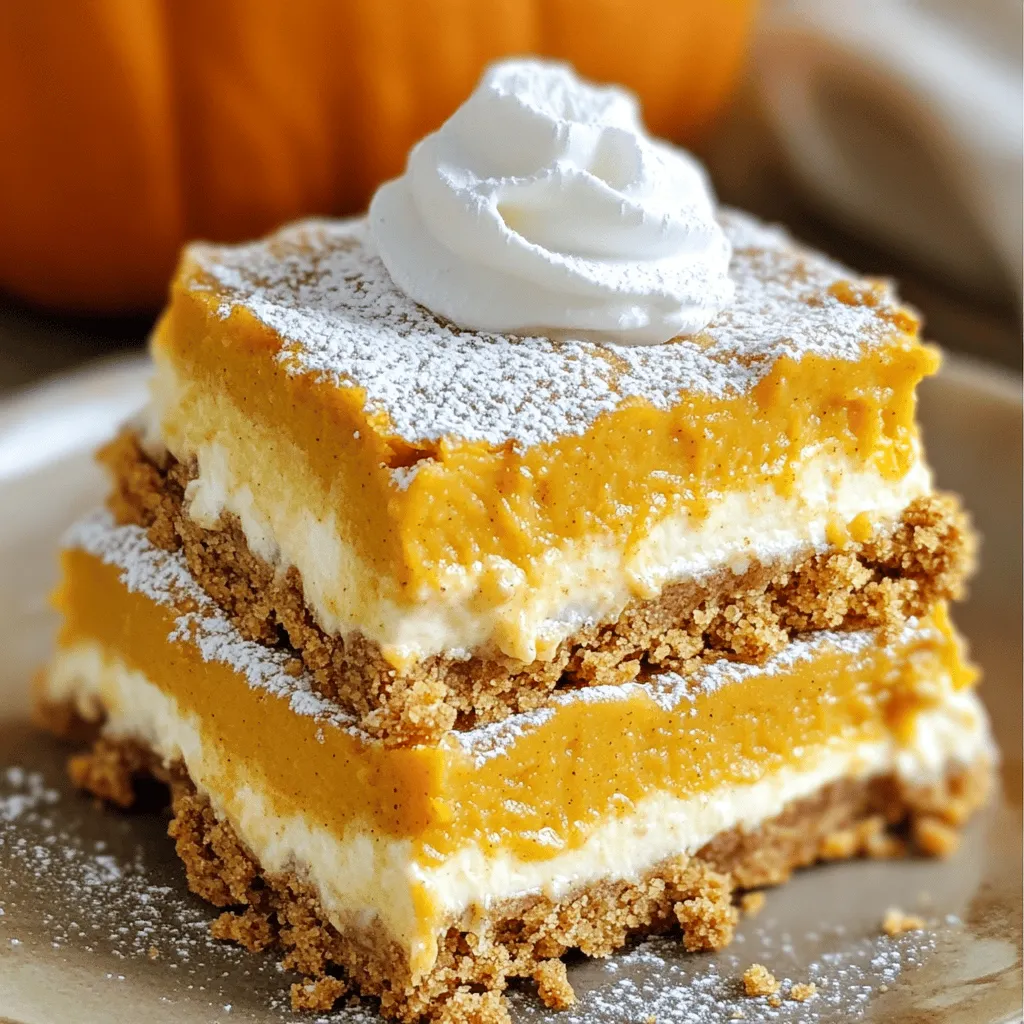
Get ready to indulge in the ultimate fall treat: Pumpkin Cheesecake Crumble Bars! These bars combine creamy cheesecake and spiced
Get ready to indulge in the ultimate fall treat: Pumpkin Cheesecake Crumble Bars! These bars combine creamy cheesecake and spiced
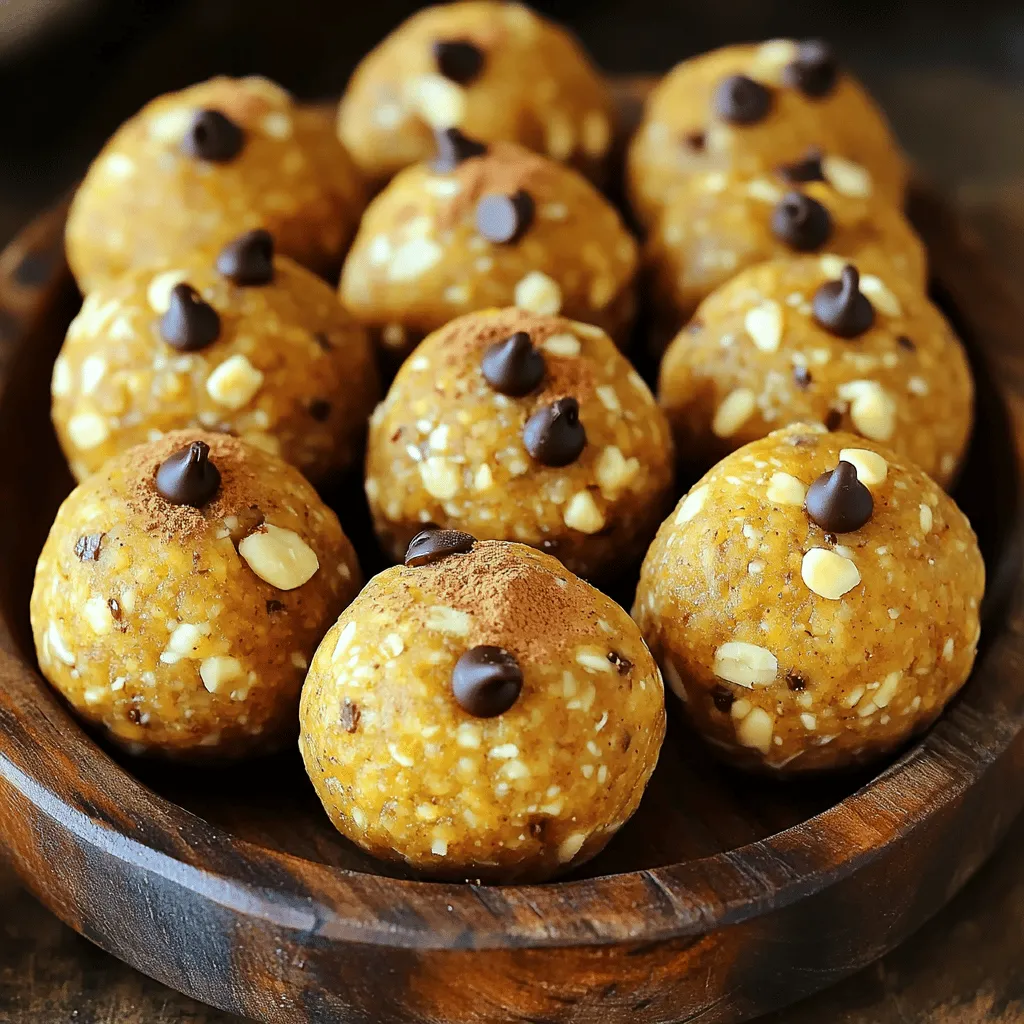
If you crave a quick snack that’s both healthy and delicious, then No Bake Pumpkin Spice Energy Balls are for
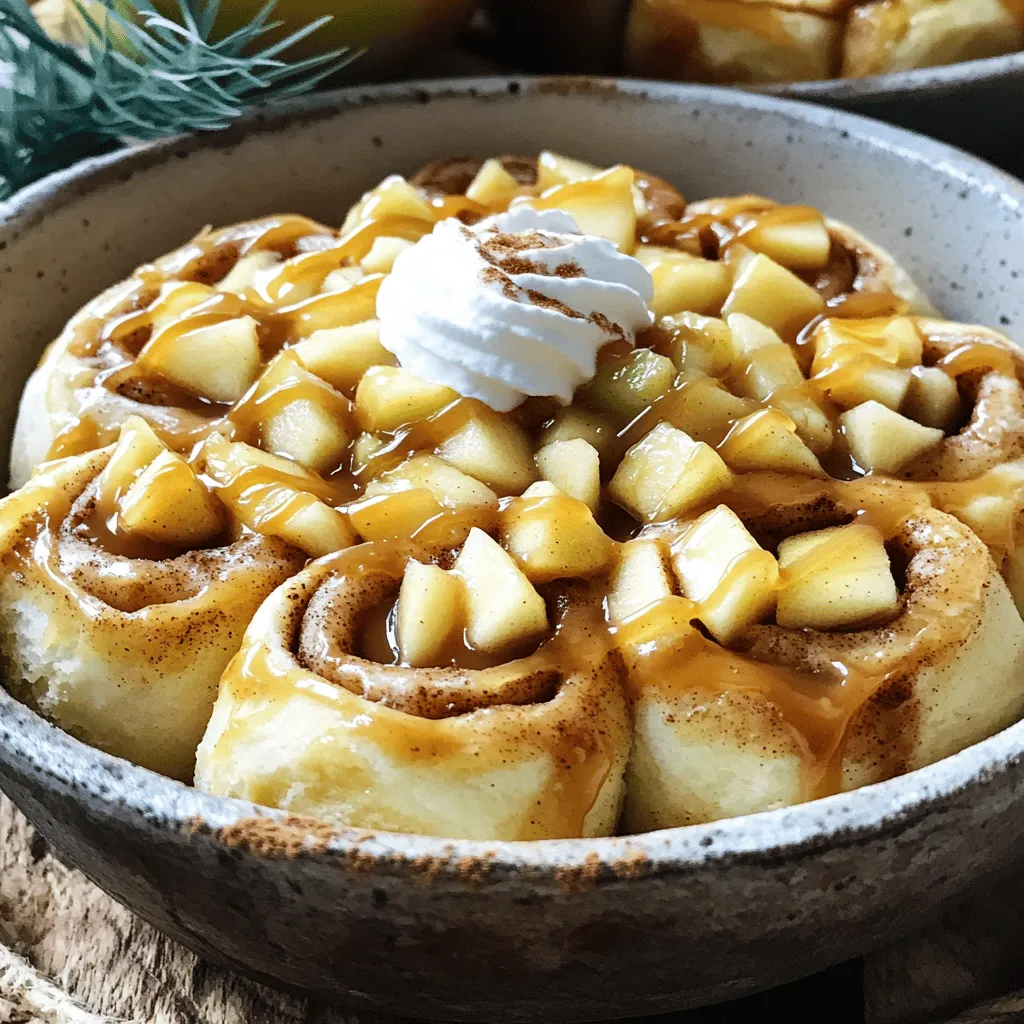
Craving a sweet, gooey treat? Let’s whip up a Caramel Apple Cinnamon Roll Bake! This easy recipe combines soft cinnamon
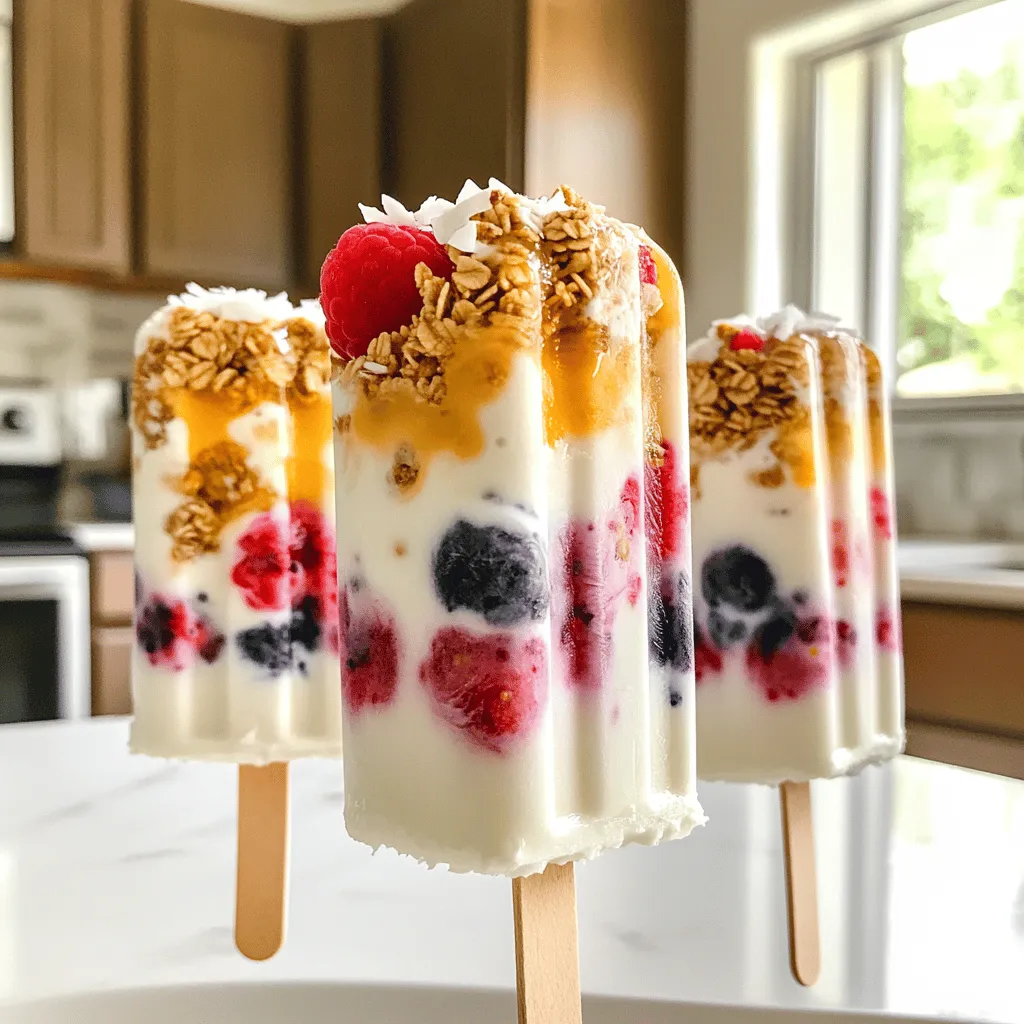
Looking for a fun, healthy way to cool down this summer? Greek Yogurt Parfait Popsicles are your answer! Packed with
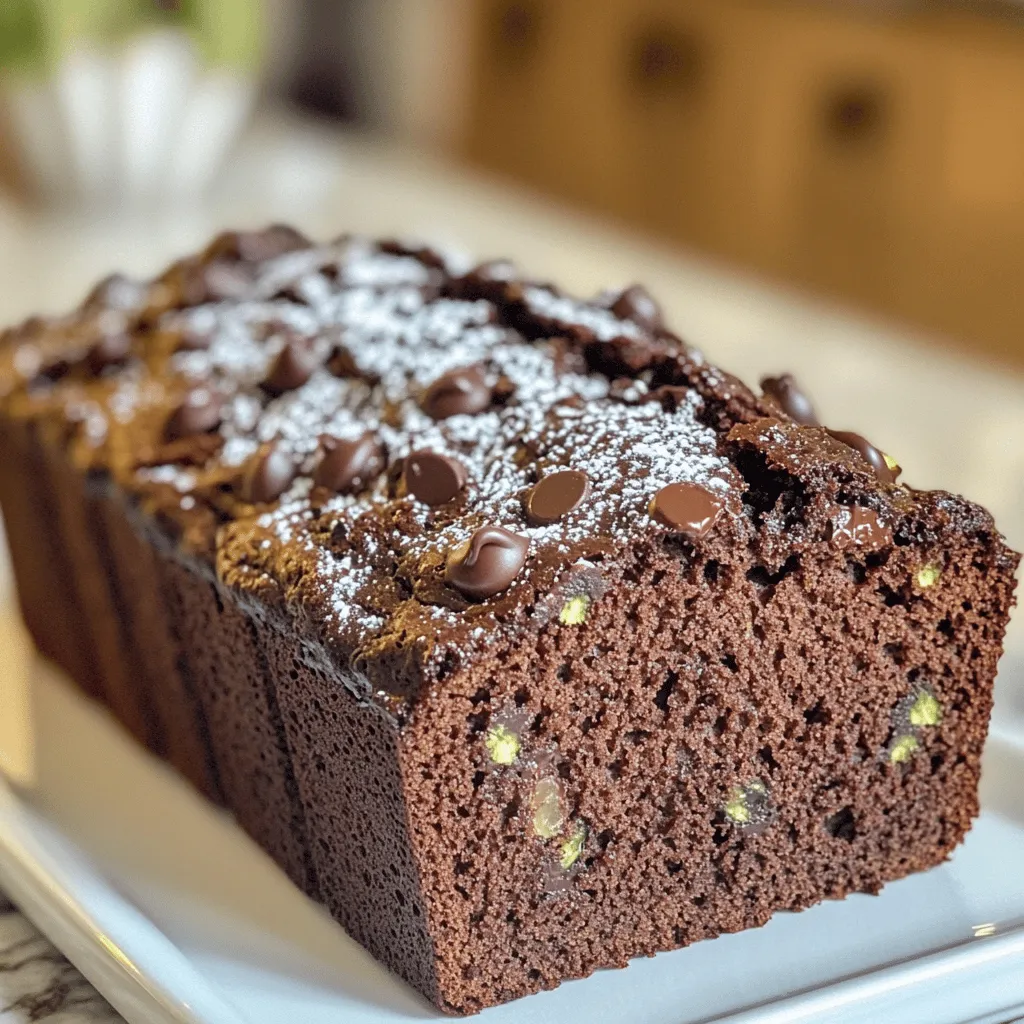
Imagine biting into a slice of Chocolate Zucchini Bread that’s rich, moist, and oh-so-delicious. Trust me, your family will never
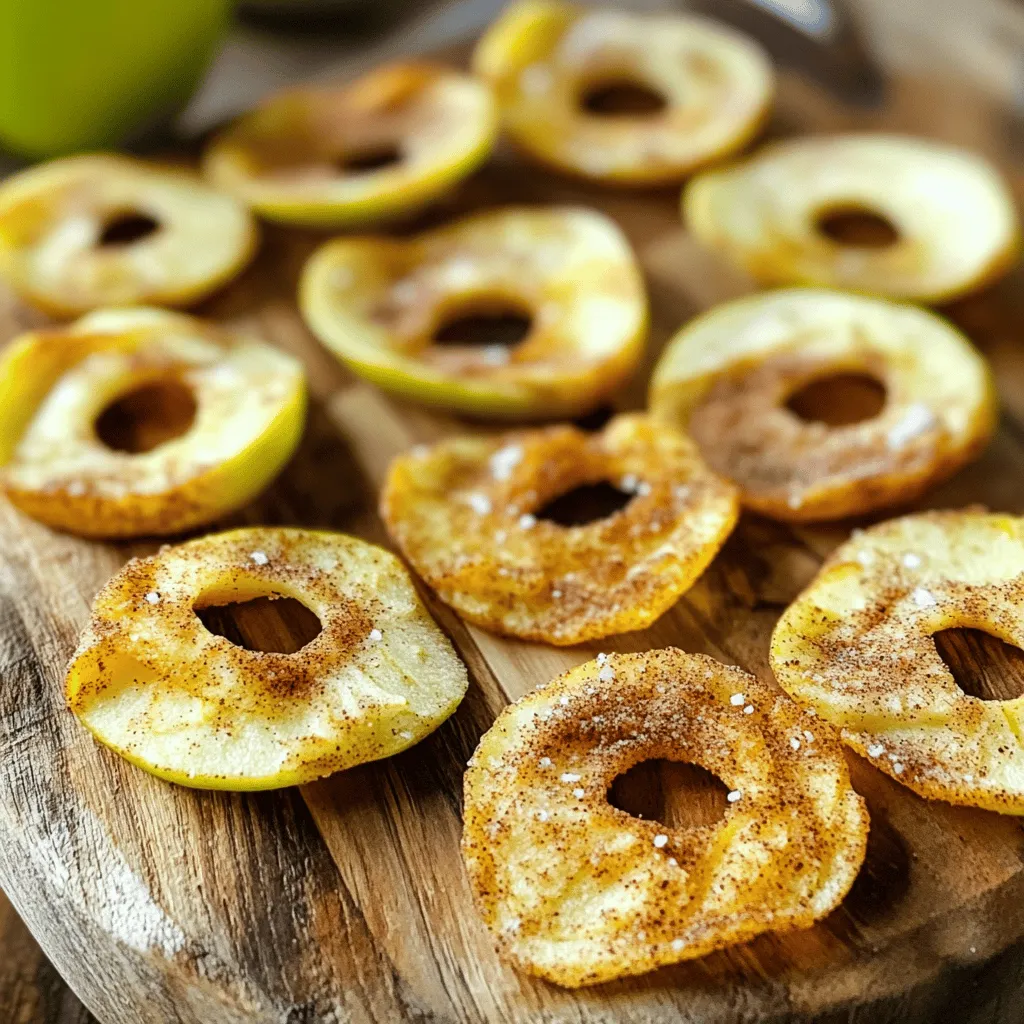
Are you ready to enjoy a tasty, healthy snack? My Air Fryer Cinnamon Apple Chips recipe is simple and delicious!
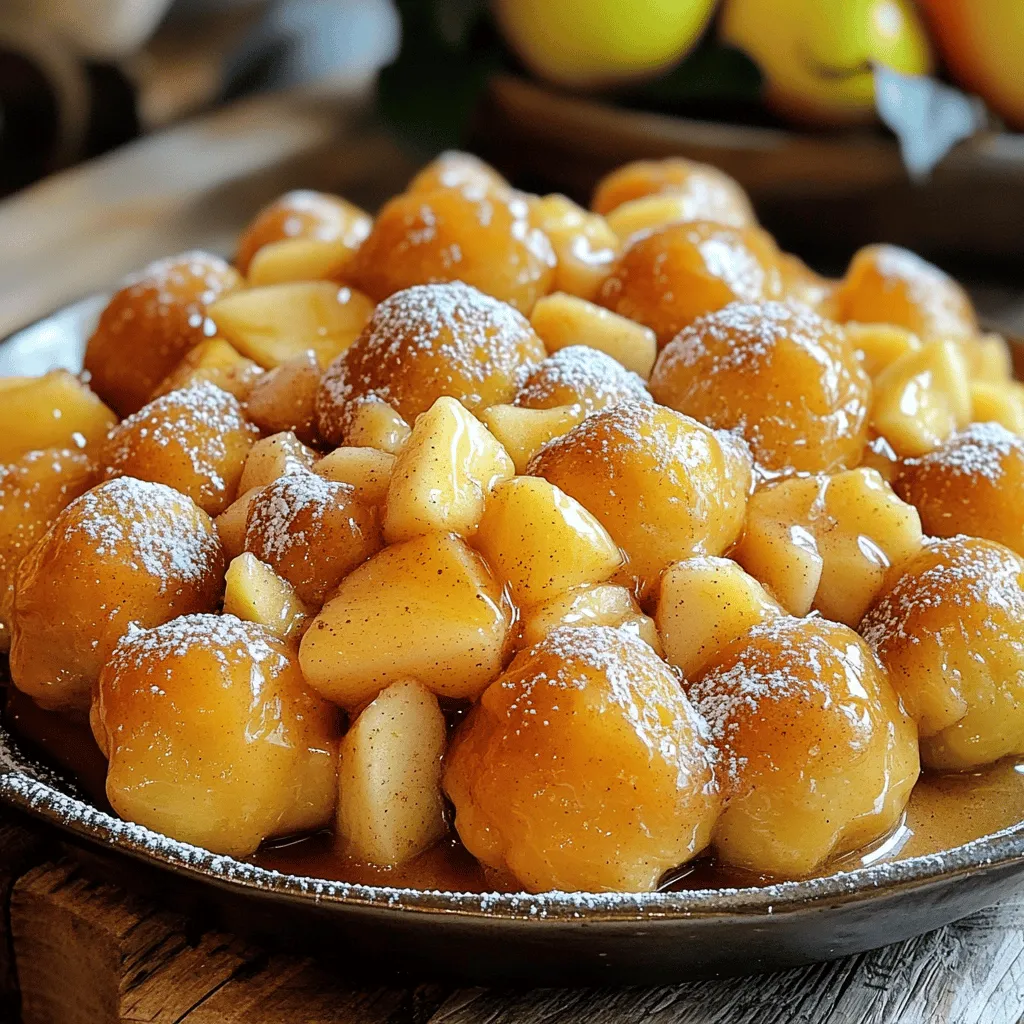
Get ready for a mouthwatering treat that combines sweet, tender apples with warm cinnamon. My Irresistible Apple Cinnamon Monkey Bread
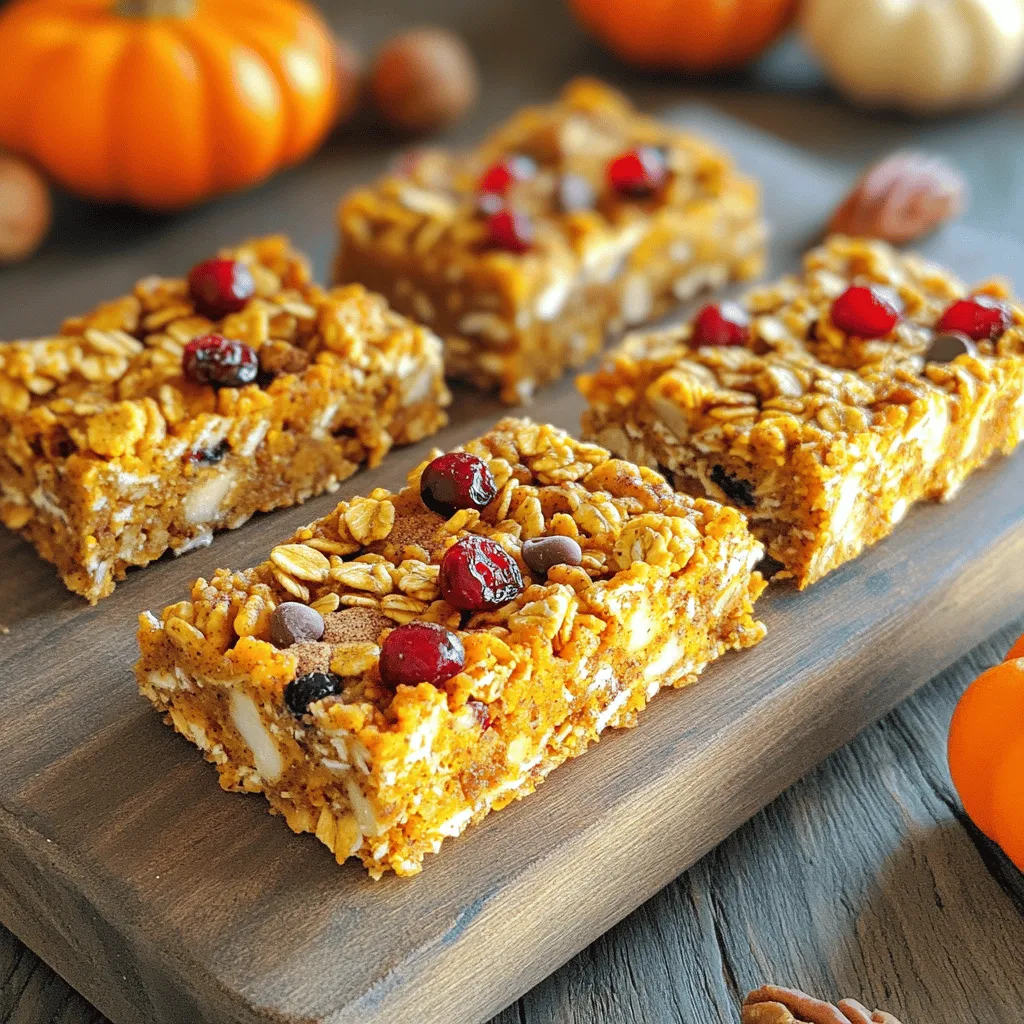
Looking for a snack that is both healthy and delicious? You’ve landed in the right place! These Pumpkin Spice Granola
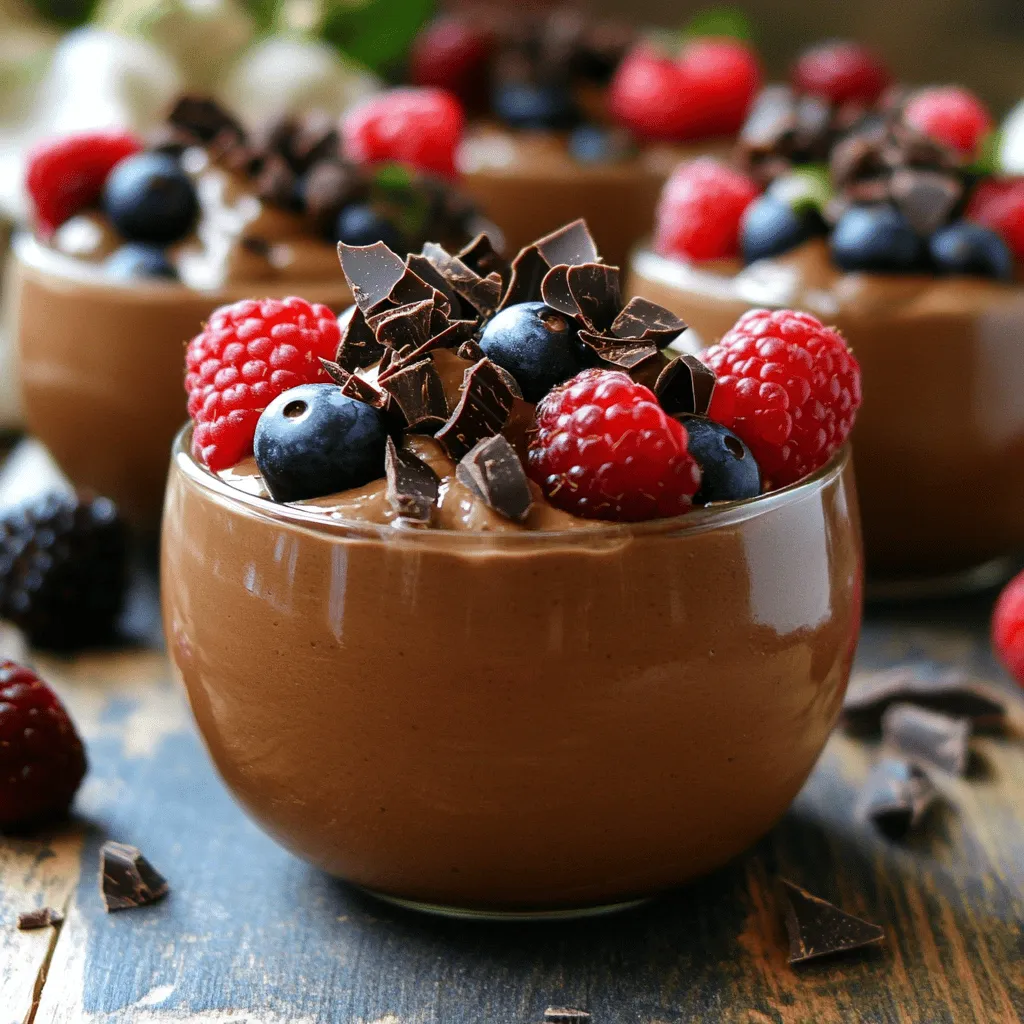
Are you ready to indulge in a rich and creamy treat that won’t ruin your diet? This Cottage Cheese Chocolate
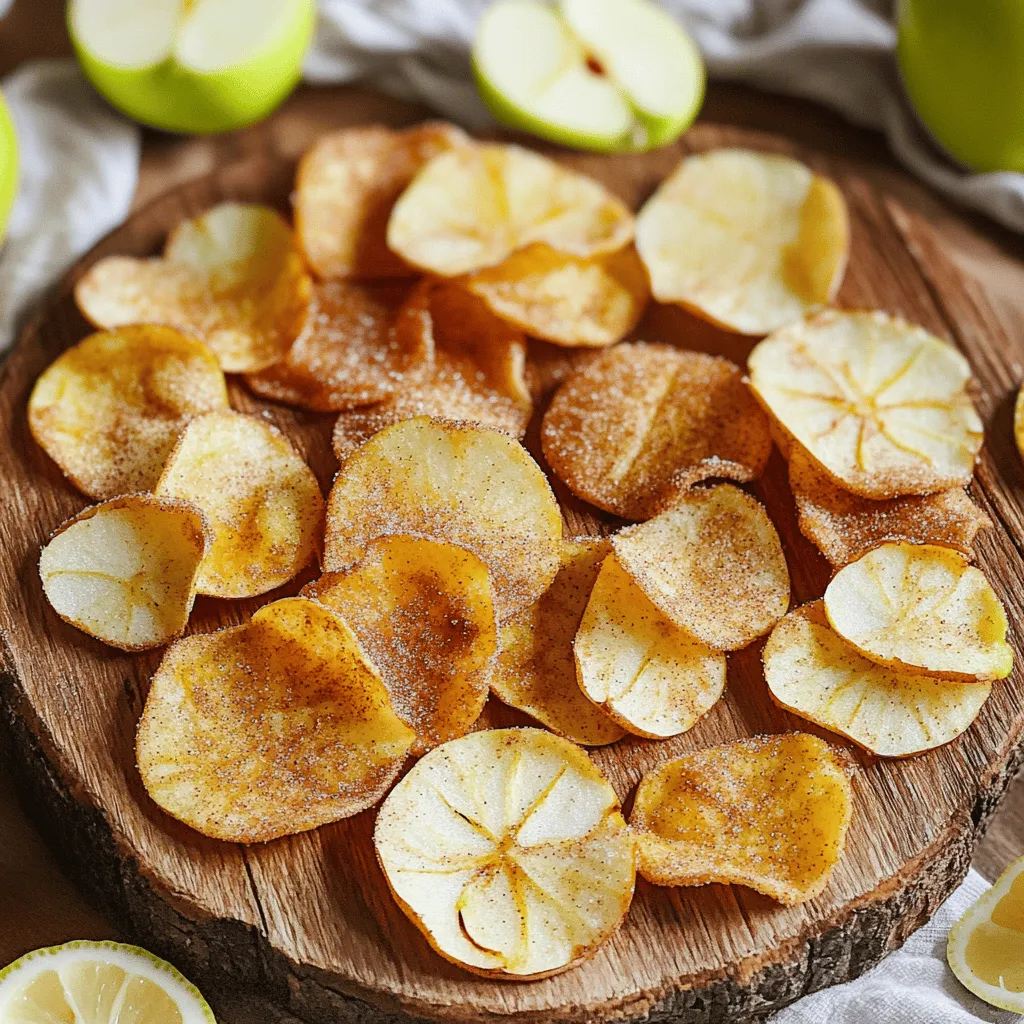
Are you on the hunt for a simple, healthy snack? Look no further! Air fryer cinnamon apple chips are easy
