Skip to content
DisclaimerTerms Of UseGDPR PolicyCookie Policy

Lisa Dishes

  • Home
  • Drinks
  • Appetizers
  • Dinner
  • Dessert
  • About
  • Contact
  • Privacy Policy
DisclaimerTerms Of UseGDPR PolicyCookie Policy

lisa

- Quinoa and Vegetable Details Quinoa is a tasty grain that cooks in just 15 minutes. It is full of protein and fiber. For this bowl, I use 1 cup of rinsed quinoa. It pairs well with colorful veggies. I like to add: - 1 red bell pepper, chopped - 1 zucchini, diced - 1 cup cherry tomatoes, halved - 1 medium red onion, quartered - 2 cups kale, chopped These veggies give great flavor and nutrients. Roasting brings out their natural sweetness. - Healthy Fats and Seasonings I use olive oil to add healthy fats. You'll need 3 tablespoons for roasting the veggies. For seasoning, I suggest: - 1 teaspoon garlic powder - 1 teaspoon smoked paprika - Salt and pepper to taste These spices add depth and warmth to the dish. - Suggested Toppings To make the bowl even better, you can add toppings like: - 1 avocado, sliced (for topping) - Fresh parsley, chopped (for garnish) These bring creaminess and freshness to every bite. - Add-ins for Extra Nutrition You can boost the nutrition of this bowl with extras like: - Cooked beans or lentils for protein - Nuts or seeds for crunch These options allow you to customize your bowl and meet your dietary needs. For the full recipe, check out the detailed instructions to create your Roasted Veggie Quinoa Bowl. To cook quinoa, start by rinsing 1 cup of quinoa under cold water. This helps remove bitter saponins. Next, bring 2 cups of vegetable broth to a boil in a medium saucepan. Once boiling, add the rinsed quinoa. Lower the heat, cover, and let it simmer for about 15 minutes. The quinoa is done when all the liquid is absorbed. Fluff it with a fork to get the perfect texture. For perfectly fluffed quinoa, remember these tips: - Use the right water-to-quinoa ratio: 2:1. - Avoid lifting the lid while it cooks. This keeps the steam inside. Now, let's prep the vegetables. You'll need a red bell pepper, zucchini, cherry tomatoes, and a red onion. Chop them into bite-sized pieces and put them in a large bowl. Drizzle 2 tablespoons of olive oil over the veggies. Add 1 teaspoon each of garlic powder and smoked paprika. Season with salt and pepper to taste. Toss everything well to coat. Roasting is simple. Spread the veggies on a baking sheet lined with parchment paper. Make sure to lay them in a single layer. Roast them in a preheated oven at 425°F (220°C) for 20-25 minutes. Toss the veggies halfway through for even cooking. In the last 5 minutes, add 2 cups of chopped kale to the pan. It will wilt nicely with the other veggies. Now, it’s time to assemble the bowl! Take the cooked quinoa and divide it among serving bowls. Top it with the roasted vegetables. For a fresh touch, add avocado slices and sprinkle with chopped parsley. If you want extra flavor, drizzle the last tablespoon of olive oil on top. This bowl is colorful and packed with flavor. Each layer brings something special, making every bite tasty. You can even explore more ideas with the Full Recipe for more inspiration! To make your roasted veggie quinoa bowl shine, focus on even cooking. Cut your veggies into similar sizes. This helps them cook at the same rate. For softer veggies like zucchini, cut them thicker. For firmer veggies like bell peppers, slice them thinner. This way, you get a perfect mix of textures. Adjust cooking times based on what you use. For heartier veggies, roast them a bit longer. Check them after 20 minutes. If they're still firm, give them 5 more minutes. Always toss the veggies halfway through roasting. This helps them brown nicely on all sides. Seasoning is key to a tasty bowl. Use a mix of garlic powder, smoked paprika, salt, and pepper. These flavors boost the taste of your veggies. You can also add a splash of lemon juice or balsamic vinegar. This adds a nice zing and balances the dish. Don’t forget about fresh herbs! Parsley or cilantro can lift the flavors. Just sprinkle them on top before serving. Plating your bowl well makes it Instagram-ready! Use a wide bowl, and start with quinoa at the bottom. Layer your colorful veggies on top. For a pop of color, add bright cherry tomatoes and green kale. Finish with creamy avocado slices on the side. The mix of colors makes the bowl look inviting. When you post it, use good lighting to show off those vibrant hues. For the full recipe, check out the detailed instructions above. {{image_2}} You can add more protein to your roasted veggie quinoa bowl easily. Beans and lentils are great options. They add fiber and nutrients. For beans, try black beans or chickpeas. Lentils work well too, and they cook fast. If you eat meat, consider grilled chicken or shrimp. These options will make your bowl filling and tasty. Feel free to swap veggies based on what you have. Seasonal vegetables can change the bowl's flavor. In winter, use root veggies like carrots or sweet potatoes. In summer, add fresh corn or asparagus. You can also explore spices to enhance flavors. Try cumin, curry powder, or even fresh herbs. Each spice opens up new taste profiles. Quinoa is great, but other grains work too. Brown rice, farro, or barley can be used. Adjust cooking times for each grain. For brown rice, cook for about 45 minutes. Farro cooks in 30 minutes, while barley takes around 25 minutes. Experiment with different grains to find your favorite. You can find the full recipe for the roasted veggie quinoa bowl to get started! To keep your roasted veggie quinoa bowl fresh, store it properly. First, let it cool to room temperature. Then, place it in an airtight container. This helps prevent moisture loss. Ideally, eat it within 3 to 5 days. After this, you may notice changes in taste or texture. If you want to save leftovers, freezing is a great option. Portion the bowl into single servings. Use freezer-safe containers or bags to store them. This keeps them fresh for up to 3 months. To reheat, thaw in the fridge overnight. Then, warm it in the microwave or on the stove until hot. Meal prep makes busy days easier. Portion out your quinoa and veggies in advance. This way, you can grab a quick lunch in minutes. When you want to eat, add fresh toppings like avocado. If the bowl seems dry, drizzle a bit of olive oil. This keeps it flavorful and satisfying. A roasted veggie quinoa bowl is a warm dish filled with quinoa and colorful roasted vegetables. The bowl is not just tasty; it’s also healthy. Quinoa is a great source of protein and fiber. It has all nine essential amino acids. Roasting veggies like bell peppers and zucchini brings out their natural sweetness. This bowl is a balanced meal with nutrients from grains and veggies. Yes, you can make this dish in advance. Cook the quinoa and roast the veggies, then store them separately in the fridge. This way, you can mix them together when you're ready to eat. Meal prep helps you save time during busy days. The flavors stay fresh for about three days. Just reheat the quinoa and vegetables in the microwave or on the stove. Some great vegetables for roasting are: - Bell peppers - Zucchini - Cherry tomatoes - Red onion - Kale These veggies have great flavor and texture when roasted. You can also try carrots, broccoli, or sweet potatoes for a twist. The key is to cut them into similar sizes so they cook evenly. You can easily change the flavors in your bowl. For a spicy kick, add cayenne pepper or chili powder. If you love herbs, try thyme or rosemary. You can also mix in lemon juice for a zesty touch. Experimenting with spices lets you create your own unique flavor. This way, your bowl can match your mood or taste. In this article, I covered how to make a tasty roasted veggie quinoa bowl. We explored key ingredients, cooking tips, and creative variations. This dish offers many ways to customize and enjoy healthy meals. Remember, you can mix different veggies or grains to make it your own. Meal prep allows you to enjoy it all week. Try garnishing your bowl for an appealing look. Enjoy making and sharing this delicious, nutritious dish!

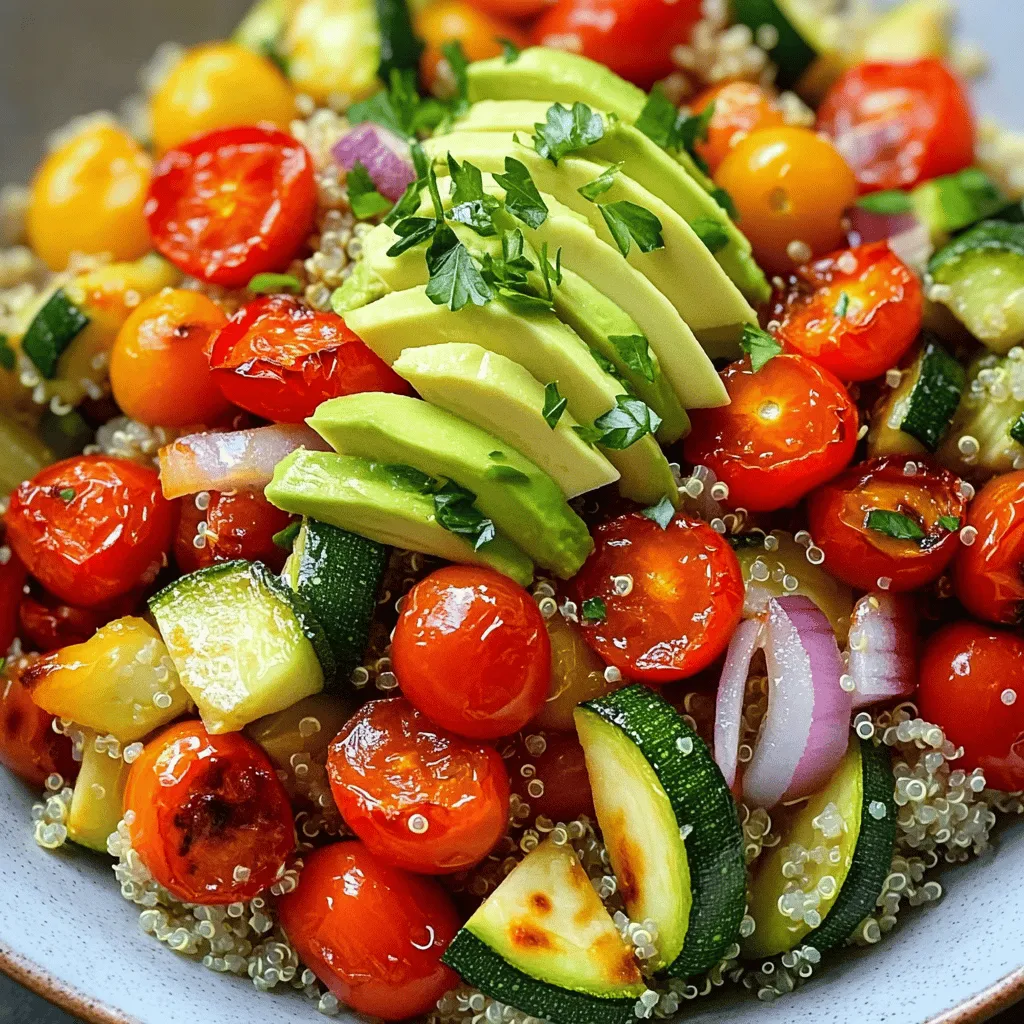
Roasted Veggie Quinoa Bowl Packed with Flavor

Are you ready to create a meal that bursts with flavor and nutrition? A Roasted Veggie Quinoa Bowl is just

- 1 cup rolled oats - ½ cup almond butter - ¼ cup honey or maple syrup - 1 cup dried blueberries - Zest of 1 lemon - 2 tablespoons lemon juice The main ingredients in Lemon Blueberry Energy Bites create a tasty and healthy snack. Rolled oats form the base, giving these bites a chewy texture. Almond butter adds protein and creaminess, while honey or maple syrup provides natural sweetness. Dried blueberries bring fruity flavor and a burst of color. The zest and juice of a lemon give a fresh, tangy kick. - 1 tablespoon chia seeds - ½ teaspoon vanilla extract - Pinch of sea salt Chia seeds are small but mighty. They add fiber and healthy fats. Vanilla extract enhances the flavor, making it aromatic and inviting. A pinch of sea salt balances the sweetness, making every bite delightful. - Consider using different nut butters like peanut or sunflower seed butter. - You can swap dried blueberries for cranberries or raisins. - For a nut-free option, use sunflower seed butter and omit nuts. Feel free to make these bites your own. You can modify the recipe to suit your taste or dietary needs. It’s all about making a snack that you love. Check out the Full Recipe for more details on how to create these energy-packed bites that fit your lifestyle. To start, gather all your dry and wet ingredients. In a large mixing bowl, combine the following: - 1 cup rolled oats - ½ cup almond butter - ¼ cup honey or maple syrup Mix these well until they blend into a smooth paste. Next, add in the fun flavors! Toss in: - 1 cup dried blueberries - Zest of 1 lemon - 2 tablespoons lemon juice - 1 tablespoon chia seeds - ½ teaspoon vanilla extract - Pinch of sea salt Use a spatula or your hands to mix everything together. You want a sticky dough that holds together. This mixture is the heart of your energy bites. Now it’s time to shape the dough. Cover the bowl and put it in the fridge for about 30 minutes. This helps firm it up. After chilling, take the dough out. Using your hands, shape the mixture into small balls, about one inch wide. Place these bites on a parchment-lined baking sheet. Make sure they are spaced apart so they don’t stick together. Once you’ve shaped all the bites, return them to the fridge for another 30 minutes. This helps them set nicely. For storage, keep the energy bites in an airtight container in the fridge. They stay fresh for up to one week. If you want to keep them longer, freeze them! When serving, try placing them in a small bowl or on a platter. A drizzle of extra honey or a sprinkle of lemon zest adds a nice touch. For the full recipe, check the section above. Enjoy your tasty, healthy snack! To get the best texture for your Lemon Blueberry Energy Bites, focus on the dough's stickiness. The right amount of almond butter and honey or maple syrup will help. If the dough feels too dry, add a little more almond butter. If it’s too wet, mix in more oats. This balance leads to a chewy and satisfying bite. When mixing the ingredients, I recommend using your hands. This method helps you feel the dough's consistency. Make sure all parts blend evenly. If you use a spatula, scrape the sides often. This will ensure all the ingredients mix well. A uniform mix is key to a great flavor in every bite. To boost the flavor of your energy bites, consider adding spices. A pinch of cinnamon can add warmth. You can also try a splash of almond extract for a nutty taste. If you want more zing, add extra lemon zest. These small changes can elevate your bites to a new level. {{image_2}} You can mix up the flavors in your energy bites. Instead of blueberries, try using dried cranberries or cherries. For nuts, swap almond butter with peanut or cashew butter. You can also add different seeds like pumpkin or sunflower for a new crunch. Here are some fun combos to inspire you: - Cranberry and cashew - Cherry and peanut - Raisin and sunflower If you want to skip the traditional ingredients, there are other ways to make energy bites. Use nut-free spreads like sunbutter or tahini. You can also add protein powder for an extra boost. Try using mashed bananas instead of honey for sweetness. Here are some ideas to create no-bake bites: - Oats, sunbutter, and chocolate chips - Protein powder, almond milk, and oats - Mashed banana, oats, and cocoa powder Seasonal produce can bring new life to your energy bites. In summer, use fresh strawberries or peaches instead of dried fruit. In fall, pumpkin puree can add flavor and moisture. Winter brings a chance to use dried figs or dates. Here’s how to swap ingredients by season: - Summer: Fresh strawberries and lemon zest - Fall: Pumpkin puree and cinnamon - Winter: Dried figs and nutmeg These variations keep things fresh and exciting. Plus, they let you customize your energy bites to suit your taste. For the full recipe, refer to the section above. To keep your Lemon Blueberry Energy Bites fresh, store them in an airtight container. This helps keep moisture out and the bites tasty. Place them in the fridge right after they set. The cool air will help maintain their flavor and texture. If you notice they are getting dry, you might want to wrap them in plastic before storing. Freezing is a great way to extend the life of your energy bites. Here’s how to do it: 1. After forming the bites, place them on a baking sheet in a single layer. 2. Freeze them for one hour. This step prevents them from sticking together. 3. Once frozen, transfer the bites to a freezer-safe bag or container. 4. Label the bag with the date, so you know when you made them. 5. Seal tightly and place them back in the freezer. You can store the bites in the fridge for up to one week. If you freeze them, they can last for about three months. Just remember to thaw them in the fridge before you enjoy them. This way, they stay nice and fresh! You can use fresh blueberries, but there are some things to keep in mind. Fresh blueberries have more moisture than dried ones. This can change the texture of your energy bites. If you use fresh blueberries, you might need to add more oats. This helps soak up the extra moisture. I recommend using about 1.5 cups of fresh blueberries to match the flavor and texture. Yes, these energy bites can be gluten-free! Just make sure to choose gluten-free rolled oats. Most oats are safe, but some can be processed in facilities with gluten. Always check the label for safety. The other ingredients, like almond butter and honey, are naturally gluten-free too. Making these energy bites vegan is easy! You can swap out honey for maple syrup. This keeps the sweetness without using animal products. Use almond butter or another nut butter that fits a vegan diet. Check the labels to ensure everything is vegan-friendly. Enjoy your tasty treats knowing they fit your diet! Lemon Blueberry Energy Bites are simple and fun to make. We explored all the main ingredients, from rolled oats to lemon zest. I shared easy steps to prepare and store them. You can customize them to fit your tastes and needs. Keep these bites fresh with the right storage tips. Remember, you can swap ingredients seasonally for new flavors. Enjoy these bites as a tasty snack or energy boost. They fit various diets too. You now have all the info to create your own delicious energy bites!

Lemon Blueberry Energy Bites Nourishing Snack Idea

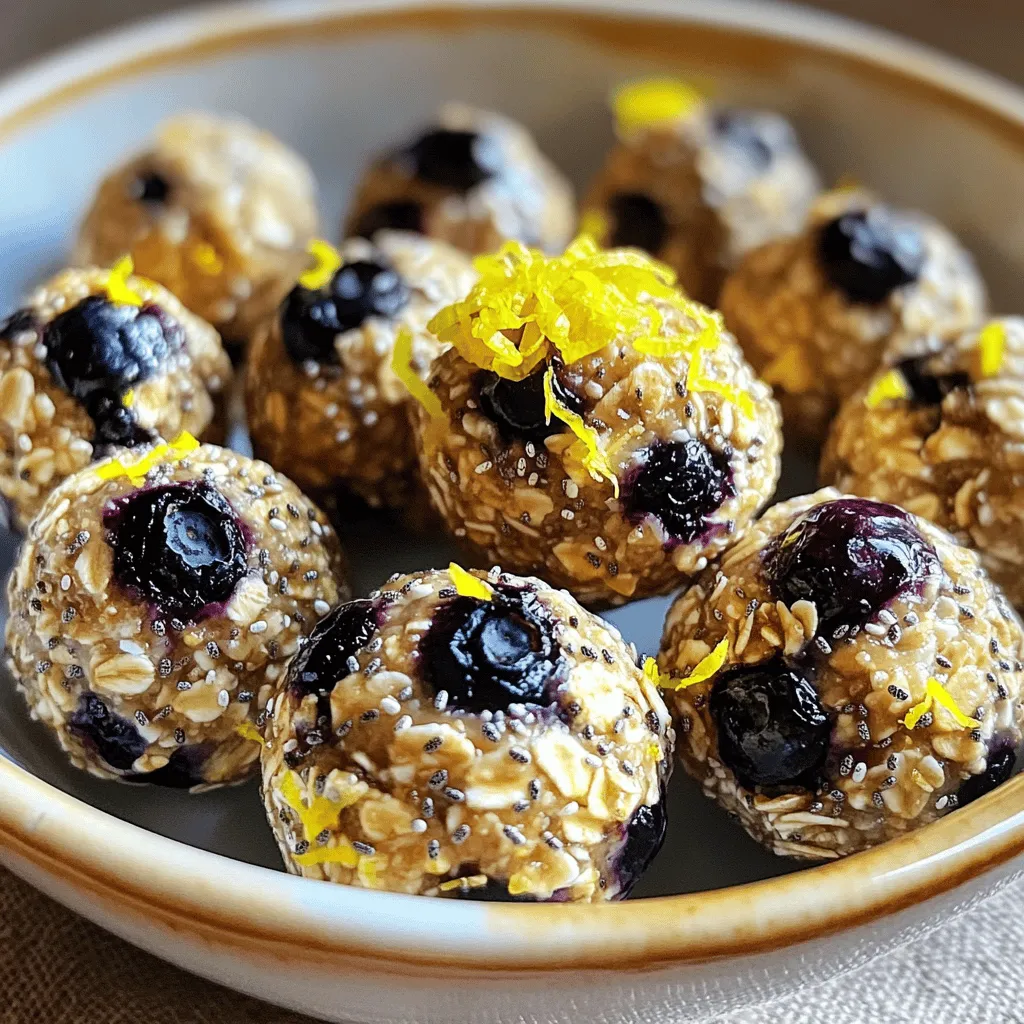
Looking for a tasty, energy-packed snack? Try my Lemon Blueberry Energy Bites! These little balls are the perfect blend of

- 1 lb (450g) chicken breast, sliced into thin strips - 2 tablespoons honey - 3 tablespoons low-sodium soy sauce - 3 cloves garlic, minced - 1 inch fresh ginger, grated The main ingredients make this dish shine. Chicken breast gives you a tender base. Honey adds sweetness and depth. Soy sauce gives it a savory kick. Fresh garlic and ginger bring in a zesty bite that keeps it fresh. - 1 bell pepper (red or yellow), sliced - 1 cup broccoli florets - 1 medium carrot, julienned These vegetables add color and crunch. Bell peppers bring a sweet note. Broccoli adds a nice texture and nutrition. Carrots give a pop of color and natural sweetness. Together, they balance the dish. - 2 tablespoons vegetable oil - 1 tablespoon sesame seeds (optional) - Cooked jasmine rice, for serving The vegetable oil helps cook everything evenly. Sesame seeds add a nutty finish and crunch. Serving over jasmine rice makes it a complete meal. This combination fills you up and satisfies your taste buds. For the full recipe, check out the details above. First, grab a medium bowl. In it, mix together the honey, soy sauce, minced garlic, and grated ginger. Whisk these ingredients until they blend well. This sauce adds a sweet and savory kick to your dish. Next, heat 1 tablespoon of vegetable oil in a large skillet over medium-high heat. Add the sliced chicken breast to the skillet. Season the chicken with salt and pepper. Sauté for about 5-7 minutes. You want it browned and fully cooked. Once done, remove the chicken from the skillet and set it aside. In the same skillet, add the remaining tablespoon of vegetable oil. Toss in the sliced bell pepper, broccoli florets, and julienned carrot. Stir-fry these vegetables for 3-4 minutes. You want them tender but still a little crispy. This adds great texture to your stir fry. Finally, return the cooked chicken to the skillet. Pour the honey garlic sauce over everything. Toss to combine all the ingredients well. Cook for an additional 2-3 minutes. This helps the sauce thicken slightly and coat every bite. Serve your honey garlic chicken stir fry over cooked jasmine rice for a complete and tasty meal. For the full recipe, check the section above! For stir fry, chicken breast is the best cut. It cooks fast and stays juicy. Slice the chicken into thin strips. This helps it cook evenly. Aim for pieces about 1/4 inch thick. If you use thighs, they will add more flavor but take longer to cook. To get the perfect stir-fry texture, heat your pan well. Use a large skillet or wok. Add oil and let it get hot. Cook the chicken in batches. This keeps the heat high and ensures a nice sear. Don't overcrowd the pan. Stir-fry quickly for about 5-7 minutes until the chicken is fully cooked. Want to spice things up? You can add red pepper flakes for heat. A splash of rice vinegar gives a tangy taste. Try adding chopped green onions for freshness. If you like more sauce, mix in extra soy sauce or honey. Adjust the amount to fit your taste. Each change can make your meal unique! {{image_2}} You can switch chicken for other proteins. Tofu works well for a plant-based option. It soaks up flavors and adds a nice texture. Shrimp is another tasty choice. It cooks quickly and pairs well with the sauce. For a heartier meal, try using beef or pork. These meats bring their own flavor and richness. Feel free to mix up the veggies in your stir fry. Snap peas add a nice crunch. Zucchini slices can bring a fresh taste. You might also use mushrooms for a savory touch. Carrots, bell peppers, and broccoli are classic, but don't limit yourself. Try bok choy or green beans for something different. You can easily adjust the sauce to suit your taste. If you like it sweeter, add more honey. For a saltier flavor, increase the soy sauce. Want some heat? Add a splash of sriracha or red pepper flakes. Experimenting with garlic or ginger can create new flavors. These changes can make each meal unique. Enjoy crafting your perfect sauce! To keep your honey garlic chicken stir fry fresh, store it in an airtight container. I recommend putting it in the fridge within two hours of cooking. This helps prevent bacteria. You can keep it for up to three days in the fridge. If you want to save it longer, freeze it in a freezer-safe bag. It can last for up to three months in the freezer. When you reheat your stir fry, use the stove for the best taste. Heat a skillet on medium heat and add a splash of water or oil. This keeps the chicken and veggies moist. Stir it often until it’s hot. You can also use a microwave, but cover it to avoid drying out. Heat in short bursts, stirring in between, until warm. The shelf life of this dish varies based on how you store it. In the fridge, enjoy it within three days. If frozen, it’s best to eat it within three months for the best flavor. Always check for any off smells or changes in color before eating. Yes, you can make this dish gluten-free. Use gluten-free soy sauce instead of regular soy sauce. Check labels to ensure they are certified gluten-free. This swap keeps the taste while making it safe for a gluten-free diet. To spice it up, add red pepper flakes or sliced fresh chili peppers. You can also use a hot sauce that you like. Start with a little, then taste and adjust. This way, you can control the heat level to match your taste. Meal prep is simple! Cook the honey garlic chicken stir fry as normal. Let it cool, then divide it into meal containers. Store each portion in the fridge for up to four days. Serve it with rice or noodles for a quick meal. Absolutely! You can swap chicken for tofu, shrimp, or beef. Each protein cooks differently, so adjust cooking times. Tofu needs a bit more time to crisp up, while shrimp cooks quickly. You can use many vegetables! Snap peas, zucchini, or mushrooms add great flavors. Just make sure to cut them into similar sizes for even cooking. Yes, you can! Mix the honey, soy sauce, garlic, and ginger a day ahead. Store it in the fridge in an airtight container. This saves you time on busy nights. Store leftovers in an airtight container. Keep them in the fridge for up to four days. If you want to keep them longer, freeze the stir fry for up to three months. Reheat in a skillet over medium heat until warmed through. You can also use the microwave. Just cover it to keep moisture in and heat in short bursts. When stored properly, the shelf life is about four days in the fridge. In the freezer, it can last three months. Always check for signs of spoilage before eating. In this post, we explored making a tasty stir-fry. We covered key ingredients like chicken, honey, and fresh veggies. You learned step-by-step how to prepare the sauce and cook everything. We shared tips to choose the right chicken and enhance flavors. You can swap proteins or change the sauce too. Stir-fry is simple and fun. With practice, you can make it your own. Enjoy your cooking adventure!

Honey Garlic Chicken Stir Fry Quick and Tasty Meal

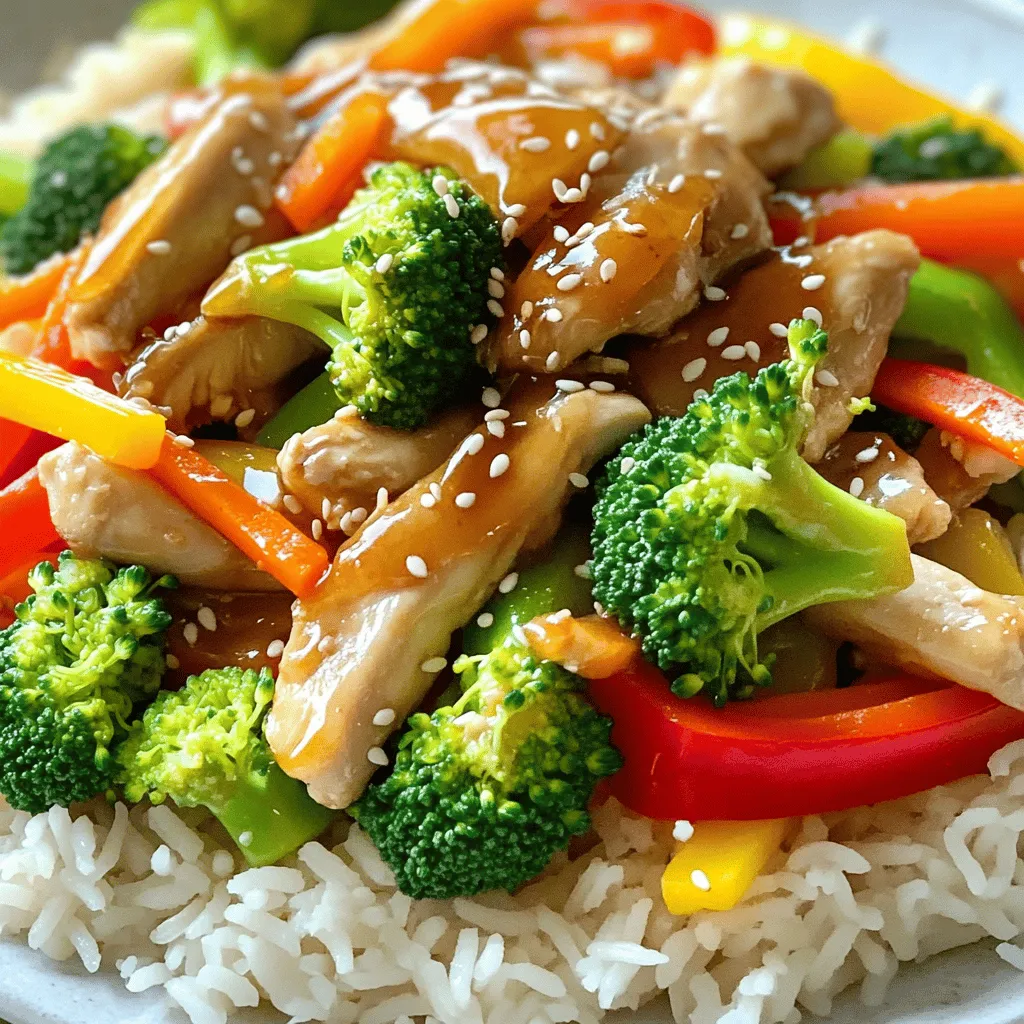
Looking for a quick and tasty meal? The Honey Garlic Chicken Stir Fry is perfect for you! Packed with flavor

- 8 oz. whole wheat or gluten-free pasta - 2 cups fresh baby spinach - 2 cups fresh strawberries - 1/2 cup crumbled feta cheese - 1/4 cup sliced almonds The main ingredients for this salad make it colorful and tasty. I love to use whole wheat pasta, but gluten-free works just as well. Baby spinach adds a nice crunch and nutrients. Strawberries bring sweetness, making every bite enjoyable. Feta cheese adds a creamy texture, while sliced almonds give a delightful crunch. - 1/4 cup olive oil - 2 tablespoons balsamic vinegar - 1 tablespoon honey - Salt and pepper to taste The dressing is simple but packs a punch. Olive oil is the base, and balsamic vinegar adds tang. Honey balances the flavors with its sweet notes. Don’t forget salt and pepper to taste; they bring everything together. - Extra sliced strawberries - Whole spinach leaves To make your salad look beautiful, consider these garnishes. Extra sliced strawberries add color and freshness. Whole spinach leaves can create a nice visual appeal. These little touches make the dish look professional and inviting. For the complete recipe, check the [Full Recipe]. Start by boiling a large pot of water. Add a pinch of salt. This step adds flavor to the pasta. Once the water boils, add 8 oz. of whole wheat or gluten-free pasta. Cook according to the package instructions. Aim for al dente, which means firm to the bite. This usually takes about 8 to 10 minutes. Drain the pasta in a colander. Rinse it under cold water to stop the cooking process. Let the pasta cool down while you prepare the dressing. In a small bowl, combine the dressing ingredients. You need 1/4 cup of olive oil, 2 tablespoons of balsamic vinegar, and 1 tablespoon of honey. Add salt and pepper to taste. Whisk these ingredients together until they blend well. This dressing is key to balancing flavors. A good dressing will elevate your salad. In a large mixing bowl, add the cooled pasta. Then, toss in 2 cups of fresh baby spinach and 2 cups of sliced strawberries. Crumbled feta cheese (1/2 cup) and toasted sliced almonds (1/4 cup) also go in. Finally, add 1/4 cup of thinly sliced red onion. Gently combine all the ingredients. Be careful not to crush the strawberries. Let the salad chill for about 10 minutes. This helps the flavors meld together. Serve it chilled or at room temperature. For a beautiful presentation, arrange the salad on a large platter. Add extra sliced strawberries and a sprinkle of feta on top. Garnish with a few whole spinach leaves for added color. For the full recipe, check out the complete instructions above. To ensure your pasta is cooked perfectly, always use salted water. The salt adds flavor right from the start. Cook the pasta until it is al dente, which means it should still have a bit of bite to it. This helps keep the pasta from getting mushy in the salad. Once done, drain the pasta and rinse it under cold water. Rinsing stops the cooking process and cools down the pasta. This way, it mixes well with the fresh greens and fruits without wilting them. When it comes to dressing, you can substitute sweeteners if you want. Instead of honey, try agave syrup or maple syrup for a different taste. For oils, olive oil is great, but you can also use avocado oil or walnut oil. Each oil adds its own unique flavor profile, letting you customize your salad. If you need gluten-free options, choose gluten-free pasta. There are many types available today. For vegan modifications, skip the feta cheese and use tofu or a vegan cheese alternative. You can also add more nuts or seeds for extra protein and crunch. This way, everyone can enjoy your delicious strawberry spinach pasta salad! {{image_2}} You can make this salad even more fresh by adding herbs. Fresh basil or mint pairs well with strawberries. You can also try dill for a unique twist. In summer, many fruits are ripe and sweet. You might add peaches or blueberries for extra flavor. These fruits can brighten your salad and add color. Each fruit brings its own taste, making the salad more exciting. If you want to make this dish a full meal, add protein. Grilled chicken works great and adds a nice smoky flavor. You can also use chickpeas for a vegetarian option. Chickpeas are rich in fiber and protein, which helps you feel full. Adding protein not only boosts nutrition but also brings a new texture. You can mix in shrimp or tofu for even more variety. When hosting a big gathering, scale up the recipe. Double or triple the ingredients to ensure everyone gets a serving. This salad is a crowd-pleaser, so more is always better! For smaller meals, you can adjust the recipe down. Halving the ingredients still gives you a tasty dish without leftovers. It makes it easy to enjoy this salad anytime you want. For the full recipe, check the previous section. To keep your Strawberry Spinach Pasta Salad fresh, store it in the fridge. Place it in an airtight container. This helps avoid moisture loss and keeps the salad crisp. You can use glass containers or plastic ones. Glass containers are great because they do not stain. If you have leftovers, eat them within three days for the best taste. You can freeze Strawberry Spinach Pasta Salad, but I do not recommend it. Freezing can change the texture of the pasta and spinach. If you still want to freeze it, store it in a freezer-safe container. When ready to eat, thaw it in the fridge overnight. Use the salad within a month for the best flavor. Get creative with your leftovers! You can turn the salad into a wrap. Use a whole wheat tortilla and fill it with the salad. Roll it up for a tasty lunch. Another idea is to make a sandwich. Spread some hummus on bread and add the salad. It makes a fun and fresh meal. You can store this salad in the fridge for up to three days. Make sure you keep it in an airtight container. This helps keep it fresh and tasty. If you notice any browning on the spinach or strawberries, it's time to toss it out. Yes, you can prepare this salad in advance. To do this, cook the pasta and make the dressing a day before. Keep these two items separate until you are ready to serve. This keeps the spinach fresh and crisp. Mix everything together just before serving. You can get creative with fruits! Try using blueberries, raspberries, or diced apples. Each fruit adds a unique flavor and texture. You can also mix different fruits for a colorful twist. A blend of strawberries and blueberries looks beautiful and tastes great! In this blog post, I covered how to make a delicious Strawberry Spinach Pasta Salad. We discussed the main ingredients, step-by-step instructions, and helpful tips for perfecting your salad. I shared ideas for variations and storage methods that keep your salad fresh. Remember, you can customize ingredients to fit your taste. This salad is not only easy to prepare, but it’s also a healthy choice. Try new fruits and proteins to enjoy it in different ways. Keep this recipe handy for your next meal!

Strawberry Spinach Pasta Salad Delicious and Easy Recipe

Looking for a fresh, tasty dish that’s easy to whip up? This Strawberry Spinach Pasta Salad is your answer! Packed

For a classic Caprese salad, you'll need fresh ingredients. Here’s what you should gather: - 3 ripe tomatoes, sliced into ¼-inch thick rounds - 8 ounces fresh mozzarella cheese, sliced into ¼-inch thick rounds - 1 cup fresh basil leaves - 3 tablespoons extra-virgin olive oil - 2 tablespoons balsamic glaze - Salt and freshly cracked black pepper to taste Using fresh and ripe tomatoes is key. They should feel firm yet slightly soft. Their color should be bright and vibrant. Choose mozzarella that is soft and moist, as it adds a creamy texture. Fresh basil leaves should be bright green and fragrant. This mix of ingredients gives your salad the best flavor. When picking tomatoes, look for those that are heavy for their size. Avoid any with bruises or wrinkles. Heirloom varieties work well for their rich taste. If you can, buy mozzarella from a local market. It tends to be fresher. The cheese should be moist and slightly springy to touch. Always check the expiration date if buying pre-packaged cheese. You can add extra flavors to your salad if you like. Try adding sliced avocado for creaminess. You could also use arugula for a peppery kick. A sprinkle of pine nuts can add a nice crunch. If you enjoy heat, thinly sliced jalapeños can spice things up. These optional add-ins can elevate your Caprese salad even more. For the full recipe, be sure to check out the detailed instructions. To make a Classic Caprese Salad, start with fresh ingredients. Use ripe tomatoes for the best flavor. Slice the tomatoes into ¼-inch thick rounds. Next, slice the fresh mozzarella cheese to the same thickness. The key is to have equal sizes for a nice look. Now, let’s build the salad. On a large platter, alternate the tomato and mozzarella slices. Overlap them slightly for a pretty effect. Tuck fresh basil leaves between the layers. This adds flavor and color. Drizzle extra-virgin olive oil over the top. Then, add balsamic glaze for a sweet touch. Finally, sprinkle salt and freshly cracked black pepper to taste. Allow the salad to rest for five minutes before serving. This helps the flavors mix well. You will need a few simple tools for this recipe: - A sharp knife for slicing - A large platter for serving - A cutting board for easy prep - A measuring spoon for the oil and glaze These tools will help you create a beautiful and flavorful Caprese Salad. For more details, check out the Full Recipe. To enjoy a Caprese salad at its best, freshness is key. Use ripe, firm tomatoes. Look for tomatoes that feel heavy for their size. Their skin should be smooth and vibrant. Fresh mozzarella should feel soft and moist. Check for a clean, mild smell. Basil leaves should look bright green with no browning. You can play with ingredients based on the season. In summer, use heirloom tomatoes for a colorful twist. In winter, try roasted tomatoes for a warm flavor. If fresh basil is hard to find, use arugula or spinach. You can also use burrata cheese instead of mozzarella. It adds creaminess and a unique taste. To boost flavors, add a sprinkle of flaky sea salt. It brings out the taste of the tomatoes. Consider adding fresh cracked pepper for a nice kick. Pair your salad with crusty bread or grilled meats for a complete meal. A glass of white wine, like Pinot Grigio, complements the salad perfectly. For a touch of sweetness, drizzle extra balsamic glaze on top. For the full recipe, check out the detailed instructions above. {{image_2}} You can easily add more veggies to your Caprese salad. Try using roasted red peppers or artichoke hearts for a unique twist. These add great taste and texture. You can also toss in some avocado slices. They add creaminess and richness that pairs well with fresh mozzarella. If you want more protein, think about adding meats or legumes. Grilled chicken or prosciutto works well. These meats bring a savory flavor that enhances the salad. For a plant-based option, add chickpeas or lentils. They provide a healthy protein boost without changing the salad's charm. Be creative when serving your Caprese salad! For picnics, use skewers to make Caprese bites. Simply thread tomato, mozzarella, and basil onto small skewers. For a fancy dinner, layer the salad in a glass for a beautiful presentation. This adds style and makes it fun to eat. You can even serve it on crostini for a delightful appetizer. For the full recipe, check out the detailed steps I shared earlier. Each variation adds a new layer of flavor and makes the classic Caprese salad even more enjoyable! To store leftover Caprese salad, keep it in an airtight container. Make sure to cover it tightly. This step helps to keep the flavors fresh. Use the salad within one day for the best taste. If you have leftover ingredients, store each separately. This method helps prevent sogginess. To keep your ingredients fresh, choose ripe tomatoes and fresh mozzarella. Store tomatoes at room temperature, away from sunlight. Refrigerate mozzarella in its original packaging or in a sealed container. Fresh basil should stay in a glass of water, like a bouquet. Change the water daily for maximum freshness. Caprese salad is best enjoyed cold. However, you can repurpose it. Try mixing your leftover salad with pasta for a quick meal. You can also use it as a topping for grilled chicken or fish. This way, you reduce waste while enjoying new flavors. For the full recipe, check out the earlier section. A Classic Caprese Salad uses fresh ingredients. It includes ripe tomatoes, mozzarella cheese, and basil. You will also need olive oil, balsamic glaze, salt, and pepper. The salad has a vibrant look and a fresh taste. Each bite brings out the flavors of summer. This dish is simple yet elegant. You can prepare some parts ahead of time. Slice the tomatoes and mozzarella a few hours before serving. Keep them in the fridge. Just wait to add the basil until right before serving. This keeps the basil fresh and bright. Drizzle the olive oil and balsamic glaze just before you serve the salad. This way, it stays crisp and tasty. Look for a thick balsamic glaze. A good glaze adds sweetness and tang. Some glazes are made from aged balsamic vinegar. These have deep flavors. You can also find lighter versions. Choose one that suits your taste. A quality glaze enhances the fresh flavors of the salad. For the best result, use a glaze you enjoy! You can find the Full Recipe to make this delightful salad easily. In this blog post, we explored how to make a tasty Caprese Salad. We looked at the best fresh ingredients, like tomatoes and cheese, and tips for adding extra flavors. I shared step-by-step instructions to guide you through preparation and assembly. You learned helpful tips to keep your salad fresh and variations to suit your taste. Remember to store leftovers properly for the next day. Now, you have the knowledge to create a delicious salad for any occasion. Enjoy your culinary journey with Caprese Salad!

Classic Caprese Salad Fresh and Flavorful Delight

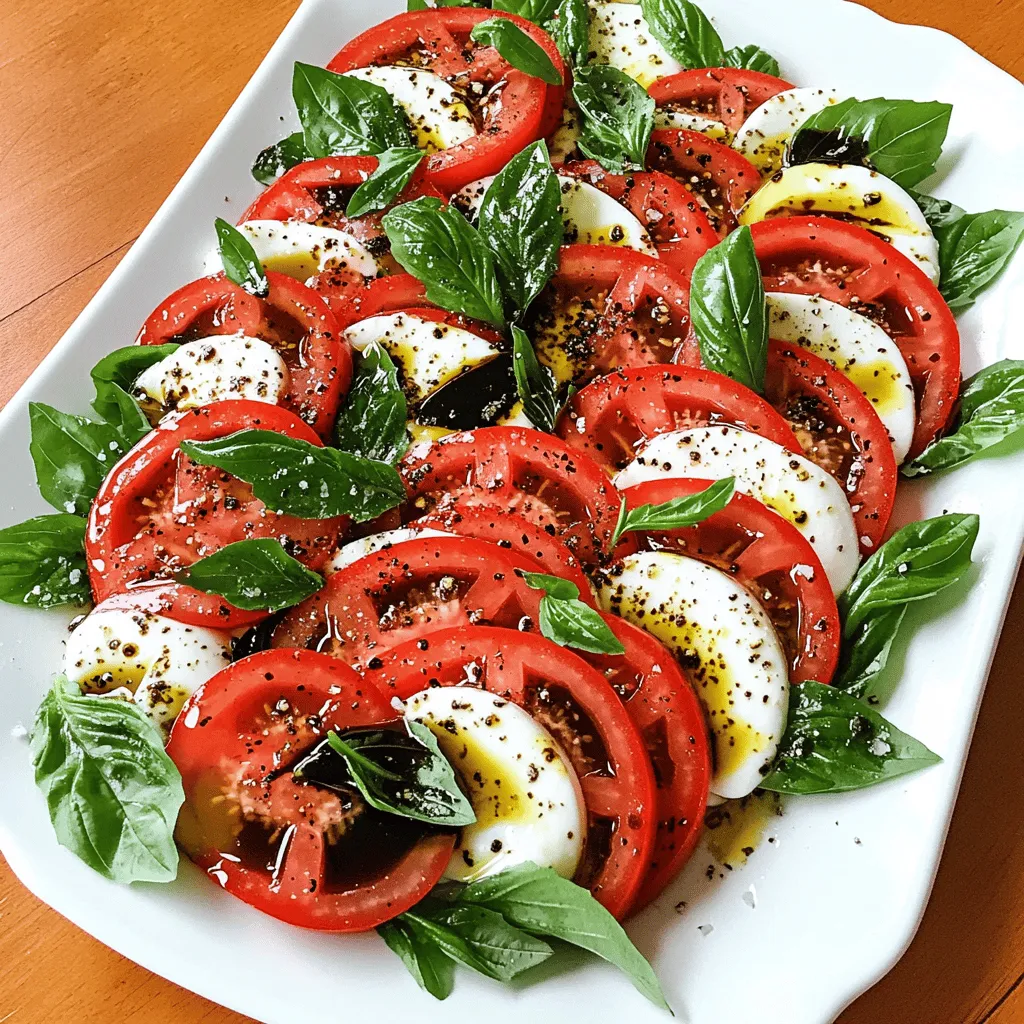
Are you ready to take your taste buds on a delightful journey? This Classic Caprese Salad is a true feast

- 1 cup unsalted butter (2 sticks) - 1 cup semi-sweet chocolate chips - 1 cup granulated sugar - 1 cup brown sugar, packed To create fudgy salted caramel brownies, you need some key ingredients. First, unsalted butter adds richness and moisture. Semi-sweet chocolate chips are essential for that deep chocolate flavor. Granulated sugar and brown sugar combine to give sweetness and depth. These four ingredients form the base of your brownies. - Sea salt flakes for topping - Homemade caramel sauce details While the main ingredients create a great brownie, optional ingredients can elevate your treat. Sea salt flakes add a nice crunch and contrast to the sweet caramel. For the caramel sauce, you can use store-bought or make your own for a personal touch. If you choose to make homemade caramel, just melt sugar in a pan until golden, then add cream for a smooth sauce. Set your oven to 350°F (175°C). This temperature works best for fudgy brownies. Grab a 9x13 inch baking pan. Grease it lightly with butter or spray. Then, line it with parchment paper. Make sure to leave some paper hanging over the edges. This helps you lift the brownies out later. For the best texture, use a heavy saucepan. Place it on low heat. Add the unsalted butter and semi-sweet chocolate chips. Stir them together until they melt and blend smoothly. Once melted, remove the pan from heat. Let it cool for a few minutes. In a mixing bowl, combine the melted mixture with granulated and brown sugar. Mix until you get a nice, smooth blend. Next, add in the eggs one by one. Mix well after each egg. Finally, stir in the vanilla extract. In a separate bowl, whisk together the all-purpose flour, cocoa powder, and salt. This step is key for a great texture. Sifting helps break up lumps and adds air. Gradually add the dry mix into the wet ingredients. Stir gently until just combined. Be careful not to overmix; this keeps the brownies fudgy. Pour half of the brownie batter into your prepared pan. Spread it evenly with a spatula. Then, drizzle half of the caramel sauce over the top. Now, pour the rest of the brownie batter over this layer. Drizzle the remaining caramel sauce on top. To create a marbled effect, take a knife or toothpick. Lightly swirl the caramel into the brownie batter. Do not overdo it; just a few swirls will do. Place the pan into the preheated oven. Bake for 25 to 30 minutes. Check for doneness by inserting a toothpick in the center. It should come out with some moist crumbs. This means your brownies are just right. Once done, take the pan out and let them cool on a wire rack. Cooling helps set the texture. After cooling, sprinkle sea salt flakes on top for that perfect finish. To get that rich, fudgy texture, set your oven to 350°F (175°C). Bake for 25-30 minutes. Check with a toothpick; it should come out with moist crumbs. This step is key for delicious brownies. Avoid overmixing your batter. Mix just until combined to keep the brownies dense and chewy. For a twist, try using dark chocolate chips instead of semi-sweet. This adds depth to the flavor. You can also mix in some chocolate chunks for extra richness. When it comes to caramel, I love using homemade sauce for the best taste. If you're short on time, a good store-bought sauce works well too. Serve these brownies warm with a scoop of vanilla ice cream on top. For a fun touch, drizzle some extra caramel sauce over the ice cream. When cutting the brownies, use a sharp knife. Dip the knife in hot water, wipe it dry, and slice for clean edges. This makes your brownies look as good as they taste! You can find the Full Recipe to start your baking adventure. {{image_2}} You can make your brownies even better by adding nuts. Nuts bring a nice crunch and flavor. You might use walnuts, pecans, or almonds. Just chop them up and mix them into the batter. I suggest adding about one cup of nuts for the best taste. The nuts will contrast with the soft, fudgy brownie and the gooey caramel. This mix makes every bite exciting and tasty. If you need a vegan or gluten-free brownie, I have you covered. For vegan brownies, swap the eggs with flax eggs. Mix one tablespoon of ground flaxseed with two tablespoons of water for each egg. For gluten-free brownies, you can use almond flour or a gluten-free flour blend. This way, everyone can enjoy the rich, fudgy taste. They will still be just as delicious as the original recipe. You can change the flavors based on the season. In fall, try adding pumpkin spice. Just mix one teaspoon of pumpkin spice into the batter. For winter, add a few drops of peppermint extract to make minty brownies. These seasonal flavors will give your brownies a fun twist. Each season brings new tastes, so feel free to get creative. For the full recipe of these delightful treats, check out the provided link. To keep your fudgy salted caramel brownies fresh, store them in an airtight container. This keeps moisture in and prevents them from drying out. If you slice them, separate each piece with parchment paper. This helps avoid sticking. Place the container in a cool, dry place. For best taste, enjoy them within five days. If you want to save brownies for later, freezing works well. Wrap each brownie tightly in plastic wrap. Then, place them in a freezer-safe bag or container. This keeps them fresh for up to three months. When you are ready to eat, you can thaw them in the fridge overnight or at room temperature for a few hours. To reheat brownies, preheat your oven to 350°F (175°C). Place brownies on a baking sheet and cover with foil. Heat for about 10 minutes. This warms them gently without drying them out. You can also use a microwave. Heat for 10 to 15 seconds, but watch closely to avoid overheating. Enjoy warm brownies with a drizzle of caramel or a scoop of ice cream for a real treat. For the full recipe, check out the detailed instructions on making these delicious brownies. To keep your brownies fudgy, follow these key steps: - Use the right amount of flour. Too much flour leads to a dry brownie. - Do not overmix the batter. Mix just until combined. - Bake for the right time. Check with a toothpick; it should come out with moist crumbs, not dry. - Use high-quality chocolate for rich flavor and texture. Yes, you can make these brownies ahead of time. Here are some storage options: - Store baked brownies in an airtight container at room temperature for up to four days. - For longer storage, wrap brownies tightly and freeze for up to three months. - Thaw frozen brownies in the fridge overnight before serving. If you need a substitute for caramel sauce, consider these options: - Make a quick homemade caramel with butter, sugar, and cream. - Use store-bought dulce de leche as a sweet alternative. - Try a chocolate ganache for a different flavor twist. - Maple syrup can also work in a pinch for added sweetness. For the full recipe, check out the detailed instructions above. These fudgy salted caramel brownies are a treat you won’t forget. We covered key ingredients, step-by-step instructions, and tips for the best results. You can even try variations or create your own twists. Remember, the right storage keeps them fresh and delicious. Enjoy making these brownies to impress your friends and family. You'll find that they are easy to make and fun to share! Now, grab your ingredients and start baking for a delightful experience.

Fudgy Salted Caramel Brownies Rich and Indulgent Treat

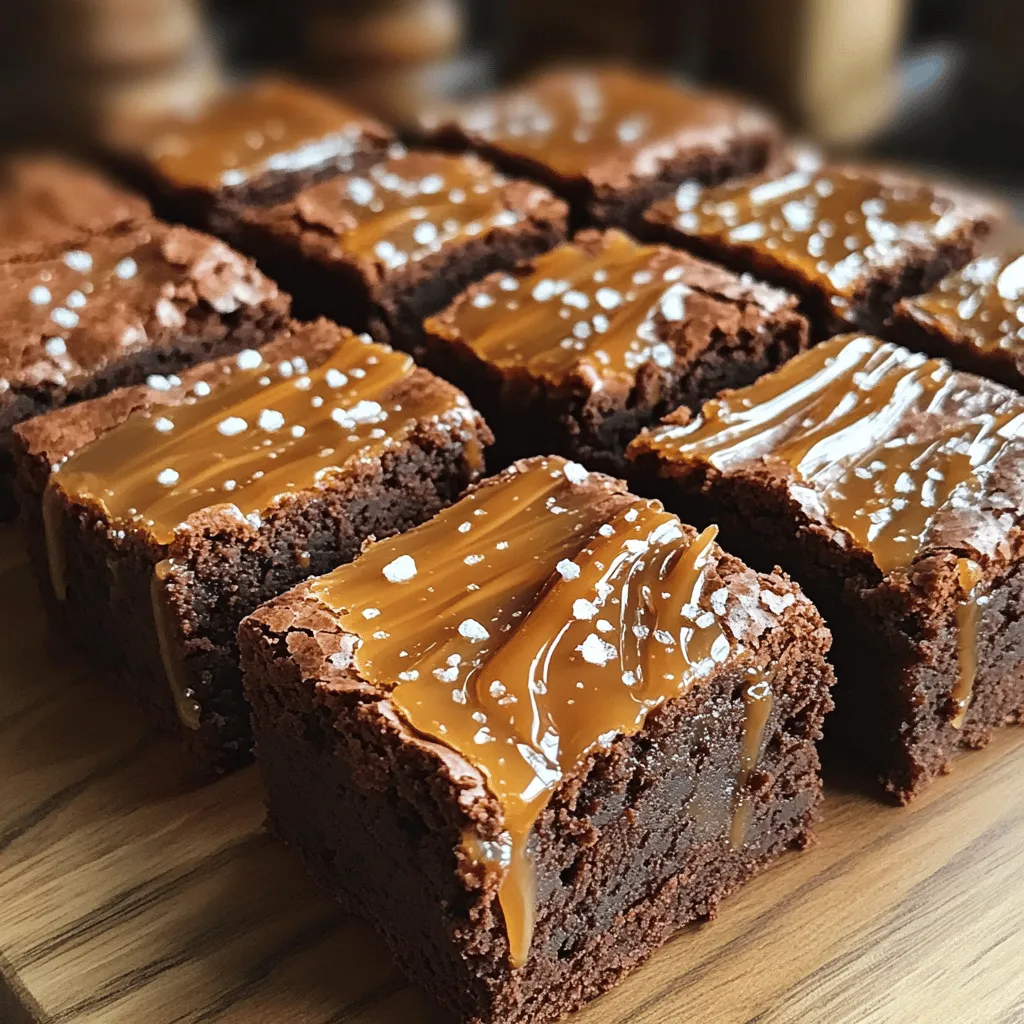
Love brownies? Get ready to elevate your dessert game with these Fudgy Salted Caramel Brownies! They combine rich chocolate with

- Cauliflower florets - Corn tortillas - Seasonings (smoked paprika, cumin, garlic powder, onion powder) The main star of this dish is the cauliflower. I like to use a medium head, cut into small florets. Cauliflower soaks up flavors well. It becomes tasty when roasted. Next, I use small corn tortillas. They add a nice texture and flavor. The seasonings bring everything together. I use smoked paprika for a hint of smokiness. Cumin adds warmth. Garlic powder and onion powder enhance the flavor, making it rich and savory. - Red cabbage - Avocado - Fresh cilantro - Lime wedges Adding fresh toppings makes the tacos shine. I choose red cabbage for its crunch and color. Sliced avocado gives creaminess. Fresh cilantro adds brightness. I always serve lime wedges on the side. The lime juice adds a zesty kick that brightens the dish. - Vegan sour cream or yogurt For extra creaminess, I suggest vegan sour cream or yogurt. It adds a rich layer of flavor. While optional, it takes these tacos to another level. You can easily find vegan options at most stores. Check the Full Recipe for all the details and measurements. Set your oven to 425°F (220°C). This high temperature helps the cauliflower roast well. It will get crispy and golden, which adds great flavor. In a large bowl, toss the cauliflower florets with olive oil and spices. Use smoked paprika, cumin, garlic powder, onion powder, salt, and pepper. Mix until the florets are well coated. This step is key for tasty tacos. Spread the seasoned cauliflower in a single layer on a baking sheet. Roast it in the oven for 25-30 minutes. Flip the cauliflower halfway through for even cooking. You know it's done when it’s golden and tender. While the cauliflower roasts, warm the corn tortillas. Place them in a pan over medium heat. Heat each side for about 30 seconds. This makes them soft and easy to fold. Once the cauliflower is ready, it’s time to build your tacos. Start with a generous amount of roasted cauliflower in the center of each tortilla. Add toppings like shredded red cabbage, avocado slices, and fresh cilantro. Serve it all with lime wedges on the side. Drizzle with vegan sour cream if you like. Enjoy this delicious meal! For the full recipe, check out the Vegan Cauliflower Tacos section. To enhance the flavor of your vegan cauliflower tacos, use fresh spices. Fresh spices bring out the best taste. They add depth and warmth that dried spices can't match. I recommend buying whole spices and grinding them yourself. This keeps their oils intact, making them more fragrant. Try using smoked paprika and cumin as your main flavors. These spices pair well with the roasted cauliflower. Knowing when your cauliflower is done is key. Roast it until it's golden brown and tender. This usually takes about 25 to 30 minutes at 425°F (220°C). Halfway through roasting, flip the cauliflower. This helps it cook evenly and get crispy on all sides. Look for a fork to slide in easily when checking for doneness. Warming your tortillas properly makes a big difference. Heat them in a pan over medium heat. It takes about 30 seconds on each side. This makes them soft and pliable. You can also wrap them in a damp paper towel and microwave them for 15 seconds. Both methods work well. Just pick the one that fits your time best. For the full recipe, check the link provided. {{image_2}} You can change up the filling in your tacos. Try using beans or lentils instead of cauliflower. Black beans add a rich taste. They are also full of protein and fiber. Lentils are another great option. They cook quickly and absorb flavors well. You can use cooked chickpeas too. They give a nice texture and are very filling. Don't be afraid to experiment with spices or sauces. You can add chili powder for heat. Or mix in some curry powder for a unique twist. Try adding fresh herbs like basil or mint for bright notes. Sauces can elevate your tacos. A drizzle of tahini or a spicy salsa can make a big difference. Even a squeeze of fresh orange juice can change the flavor profile. The type of tortilla you use can change your tacos. Corn tortillas are traditional and gluten-free. They have a nice flavor that pairs well with cauliflower. If you prefer, try flour tortillas. They are soft but may contain gluten. You can also find gluten-free options made from almond or coconut flour. These can add a different taste and texture to your tacos. Enjoy experimenting with what works best for you! To store leftover vegan cauliflower tacos, place them in an airtight container. Make sure to separate the tortillas from the filling to keep them fresh. Refrigerate your tacos within two hours of cooking. They will stay good for about three to four days. For best quality, avoid stacking the tacos too high to prevent squishing. When you’re ready to eat your leftovers, reheat the cauliflower in the oven. Preheat it to 350°F (175°C). Spread the cauliflower on a baking sheet and heat for about 10 minutes. This keeps the cauliflower crispy. For tortillas, warm them in a dry pan on medium heat for about 30 seconds on each side. This helps maintain their texture and flavor. To freeze your taco components, first let everything cool completely. Place the roasted cauliflower in a freezer-safe bag, removing as much air as possible. Wrap the tortillas in foil or wax paper and put them in a separate bag. You can freeze them for up to three months. When you're ready to eat, thaw them in the fridge overnight before reheating. This method keeps your meal fresh and tasty. For the full recipe and more tips, check out the [Full Recipe]. You can easily swap out regular tortillas for gluten-free options. Look for corn tortillas, as they are naturally gluten-free. You can also find brands that offer gluten-free flour tortillas made from rice or almond flour. Check the labels to ensure they meet your dietary needs. Yes, you can prep the cauliflower in advance. Chop the florets and store them in an airtight container in the fridge for up to three days. You can also roast the cauliflower ahead of time. Just keep it in the fridge for two to three days. Reheat it in the oven for a few minutes before serving. Cauliflower tacos are a great choice for health. Cauliflower is low in calories and high in fiber. It is also rich in vitamins C and K, which help boost your immune system. Compared to traditional tacos, these are lower in carbs and fats. This makes them a great option for a healthy meal. Absolutely! You can add beans, like black beans or pinto beans, for protein. Simply rinse and warm them before adding them to the tacos. Tofu is another great choice. Cube it and sauté it with spices for extra flavor. This way, you can enjoy a more filling meal that still tastes amazing. You can find the full recipe for Vegan Cauliflower Tacos above. Cauliflower tacos are easy to make. You start with fresh cauliflower and tortillas. Season them well, add tasty toppings, and roast until perfect. You can switch up flavors and proteins too. Store leftovers smartly to keep them fresh. These tacos are tasty, healthy, and fun to prepare. Experiment and find your favorite mix. Enjoy every bite!

Vegan Cauliflower Tacos Flavorful and Healthy Meal

Looking for a tasty yet healthy meal? These Vegan Cauliflower Tacos are your answer! Packed with flavor and easy to

To make Mango Coconut Chia Pudding, you will need a few key items. Here’s the list: - 1 cup coconut milk (canned or carton) - 1/4 cup chia seeds - 2 tablespoons honey or maple syrup (adjust to taste) - 1 ripe mango, diced - 1/4 teaspoon vanilla extract - A pinch of salt - Toasted coconut flakes for garnish - Fresh mint leaves for garnish (optional) Each ingredient plays an important role. Coconut milk gives a creamy base. Chia seeds provide texture and thickness. Honey or maple syrup adds sweetness, while fresh mango brings bright flavor. Vanilla extract enhances the taste, and salt balances it all. To garnish, toasted coconut flakes add crunch and flavor. Mint leaves offer a fresh touch. Feel free to adjust sweeteners to fit your taste. You can find the full recipe [here](#). Gather these ingredients, and you’re ready to create a delightful dessert! 1. Start by whisking the coconut milk. In a medium bowl, mix the coconut milk, honey or maple syrup, vanilla extract, and a pinch of salt. Keep whisking until everything blends well. This mixture brings a creamy taste to the pudding. 2. Next, add the chia seeds. Stir them into the coconut milk mixture. Make sure you mix well so the seeds spread evenly. This helps prevent clumps from forming as they soak. 3. Now, it's time to cover and chill. You can use plastic wrap for the bowl or pour the mixture into a mason jar. Place it in the fridge for at least four hours, or overnight if you can wait. This chilling time is key for the chia seeds to expand and create that thick pudding texture. 1. For serving, layer with diced mango. You can put the chia pudding in bowls first and then add the mango on top. Or, create pretty layers with the mango in between the pudding. This makes your dessert look beautiful and inviting. 2. Garnish effectively to enhance the look. Sprinkle toasted coconut flakes on top for crunch. If you like, add fresh mint leaves for a pop of color and a hint of freshness. This not only adds flavor but also makes your dish stand out. For the full recipe, check the complete guide. Enjoy making this Mango Coconut Chia Pudding! Chilling is key for great chia pudding. It helps the seeds soak up liquid and turn soft. I recommend chilling for at least four hours. Overnight is even better. This gives you a creamy texture that delights the palate. Sweetness is personal. Taste your pudding before serving. You can add more honey or maple syrup if you like. Just stir it in well. Keep tasting until it’s just right for you. Even chia seed distribution is important. If you don’t mix them well, some will sink. Stir them in thoroughly with the coconut milk. This ensures a uniform texture. Before serving, check for clumps. If you see any, give it a good stir. Clumps can be off-putting. No one wants a chunky pudding. Follow these tips, and you’ll have a perfect Mango Coconut Chia Pudding. For the complete process, refer to the Full Recipe. Enjoy! {{image_2}} You can mix things up with your mango coconut chia pudding. Try adding tropical fruits like pineapple or passion fruit. These fruits add a burst of flavor and color. You can also swap the coconut milk for almond or soy milk. This change gives the pudding a different taste. You might find a new favorite! This pudding is easy to make vegan-friendly. Simply use maple syrup instead of honey. All the ingredients are plant-based, so you can enjoy this treat without worry. It's also gluten-free! Chia seeds, coconut milk, and fruits do not contain gluten. This dish is safe for anyone avoiding gluten. Enjoy the creamy, tasty goodness of this pudding. For the full recipe, check the section above. To keep your Mango Coconut Chia Pudding fresh, store it in the fridge. It lasts well for up to five days. Use a sealed container to prevent it from absorbing other smells. A mason jar works great for this. You can also use a plastic or glass container with a lid. You don’t need to heat this pudding before serving. To refresh it, give it a good stir. If it looks too thick, add a little coconut milk. This will help bring back its creamy texture. Layer it with fresh mango and add toppings right before you serve. Enjoy each bite! Mango Coconut Chia Pudding lasts about 4 to 5 days in the fridge. Proper storage is key. Keep it in an airtight container to keep it fresh. If you see any changes in smell or texture, it’s best to discard it. Yes, you can use frozen mango! Just make sure to thaw it first. Frozen mango works well and can add a nice cool touch to your pudding. It may be a bit softer, but the flavor stays just as sweet. Chia seeds are packed with fiber and omega-3 fatty acids. They help keep you full and support heart health. Mango is rich in vitamins A and C, boosting your immune system. Coconut offers healthy fats and adds a creamy texture. Together, they create a tasty and nutritious treat. For the complete recipe, check out the [Full Recipe]. Mango coconut chia pudding is a simple and tasty treat. We covered key ingredients, prep steps, and tips to perfect your pudding. I shared ways to add flavor and accommodate different diets. You also learned how to store and refresh your pudding. Now you can enjoy this healthy dessert anytime. With a few simple steps, you can create a delicious and satisfying dish. Keep experimenting to find your favorite variations. Enjoy the freshness and flavors!

Mango Coconut Chia Pudding Easy and Tasty Delight

Mango Coconut Chia Pudding is a quick and tasty treat you can whip up in minutes. This dessert combines creamy

- 2 cups cooked chicken, diced - 1 cup frozen peas and carrots mix - 1 cup potatoes, peeled and diced - 1/2 cup onion, diced - 1/2 cup celery, diced - 1 cup chicken broth - 1 cup milk - 1/3 cup butter - 1/3 cup all-purpose flour - 1 teaspoon garlic powder - 1 teaspoon dried thyme - Salt and pepper to taste - 1 package (2) refrigerated pie crusts - 1 egg, beaten (for egg wash) - Fresh herbs (e.g., parsley, rosemary) - Different vegetable options (e.g., corn, green beans) - Alternative crusts (e.g., biscuit topping, puff pastry) To create my classic chicken pot pie, I gather all the essential ingredients. These items form the base of a comforting meal that warms the heart. Required Ingredients: I start with two cups of cooked chicken, diced into bite-sized pieces. It’s perfect for a hearty filling. Next, I add one cup of frozen peas and carrots, which brings in color and sweetness. One cup of peeled and diced potatoes adds a nice texture and makes it filling. The base gets flavor from half a cup of diced onion and half a cup of diced celery. For the sauce, I use one cup of chicken broth and one cup of milk. These make the filling creamy and rich. I also need one-third cup of butter and one-third cup of all-purpose flour to create a roux. This roux thickens the sauce. To season, I use one teaspoon of garlic powder and one teaspoon of dried thyme. Salt and pepper help enhance all the flavors. Finally, I grab one package of refrigerated pie crusts, which makes assembly easy. I like to brush the top crust with one beaten egg for a lovely golden finish. Optional Ingredients: For those who want to mix it up, I suggest fresh herbs like parsley or rosemary. They add a fresh note. You can also swap in different vegetables like corn or green beans to suit your taste. If you want a twist, consider using a biscuit topping or puff pastry instead of a traditional crust. With these ingredients ready, you are set for a delightful cooking experience. You can find the Full Recipe to guide you through each step. - Preheat the oven to 425°F (220°C). - Gather your vegetables and cooked chicken. Start by chopping your onion, celery, and potatoes into small pieces. This helps them cook evenly. Make sure your chicken is already cooked and diced. You can use rotisserie chicken for ease. - Sauté onions and celery. In a large saucepan, melt the butter over medium heat. Add the diced onion and celery, cooking until soft, about 3-4 minutes. Stir them often to avoid burning. - Make the creamy filling sauce. Next, stir in the flour, garlic powder, thyme, salt, and pepper. Cook this mixture for about a minute. Then, slowly add the chicken broth and milk. Stir constantly until the mixture thickens and is smooth. Bring it to a gentle simmer. - Combine chicken and vegetables with the sauce. Now, add the cooked chicken, peas, carrots, and potatoes to the sauce. Mix well to combine everything. Remove the pan from heat. - Roll out the pie crusts. Take one pie crust and roll it out into a 9-inch pie plate. Make sure it hangs over the edges a bit. - Add filling and cover with the second crust. Pour the chicken filling into the pie crust. Next, place the second pie crust on top. Seal the edges by pressing them together. Cut small slits on the top for steam to escape. - Brush with egg wash and cut steam slits. Use the beaten egg to brush the top crust. This gives it a beautiful golden finish. - Bake until golden brown. Place the pie in the oven and bake for 30-35 minutes. Check for a golden brown crust. If the edges brown too quickly, cover them with foil. - Cooling and serving instructions. Let the pie cool for 10 minutes before serving. This helps the filling set. Enjoy your comforting chicken pot pie! You can find the Full Recipe with all the details and tips to make this dish even better. To make your chicken pot pie shine, focus on seasoning. Use salt and pepper to enhance the flavors. Add garlic powder and dried thyme for depth. You can also try fresh herbs like parsley or rosemary. For the chicken, poach it gently in broth. This keeps it tender and juicy. A flaky crust is key to a great pot pie. Use cold butter and cold water when making your dough. This helps create those lovely layers. When rolling out the crust, avoid overworking it. This can make it tough. To prevent a soggy bottom, pre-bake the crust for a few minutes before adding the filling. This step helps keep it crisp. Serve your chicken pot pie hot from the oven. For a lovely touch, sprinkle fresh herbs on top. This adds color and flavor. Pair it with a simple side salad or roasted vegetables. These sides balance the richness of the pie. For a fun twist, serve pot pie in individual ramekins. This makes each serving special. For the complete recipe, check out the [Full Recipe]. {{image_2}} You can switch up the protein in your chicken pot pie. Leftover turkey works great. It gives the same comfort but with a new twist. If you want a veggie option, use mushrooms and beans. They add great flavor and texture. You can also play with the vegetables. Use whatever you have on hand. Green beans, corn, or bell peppers can make the dish pop. Try mixing in sweet potatoes for a hint of sweetness. This keeps the recipe fresh and exciting. Getting creative with how you serve chicken pot pie can be fun. Try making chicken pot pie cups. Use muffin tins and cut the crust into smaller rounds. Fill each cup with the creamy filling. Bake until golden for a fun twist. Another quick method is skillet pot pie. Cook everything in a skillet on the stove. Top with a layer of crust and bake until bubbly. This method saves time and gives you a crispy bottom. Switching up the sauce can change the whole dish. You can use cream of mushroom soup for a rich taste. It adds a nice creaminess and flavor. Another option is cream of celery soup. This gives a lighter taste but still keeps it rich. If you want a cheesy flavor, mix in some shredded cheese. Cheddar or Gruyère works well. It adds a tasty twist to the classic recipe. For a full step-by-step guide on making this dish, check the Full Recipe. After enjoying your delicious chicken pot pie, you will want to store leftovers properly. To keep the pie fresh, cover it tightly with plastic wrap or aluminum foil. You can also place it in an airtight container. This helps prevent the pie from drying out. Use a container that fits the pie well to avoid excess air. You can freeze chicken pot pie for later enjoyment. If you want to freeze it before baking, assemble the pie and wrap it tightly. Place it in a freezer-safe container. When you're ready to bake, thaw it in the fridge overnight. Bake it the next day, adding about 10-15 minutes to the cooking time. If you freeze the pie after baking, let it cool first. Wrap it well and store it in the freezer. To reheat, thaw it in the fridge overnight and bake at 350°F (175°C) until heated through. In the fridge, chicken pot pie lasts about 3-4 days. Always check for signs of spoilage. If the pie smells sour or looks discolored, it’s best to throw it away. Also, if the crust feels soggy or slimy, discard it. Storing your pie properly will help it stay fresh and tasty for your next meal. For the full recipe, check the previous sections. To make chicken pot pie from scratch, follow these steps: 1. Prepare the filling: Sauté diced onions and celery in butter until soft. 2. Make the sauce: Stir in flour, garlic powder, and thyme. Gradually add chicken broth and milk until smooth. Cook until thickened. 3. Combine ingredients: Mix in cooked chicken, peas, carrots, and potatoes. 4. Assemble the pie: Roll out the crust, fill it, cover, and seal. 5. Bake: Cook in the oven until golden brown. Using fresh ingredients gives the best flavor. For a more detailed guide, refer to the Full Recipe. Yes, you can use different meats. Turkey works well, especially as a leftover option. Beef is another option, but it changes the flavor. You can even try chicken sausage for a twist. Just ensure the meat is cooked before adding it to the filling. This keeps your pie tasty and safe. Chicken pot pie pairs well with many sides. Here are some ideas: - Salads: A fresh green salad adds crunch. - Vegetables: Roasted or steamed veggies bring color. - Beverages: Serve with warm apple cider or sweet tea. These sides balance the rich pie and enhance your meal. Making chicken pot pie healthier is easy. Here are some tips: - Use lean chicken: Skinless chicken breast has less fat. - Substitute milk: Use low-fat or almond milk for a lighter sauce. - Add more vegetables: Increase the veggie mix for more fiber. - Limit butter: Use less butter or swap for olive oil. These changes keep the flavors while cutting down on calories. Yes, you can use a store-bought crust. Here are some pros and cons: - Pros: Saves time and effort, easy to find. - Cons: May lack flavor and texture of homemade. If you’re short on time, a store-bought crust is a good choice. For the best results, follow the cooking instructions on the package. You've learned how to make a delicious chicken pot pie from scratch. We covered the essential ingredients and the cooking steps that lead to a comforting meal. Remember, you can customize it with different veggies, crusts, and sauces. Use the tips for flavor and presentation to impress your guests. With proper storage methods, you can enjoy leftovers too. Making this dish is easy, fun, and rewarding—perfect for any meal. Trust me, your kitchen will smell amazing, and you’ll have a tasty pie to enjoy.

Classic Chicken Pot Pie Comforting Family Favorite Dish

Classic Chicken Pot Pie is the ultimate comfort food that warms the soul. With tender chicken, savory vegetables, and a

To make delicious pumpkin chocolate chip muffins, you need key ingredients. Here’s what you will need: - 1 cup pumpkin puree - 1/2 cup brown sugar - 1/4 cup granulated sugar - 1/2 cup vegetable oil - 2 large eggs - 1 teaspoon vanilla extract - 1 1/2 cups all-purpose flour - 1 teaspoon baking powder - 1/2 teaspoon baking soda - 1 teaspoon ground cinnamon - 1/2 teaspoon ground nutmeg - 1/4 teaspoon salt - 1/2 cup chocolate chips These ingredients blend well to create a moist and tasty muffin. The pumpkin adds moisture and flavor. The sugars give sweetness, while the chocolate chips bring joy in every bite. You can enhance the flavor with fun add-ins. Consider these options: - Chopped nuts, like walnuts or pecans - Dried fruit, such as cranberries or raisins - A dash of ginger or cloves for warmth These add-ins can make your muffins unique. Feel free to experiment with what you love! If you need to swap out ingredients, it’s easy! Here are some substitutions: - Use applesauce for half the oil for a lighter muffin. - Substitute whole wheat flour for all-purpose flour for more fiber. - Use maple syrup instead of brown sugar for a richer taste. These substitutions can change the muffins while keeping them tasty. You can adjust based on your needs or what you have at home. For the full recipe, check the earlier section. Start by gathering all your ingredients. You need pumpkin puree, sugars, oil, eggs, and more. Preheat your oven to 350°F (175°C). This step is key! Line your muffin tin with paper liners or grease it lightly. This helps prevent sticking. 1. In a large bowl, whisk together pumpkin puree, brown sugar, granulated sugar, vegetable oil, eggs, and vanilla extract. Mix until everything is well blended. 2. In another bowl, combine all-purpose flour, baking powder, baking soda, cinnamon, nutmeg, and salt. 3. Gradually add the dry mix to the pumpkin mix. Stir gently until just combined. A few lumps are fine! 4. Fold in the chocolate chips. Make sure they spread evenly through the batter. 5. Spoon the batter into your prepared muffin tin, filling each cup about two-thirds full. 6. Bake for 18-20 minutes. Test doneness by inserting a toothpick in the center of a muffin. If it comes out clean, they’re ready! 7. Let the muffins cool in the pan for 5 minutes. Then, transfer them to a wire rack to cool completely. To check if your muffins are done, use a toothpick. Insert it into the center of a muffin. If it comes out clean, the muffins are ready. If it has wet batter, bake a few more minutes. Muffins can be tricky, so check them around 18 minutes. Each oven is a bit different, so keep an eye on them! When baking pumpkin chocolate chip muffins, avoid overmixing the batter. This makes the muffins tough. Mix just enough so the dry and wet ingredients blend well. Another mistake is not measuring ingredients correctly. Use measuring cups for accuracy. If you skip the spices, you lose flavor. Always add cinnamon and nutmeg for warmth. For fluffy muffins, use room-temperature eggs and oil. This helps the batter combine better. Make sure your baking powder and baking soda are fresh. Old leavening agents can lead to dense muffins. Fill each muffin cup about two-thirds full. This allows the muffins to rise without spilling over. Serve your muffins warm for the best taste. You can dust them with powdered sugar for flair. A drizzle of melted chocolate makes them extra special. Pair these muffins with a hot cup of coffee or tea. For a fun twist, try them with vanilla ice cream. Enjoy these delicious treats any time of day! For the full recipe, check the earlier section. {{image_2}} You can easily make gluten-free pumpkin chocolate chip muffins. Use gluten-free flour instead of regular flour. This swap keeps the muffins light and tasty. Make sure to check that your baking powder is gluten-free as well. You can also add a bit of xanthan gum to help with texture. This makes the muffins rise nicely and keeps them fluffy. For dairy-free muffins, swap out the vegetable oil for coconut oil. You can also use a dairy-free milk like almond or oat milk in place of any milk. There are many dairy-free chocolate chips on the market now. These will give you the same rich chocolate flavor without any dairy. You can add fun spices and mix-ins to change the flavor. Try adding a pinch of ginger or allspice for a warm kick. Chopped nuts, like walnuts or pecans, add a nice crunch. You could also fold in some dried cranberries or raisins for a fruity touch. Want a chocolate overload? Use double chocolate chips. You can even drizzle melted chocolate on top for extra sweetness. Check out the Full Recipe for these delicious muffins and start your baking adventure! To keep your pumpkin chocolate chip muffins fresh, store them in an airtight container. Place a piece of parchment paper between layers to prevent sticking. They can last up to three days at room temperature. For longer storage, keep them in the fridge. Just make sure to seal them well. This helps avoid drying out. Freezing muffins is easy and smart. Wrap each muffin in plastic wrap. Then, place them in a freezer bag or airtight container. They can stay fresh for up to three months in the freezer. When you want one, just remove it from the bag and let it thaw at room temperature. You can also warm it up in the microwave for a quick treat. To enjoy your muffins warm, reheat them in the oven. Set it to 350°F (175°C) and heat for about 5 to 10 minutes. This brings back their soft texture. You can also use the microwave for about 15 to 20 seconds. Just be careful not to overheat them, or they may become dry. For added fun, top with a bit of butter or more chocolate chips when warm. To make pumpkin chocolate chip muffins, gather your ingredients first. You need pumpkin puree, sugars, oil, eggs, vanilla, flour, baking powder, baking soda, spices, salt, and chocolate chips. Mix the wet ingredients in one bowl. In another bowl, combine the dry ingredients. Gradually add dry to wet. Stir gently until just mixed. Then, fold in the chocolate chips. Pour the batter into a muffin tin and bake. For the full recipe, check the section above. Yes, you can use fresh pumpkins. First, you need to cook the pumpkin. Cut it in half and remove the seeds. Roast or steam it until soft. Then, scoop out the flesh and mash it. Make sure to measure out the right amount for your recipe. Fresh pumpkin may have a different taste, but it adds great flavor to your muffins. Pumpkin chocolate chip muffins stay fresh for about three days when stored at room temperature. Keep them in an airtight container to prevent drying out. If you want to keep them longer, you can freeze them. They can last up to three months in the freezer. Just make sure to wrap them well! If you want a different flavor, you can use nuts or dried fruit instead of chocolate chips. Chopped walnuts or pecans add crunch. Dried cranberries or raisins bring a nice sweetness. You can also use white chocolate chips or butterscotch chips for a fun twist. Be creative and choose what you like! You learned the key ingredients for making tasty pumpkin chocolate chip muffins. We covered both must-haves and fun add-ins. I shared detailed steps for baking and tips to avoid common mistakes. You can also find gluten-free and dairy-free options to suit your needs. These muffins can be stored well and reheated easily. I hope you feel inspired to bake your own delicious batch. Enjoy every bite and share them with friends and family!

Pumpkin Chocolate Chip Muffins Tasty and Simple Treat

Looking for a delicious treat that’s easy to make? You’re in the right place! These Pumpkin Chocolate Chip Muffins are

Older posts
Newer posts
← Previous Page1 … Page4 Page5 Page6 … Page54 Next →

dsad

© 2025 Lisa Dishes • Built with GeneratePress

Our Policies

  • Copyright Policy
  • Cookie Policy
  • GDPR Policy
  • Privacy Policy
  • Disclaimer
  • Terms Of Use

More Information

  • Home
  • About
  • Contact
  • Appetizers
  • Dessert
  • Dinner
  • Drinks
©2025, Lisa Dishes About Back To Top