Skip to content
DisclaimerTerms Of UseGDPR PolicyCookie Policy

Lisa Dishes

  • Home
  • Drinks
  • Appetizers
  • Dinner
  • Dessert
  • About
  • Contact
  • Privacy Policy
DisclaimerTerms Of UseGDPR PolicyCookie Policy

lisa

To make creamy Cajun shrimp pasta, you need a few simple ingredients. These items bring rich flavors and a lovely texture to the dish. Here’s what you need: - 8 oz fettuccine pasta - 1 lb large shrimp, peeled and deveined - 2 tablespoons Cajun seasoning - 2 tablespoons olive oil - 3 cloves garlic, minced - 1 cup heavy cream - ½ cup grated Parmesan cheese - 1 cup cherry tomatoes, halved - 2 cups spinach - Salt and pepper to taste - Fresh parsley for garnish Each ingredient plays a role in creating that creamy, spicy goodness. The fettuccine provides a hearty base. The shrimp adds protein and a slight sweetness. Cajun seasoning brings heat and depth. Olive oil helps with sautéing, while garlic gives a fragrant touch. Heavy cream creates a rich sauce, and Parmesan adds a nice cheesy flavor. Cherry tomatoes offer a burst of freshness, and spinach adds color and nutrition. Don't forget salt and pepper to enhance the overall taste. Finally, fresh parsley is perfect for garnishing. For more details on how to bring it all together, check the Full Recipe. 1. Bring a large pot of salted water to a boil. 2. Add 8 oz of fettuccine pasta and cook until al dente, about 8-10 minutes. 3. Drain the pasta and set it aside. 1. In a bowl, toss 1 lb of large shrimp with 2 tablespoons of Cajun seasoning. 2. Heat 2 tablespoons of olive oil in a skillet over medium-high heat. 3. Cook the shrimp for 2-3 minutes on each side until they turn pink. Remove them from the skillet and set aside. 1. In the same skillet, add 3 cloves of minced garlic. Sauté for about 30 seconds until fragrant. 2. Gradually pour in 1 cup of heavy cream, stirring constantly to prevent lumps. 3. Incorporate ½ cup of grated Parmesan cheese, stirring until melted and smooth. Adjust the sauce with a splash of pasta water if needed. 1. Add 1 cup of halved cherry tomatoes and 2 cups of spinach into the sauce. Cook until the spinach wilts. 2. Return the cooked shrimp to the skillet and mix gently. Season with salt and pepper to taste. 3. Toss the cooked fettuccine into the skillet, ensuring it is coated with the creamy sauce. Mix well to combine. For the full recipe, check out the complete instructions above. Enjoy making your creamy Cajun shrimp pasta! - Adjust spice levels to taste: Start with the recommended Cajun seasoning. If you love heat, add more! - Use fresh ingredients for best flavor: Fresh shrimp and vibrant greens make a big difference. Try to source your ingredients locally. - Recommended pasta cooking techniques: Always cook pasta until al dente. This keeps it firm and prevents it from getting mushy in the sauce. - Serving in deep bowls with garnishes: Deep bowls hold the sauce well and keep the dish warm. - Adding extra Parmesan and parsley: A sprinkle of cheese and fresh herbs makes the dish pop. It also adds a nice flavor! - Optional garnishes for an elegant look: Consider adding a few whole shrimp on top. It gives a beautiful touch and invites your guests to dig in! For the full recipe, check out the detailed steps to make this delicious creamy Cajun shrimp pasta. {{image_2}} You can switch the shrimp for chicken or scallops. Chicken gives a nice, mild taste. Cut it into bite-sized pieces. Sauté it until golden brown. Scallops are sweet and tender. Cook them for just a few minutes. Both options work well with the creamy sauce. If you want a vegetarian dish, try mushrooms or tofu. Use mushrooms like cremini or portobello for a meaty texture. Sauté them until soft before adding the sauce. Tofu absorbs flavors well. Press it to remove extra water. Then, cube it and cook until golden. If you want to change the sauce, try a tomato-based version. Use crushed tomatoes instead of cream. This gives a fresh, tangy flavor. You can also add Italian herbs like basil and oregano. Adding pesto is another fun twist. It brings a bright, herby taste. Just stir in a few spoonfuls of pesto after cooking the garlic. This change can make the dish more vibrant and exciting. For gluten-free pasta, use brown rice or chickpea pasta. They cook similarly and taste great. If you need dairy-free options, try coconut cream or cashew cream instead of heavy cream. Nutritional yeast can replace Parmesan cheese for a cheesy flavor. These swaps allow more people to enjoy this dish without losing taste. For the full recipe, check out the instructions above! To store your creamy Cajun shrimp pasta, let it cool first. Place it in an airtight container. Make sure to seal it well to keep out air. Store it in the fridge for up to three days. When you're ready to eat, reheating is key. Use a skillet over medium heat. Add a splash of cream or water to prevent drying. Stir until hot. You can also use the microwave, but stir halfway through. This way, it heats evenly. You can freeze creamy Cajun shrimp pasta, but it’s best to do it without shrimp. Cooked shrimp can become rubbery after freezing. Chill the pasta and sauce, then put them in a freezer-safe container. Seal it tightly and label it with the date. It can last for up to two months in the freezer. When ready to enjoy, thaw it overnight in the fridge. Reheat in a skillet, adding fresh shrimp if desired. This keeps the dish tasty and fresh. Cajun seasoning is a blend of spices. It adds a kick to dishes. Common ingredients include paprika, cayenne, garlic powder, and black pepper. This mix gives a bold, warm flavor. You can adjust the blend to suit your taste. It works well with meats, seafood, and veggies. Adding Cajun seasoning to your meals brings the heart of Louisiana to your kitchen. Yes, you can prepare parts of this dish ahead. Cook the pasta and shrimp in advance. Store them separately in the fridge. Make the creamy sauce a day early as well. Just reheat everything gently when ready to serve. This way, you save time on busy nights. It helps to have a delicious meal ready in minutes. To add more heat, try adding extra Cajun seasoning. You can also use crushed red pepper flakes. Fresh jalapeños or diced serrano peppers work well too. For a smoky touch, consider adding chipotle powder. Adjust the spice level to what you like best. Remember, it’s easier to add heat than to take it away! This dish pairs well with fresh salads and crusty bread. A simple green salad with vinaigrette balances the meal. Garlic bread is great for soaking up the creamy sauce. You can also serve it with roasted vegetables for extra flavor. These sides complement the pasta while adding color to your plate. For the full recipe, check out the complete details. In this guide, we explored a simple recipe for Creamy Cajun Shrimp Pasta. You learned about the key ingredients, step-by-step cooking instructions, and helpful tips. I shared variations for different tastes and preferences, plus storage methods to keep leftovers fresh. Cooking can be rewarding and fun. Enjoy trying this recipe and making it your own! Your kitchen adventures await.

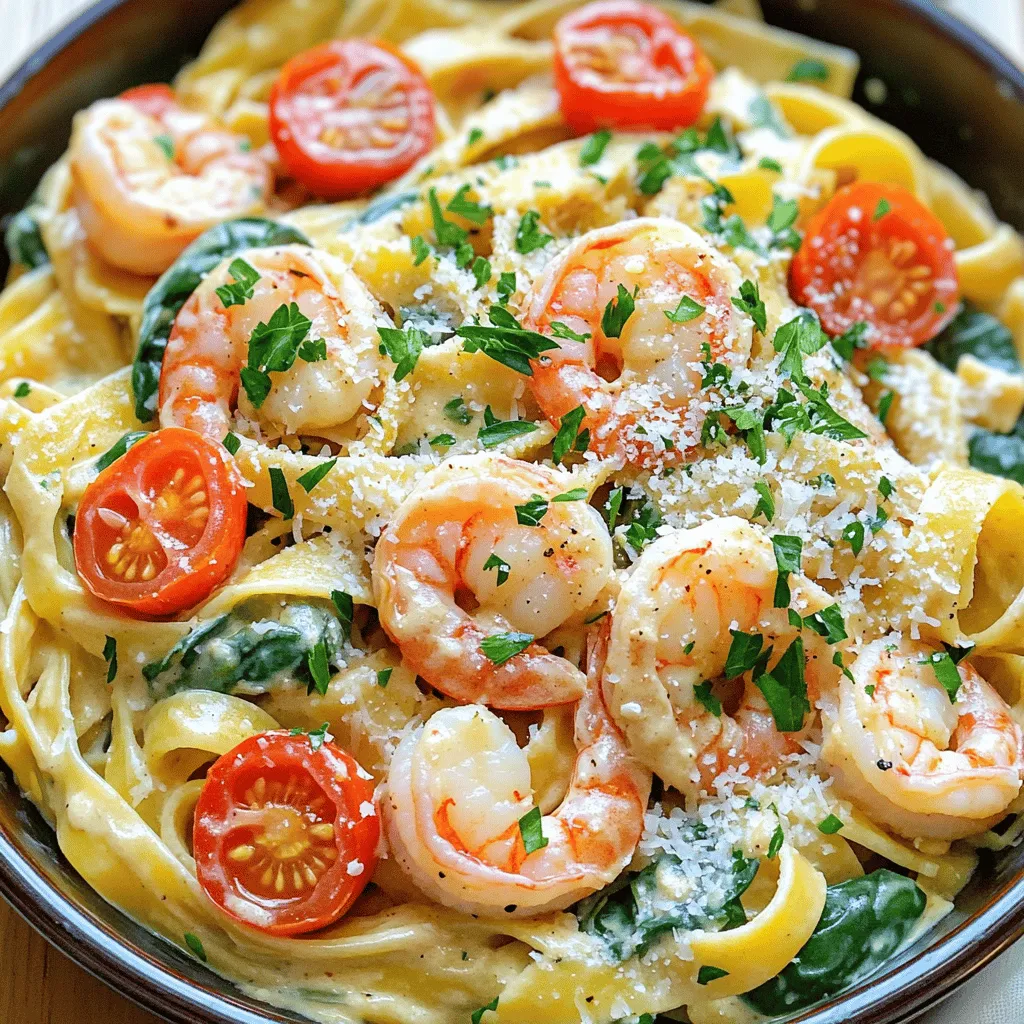
Creamy Cajun Shrimp Pasta Flavorful and Simple Dish

Are you ready for a dish that’s as easy to make as it is delicious? Creamy Cajun Shrimp Pasta blends

- 8 oz fettuccine pasta - 1 lb shrimp, peeled and deveined - 1 lb sea scallops, rinsed and patted dry - 3 cloves garlic, minced - 1/2 cup sun-dried tomatoes in oil, drained and chopped - 1 cup heavy cream - 1/2 cup grated Parmesan cheese - 3 tablespoons olive oil - 1 teaspoon red pepper flakes (adjust for spice preference) - Salt and pepper to taste - Fresh parsley, chopped, for garnish - Zest and juice of 1 lemon To make a tasty shrimp scallop pasta, gather these ingredients. Use fresh seafood for the best flavor. The fettuccine pasta gives the dish a nice base. Sun-dried tomatoes add a rich taste. The heavy cream and Parmesan make the sauce creamy and savory. When I cook, I love to use fresh herbs. They brighten up the dish. Fresh parsley adds color and flavor. The lemon zest and juice enhance the seafood's taste, giving it a refreshing twist. You can find the full recipe [here](#Full Recipe). Whether it's for a special dinner or a weeknight meal, this dish is sure to impress. To start, bring a large pot of salted water to a boil. Add 8 oz of fettuccine pasta. Cook it according to the package instructions until it is al dente. This means it should be firm but not hard. Once done, drain the pasta but save about 1/2 cup of the pasta water. This water helps to adjust your sauce later. Heat a large skillet over medium-high heat. Add 2 tablespoons of olive oil. Season the sea scallops with salt and pepper. Add them to the hot skillet. Sear each side for about 2-3 minutes until they turn golden brown and opaque. Be careful not to overcrowd the pan. Once they are cooked, take them out and set them aside. Using the same skillet, add the last tablespoon of olive oil. Toss in 3 cloves of minced garlic and sauté for about 30 seconds. Next, add 1 lb of shrimp and 1 teaspoon of red pepper flakes. Cook for about 2-3 minutes until the shrimp turn pink and opaque. Watch closely so they don't overcook. Now, add the chopped sun-dried tomatoes to the skillet. Pour in 1 cup of heavy cream, 1/2 cup of grated Parmesan cheese, and the zest and juice of 1 lemon. Stir everything together and bring it to a gentle simmer for about 2-3 minutes. Make sure to season with salt and pepper to taste. Add the drained fettuccine to the skillet. Toss to coat the pasta in the creamy sauce. If the sauce feels too thick, stir in some of that reserved pasta water. This will help you get the perfect creamy texture. Gently fold in the seared scallops. Remove the skillet from heat. Garnish with fresh parsley for color and flavor. Serve immediately, and don’t forget to add lemon wedges on the side for a burst of freshness. For the full recipe, check out Ocean's Delight Shrimp & Scallop Pasta. To cook seafood right, start with fresh shrimp and scallops. Always rinse them well. Pat them dry before cooking. This helps achieve a nice sear. - For shrimp, look for bright pink color. They should also curl slightly. - Scallops should be golden brown and opaque in the center. These signs show that your seafood is done and safe to eat. Herbs and spices can make your dish shine. I love using fresh basil and parsley. They add a bright taste to the creamy sauce. - For a kick, try adding a bit more red pepper flakes. - When it comes to cheese, Parmesan is a great choice. It melts well and adds creaminess. You can also experiment with aged Gouda for a deeper flavor. One major mistake is overcooking seafood. It turns rubbery and loses its flavor. - Keep an eye on cooking times. - Don’t skip the steps for developing flavor. Sauté your garlic before adding other ingredients. This step builds a strong base for your sauce. A well-cooked dish is always more enjoyable. For the full recipe, check out the detailed instructions in the article above. {{image_2}} You can switch the fettuccine with other pasta types. Try penne or spaghetti for a twist. If you want a different seafood option, use crab or lobster. Both add a rich flavor. For a dairy-free version, use plant-based cream. Almond or coconut cream works well. You still get that creamy texture without the dairy. If you want a vegetarian dish, skip the seafood. Use vegetables like zucchini, bell peppers, or mushrooms instead. Sauté these veggies until soft for a lovely texture. Cauliflower can also add some bite, mimicking the feel of scallops. A splash of lemon juice will brighten the flavors, making it fresh and tasty. Seasons change the ingredients you can use. In spring, add fresh peas or asparagus for a pop of green. Summer allows for cherry tomatoes and fresh basil, giving the dish vibrancy. In fall, think about using butternut squash or kale for warmth. Winter can bring in hearty greens like spinach or swiss chard, creating a cozy meal. Adjust your herbs and spices based on what's in season for the best flavor. To keep your shrimp scallop pasta fresh, store it in an airtight container. Place it in the fridge right after it cools down. Make sure it cools for no more than two hours to stay safe. This dish lasts about three days in the fridge. When you reheat shrimp scallop pasta, use low heat to keep it creamy. Add a splash of cream or pasta water while reheating. This helps maintain the smooth texture. Avoid using high heat, as it can make the seafood rubbery. Heat it gently on the stove or in the microwave. If you want to freeze shrimp scallop pasta, let it cool completely first. Then, store it in a freezer-safe container or bag. It can last up to three months in the freezer. When you’re ready to eat, thaw it in the fridge overnight. Reheat it slowly on the stove, adding a bit of cream to keep it creamy. It takes about 15 minutes to prep and 30 minutes to cook. In total, you need about 45 minutes for this dish. This timing allows you to make a delicious meal without a long wait. You’ll love how quick and simple it is! Yes, you can use frozen shrimp and scallops. Just make sure to thaw them safely. Place them in the fridge overnight or run cold water over them. Cooking time remains the same, but check that they are fully cooked. They should turn pink and opaque. Great sides include a fresh salad or garlic bread. A light vegetable side, like steamed broccoli, also works well. These sides balance the rich flavors of the pasta. They add color and texture to your meal. The dish can be spicy, depending on your taste. You can adjust the spice by adding more or less red pepper flakes. For a milder flavor, leave them out altogether. This way, everyone can enjoy it just how they like. You can make this dish ahead of time, but it’s best served fresh. If you want to prep, cook the pasta and seafood separately. Store them in the fridge. When ready to eat, reheat the pasta and seafood together, adding a splash of cream. This keeps it creamy and delicious. For the full recipe, you can check it out [here](#). This blog post covered how to make delicious Shrimp Scallop Pasta. We explored key ingredients, easy steps, and useful tips. You learned how to cook pasta and seafood to perfection. I shared common mistakes to avoid and variations to try. Keep these tips in mind for a tasty dish. Enjoy creating this recipe and delighting your taste buds with every bite!

Savory Shrimp Scallop Pasta Creamy Delight Recipe

Get ready to create a dish that wows your taste buds! My Savory Shrimp Scallop Pasta Creamy Delight Recipe combines

- 1/2 cup unsalted butter - 1 cup granulated sugar - 2 large eggs - 1 teaspoon vanilla extract - 1/3 cup unsweetened cocoa powder - 1/2 cup all-purpose flour - 1/4 teaspoon salt - 1/4 teaspoon baking powder Brownies need rich flavors and a soft texture. The butter adds creaminess. Sugar gives sweetness. Eggs bind the mix. Vanilla brings warmth. Cocoa adds that deep chocolate taste. Flour helps hold it all together. Salt and baking powder balance flavors and give lift. - 8 oz cream cheese, softened - 1/4 cup granulated sugar - 1 large egg - 1 teaspoon vanilla extract - 1 tablespoon all-purpose flour The cheesecake layer needs cream cheese for creaminess. Sugar sweetens it up. One egg helps set the mix. Vanilla adds a nice aroma. A bit of flour makes it smooth. Together, these create a luscious layer that pairs well with brownies. You need simple tools to make these treats. Here’s what I use: - Medium saucepan - Mixing bowls - Whisk - Rubber spatula - 8x8 inch baking pan - Parchment paper - Knife for swirling Having the right equipment makes the process easy. A good whisk helps mix well. A rubber spatula scrapes every bit from the bowl. Parchment paper ensures easy removal. This way, you enjoy beautiful slices of cheesecake brownies. For the full recipe, check out the details above. First, preheat your oven to 350°F (175°C). This step is key for baking. Grease an 8x8 inch pan and line it with parchment paper. This makes for easy removal later. Next, melt 1/2 cup of unsalted butter in a medium saucepan over low heat. Once the butter melts, take it off the heat. Stir in 1 cup of granulated sugar until mixed well. Then, add 2 large eggs and 1 teaspoon of vanilla extract. Mix everything until it looks smooth. Sift in 1/3 cup cocoa powder, 1/2 cup flour, 1/4 teaspoon salt, and 1/4 teaspoon baking powder. Stir until you see no dry ingredients left. Don't overmix; just combine gently. In a separate bowl, beat 8 oz of softened cream cheese until smooth. Add 1/4 cup of sugar, 1 large egg, 1 teaspoon of vanilla, and 1 tablespoon of flour. Mix until creamy and well blended. This layer is what makes the brownies rich and tasty. Pour half of the brownie batter into your prepared pan and spread it evenly. Next, pour all of the cheesecake mixture over this layer. Finally, dollop the rest of the brownie batter on top. Use a knife to swirl the two layers together, creating a marbled effect. This step adds beauty and flavor. Now, bake your creation in the preheated oven for 25-30 minutes. To check if they are done, insert a toothpick into the center. It should come out slightly damp, not wet. Once done, cool the brownies in the pan for 15 minutes. Then transfer them to a wire rack to cool completely. For the full recipe, check out the detailed instructions. To get that perfect brownie texture, use the right amount of butter. I recommend 1/2 cup of unsalted butter. Melt it slowly over low heat. This method keeps the brownies moist and rich. Mix in the sugar while the butter is still warm. This step helps to dissolve the sugar better. Make sure you stir just until the ingredients blend. Over-mixing can lead to tough brownies. For a smooth cheesecake layer, use room temperature cream cheese. Cold cream cheese will not mix well. Beat it until it’s creamy before adding the sugar and other ingredients. This helps avoid lumps. When you mix in the sugar, do it slowly. This technique ensures a silky texture. Avoid overmixing once the eggs are added. Just blend until it’s smooth. When it's time to swirl, don’t rush! Pour half of the brownie batter into the pan first. Then spread the cheesecake mixture on top. Dollop the remaining brownie batter on the cheesecake layer. Use a knife to gently swirl the two mixtures together. Try to create a marbled effect without mixing them completely. This gives you the best look and flavor. For the best results, use a gentle hand. {{image_2}} You can make cheesecake brownies even better by adding flavors. Try mint for a fresh taste. Just add a few drops of mint extract to the cheesecake mix. Peanut butter is another great choice. Mix in half a cup of creamy peanut butter into the cheesecake layer. This gives a rich, nutty flavor. Coffee is also delicious. Stir in a tablespoon of instant coffee granules into the brownie batter. This will deepen the chocolate flavor. If you want a gluten-free treat, swap out the all-purpose flour. Use a gluten-free blend instead. Many blends work well in baking. Look for one that has a mix of rice flour and starches. You can also use almond flour for a nutty taste. Both options give you tasty brownies without gluten. Just make sure to check all other ingredients for gluten. Creating swirls makes your brownies look beautiful. After you pour the layers, use a knife to swirl them together. Begin at one corner and move in a zigzag motion. This will mix the brownie and cheesecake layers. Be careful not to mix too much. You want to see both layers. Another fun technique is to create a heart shape. Just draw a heart with your knife before baking. This adds a special touch to your dessert. For the full recipe, check the details above. To keep your cheesecake brownies fresh, follow these steps. First, let them cool completely. Once cooled, cut them into squares. Place them in an airtight container. This helps keep the brownies moist. You can store them at room temperature for up to three days. If you want to keep them longer, store them in the fridge for about a week. Freezing cheesecake brownies is a great way to save them. Wrap each square tightly in plastic wrap. Then, place them in a freezer-safe container. Label the container with the date. You can freeze them for up to three months. When you're ready to enjoy them, simply move them to the fridge overnight to thaw. Reheating cheesecake brownies is easy. If they are cold, warm them in the microwave for about 10-15 seconds. This will make them soft and gooey again. You can also heat them in an oven at 350°F (175°C) for about 5-10 minutes. Check frequently to avoid overheating. Enjoy your delicious cheesecake brownies warm! You can check if the brownies are done by using a toothpick. Insert it into the center of the brownies. If it comes out slightly damp but not wet, they are ready. This means they are cooked well. If it comes out clean, the brownies may be overbaked. Keep a close eye on the time. They usually bake for 25 to 30 minutes. Yes, you can use other cheeses, but cream cheese gives the best taste. Mascarpone can be a nice swap too. It adds a rich flavor and creamy texture. Just remember that each cheese has its own taste. This can change the final flavor of your cheesecake layer. 1. Overmixing: Mix your batter just until combined. Overmixing can make brownies tough. 2. Incorrect Oven Temp: Always preheat your oven. This helps bake evenly. 3. Not Cooling Enough: Let brownies cool before slicing. This helps them set properly. 4. Skipping the Swirl: Swirling the batter makes a beautiful pattern. Don’t skip this step! Leftover brownies can last for about 3 to 5 days at room temperature. Store them in an airtight container. If you want them to last longer, you can freeze them. Just wrap them well in plastic wrap and foil. They can last up to 3 months in the freezer. When you are ready, just thaw them in the fridge. In this guide, I shared how to make delicious cheesecake brownies. We covered ingredients, step-by-step instructions, and tips for great results. I also highlighted variations for extra flavor and explained storage methods. Try these techniques to impress friends and family. By following these steps, you’ll create a treat that everyone will love. Enjoy baking and make these cheesecake brownies your own!

Cheesecake Brownies Irresistible Chocolate Delight

Are you ready to indulge in a rich, chocolaty treat? Cheesecake brownies blend two beloved desserts into one tasty delight.

To make a bowl of easy roasted tomato soup, you need a few fresh ingredients. Here’s the list: - 2 lbs ripe tomatoes, halved - 1 medium onion, quartered - 4 cloves garlic, unpeeled - 2 tablespoons olive oil - 1 teaspoon dried oregano - 1 teaspoon sugar (to taste) - 2 cups vegetable broth - Salt and pepper to taste - Fresh basil leaves for garnish - Optional: ½ cup heavy cream or coconut cream These ingredients create a rich and tasty soup that warms the soul. The ripe tomatoes are key. They bring sweetness and depth to the soup. Choose tomatoes that are firm and fragrant for the best flavor. The onion adds a savory touch, while garlic gives a wonderful aroma. Olive oil helps to roast the veggies and enhances their natural flavors. Adding dried oregano gives the soup a hint of earthiness. The sugar balances the acidity of the tomatoes, which is important for flavor. Vegetable broth adds body and richness, making each spoonful comforting. Finally, basil leaves on top add a fresh finish. If you like creaminess, the optional cream can make the soup even more luscious. You can get the full recipe to see how to bring these ingredients together for a delightful dish. First, you need to preheat the oven to 400°F (200°C). This temperature helps the tomatoes roast well. Next, arrange your halved tomatoes, quartered onion, and unpeeled garlic on a baking sheet. It’s best to use parchment paper to keep things tidy. Now, drizzle the olive oil over the veggies. Season them with salt, pepper, and dried oregano. Toss everything to coat well. This step adds flavor! Roast the vegetables in the oven for about 30-35 minutes. You want them to get soft and caramelized. The roasting time can vary, so keep an eye on them. Once the veggies are done roasting, take them out and let them cool for a few minutes. Squeeze the garlic from its skin into a bowl and discard the skins. In a blender, combine the roasted vegetables, garlic, sugar, and vegetable broth. Blend until smooth. Pour the blended soup into a pot and heat over medium. If you like it creamy, stir in the heavy cream or coconut cream. Adjust the seasoning with salt and pepper as needed. Simmer for 5-10 minutes to meld the flavors. This step is key for a rich taste! For the full recipe, check out the Easy Roasted Tomato Soup section. Enjoy your delicious soup! Choosing the right tomatoes makes a big difference. I like to use Roma or vine-ripened tomatoes. They have a sweet taste and juicy flesh. You want your tomatoes to be ripe for the best flavor. Roasting time is very important. Aim for 30 to 35 minutes at 400°F. This allows the tomatoes and onion to caramelize. You will notice a rich, deep flavor develop as they roast. Adjusting seasoning can elevate your soup. Start with salt and pepper. Taste your soup after blending. If it needs more flavor, add a pinch of salt or more oregano. You can also add a teaspoon of sugar to balance acidity. Adding cream gives your soup a rich texture. You can use heavy cream or coconut cream. Stir it in right before serving for a smooth finish. This small touch makes the soup feel extra special. For the complete recipe, check out the Full Recipe section. {{image_2}} You can make your soup creamy by adding different types of cream. If you want a lighter option, use coconut cream. It adds a nice flavor and keeps it dairy-free. Heavy cream gives a rich, smooth taste. You can also add spices to boost the flavor. Consider garlic powder or smoked paprika. They add warmth and depth to your soup. A pinch of red pepper flakes can give it a nice kick. To decide on the texture, think about blending. For a smooth soup, blend it well until it’s creamy. If you prefer a chunky version, blend just half of the soup. Leave the rest unblended for texture. Adding vegetables can enhance heartiness. Cooked carrots or bell peppers work great. You can also toss in beans for protein. Chickpeas or white beans add a nice bite and nutrition. After enjoying your easy roasted tomato soup, store the leftovers in the fridge. Use an airtight container to keep it fresh. The soup stays good for about three to five days. If you want to keep it longer, freezing is a great option. Let the soup cool down before pouring it into freezer-safe bags. Remove as much air as possible. It can last for up to three months in the freezer. When you are ready to enjoy your soup again, reheating it properly is key. The best method is to use a pot on the stove. Heat it over medium heat, stirring often. If you want to use a microwave, transfer the soup to a microwave-safe bowl. Heat it in short bursts, stirring in between. To avoid separation while reheating, stir the soup well. If you added cream, mix it in slowly. This will help keep the texture smooth. Enjoy your comforting soup just like the first time! To make the soup vegan, simply skip the heavy cream. You can use coconut cream or serve it without any cream. Both options keep the soup rich and tasty. Using vegetable broth ensures the soup remains plant-based. This way, you enjoy a scrumptious vegan dish without sacrificing flavor. Yes, you can use canned tomatoes. They save time and still taste great. Choose whole peeled tomatoes for the best flavor. Drain excess liquid to keep the soup from being too watery. Use about 2 cans (14.5 oz each) to match the fresh tomatoes. Canned tomatoes add a nice depth to the soup. Roasted tomato soup pairs well with many sides. Here are some tasty options: - Grilled cheese sandwiches - Crusty bread or baguette - Garlic bread - Fresh salads - Croutons for added crunch These options enhance the meal and make it more filling. You can even try a dollop of pesto for a fun twist. For the full recipe, check out the Easy Roasted Tomato Soup section above! You can create a delicious roasted tomato soup with simple steps. You learned about the best ingredients, from ripe tomatoes to flavorful herbs. The roasting brings out the sweet taste of veggies, and blending provides a silky finish. Remember, you can add cream for richness or leave it out for a lighter dish. Store leftovers properly to enjoy later. With these tips, you’ll make a soup that warms hearts. Keep exploring variations to make it your own. Enjoy your cooking!

Easy Roasted Tomato Soup Flavorful and Comforting Dish

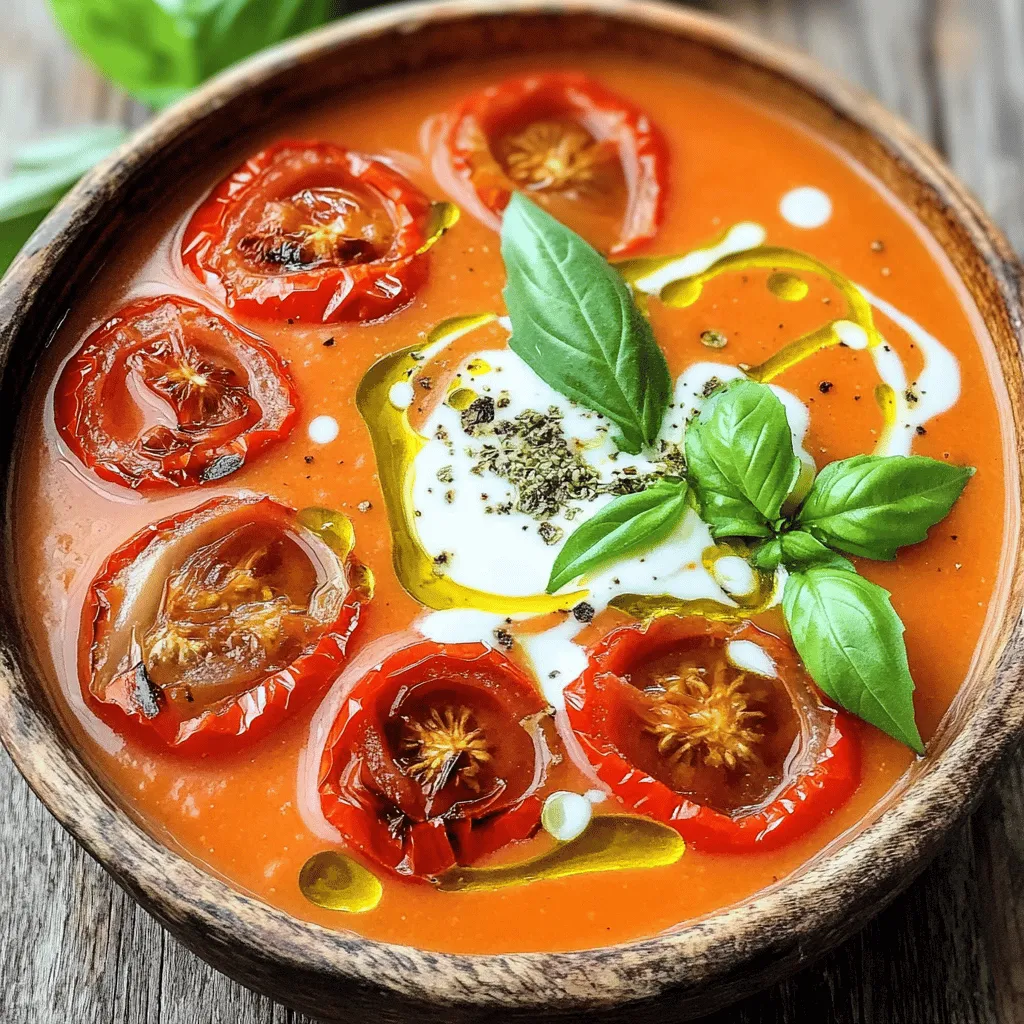
If you’re craving a warm and rich dish, it’s time to make Easy Roasted Tomato Soup! This recipe is simple

To make this dish, gather these key ingredients: - 300g pasta (penne or fusilli works well) - 1 tablespoon olive oil - 4 cloves garlic, minced - 1 onion, finely chopped - 1 can (400g) diced tomatoes - 1 cup vegetable broth - 1 cup heavy cream - 1 teaspoon Italian seasoning - 1 teaspoon sugar (to balance acidity) - Salt and pepper to taste - Fresh basil leaves, for garnish - Grated Parmesan cheese, for serving These items create a rich and creamy sauce that coats the pasta. The diced tomatoes give the dish its base flavor, while the heavy cream adds a smooth texture. Garlic and onion bring depth, and Italian seasoning ties it all together. You can add extra ingredients to make this dish your own. Here are some fun ideas: - Spinach or kale for added greens - Cherry tomatoes for bursts of freshness - Red pepper flakes for a little heat - Cooked chicken or shrimp for protein - Lemon zest for a bright twist These additions can enhance flavors and textures, making your pasta unique. If you're missing something, don't worry! Here are some easy swaps: - Use whole wheat or gluten-free pasta instead of regular pasta. - Swap heavy cream with coconut milk for a lighter option. - Replace vegetable broth with chicken broth for more flavor. - Use crushed tomatoes if diced tomatoes are unavailable. These substitutions keep the dish delicious while catering to your needs. You can find the Full Recipe for detailed steps to prepare this delightful meal. Start by gathering all your ingredients. This makes cooking easier. You will need: - 300g pasta (penne or fusilli works well) - 1 tablespoon olive oil - 4 cloves garlic, minced - 1 onion, finely chopped - 1 can (400g) diced tomatoes - 1 cup vegetable broth - 1 cup heavy cream - 1 teaspoon Italian seasoning - 1 teaspoon sugar (to balance acidity) - Salt and pepper to taste - Fresh basil leaves, for garnish - Grated Parmesan cheese, for serving Chop the onion and mince the garlic. This saves time later. Heat a large skillet over medium heat and add the olive oil. Once hot, add the chopped onion. Cook it for about 3-4 minutes. It should become soft and clear. Then, add the minced garlic. Cook it for 1-2 minutes until you smell its rich aroma. Next, pour in the diced tomatoes and vegetable broth. Add the heavy cream and stir well. Now, sprinkle in the Italian seasoning, sugar, salt, and pepper. Stir again for an even mix. Bring the mixture to a gentle simmer. Once it bubbles, add the pasta. Make sure the pasta is well covered in the sauce. Cover the skillet and cook for 10-12 minutes. Stir it occasionally to prevent sticking. The pasta should be al dente and absorb the creamy sauce. If the pasta looks dry, add a bit more vegetable broth or water. This helps keep it creamy. When done, remove the skillet from heat. Let it sit for a couple of minutes. This lets the sauce thicken. To check if the pasta is done, taste a piece. It should be firm yet tender. If you prefer softer pasta, cook it a minute more. Be careful not to overcook it. Overcooked pasta becomes mushy. Remember, it will continue to cook slightly while it sits. Enjoy your One Pan Creamy Tomato Pasta! To make your sauce creamy, use heavy cream. This adds rich flavor. The key is to add it after cooking the garlic and onion. This way, the cream mixes well with the other ingredients. Stir it in slowly, letting it blend fully. Adding sugar balances the acidity of the tomatoes. This small step makes a big difference. One common mistake is overcooking the pasta. Cook it until al dente. This means it should still have a slight bite. If you add the pasta too early, it can get mushy. Another mistake is not seasoning enough. Always taste the sauce. Adjust salt and pepper to your liking. Finally, don’t skip the resting time after cooking. It helps the sauce thicken. To boost the flavor, add fresh herbs. Basil or parsley work great. You can also use crushed red pepper for a kick. For a deeper taste, try adding a splash of balsamic vinegar. It adds complexity without overpowering. Lastly, finish with grated Parmesan cheese. It melts beautifully and enhances the dish. For the full experience, check the Full Recipe. {{image_2}} To make this dish vegetarian, skip the Parmesan cheese. Use a plant-based cream instead of heavy cream. You can also add more veggies, like spinach or mushrooms. These options keep the meal tasty and healthy. If you want more protein, you can add cooked chicken or shrimp. Sauté them in the pan before adding the onion. For a meatless option, try chickpeas or lentils. They pack a protein punch and blend well with the sauce. In spring and summer, fresh tomatoes can replace canned ones. They add a rich, sweet flavor. In fall, consider roasted butternut squash or zucchini. These swaps keep your dish fresh and exciting all year round. For the full recipe, check out the details above. To keep your One Pan Creamy Tomato Pasta fresh, let it cool first. Then, place it in an airtight container. Store it in the fridge for up to three days. Make sure to label the container with the date. This helps you remember how long it has been stored. When you are ready to eat the leftovers, you can reheat it on the stove or in the microwave. For the stove, add a splash of water or broth to the pan. Heat it over low heat, stirring often. In the microwave, use a microwave-safe dish. Cover it with a lid or a damp paper towel to keep it moist. Heat in short bursts, stirring in between to avoid hot spots. If you want to save it for later, freezing is a great option. Portion the pasta into freezer-safe bags or containers. Remove as much air as possible before sealing. Label the bags with the date. To thaw, place it in the fridge overnight. For a quick option, you can microwave it directly from the freezer. Just add a little extra liquid to help it heat evenly. I recommend using penne or fusilli for this recipe. These shapes hold sauce well. They cook evenly and absorb flavors easily. Rigatoni also works if you prefer a larger pasta. Yes, you can! To make this dish dairy-free, swap heavy cream with coconut milk. Use nutritional yeast in place of Parmesan for a cheesy flavor. This keeps the meal creamy and tasty without dairy. This dish lasts about 3 to 4 days in the fridge. Store it in an airtight container to keep it fresh. Just make sure it cools down before putting it away. Absolutely! You can use fresh tomatoes, crushed tomatoes, or even tomato sauce. Just adjust the seasoning as needed. Canned tomatoes are great for convenience and flavor, but fresh adds a nice touch. This pasta pairs well with a simple green salad or garlic bread. You can also try serving it with steamed veggies for a healthy side. A glass of red wine makes it feel extra special! In this blog post, we explored the essentials you need for One Pan Creamy Tomato Pasta. We covered key ingredients, cooking steps, and tips to make it creamy. You can customize this dish with add-ons or seasonal swaps. Storing and reheating leftovers was also discussed for your convenience. Whether you prefer vegetarian options or hearty proteins, this pasta dish is easy and flexible. Enjoy experimenting with flavors and making it your own!

One Pan Creamy Tomato Pasta Easy and Flavorful Meal

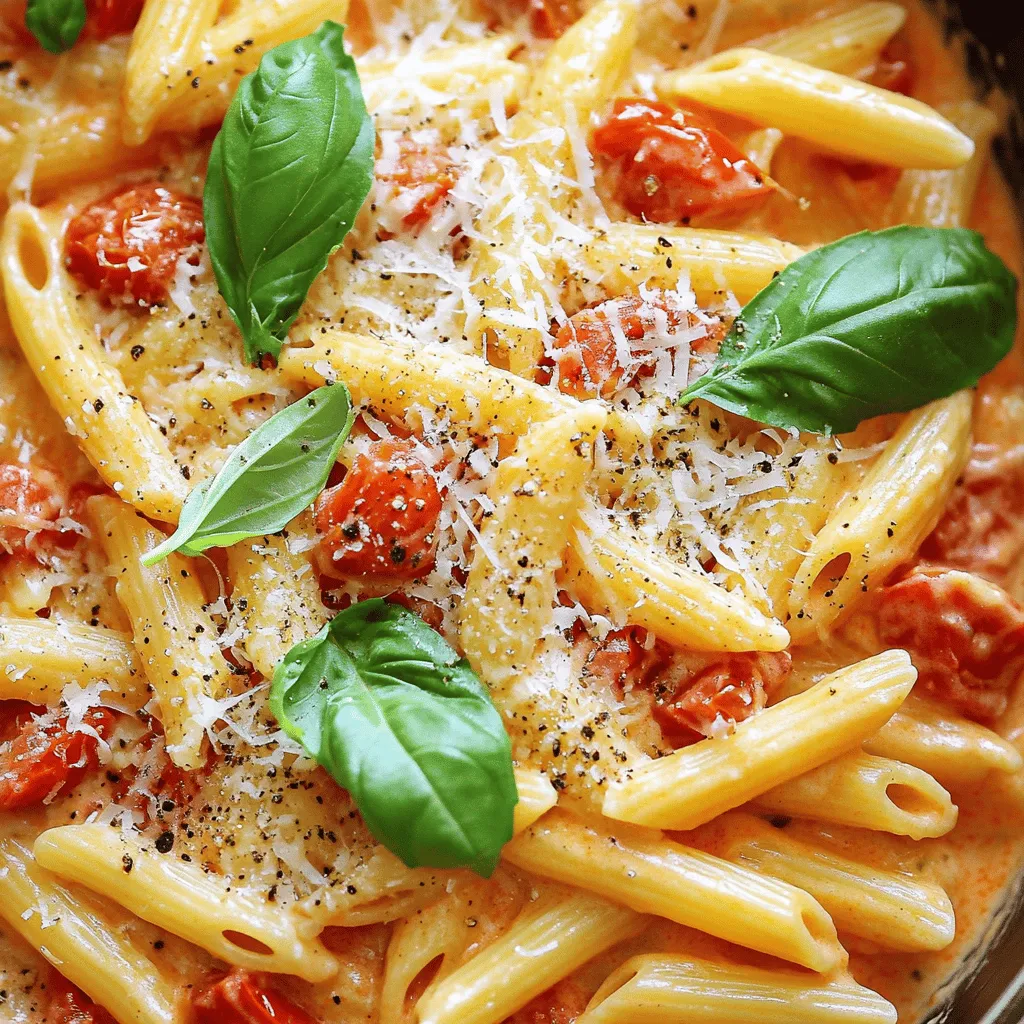
One Pan Creamy Tomato Pasta is the perfect dish for busy nights. It’s easy, quick, and full of flavor! You

For your savory cheese scones, gather these key ingredients: - 2 cups all-purpose flour - 1 tablespoon baking powder - 1/2 teaspoon salt - 1/4 teaspoon black pepper - 1/4 teaspoon cayenne pepper (optional) - 1/2 cup cold unsalted butter, cubed - 1 cup shredded sharp cheddar cheese - 1/2 cup grated Parmesan cheese - 1/2 cup whole milk (or buttermilk) - 1 egg, beaten (for egg wash) - Fresh chives, finely chopped (for garnish) Using quality cheese is vital for flavor. Sharp cheddar brings a rich taste. Parmesan adds depth and a hint of nuttiness. Always choose fresh, high-quality cheese for the best results. You can enhance your scones with some fun add-ins. Consider these herbs and spices: - Fresh rosemary - Thyme - Garlic powder For cheese varieties, try: - Gruyère for a nutty twist - Feta for a tangy kick - Mozzarella for a gooey texture These options let you explore new flavors and keep your scones exciting. Enjoy experimenting! For the full recipe, check out the detailed instructions above. 1. Start by preheating your oven to 400°F (200°C). Line a baking sheet with parchment paper to prevent sticking. 2. In a large bowl, mix 2 cups of all-purpose flour, 1 tablespoon of baking powder, 1/2 teaspoon of salt, 1/4 teaspoon of black pepper, and 1/4 teaspoon of cayenne pepper. This blend gives your scones a nice kick. 3. Add 1/2 cup of cold, cubed unsalted butter to the flour mix. Use your fingers or a pastry cutter to blend until it looks like coarse crumbs. 4. Stir in 1 cup of shredded sharp cheddar cheese and 1/2 cup of grated Parmesan cheese. Make sure the cheese is spread evenly. 5. Slowly pour in 1/2 cup of whole milk (or buttermilk). Use a fork to mix until the dough sticks together. Be careful not to overmix; it should feel slightly sticky but easy to handle. 6. Turn the dough onto a floured surface. Gently knead it a few times until it forms a ball. Remember, you want a soft dough, not tough. 7. Pat the dough into a rectangle about 1 inch thick. Use a knife or pizza cutter to cut it into squares or triangles. 8. Place your cut scones on the prepared baking sheet, leaving about 1 inch of space between them. 9. Brush the tops with a beaten egg to give them a golden look when baked. 10. Bake the scones for 15-20 minutes. Keep an eye on them; they should turn lightly golden. 11. To check if they are ready, insert a toothpick into the center. If it comes out clean, your scones are perfect. 12. Remove the scones from the oven and let them cool on a wire rack for a bit. 13. While they are still warm, sprinkle some finely chopped chives on top for a fresh touch. These simple steps will lead you to delicious, savory cheese scones. For the complete recipe, refer to the Full Recipe. To make the best savory cheese scones, avoid common mistakes. Here are some tips: - Overmixing the dough: Mix just enough until the dough comes together. Overmixing makes scones tough. - Using warm butter: Always use cold butter. It helps create a flaky texture. - Skipping the chill: If time allows, chill the dough for a bit. It helps the scones rise better. For a flaky texture, keep these techniques in mind: - Cut in butter correctly: Use a pastry cutter or your fingers. Aim for coarse crumbs. - Use cold ingredients: Cold milk or buttermilk helps the dough stay cool. - Pat, don’t roll: Pat the dough into shape instead of rolling it out. This keeps layers intact. Savory cheese scones pair well with many drinks and spreads. Here are my favorites: - Pairing with soup: Serve these scones with a warm bowl of tomato basil or creamy potato soup. - Cheese and charcuterie boards: Include scones on a board with cured meats and fresh fruits. - Beverages: Enjoy with herbal tea, coffee, or a light white wine. For presentation, try these ideas: - Garnish with herbs: Sprinkle fresh chives or parsley on top for color. - Serve warm: Warm scones taste best. Serve them right out of the oven. - Use rustic dishes: Place scones on a wooden board or in a woven basket for a cozy look. For the full recipe and more details, check out the [Full Recipe]. {{image_2}} You can play with many cheese flavors in savory cheese scones. While sharp cheddar gives a nice bite, other cheeses can add depth. Here are some great choices: - Gruyère: This Swiss cheese adds a nutty twist. - Feta: Crumbled feta brings a salty taste that pairs well with herbs. - Blue cheese: If you like bold flavors, try adding blue cheese for a rich profile. - Goat cheese: This cheese adds creaminess and a tangy flavor. Combining cheeses can make your scones gourmet. For example, use half cheddar and half Gruyère. This mix creates a tasty balance. Experimenting with different cheeses can lead to fun and unique scone experiences. You can create sweet or savory variations with add-ins. Fresh herbs like rosemary or thyme can brighten the flavor. If you want a sweet twist, try adding dried cranberries or chopped apples. Seasonal fruits and vegetables also work great. In spring, add fresh asparagus or peas for a fresh touch. In the fall, try pumpkin puree or grated zucchini for moisture and flavor. Adding these elements allows you to customize your scones. Each season can bring new flavors to your kitchen. For the full recipe, check out the detailed steps. To keep your savory cheese scones fresh, store them in an airtight container. This helps maintain their texture and flavor. Place a piece of parchment paper between layers to prevent sticking. Keep them at room temperature for up to two days. If you need to store them longer, consider freezing. To freeze, let the scones cool completely. Wrap each one in plastic wrap and place them in a freezer bag. They will stay fresh for about three months. When you want to enjoy them, simply thaw them overnight in the fridge. To warm up your scones, the oven is the best method. Preheat it to 350°F (175°C). Place the scones on a baking sheet and heat for about 10 minutes. This keeps them crispy on the outside while soft inside. If you prefer a softer texture, microwave them for 15-20 seconds. However, this may make them a bit chewy. For the best results, try both methods and see which you like most! To boost the cheese flavor, choose sharp cheddar and aged Parmesan. You can also mix in herbs like rosemary or thyme for an extra kick. Adding a pinch of garlic powder can enhance the taste, too. For dairy-free or vegan options, use plant-based butter and non-dairy milk. Nutritional yeast can mimic the cheese flavor well. You can also try vegan cheese made from nuts or soy, which can add a nice creaminess. Yes, you can make the dough ahead. Wrap it tightly and keep it in the fridge for up to 24 hours. When ready, just cut and bake as usual. If baked, store scones in an airtight container at room temperature for up to two days. For longer storage, freeze them. Just reheat in the oven for a few minutes to bring back the freshness. Savory cheese scones pair well with soups or salads. A rich tomato soup or a fresh garden salad makes a great match. You can also serve them with dips like hummus or a spicy salsa for extra flavor. Consider a spread like herb-infused butter or cream cheese to enjoy on the side. These options elevate your scone experience, making it even more delightful. For more ideas, check the Full Recipe. In this post, we covered how to make delicious cheese scones. We discussed key ingredients, especially the importance of using quality cheese, and optional add-ins like herbs. The step-by-step guide helped you knead the dough and bake it to perfection. We shared tips for achieving a flaky texture and offered serving ideas. Finally, I hope you feel ready to experiment with variations and enjoy fresh scones at home. Your tasty creations await!

Savory Cheese Scones Simple and Tasty Recipe

If you’re craving a delicious snack, look no further than savory cheese scones! This simple and tasty recipe will have

To make cheesy baked egg toast, you need just a few simple ingredients. Here’s what you’ll gather: - 4 slices of thick bread (sourdough or whole grain) - 4 large eggs - 1 cup shredded mozzarella cheese - 1/2 cup grated Parmesan cheese - Seasonings: garlic powder, dried thyme, black pepper, salt - Garnish: fresh parsley Each ingredient plays a key role in making this dish tasty. The thick bread gives a sturdy base, while the eggs add protein. Mozzarella melts beautifully, and Parmesan adds a rich flavor. You can customize the seasonings to match your taste. Fresh parsley not only looks nice, but it also adds a fresh bite. For more fun, try adding different herbs or spices you love. I recommend using the Full Recipe to see how to combine these ingredients perfectly. Enjoy cooking! - Set oven temperature to 375°F (190°C). This step warms the oven for even cooking. - Hollow out bread by cutting a round hole. Use a sharp knife but be careful not to cut all the way through. This creates a nest for the egg. - Combine eggs with seasonings in a bowl. Use 4 large eggs, garlic powder, dried thyme, black pepper, and a pinch of salt. Whisk until mixed well. - Add cheese and eggs to bread. First, sprinkle mozzarella and half of the Parmesan cheese inside the hollowed bread. Then, gently pour an egg into each slice. - Bake for 15-20 minutes until desired doneness. You want the egg whites to be set and the yolks slightly runny. Adjust baking time to your taste. For the full recipe, check the ingredients list at the start. To get the best egg consistency, aim for a soft, runny yolk. Bake your toast until the whites are set, but the yolk remains slightly jiggly. This usually takes around 15-20 minutes at 375°F. If you prefer a firmer yolk, leave it in the oven a bit longer. Hollowing out the bread is key. Use a sharp knife for a clean cut. Start by cutting a large round hole in the center. Make sure not to cut all the way through. The bread needs to hold the egg and cheese well. Want to spice things up? Try adding diced tomatoes, bell peppers, or cooked bacon into the egg mixture. These add flavor and texture. You can also switch up the seasonings. Adding smoked paprika or chili flakes can give your dish a nice kick. If you're a cheese lover, experiment with different cheeses. Cheddar, feta, or even goat cheese can bring new flavors. Just remember to adjust the amount of salt based on the cheese you choose. Serving is as important as cooking. Place each Cheesy Baked Egg Toast on a bright plate. This makes the dish pop! Add a side of cherry tomatoes or a light salad for color and freshness. For a final touch, drizzle a balsamic reduction over the toast. This adds sweetness and a gourmet feel. Garnish with fresh parsley for a bright finish. It looks great and tastes even better! {{image_2}} You can swap mozzarella for other cheeses. Cheddar adds a sharp flavor. Gouda melts nicely and gives a creamy texture. Feta adds a tangy twist. For a rich taste, try Gruyère. Mixing cheeses can create a unique flavor profile. Experiment to find your favorite blend! Incorporating vegetables or proteins can elevate your toast. Spinach adds color and nutrients. Diced tomatoes brighten each bite. Cooked bacon or sausage brings in savory notes. Avocado slices add creaminess and healthy fats. Feel free to mix and match based on what you have. If you need gluten-free options, use gluten-free bread. You can also try rye or ciabatta for a different taste. Each bread type will change the texture and flavor. Explore various styles to find what you enjoy most. It’s all about personal preference! To keep leftover cheesy baked egg toast fresh, first let it cool. Place the slices in an airtight container. You can store them in the fridge for up to three days. If you want to keep them longer, consider freezing them. Just make sure to wrap each slice tightly. To reheat, preheat your oven to 350°F (175°C). Place the toast on a baking sheet. Heat for about 10 minutes. This keeps the bread crispy and the egg warm. You can also use a microwave, but the toast may get soggy. If you do, heat for 30 seconds at a time. Yes, you can freeze cheesy baked egg toast! Wrap each slice in plastic wrap and then put them in a freezer bag. They can last up to two months in the freezer. To eat, just thaw in the fridge overnight and follow the reheating instructions. Enjoy your tasty meal anytime! Yes, you can prep cheesy baked egg toast ahead of time. To do this, hollow out the bread and store it in a sealed container. You can mix the egg mixture and keep it in the fridge. Just pour the egg mixture into the bread and bake it when you're ready to eat. This way, you save time and enjoy a fresh meal. Cheesy baked egg toast pairs well with many sides. You can serve it with a light salad or some cherry tomatoes for freshness. A fruit salad also makes a great choice. If you're in the mood for something warm, try pairing it with crispy bacon or sautéed spinach. These sides enhance the meal and add color to your plate. Yes, you can use only egg whites for a lighter version. This will reduce fat and calories while still keeping the toast tasty. Just remember that using whole eggs gives the dish a richer flavor. If you prefer a fluffier texture, add a bit of milk to the egg whites before whisking. This can help balance the flavors and keep it moist. For cheesy baked egg toast, thick bread works best. Sourdough and whole grain bread are great choices. They hold up well during baking and add a nice flavor. You can also try brioche for a sweeter touch or rye for a heartier option. The key is to choose a bread that can support the egg and cheese without falling apart. Cheesy baked egg toast is easy and fun to make. The ingredients blend perfectly to create a delicious dish. We discussed how to prepare, bake, and enjoy it with various tips and variations. You can have it with just a few ingredients or mix it up with add-ins. In the end, this recipe is great for breakfast or brunch. Test out different flavors and make it your own. Enjoy your cooking!

Cheesy Baked Egg Toast Simple and Tasty Recipe

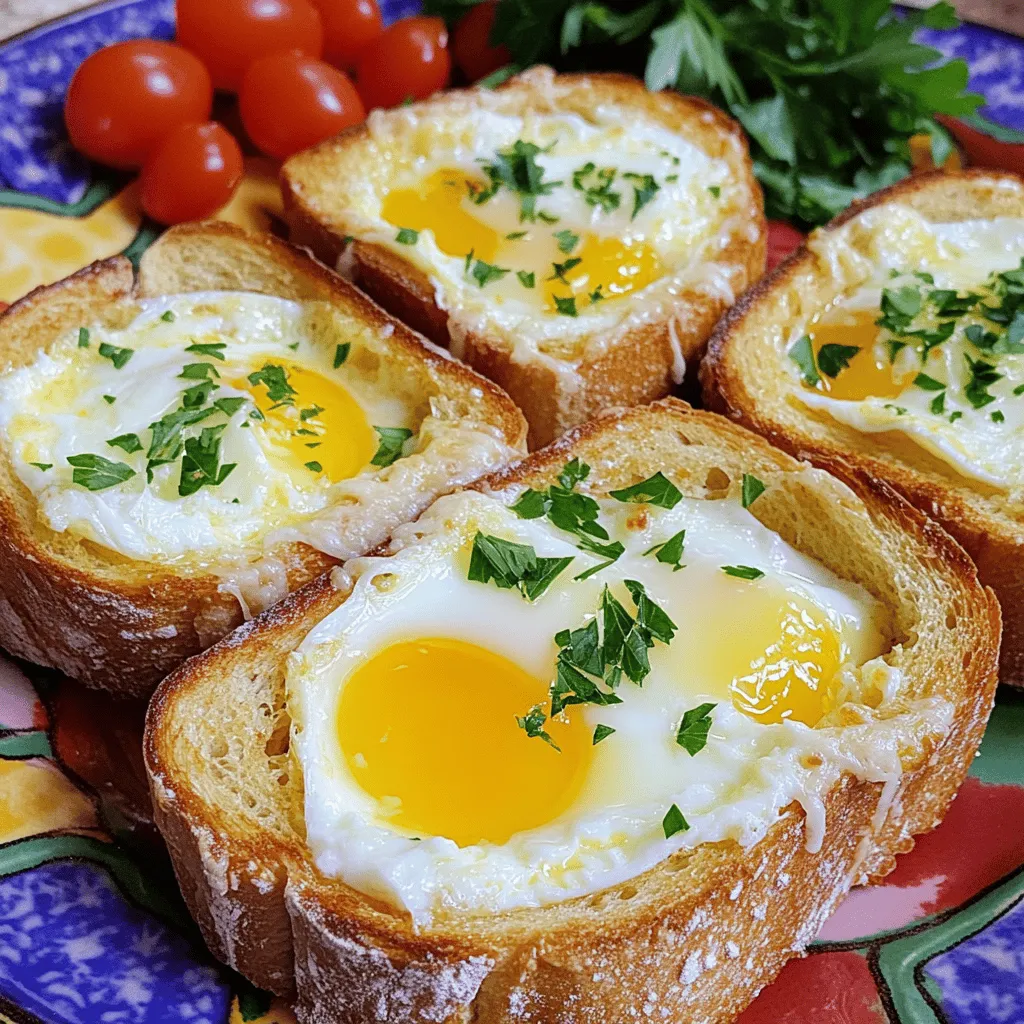
Are you ready to whip up a breakfast that’s both quick and delicious? This Cheesy Baked Egg Toast recipe combines

Here’s what you need to make these tasty 2-point pumpkin muffins. Gather these ingredients for a fun baking session. - 1 cup canned pumpkin puree - 1/3 cup unsweetened applesauce - 1/4 cup maple syrup - 1/4 cup brown sugar, packed - 1 large egg - 1 teaspoon vanilla extract - 1 1/2 cups all-purpose flour - 1 teaspoon baking powder - 1/2 teaspoon baking soda - 1 teaspoon pumpkin pie spice - 1/2 teaspoon ground cinnamon - 1/4 teaspoon salt - Optional Ingredients: - 1/2 cup chopped walnuts or pecans - 1/4 cup chocolate chips Using canned pumpkin puree makes it easy. It’s smooth and full of flavor. Unsweetened applesauce adds moisture without extra sugar. Maple syrup and brown sugar give a rich sweetness to the muffins. When you mix in an egg, it binds everything together. The vanilla extract adds a lovely aroma. The dry ingredients work their magic too. All-purpose flour provides texture, while baking powder and baking soda help the muffins rise. Pumpkin pie spice and cinnamon give that cozy fall flavor. Feel free to add nuts or chocolate chips for fun surprises. Each bite can be unique! Get ready to bake these muffins with joy. You can find the full recipe in the [Full Recipe] section. - Preheating the Oven First, preheat your oven to 350°F (175°C). This helps the muffins bake evenly. - Mixing Wet Ingredients In a large bowl, mix together: - 1 cup canned pumpkin puree - 1/3 cup unsweetened applesauce - 1/4 cup maple syrup - 1/4 cup brown sugar, packed - 1 large egg - 1 teaspoon vanilla extract Whisk these ingredients until smooth. This mix adds moisture and flavor. - Combining Dry Ingredients In another bowl, sift together: - 1 1/2 cups all-purpose flour - 1 teaspoon baking powder - 1/2 teaspoon baking soda - 1 teaspoon pumpkin pie spice - 1/2 teaspoon ground cinnamon - 1/4 teaspoon salt Mix these dry ingredients well to ensure even distribution. - Folding in Optional Ingredients If you want to add a twist, fold in: - 1/2 cup chopped walnuts or pecans (optional) - 1/4 cup chocolate chips (optional) Gently mix until they are spread throughout the batter. Be careful not to overmix. - Distributing Batter in Muffin Pan Spoon the batter into your prepared muffin pan. Fill each cup about 3/4 full. This gives the muffins room to rise. - Baking Time and Temperature Bake in your preheated oven for 18-22 minutes. Check them by inserting a toothpick in the center. If it comes out clean, they are done. - Cooling Instructions Once baked, remove the muffins from the oven. Let them cool in the pan for about 5 minutes. Then, transfer them to a wire rack to cool completely. This helps keep them soft and fluffy. These easy steps get you delicious 2-point pumpkin muffins. For the complete process, check the Full Recipe. - Healthier Sweetener Options: You can replace maple syrup with honey or agave. Both options add sweetness without extra calories. Try using coconut sugar for a lower glycemic index. - Gluten-Free Flour Alternatives: For a gluten-free option, use almond flour or a gluten-free blend. These flours work well and keep the muffins moist. - Avoiding Overmixing: When you mix the wet and dry ingredients, stir gently. This keeps the muffins light and fluffy. Overmixing can make them dense or tough. - Testing for Doneness: To check if your muffins are done, insert a toothpick in the center. If it comes out clean, they're ready! If not, give them a few more minutes. - Serving Suggestions: Serve your muffins warm on a rustic wooden board. Dust them with extra ground cinnamon or powdered sugar for a nice touch. You can also add a dollop of cream cheese for extra flavor. - Storing for Freshness: To keep muffins fresh, store them in an airtight container. They stay good for up to three days at room temperature. For longer storage, freeze them in a zip-top bag. {{image_2}} You can easily change the taste of your muffins. One way is by adding spices. Try ginger or nutmeg for a warm twist. These spices bring out the pumpkin flavor more. If you want to switch it up, use sweet potato instead of pumpkin. It gives a nice, sweet flavor too. Toppings can make your muffins even better. Cream cheese frosting is a popular choice. It adds a rich, creamy layer on top. You can also try different glazes. A simple sugar glaze can add sweetness and shine. Just mix powdered sugar with a bit of milk or water for a quick glaze. Mix-ins add fun textures and flavors. Dried fruits like cranberries or raisins can give a chewy bite. They also add a bit of tartness. Coconut flakes are another great option. They bring a tropical taste that pairs well with pumpkin. Feel free to get creative with your mix-ins! For the complete recipe, check out the Full Recipe. To keep your muffins fresh, store them in an airtight container. This helps lock in moisture. You can keep them at room temperature for up to three days. If you want to keep them longer, consider freezing them. To freeze pumpkin muffins, first let them cool completely. Then, wrap each muffin in plastic wrap. Place the wrapped muffins in a freezer bag. Squeeze out the air before sealing. Label the bag with the date. Frozen muffins can last for about three months. To enjoy your frozen muffins, take them out and unwrap them. You can thaw them at room temperature for about an hour. Or, use the microwave. Heat them on low for about 15-20 seconds. Enjoy them warm for a tasty treat. For more details, check the Full Recipe. These pumpkin muffins are just 2 points each. I used a simple system to keep track. This means you can enjoy a tasty treat without worrying too much. The low point count makes them a great choice for a snack or breakfast. Yes, you can easily make these muffins vegan. For the egg, use a flax egg. Just mix 1 tablespoon of ground flaxseed with 3 tablespoons of water. Let it sit for a bit to thicken. You can swap the milk for any plant-based milk. Applesauce works well, too. These muffins last about 3 to 5 days when stored correctly. Keep them in an airtight container at room temperature. If you want them to last longer, you can freeze them. Just make sure they are fully cooled before freezing. Absolutely! Using fresh pumpkin can add a nice touch. Start by cutting a small pumpkin in half and removing the seeds. Roast it in the oven until soft. Then, scoop out the flesh and mash it until smooth. Use this fresh pumpkin puree in your recipe. These muffins pair well with many things. You can enjoy them with a cup of coffee or tea. A spread of cream cheese or butter adds a nice flavor. You could also serve them with a dollop of yogurt or whipped cream for a sweet treat. For more ideas, check out the Full Recipe. You now have a complete guide to making delicious pumpkin muffins. We covered key ingredients, step-by-step instructions, and tips for success. With options for variations and storage, you can explore your creativity in the kitchen. Remember, these muffins are easy to make and fun to share. Enjoy your baking journey and let the flavors shine. Your homemade muffins will be a hit!

2-Point Pumpkin Muffins Recipe Simple and Tasty Treat

Are you ready for a treat that’s both tasty and guilt-free? Let me introduce you to my 2-Point Pumpkin Muffins

When making roasted Parmesan green beans, you need fresh and simple ingredients. Here’s what you will need: - 1 pound fresh green beans, trimmed - 3 tablespoons olive oil - 1 teaspoon garlic powder - 1 teaspoon onion powder - ½ teaspoon smoked paprika - ½ teaspoon salt (adjust to taste) - ¼ teaspoon black pepper - ½ cup grated Parmesan cheese - Zest of 1 lemon - 2 tablespoons fresh parsley, chopped (for garnish) These ingredients work together to create a dish that is both tasty and easy to make. Fresh green beans give a nice crunch, while Parmesan adds a rich flavor. The spices, like garlic and smoked paprika, bring warmth and depth. Using these simple items helps you create a side dish that can impress anyone. You can find the full recipe online for more details on how to prepare this dish. Enjoy your cooking! - Preheat your oven to 425°F (220°C). - In a large mixing bowl, combine the trimmed green beans with olive oil, garlic powder, onion powder, smoked paprika, salt, and black pepper. - Toss until the green beans are well coated. Start with the right oven temperature. This ensures even cooking. Next, mix the green beans with the olive oil and spices. I love using garlic and onion powder for a deep flavor. The smoked paprika adds a nice touch. Toss well to coat every bean. This step helps all the flavors stick. - Spread the seasoned green beans in a single layer on a parchment-lined baking sheet. - Roast in the preheated oven for 15 minutes. - Add the grated Parmesan cheese, then return to oven for an additional 5-7 minutes. Lining your baking sheet with parchment makes cleanup easy. After 15 minutes, take the green beans out and sprinkle them with Parmesan. This cheese melts beautifully and turns golden. The last roasting time lets the cheese get bubbly and crisp. - Add lemon zest before serving. - Garnish with chopped fresh parsley. Zesting a lemon adds a bright flavor that cuts through the richness. It gives the dish a fresh taste. Finally, I like to sprinkle fresh parsley on top. This not only adds color but also a hint of herbal flavor. Enjoy your Roasted Parmesan Green Beans! For the full recipe, check the earlier section. To avoid soggy green beans, make sure to dry them well after washing. Wet beans steam instead of roast. Use a clean kitchen towel or paper towel to pat them dry. For even roasting, place the baking sheet on the middle rack. This allows hot air to flow around the beans. If you place it too high or low, the beans may cook unevenly. You can add extra spices for more flavor. Try red pepper flakes for heat or Italian herbs for a twist. These spices boost taste without much effort. Experiment with different cheese types too. Feta or sharp cheddar can give a new flavor. Each cheese adds its own character to the dish. Roasted green beans pair well with many main dishes. Serve them alongside grilled chicken or steak for a complete meal. Their crunch complements rich meats perfectly. You can also add green beans to salads or grain bowls. Toss them in with quinoa or brown rice for added nutrition. They add a nice crunch to any dish. {{image_2}} You can use frozen green beans instead of fresh ones. Frozen beans are often picked at their peak. They freeze quickly, locking in flavor and nutrients. Just keep in mind they might cook faster. Adjust your roasting time to avoid overcooking. You can also try different herbs and spices. Instead of garlic powder, consider using fresh garlic for a stronger flavor. You can use Italian seasoning or red pepper flakes for a kick. These swaps can change the dish's taste while keeping it simple. Want to cook these green beans faster? Use an air fryer! Just preheat it to 400°F (200°C). Toss the beans with oil and seasonings. Cook for about 10 minutes, shaking halfway through. This method makes them crispy and delicious without heating your kitchen. You can also blanch and sauté them on the stovetop. Start by boiling water and adding salt. Blanch the beans for 2-3 minutes until bright green. Drain and quickly sauté in a pan with olive oil and garlic. This method gives a nice crunch and vibrant color. Making this dish gluten-free is easy! All the ingredients in the recipe are naturally gluten-free. Just check the Parmesan cheese label to ensure it’s gluten-free. If you need it dairy-free, swap the Parmesan with nutritional yeast. It adds a cheesy flavor without dairy. You can also use vegan cheese for a similar taste. For low-sodium options, reduce the salt and use fresh herbs. Lemon zest adds brightness and flavor without added sodium. You can enjoy this dish while being health-conscious. For the full recipe, refer to the earlier section. To keep your roasted Parmesan green beans fresh, store leftovers in an airtight container. Place them in the fridge within two hours of cooking. They will stay good for about three to four days. If you want to keep them longer, you can freeze the green beans. Make sure they are fully cooled, then place them in a freezer bag. Remove as much air as possible to prevent freezer burn. They can last up to three months in the freezer. To reheat your green beans, the oven works best. Preheat your oven to 350°F (175°C). Spread the green beans on a baking sheet and heat for about 10 minutes. This helps keep them crispy. If you use a microwave, place the green beans in a microwave-safe dish. Cover them with a damp paper towel. Heat in 30-second intervals, stirring in between, until warm. Leftover roasted Parmesan green beans last about three to four days in the fridge. If you see any signs of spoilage, like mushiness or an off smell, it’s best to toss them. Always check for bright color and firmness to know they are still good to eat. Can I use different types of beans? Yes, you can use other beans. Try snap peas or asparagus for a twist. They roast well and taste great with Parmesan. How can I make this recipe vegan? To make this dish vegan, skip the Parmesan cheese. You can use nutritional yeast for a cheesy flavor. It adds depth without dairy. What can I serve with roasted green beans? Roasted green beans pair well with many dishes. Serve them with grilled chicken, fish, or a hearty grain bowl. They add a nice crunch and flavor. Can I prepare them ahead of time? You can prep green beans in advance. Toss them with olive oil and spices, then store in the fridge. Roast them just before serving for the best taste. How do I know when green beans are cooked? Green beans are done when they are bright green and tender-crisp. You can test one with a fork. If it’s easy to pierce, they are ready! For the full recipe, check out my detailed guide on Roasted Parmesan Green Beans. Roasting green beans with Parmesan is easy and tasty. We covered key ingredients and step-by-step instructions to make perfect roasted green beans. I shared tips for flavor and variations, plus storage info and reheating methods. Incorporate these techniques to impress at your next meal. Enjoy experimenting with flavors and textures. Roasted green beans can elevate any dish. Start cooking today and savor the results!

Roasted Parmesan Green Beans Flavorful and Simple Dish

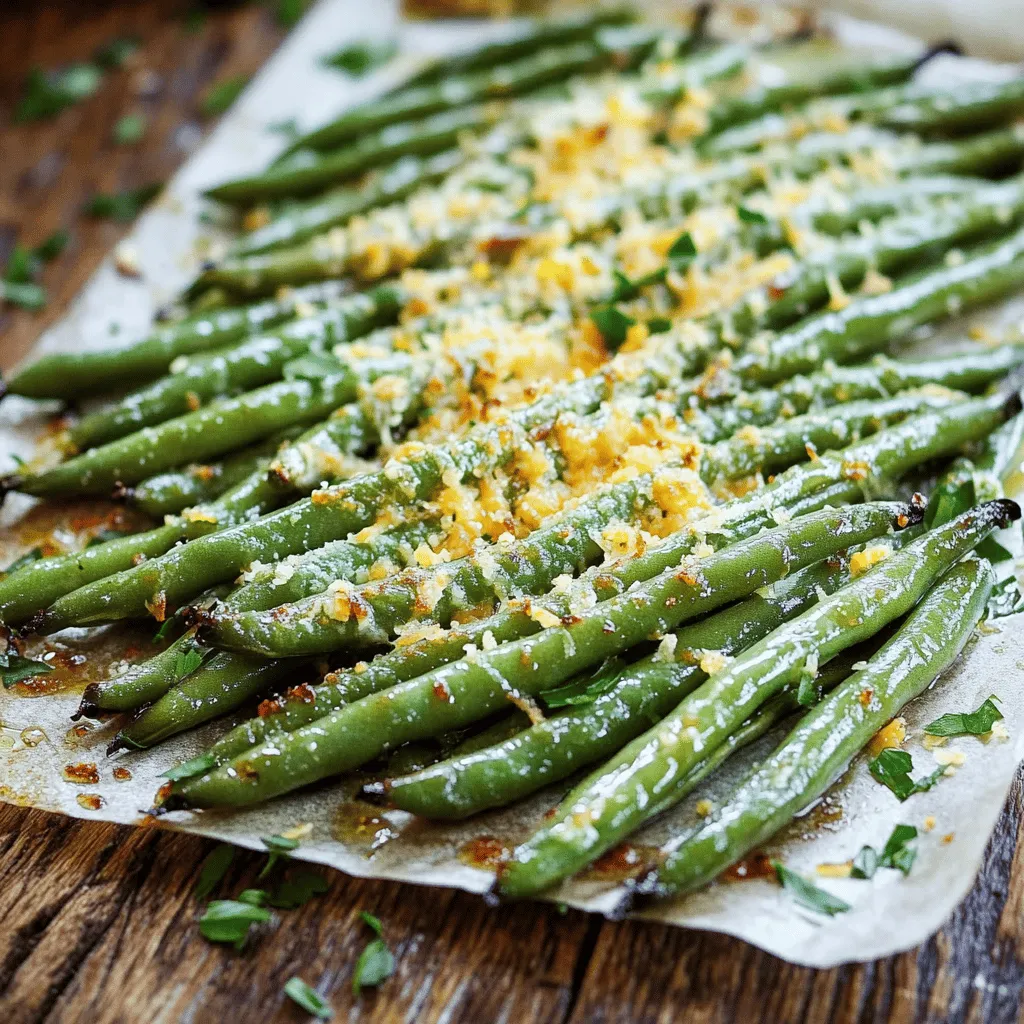
If you’re looking for a quick, tasty side dish, roasted Parmesan green beans are the answer! This simple recipe combines

The Cheddar Bay Ground Beef Cobbler blends savory flavors and rich textures. Here’s what you need: - 1 lb ground beef - 1 medium onion, diced - 2 cloves garlic, minced - 1 cup frozen mixed vegetables (carrots, peas, corn) - 1 teaspoon Worcestershire sauce - 1 teaspoon salt - 1/2 teaspoon black pepper - 1 cup beef broth - 2 cups shredded cheddar cheese - 1 ½ cups all-purpose flour - 1 tablespoon baking powder - 1/2 teaspoon garlic powder - 1/2 teaspoon paprika - 1/4 cup cold butter, cubed - 3/4 cup milk - Fresh parsley, for garnish (optional) These ingredients create a hearty dish perfect for any meal. Accurate measuring makes a big difference in cooking. Here are some helpful tips: - Use dry measuring cups for flour and other dry goods. - For liquids, always use a liquid measuring cup. - Level off dry ingredients with a straight edge for precision. - Use a kitchen scale for ground beef if you want exact weight. - Spoon flour into the measuring cup instead of scooping. This keeps it from being packed down. These simple steps ensure your cobbler will turn out just right. Some brands stand out for quality. Here are my recommendations: - Ground Beef: Look for 80/20 ground beef for flavor and juiciness. Brands like Angus or Certified Organic work well. - Cheddar Cheese: I prefer sharp cheddar cheese for a stronger flavor. Brands like Tillamook or Cabot are excellent choices. - Beef Broth: Swanson or Kitchen Basics offer rich beef broth. You can also use homemade broth for a fresher taste. - Flour: King Arthur is a trusted brand for all-purpose flour. Use gluten-free flour if needed, like Bob's Red Mill. Feel free to mix and match based on your taste and what you have on hand! For the full recipe, refer to the comprehensive details above. To start, preheat your oven to 400°F (200°C). This heat is key for a perfect bake. In a large skillet, cook 1 pound of ground beef over medium heat. Stir until the beef is browned. Make sure to drain any fat. Next, add in 1 medium diced onion and 2 minced garlic cloves. Sauté until the onion turns soft, about 4 minutes. Now, toss in 1 cup of frozen mixed vegetables, 1 teaspoon of Worcestershire sauce, 1 teaspoon of salt, and 1/2 teaspoon of black pepper. Cook this mix for another 5 minutes. The veggies should be warm. Then, pour in 1 cup of beef broth and let it simmer for 3 to 4 minutes. Once done, remove the skillet from the heat. Transfer the beef mixture to a greased 9x13 inch baking dish. In a separate bowl, mix 1 ½ cups of all-purpose flour, 1 tablespoon of baking powder, 1/2 teaspoon of garlic powder, and 1/2 teaspoon of paprika. This blend gives flavor and rise. Cut in 1/4 cup of cold cubed butter. Use a pastry cutter or your fingertips. Aim for coarse crumbs. Now, gradually stir in 3/4 cup of milk. Mix until a soft dough forms. This dough will be the topping. Gently fold in 1 cup of shredded cheddar cheese. This adds a rich taste to your cobbler. Spoon the dough over the beef mixture. Try to cover as much of the surface as possible. This helps it bake evenly. Then, sprinkle the remaining 1 cup of cheddar cheese on top of the dough. This will create a cheesy crust. Place the dish in your preheated oven. Bake the cobbler for 25 to 30 minutes. Look for a golden brown top. Once it's done, let it cool for a few minutes. You can garnish with fresh parsley if you want. Now, you’re ready to enjoy your Cheddar Bay Ground Beef Cobbler! For the full recipe, check the earlier section. To boost the flavor of your Cheddar Bay Ground Beef Cobbler, use fresh herbs. Adding thyme or rosemary gives a nice touch. You can also use different cheeses for depth. Try a mix of mozzarella and cheddar for creaminess. Add a splash of hot sauce for heat if you like spice. Lastly, don’t skip the Worcestershire sauce; it adds a savory umami flavor. For a soft and flaky biscuit topping, keep the butter cold. This helps create steam as it bakes, making the biscuits rise. When mixing your dough, don’t overwork it. Stir until just combined. This keeps your biscuits light. Use a pastry cutter or your hands to cut the butter into the flour. Aim for pea-sized pieces for the best texture. A common mistake is using warm butter. It can make your biscuits tough. Avoid adding too much milk; it can make the dough runny. If you see lumps in your dough, that’s fine. It means you will get nice flaky biscuits. Lastly, don’t skimp on baking time. A golden top means the biscuits are cooked through. For the full recipe, check out the details above. {{image_2}} If you need to make changes for dietary reasons, you have options. You can swap ground beef for ground turkey or chicken. For a vegetarian dish, use lentils or a meat substitute. If you are gluten-free, try almond flour or a gluten-free blend in the topping. For dairy-free needs, use plant-based cheese and milk. You can have fun adding new flavors to your cobbler. Consider adding diced bell peppers or mushrooms to the beef layer. You could mix in some cooked bacon for a smoky taste. If you love heat, add diced jalapeños or red pepper flakes. Fresh herbs like thyme or rosemary can boost the flavor too, making it unique every time. The topping is where you can get creative as well. Instead of cheddar, try using pepper jack cheese for a spicy kick. You can also use cornbread mix for a different texture and taste. If you want a lighter option, drop spoonfuls of biscuit dough or a simple pancake mix on top. These changes can make the dish your own and keep it exciting. For the full recipe, check it out! After enjoying your Cheddar Bay Ground Beef Cobbler, let it cool down for about 30 minutes. This step helps prevent moisture buildup. Once cooled, cover the dish tightly with plastic wrap or aluminum foil. It’s best to store it in the fridge within two hours of cooking. Properly stored, it can last for up to three days. If you want to save some for later, freezing is a great option. First, allow the cobbler to cool completely. Then, cut it into portions for easy serving. Wrap each portion in plastic wrap, and then place them in airtight freezer bags. Make sure to remove as much air as possible. This method can keep it fresh for up to three months. When you’re ready to enjoy your cobbler again, preheat your oven to 350°F (175°C). Place the cobbler in an oven-safe dish and cover it with foil. Heat for about 20-25 minutes, or until it’s warmed through. This helps keep the biscuit topping nice and soft. For a crispy top, remove the foil for the last 5 minutes. Enjoy your meal! For the full recipe, check out the instructions above. Cheddar Bay Ground Beef Cobbler lasts about 3 to 4 days in the fridge. Store it in an airtight container to keep it fresh. Make sure it cools down before sealing it. This helps keep the flavors intact. Yes, you can use leftover beef in this recipe. It’s a great way to reduce waste. Just chop it into small pieces before adding it to the skillet. The beef will mix well with the other ingredients and save you time. Many sides go well with Cheddar Bay Ground Beef Cobbler. Here are some tasty options: - A fresh garden salad - Steamed broccoli or green beans - Mashed potatoes for extra comfort - Garlic bread for a crunchy touch These sides balance the flavors and add texture to your meal. Enjoy your cooking adventure with this delicious cobbler! For the full recipe, check out the details above. This article covered the key ingredients for a tasty Cheddar Bay Ground Beef Cobbler. I shared tips on measuring and recommended brands to use. You learned how to cook the beef, make the biscuit topping, and assemble everything. I also included tips to boost flavor and avoid common mistakes. Remember, variations enhance your dish and accommodate dietary needs. Proper storage keeps your leftovers fresh for longer. Enjoy your cooking journey!

Cheddar Bay Ground Beef Cobbler Flavorful Comfort Meal

If you crave a warm, comforting meal, look no further than Cheddar Bay Ground Beef Cobbler. This dish combines seasoned

Older posts
Newer posts
← Previous Page1 … Page45 Page46 Page47 … Page55 Next →

dsad

© 2025 Lisa Dishes • Built with GeneratePress

Our Policies

  • Copyright Policy
  • Cookie Policy
  • GDPR Policy
  • Privacy Policy
  • Disclaimer
  • Terms Of Use

More Information

  • Home
  • About
  • Contact
  • Appetizers
  • Dessert
  • Dinner
  • Drinks
©2025, Lisa Dishes About Back To Top