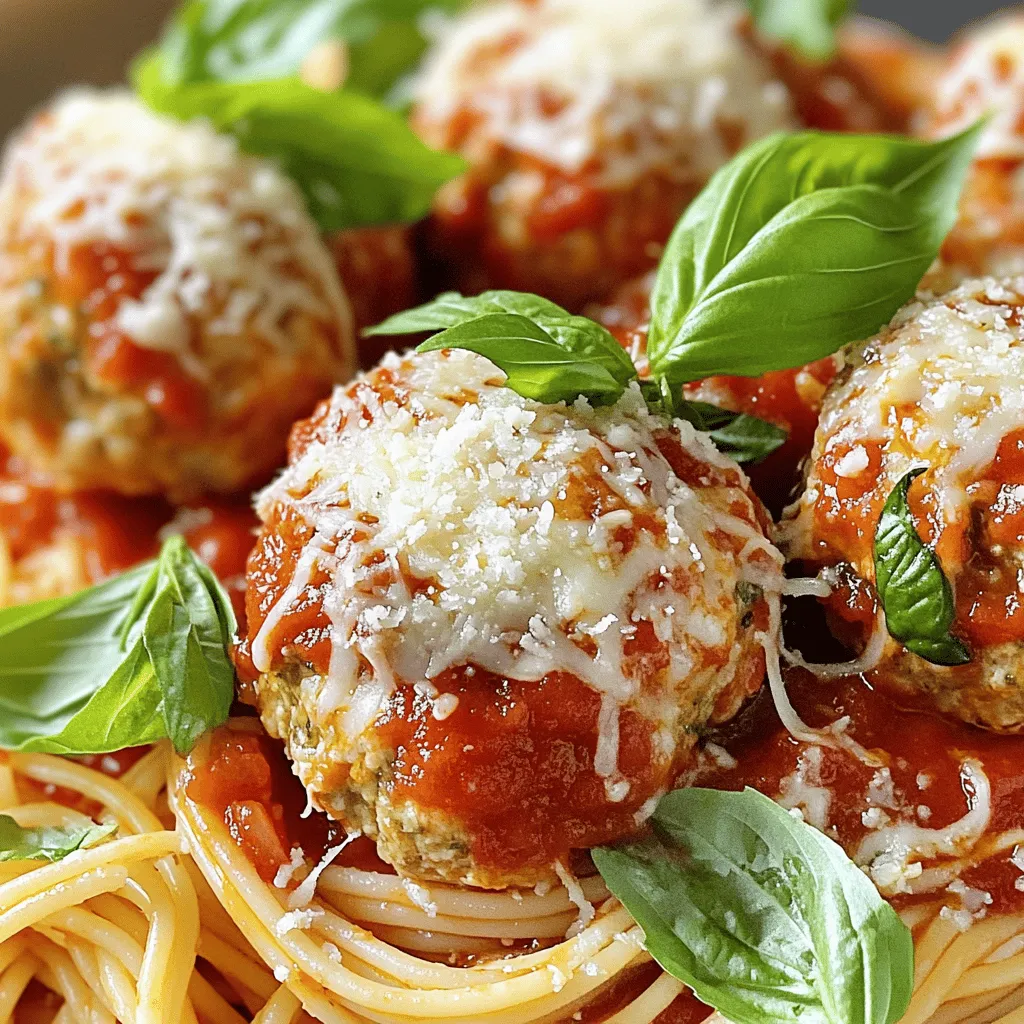
Chicken Parmesan Meatballs Flavorful and Easy Recipe
Are you ready to enjoy a dish that’s both tasty and simple? Chicken Parmesan Meatballs are a perfect mix of
Are you ready to enjoy a dish that’s both tasty and simple? Chicken Parmesan Meatballs are a perfect mix of
![- 20 jumbo pasta shells - 2 cups fresh spinach, chopped - 1 cup ricotta cheese - 1 cup mozzarella cheese, shredded - 1/2 cup Parmesan cheese, grated - 1 egg, beaten - 1 teaspoon garlic powder - 1 teaspoon onion powder - Salt and pepper to taste - 3 cups marinara sauce - Fresh basil leaves, for garnish You will need 20 jumbo pasta shells for this dish. They are the perfect size for stuffing. I love using fresh spinach, about 2 cups chopped. It adds color and nutrients. Ricotta cheese gives a creamy texture; you’ll need 1 cup. Mozzarella cheese, 1 cup, melts beautifully on top. Add 1/2 cup of grated Parmesan cheese for extra flavor. To hold everything together, you need 1 beaten egg. A teaspoon each of garlic powder and onion powder adds great taste. Don’t forget salt and pepper to taste! Finally, you will need 3 cups of marinara sauce to soak the shells. Fresh basil leaves are great for garnish and add a nice touch. - Calories per serving: Around 350 calories - Macronutrient breakdown: Approximately 15g protein, 20g fat, 30g carbs - Dietary restrictions: Contains dairy and gluten This dish packs about 350 calories per serving. It has around 15 grams of protein from the cheeses and egg. The fat content is about 20 grams, mostly from cheese. Carbohydrates come from the pasta and sauce, adding up to 30 grams. Keep in mind, this dish contains dairy and gluten. Adjust the recipe if you have any dietary needs. For the full recipe, visit the link provided. - Preheat the oven to 375°F (190°C). This step ensures your dish cooks evenly. - Cook jumbo pasta shells according to package directions until al dente. Drain them well and set aside to cool. This makes them easier to handle. - In a large bowl, combine the chopped spinach, ricotta cheese, half of the mozzarella, and half of the Parmesan. This mix will be creamy and rich. - Add the beaten egg, garlic powder, onion powder, salt, and pepper. Mix until well combined. This filling packs lots of flavor. - Generously stuff each cooked pasta shell with the spinach and ricotta mixture. Place them in a 9x13-inch baking dish, open side up. This makes for a pretty presentation. - Spread 1 cup of marinara sauce on the bottom of the dish. This keeps the shells moist. - Pour the remaining marinara sauce evenly over the stuffed shells. - Sprinkle the rest of the mozzarella and Parmesan cheeses on top. This will create a delicious, bubbly crust when baked. For complete details on cooking times and servings, refer to the Full Recipe. To keep your shells intact, cook them just right. Do not overcook them. Follow the package time closely. Al dente shells hold the filling better. Once drained, cool them in cold water. This helps them firm up. For perfect cheese melting, layer your mozzarella and Parmesan well. Spread them evenly over the shells. Cover the dish with foil for the first 25 minutes. This traps steam and helps the cheese melt. Remove the foil to brown the cheese in the last 10 minutes. These stuffed shells pair well with a fresh salad or crusty bread. A light green salad adds crunch and color. A simple olive oil and vinegar dressing works great. Serve garlic bread on the side for a cozy meal. For wine, a crisp white like Pinot Grigio is perfect. It balances the rich cheese. If you prefer red, a light Chianti won’t overpower the dish. You can freeze unbaked shells for later. After stuffing, place them in a freezer-safe dish. Cover well with plastic wrap. When you’re ready to bake, just add a bit more sauce and bake longer. Store cooked leftovers in an airtight container. They last up to three days in the fridge. Reheat in the oven for best results. Use a bit of sauce to keep them moist. [Full Recipe] {{image_2}} You can easily switch up the greens in your stuffed shells. Kale or chard work great if you want new flavors. Both are healthy and add a nice crunch. If you want a vegan version, try using tofu instead of ricotta. You can also use vegan cheese for the filling. This keeps the dish creamy without dairy. Adding meats can take your stuffed shells to the next level. Ground turkey or sausage adds a savory kick. You can also mix in more veggies. Chopped mushrooms or bell peppers blend well with the filling. This makes the dish heartier and adds more nutrients. While marinara is a classic choice, trying different sauces can change the game. A creamy white sauce gives a rich taste. You can make it with butter, flour, and milk. Pesto sauce is another tasty option. It adds a fresh, herby flavor that pairs well with spinach and ricotta. For the full recipe, refer to the Cheesy Spinach & Ricotta Shells section. To keep your stuffed shells fresh, store them in an airtight container. This method helps keep moisture in and prevents drying out. If you place them in the fridge, they will last about 3 to 5 days. Always cool the shells before sealing them away. This step prevents condensation, which can make the shells soggy. If you want to save your stuffed shells for later, freezing is a great option. Start by letting them cool completely. Then, place them in a freezer-safe container or a zip-top bag. Make sure to remove as much air as possible to avoid freezer burn. They can stay good for up to 3 months. When you're ready to eat, simply thaw them in the fridge overnight. Heat them in the oven at 350°F (175°C) until warmed through. Choosing the right storage container matters. Glass containers are sturdy and don’t hold odors. They are also great for reheating in the oven. Plastic containers are lighter and easier to store but may warp over time. Use BPA-free plastic for safety. Both options work well, so pick what suits you! Spinach and ricotta stuffed shells last about 3 to 5 days in the fridge. Store them in an airtight container. This keeps the shells fresh and safe to eat. Remember to let them cool before sealing. Yes, you can use fresh cheese. Using fresh cheese can give your dish a rich taste. Just remember to drain any excess moisture. This helps avoid watery shells. A simple, homemade marinara sauce works best for stuffed shells. Look for a sauce with fresh tomatoes and herbs. You can also use store-bought sauce if it’s high quality. Yes, you can easily make this dish gluten-free. Simply use gluten-free jumbo pasta shells. Many brands offer good options that taste great. Just check the cooking times as they may vary. You know the shells are perfect when the cheese is bubbly and golden. The edges of the shells should be slightly crisp, too. A cooking time of about 35 to 40 minutes should do the trick. You can refer to the Full Recipe for exact timings. Spinach and Ricotta Stuffed Shells are both tasty and easy to make. You learned how to prepare the shells, mix the filling, and assemble the dish with layers of sauce. I shared key tips for cooking and serving. You can even make it ahead or try different flavors. Store leftovers correctly for the best taste. This dish is versatile and can suit many diets. Whether it's a family dinner or a special occasion, enjoy your stuffed shells!](https://lisadishes.com/wp-content/uploads/2025/06/2f93ad11-cd07-4d55-9b42-780e399a317c.webp)
If you crave a hearty and flavorful meal, spinach and ricotta stuffed shells are your answer. These jumbo shells, loaded
![To make a tasty chicken piccata, you need a few simple ingredients. Each one plays a key role in building flavor. Here’s what you will need: - Chicken breasts: Use 4 boneless, skinless chicken breasts. They cook quickly and stay juicy. - Flour and seasonings: Combine 1/2 cup of all-purpose flour with 1 teaspoon of salt, 1/2 teaspoon of black pepper, 1/4 teaspoon of garlic powder, and 1/4 teaspoon of paprika. This mix gives the chicken a nice crust. - Olive oil and liquids: You'll need 3 tablespoons of olive oil for cooking. For the sauce, gather 1/4 cup of low-sodium chicken broth and 2 tablespoons of fresh lemon juice. These add depth and tang to the dish. - Garnishes: Fresh parsley, chopped, and lemon slices make great toppings. They add color and freshness. With these ingredients, you can create a flavorful meal in just a short time. If you want the complete guide, check out the Full Recipe. Start by flattening the chicken breasts. Use a meat mallet or a rolling pin. Place the chicken between two sheets of plastic wrap. This helps the chicken cook evenly. Aim for about half an inch thick. Thin chicken cooks faster and stays juicy. Next, coat the chicken in seasoned flour. In a shallow dish, mix flour with salt, black pepper, garlic powder, and paprika. Dredge each chicken breast in the mixture. Make sure it’s fully covered. Shake off any extra flour. This step gives the chicken a crispy crust. Now, heat olive oil in a large skillet over medium heat. Once the oil is hot, add the coated chicken breasts. Cook them for about 4-5 minutes on each side. Look for that golden brown color. This means your chicken is ready. Remove the chicken from the skillet and set it aside on a plate. In the same skillet, add chicken broth, lemon juice, and capers. Stir to mix everything together. Scrape up any tasty bits stuck to the bottom of the skillet. Let this mixture simmer for 2-3 minutes. This helps the flavors blend and the sauce to thicken slightly. Return the cooked chicken to the skillet. Spoon some sauce over each piece. Cook for another 1-2 minutes to warm the chicken. When ready, remove from heat. Sprinkle with fresh parsley. Serve with lemon slices on the side for a zesty kick. For the full recipe, check the details provided. To make your chicken piccata sing with flavor, start by seasoning it well. Here are my tips: - Use salt and pepper: A good sprinkle of salt and pepper adds basic flavor. - Add garlic powder: This gives a nice depth without being too strong. - Try paprika: It adds a hint of sweetness and color to the dish. - Marinate if possible: Let the chicken sit in lemon juice and seasonings for 15-30 minutes. This can make a big difference in taste. The sauce should be smooth and slightly thick. Here’s how to get that perfect texture: - Use low-sodium broth: This keeps the flavor strong without being too salty. - Let it simmer: Simmering the sauce for a few minutes helps it reduce and thicken. - Adjust with flour: If your sauce is too thin, add a little more flour to help it thicken. Just whisk it in slowly. You can switch up how you cook chicken piccata for different flavors: - Grill the chicken: This adds a smoky taste that pairs well with the lemon. - Bake it: Cooking in the oven can make it juicy and tender. - Try a slow cooker: This gives you tender chicken that absorbs all the flavors. For the full recipe, check out the details I shared earlier! {{image_2}} You can make your chicken piccata even better by adding fresh herbs. Herbs like thyme, basil, or oregano can boost the flavor. Just chop them finely and mix them into the flour before dredging the chicken. This small change can add a new layer of taste. Fresh herbs not only taste great but also make your dish look beautiful. If you want to switch things up, consider using different proteins. Instead of chicken, you can use fish like salmon or tilapia. You could also try veal for a richer taste. Just be sure to adjust the cooking time. Fish cooks faster than chicken, so keep an eye on it. This way, you can enjoy a new twist on the classic recipe. Making chicken piccata gluten-free is easy. You can use almond flour or rice flour instead of regular flour for dredging. Both options give a nice crisp texture. Just ensure that all your other ingredients are gluten-free too. This way, everyone can enjoy your tasty chicken piccata. For the full recipe, check out the section above. To keep your Chicken Piccata fresh, store leftovers in an airtight container. Place it in the fridge within two hours of cooking. This helps prevent bacteria growth. You can keep it in the fridge for up to three days. When you're ready to eat, reheat it gently in a skillet. This keeps the chicken juicy and the sauce flavorful. You can freeze Chicken Piccata for later use. First, let it cool completely. Then, place it in a freezer-safe container or bag. Make sure to remove as much air as possible. This helps prevent freezer burn. It will stay good for up to three months. To reheat, thaw it in the fridge overnight. Then, warm it in a skillet over medium heat, adding a splash of chicken broth for moisture. Chicken Piccata is great for meal prep. You can cook a big batch at once. Divide it into single servings and store them in the fridge or freezer. Pair it with rice or veggies for a complete meal. This way, you have delicious meals ready for busy days. You can also use the Full Recipe to create tasty variations throughout the week. Chicken Piccata is a simple and tasty dish that features chicken, lemon, and capers. It comes from Italy, where cooks always seek fresh flavors. The dish has a bright, zesty taste from lemon juice and a savory element from capers. It is a classic that many love for its quick preparation and bold flavor. To make Chicken Piccata dairy-free, skip any butter and cream. Instead, use olive oil to cook the chicken. You can also enhance flavor with a touch of extra lemon juice or a splash of white wine. This way, you still get that rich taste without any dairy. Yes, you can use chicken thighs instead of breasts. Thighs have more flavor and stay moist during cooking. Just be sure to adjust the cooking time since thighs may take a bit longer to cook through. They can make your Chicken Piccata even more delicious! For the full recipe, check here: [Full Recipe]. You’ve learned how to make Chicken Piccata from scratch. We covered the key ingredients, like chicken, flour, and seasonings. I shared step-by-step instructions for prepping, dredging, cooking, and making the sauce. Plus, I offered tips to ensure flavor and sauce thickness. Now, you can try different proteins or gluten-free options. Store leftovers with ease and plan for future meals. This dish can be simple or fancy, making it perfect for any occasion. Enjoy your cooking journey and impress your friends and family!](https://lisadishes.com/wp-content/uploads/2025/06/95a0192c-04d9-4f44-8792-8aa3914c925d.webp)
Looking for a quick and tasty dinner? Try my Easy Chicken Piccata recipe! It’s simple and packed with flavor. With
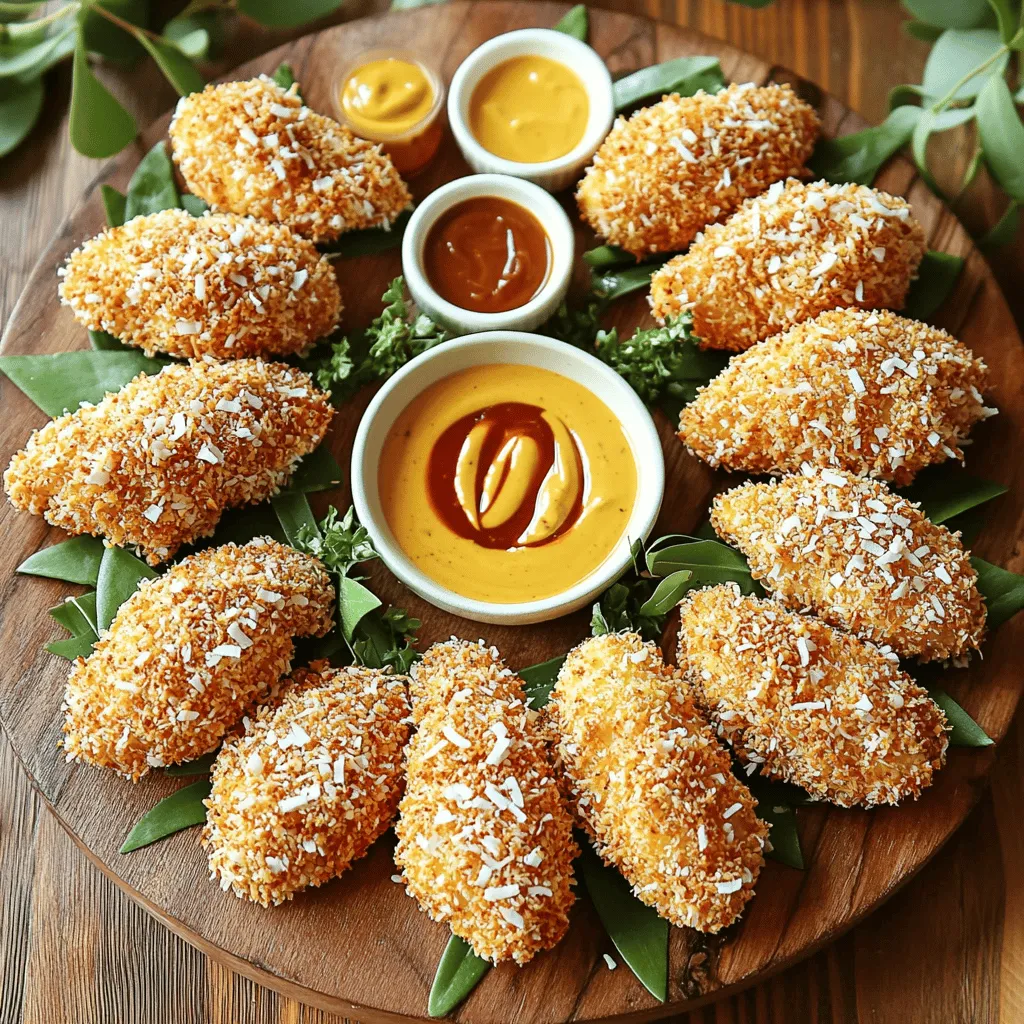
Craving something crispy and flavorful? Let’s make homemade chicken tenders that will impress! With simple ingredients, you can whip up
![For this dish, you need simple and fresh items. The main ingredients include: - 20 jumbo pasta shells - 2 cups cooked chicken, shredded - 1 cup fresh spinach, chopped - 1 cup ricotta cheese - 1 cup mozzarella cheese, shredded - 1/2 cup Parmesan cheese, grated - 1 egg, beaten - 2 cups marinara sauce - 1 teaspoon garlic powder - 1 teaspoon onion powder - Salt and pepper to taste - Fresh basil leaves for garnish These ingredients come together to create a tasty meal. The chicken brings protein, while the spinach adds nutrients. The cheeses create a creamy texture that makes each bite rich and satisfying. You can enhance your stuffed shells with a few extras. Consider adding: - 1 teaspoon Italian seasoning - Red pepper flakes for a little spice - Fresh herbs like parsley or oregano These optional ingredients can boost the flavors and make your dish unique. They allow you to customize your meal based on your taste. To make cooking easier, use the right tools. Here are some recommended items: - Large pot for boiling pasta - Mixing bowl for the filling - Baking dish (9x13 inches) - Spoon or spatula for mixing - Aluminum foil to cover the dish Having these tools ready will help you cook smoothly. Good tools make the process fun and keep your kitchen organized. For the full recipe, check out the guidelines that include every step you need. Start by preheating your oven to 375°F (190°C). Next, cook the jumbo pasta shells. Follow the package instructions and boil them until they are al dente. This means they should still have a slight firmness. Drain the shells and set them aside to cool for a few minutes. You want to make sure they are easy to handle. In a large mixing bowl, add the cooked chicken. Shred it into small pieces. Then, add the chopped fresh spinach. Mix in the ricotta cheese, half of the mozzarella cheese, and grated Parmesan cheese. Next, crack an egg into the bowl and add garlic powder, onion powder, salt, and pepper. Stir everything together until it is well combined. This filling is packed with flavor and nutrients. Now it's time to stuff the pasta shells. Take each shell and fill it with the chicken and spinach mixture. Place the stuffed shells in a 9x13 inch baking dish. Once all the shells are filled, pour marinara sauce evenly over them. Sprinkle the remaining mozzarella cheese on top. Cover the dish with aluminum foil and place it in the oven. Bake for 25 minutes. After that, take off the foil and bake for an extra 10-15 minutes. The cheese should become bubbly and golden. Let the dish sit for 5 minutes before serving. Garnish with fresh basil leaves for a nice touch. You can find the Full Recipe [here]. Cooking pasta shells may seem simple, but a few tricks help. Always cook the shells until they are al dente. This way, they stay firm and hold the filling well. Follow the package instructions for timing. After cooking, drain the shells and rinse them with cold water. This stops the cooking and keeps them from sticking together. Stuffing shells can get messy, but practice makes perfect. Use a spoon or a piping bag to fill each shell. Fill them generously but avoid overstuffing. This helps the shells stay intact while baking. Place the shells in your baking dish with the opening facing up. This way, they soak up the sauce and flavors better. Once your stuffed shells are ready, serve them hot. They pair well with a fresh salad or garlic bread. You can also sprinkle some extra Parmesan cheese on top for added flavor. For drinks, a light white wine or sparkling water makes a nice choice. Want to try something different? Add a side of roasted vegetables for a colorful plate. For the full recipe, check out the [Full Recipe]. {{image_2}} If you want a vegetarian spin on this dish, swap the chicken for more veggies. Use mushrooms, zucchini, or bell peppers. You can also add more spinach or even kale for extra greens. For the cheese, you might try using cottage cheese instead of ricotta. This will keep the dish creamy and delicious without meat. You can change up the protein in these stuffed shells to suit your taste. Ground turkey or beef works well. If you prefer seafood, cooked shrimp or crab meat adds a nice twist. Just make sure to cook any raw meat before mixing it with the other filling ingredients. This way, everything cooks evenly in the oven. While marinara sauce is a classic choice, feel free to get creative with your sauce. Try Alfredo sauce for a rich and creamy taste. A pesto sauce can add a fresh and herby flavor. For a spicy kick, a arrabbiata sauce can bring heat to the dish. You can even mix sauces for a unique blend that makes your meal stand out. For the full recipe, check out the instructions above. After enjoying your Chicken and Spinach Stuffed Shells, store any leftovers promptly. Use an airtight container to keep them fresh. Place the shells in a single layer if possible. This way, they won't stick together. Store them in the fridge for up to three days. Always check for signs of spoilage before eating. Freezing is a great option for meal prep. To freeze, let the stuffed shells cool completely. Then, place them in a freezer-safe container or a zip-top bag. Make sure to label the bag with the date. They can last up to three months in the freezer. For best results, freeze them before baking. This keeps the flavors fresh. When you’re ready to enjoy your frozen stuffed shells, there are easy ways to reheat them. For frozen shells, thaw them overnight in the fridge. Preheat your oven to 375°F (190°C). Place the shells in a baking dish and cover with foil. Bake for about 25 minutes. If they are refrigerated, bake for about 15 minutes. Check with a fork to make sure they are hot in the center. Enjoy your tasty meal! Yes, you can make Chicken and Spinach Stuffed Shells ahead of time. You can prepare them and then store them in the fridge before baking. This saves time on busy days. Just cover the dish with foil and keep it in the fridge for up to 24 hours. When you are ready to eat, bake it straight from the fridge. You may need to add a few extra minutes to the baking time. If you don’t have ricotta cheese, there are great substitutes. You can use cottage cheese, cream cheese, or even Greek yogurt. Each of these will change the flavor a bit. Cottage cheese gives a nice texture. Cream cheese adds a rich taste. Greek yogurt makes it creamy and tangy. Choose one based on what you like. Stuffed shells can last about 3 to 5 days in the fridge. Make sure to store them in an airtight container. This keeps them fresh and prevents odors from other foods. When you reheat them, make sure they are warmed all the way through. Enjoy your tasty meal again! For the complete recipe, check out the Full Recipe. Chicken and spinach stuffed shells are a great dish to make at home. We covered the main ingredients, optional flavors, and tools to use. You learned how to prepare, fill, and bake your shells perfectly. Plus, I shared tips for storing leftovers and meal prep. You can even experiment with variations and find what you love most. Use this guide to enjoy a delicious meal with ease. Now, it's time to get cooking and savor each bite!](https://lisadishes.com/wp-content/uploads/2025/06/c9318db0-5624-4189-a6be-1e769a360590.webp)
Looking for a tasty family meal that everyone will love? You’ve found it! Chicken and Spinach Stuffed Shells are the
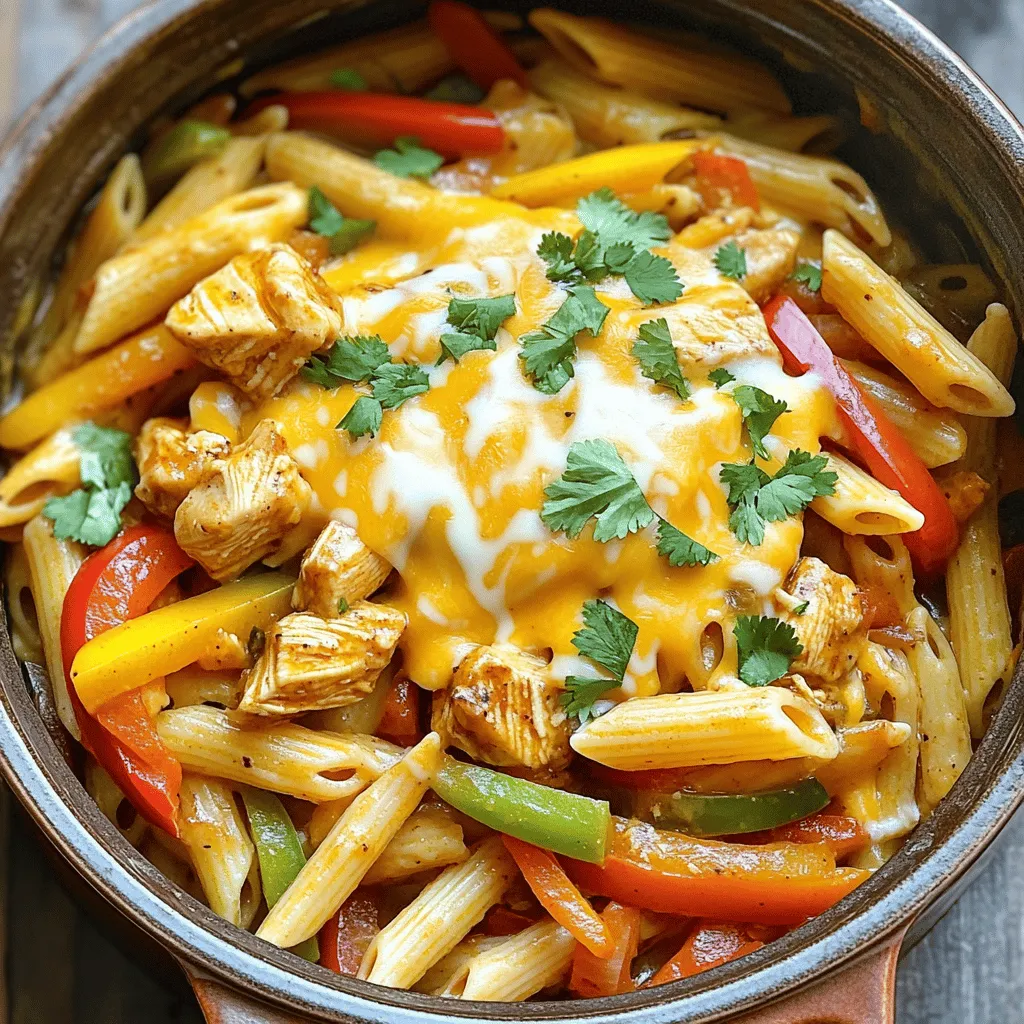
Craving a quick, tasty meal? One Pot Chicken Fajita Pasta is your answer! This dish combines juicy chicken, colorful veggies,
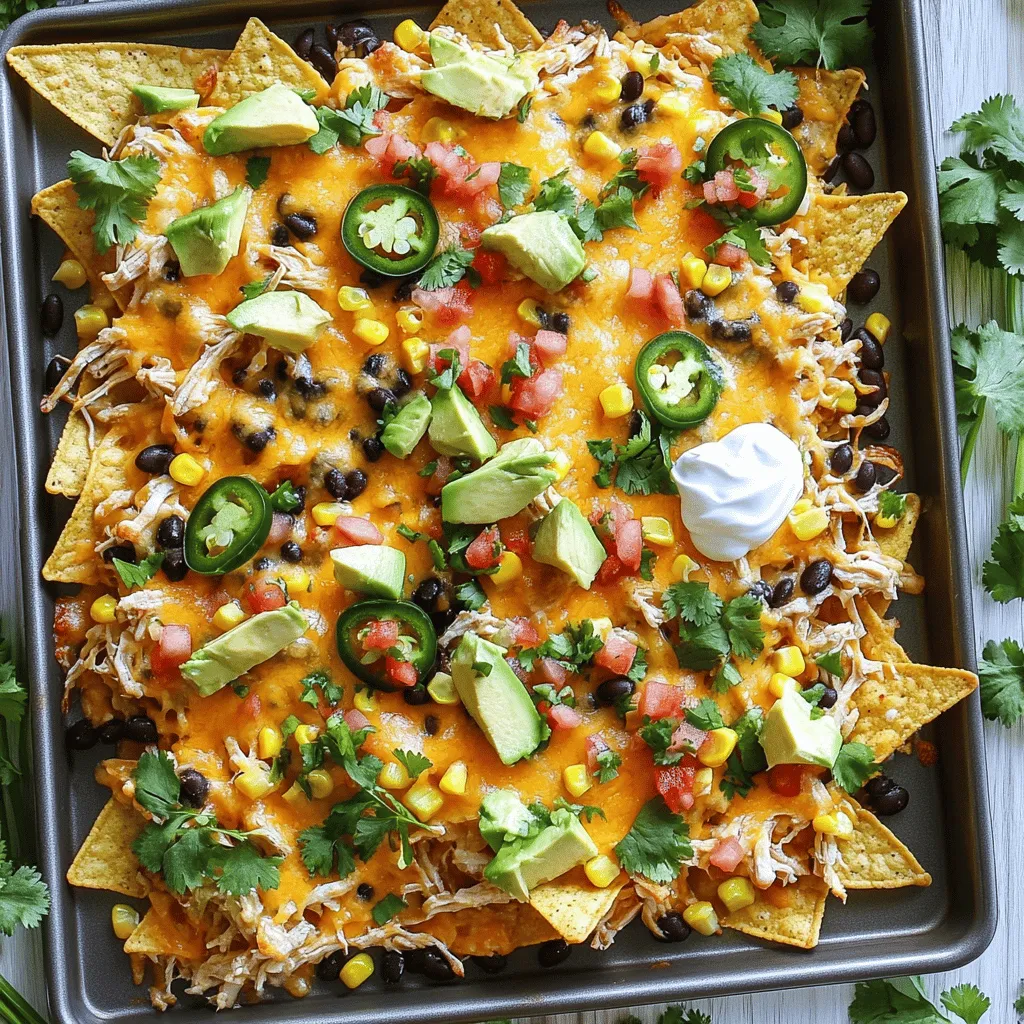
Craving a dish that’s both tasty and hearty? Look no further than loaded nachos with chicken! This meal combines crispy
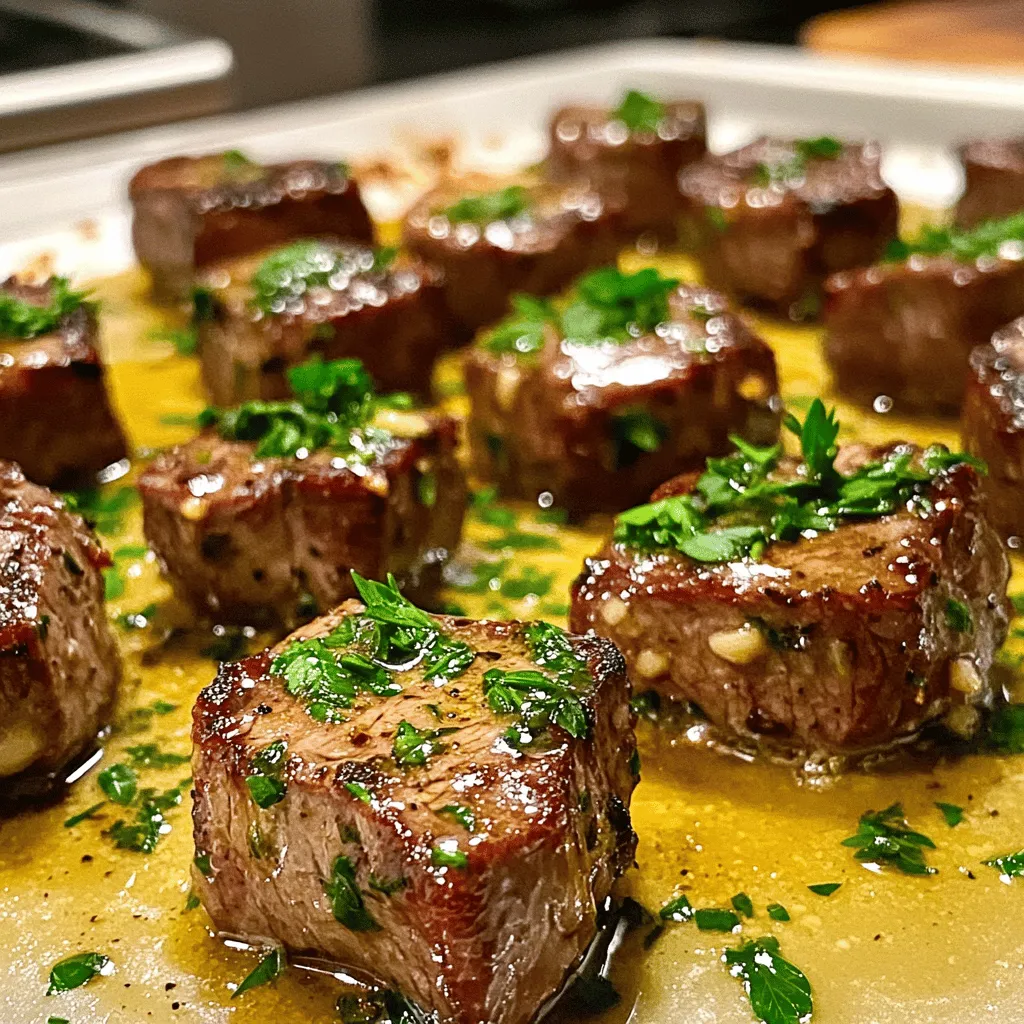
Are you craving a quick and easy meal that packs big flavor? These Savory Garlic Butter Steak Bites are just
![For this tasty dish, gather these must-have items: - 4 salmon fillets, skinless - 3 tablespoons olive oil - 4 cloves garlic, minced - 2 lemons (1 juiced, 1 sliced) - 1 teaspoon dried oregano - 1 teaspoon smoked paprika - Salt and pepper to taste - 1 cup cherry tomatoes, halved - 1 cup fresh spinach - Fresh parsley, chopped (for garnish) These ingredients work together to create a bright and zesty flavor. The lemon gives a fresh taste, while the garlic adds warmth. Want to kick things up a notch? Consider adding: - Red pepper flakes for heat - Capers for a salty bite - Fresh herbs like dill or thyme These extras can enhance the dish and make it your own. It’s fun to mix and match flavors based on your taste. Don’t have something on hand? Here are some swaps: - Use avocado oil instead of olive oil. - Try fresh garlic if you don't have minced. - Swap spinach with kale or arugula. These changes can still give you a yummy meal. Just remember, cooking is about being creative! For the full recipe, check out the complete guide. First, gather all the ingredients. You will need: - 4 salmon fillets, skinless - 3 tablespoons olive oil - 4 cloves garlic, minced - 2 lemons (1 juiced, 1 sliced) - 1 teaspoon dried oregano - 1 teaspoon smoked paprika - Salt and pepper to taste - 1 cup cherry tomatoes, halved - 1 cup fresh spinach - Fresh parsley, chopped (for garnish) Next, preheat your oven to 400°F (200°C). This step is key to cooking the salmon evenly. Line a large baking sheet with parchment paper. This helps with clean-up later. In a small bowl, mix the olive oil, minced garlic, lemon juice, dried oregano, smoked paprika, salt, and pepper. This mix is your flavor booster. Now, place the salmon fillets on the baking sheet. Pour the marinade over the fillets. Make sure every piece is well-coated. This adds flavor and keeps the fish moist. Arrange lemon slices on top of the salmon. These slices will add a fresh taste while cooking. Next, scatter the cherry tomatoes around the salmon. Drizzle any leftover marinade over the veggies for extra flavor. Bake the salmon in the oven for 12-15 minutes. The salmon should flake easily with a fork when done. In the last 5 minutes, add fresh spinach around the salmon. It wilts nicely and adds color. Once cooked, remove the baking sheet from the oven. Garnish the dish with fresh parsley. You can serve this dish right away. I enjoy serving this dish with a side of rice or crusty bread. The flavors pair well together. You can also add a simple green salad for a fresh crunch. For the full recipe and more details, check out the [Full Recipe]. To cook salmon perfectly, focus on temperature. Use a meat thermometer. The salmon should reach 145°F (63°C) in the thickest part. When the salmon flakes easily with a fork, it's done. Cooking time varies based on thickness. Thinner fillets take about 12 minutes. Thicker pieces may need a few more minutes. Always watch it closely. Overcooking dries it out, and no one wants that! One pan dishes shine for their simplicity. Start by preheating your oven to 400°F (200°C). Use parchment paper for easy cleanup. This keeps the fish and veggies from sticking. Arrange ingredients in a single layer to ensure even cooking. This helps everything cook at the same rate. A mix of direct heat and steam works wonders for flavor and texture. Avoid overcrowding the pan. If you squeeze too much in, it steams instead of bakes. This won't give you that nice roasted flavor. Another mistake is not seasoning enough. Salt and pepper bring out the best in salmon. Lastly, don’t skip the marinade. It adds depth to the dish. For the full recipe, check out the One Pan Lemon Garlic Salmon details. {{image_2}} You can make this dish even better by adding veggies. Broccoli, asparagus, or bell peppers mix well with salmon. Just chop them up and place them around the salmon on the baking sheet. They will soak up the lemon and garlic flavors while cooking. This makes your meal colorful and healthy. Plus, you get more nutrients! If you want to switch it up, try different spices. You can use dill or thyme instead of oregano. A splash of soy sauce adds a nice twist too. For a kick, add crushed red pepper flakes. These changes keep the dish exciting and full of flavor. You can also marinate the salmon longer for a stronger taste. Salmon is great, but you can use other proteins too. Chicken breasts or shrimp work well in this recipe. Just adjust the cooking time as needed. Chicken takes longer to cook, while shrimp cooks faster. Each protein brings its own taste, making this dish fun to explore. You can enjoy the same bright lemon and garlic flavors, no matter what you choose. For more details, check the Full Recipe. To keep your leftover salmon fresh, let it cool first. Place it in an airtight container. You can store it in the fridge for up to three days. Make sure to cover it well to prevent it from drying out. If you want to keep it longer, consider freezing it. When you want to enjoy your leftover salmon, reheating is key. The best way is to use the oven. Preheat it to 350°F (175°C). Place the salmon on a baking sheet and cover it with foil. Heat for about 10 minutes, or until warm. This keeps the salmon moist. You can also use the microwave if you're in a hurry. Just heat it for 30 seconds at a time, checking so it doesn't overcook. If you want to freeze the salmon, it’s easy! Wrap each piece tightly in plastic wrap. Then, place them in a freezer-safe bag. Make sure to remove as much air as you can. This helps prevent freezer burn. You can freeze it for up to three months. When you're ready to eat, thaw it in the fridge overnight before reheating. The best way to know if salmon is done is to check its color and texture. Salmon should appear opaque and flake easily with a fork. You can also use a food thermometer. The internal temperature should reach 145°F (63°C). This ensures the fish is safe to eat. I recommend checking it a few minutes before the time ends. This way, you avoid overcooking. Yes, you can use frozen salmon for this recipe. Just make sure to thaw the salmon first. You can do this in the fridge overnight or in cold water for a quicker option. Once thawed, pat it dry before marinating. This step helps the flavors stick better. Using frozen salmon can save time and still give you a tasty dish. You can prepare this dish ahead of time by marinating the salmon and veggies. Mix the marinade and coat the salmon fillets. Place them and the veggies in a baking dish and cover it with plastic wrap. You can store it in the fridge for up to 24 hours. When you’re ready to cook, just pop it in the oven. This makes for an easy and quick meal any day. For the full recipe, check the earlier section. This blog post covered everything about making One Pan Lemon Garlic Salmon. We explored essential and optional ingredients, plus helpful substitutes. I shared detailed steps for prep and cooking, along with tips for perfect results. Variations and storage tips enhance your meal experience. In my view, this dish is simple yet full of flavor. Now, you can create a tasty, easy meal that fits your taste! Enjoy your cooking.](https://lisadishes.com/wp-content/uploads/2025/06/e03ef2aa-8c49-4872-8e66-3eb4392b0e63.webp)
Craving a quick, tasty meal? I’ve got you covered with my One Pan Lemon Garlic Salmon recipe! This dish is
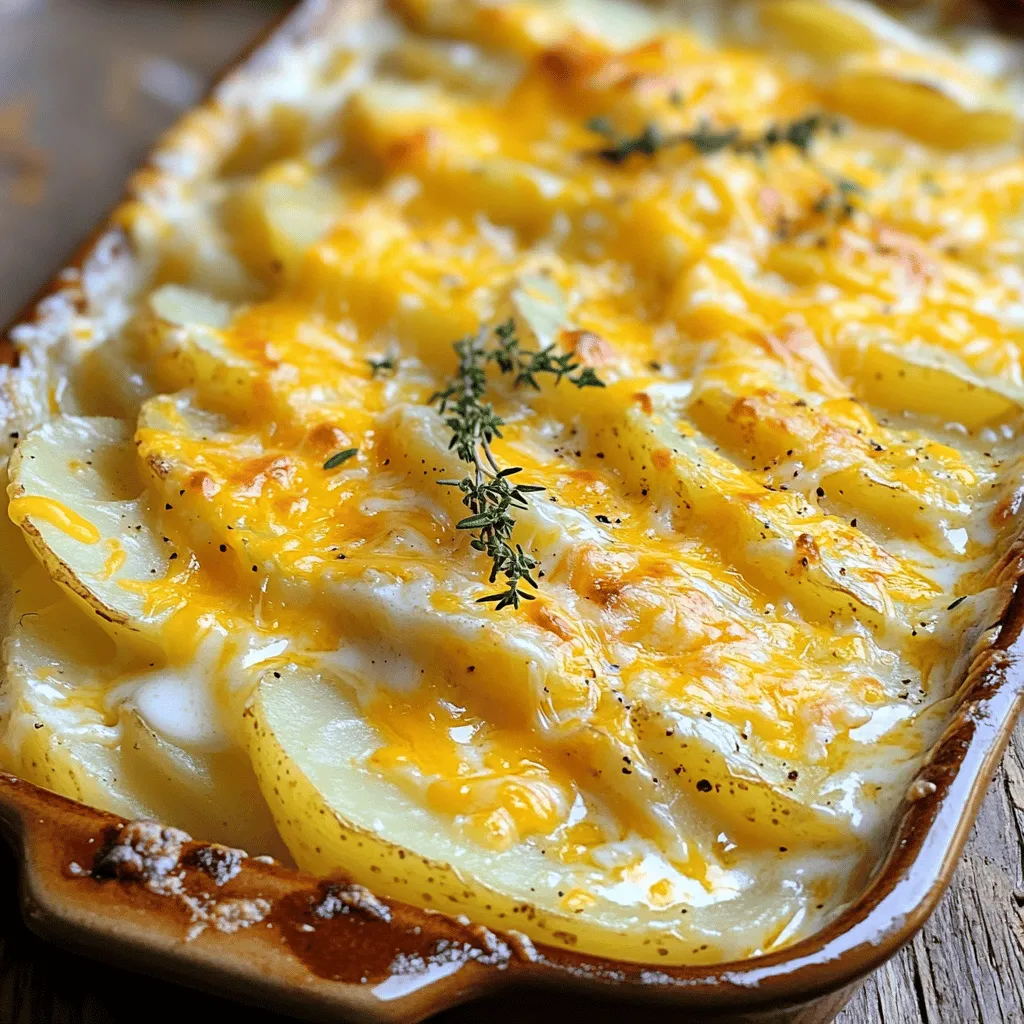
Looking for a dish that’s simple, cheesy, and full of comfort? Cheesy scalloped potatoes fit the bill perfectly! This creamy
