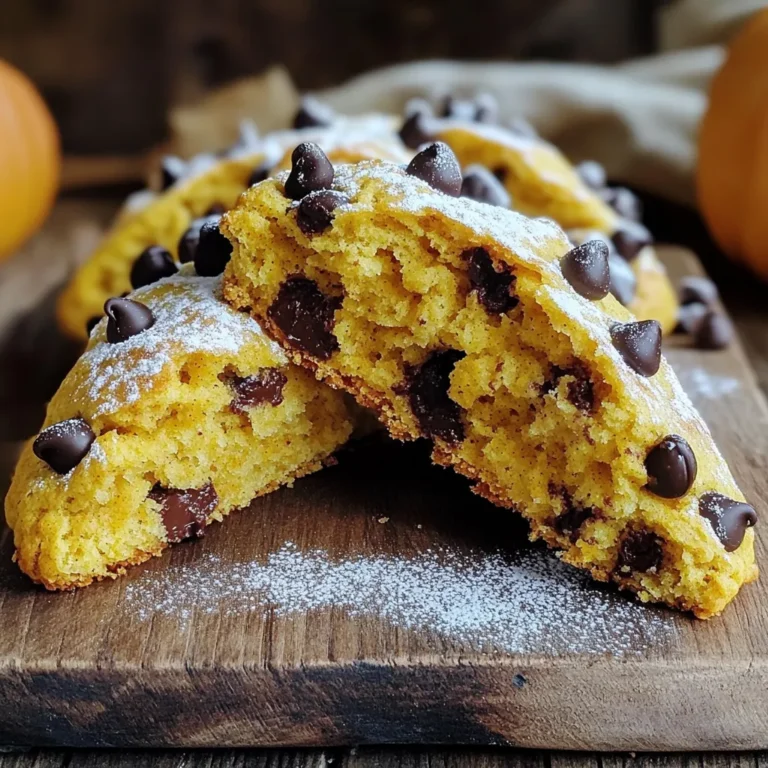
If you’re craving a warm, fall treat, my Bakery-Style Pumpkin Chocolate Chip Scones will hit the spot. These scones are easy to make and burst with flavor. The blend of pumpkin and chocolate creates a cozy, sweet taste you won’t forget. In this post, I’ll guide you step by step, sharing tips for perfect scones every time. Get ready to impress your family and friends with this delightful recipe!
Ingredients
Complete Ingredient List
For my Bakery-Style Pumpkin Chocolate Chip Scones, gather these key items:
– 2 cups all-purpose flour
– 1/4 cup granulated sugar
– 1 tablespoon baking powder
– 1/2 teaspoon baking soda
– 1/2 teaspoon salt
– 1 tablespoon pumpkin spice
– 1/2 cup cold unsalted butter, cubed
– 3/4 cup canned pumpkin puree
– 1/4 cup heavy cream
– 1 large egg
– 1 teaspoon vanilla extract
– 3/4 cup semi-sweet chocolate chips
– Extra sugar for sprinkling on top (optional)
Importance of Quality Ingredients
Using quality ingredients makes a big difference in your scones. Fresh, high-quality flour leads to a better texture. Choose a good brand of baking powder to ensure proper rising. For the butter, use unsalted to control the salt levels in your bake. Canned pumpkin puree should be pure and without additives. This gives your scones a rich, true pumpkin flavor. Finally, use semi-sweet chocolate chips for a perfect balance of sweetness.
Substitutions and Alternatives
If you’re missing an ingredient, don’t worry! You can try these alternatives:
– Flour: Use whole wheat flour for a heartier scone.
– Sugar: Brown sugar adds a deeper flavor.
– Butter: Coconut oil can replace butter for a dairy-free option.
– Pumpkin puree: You can use homemade puree if you have access to fresh pumpkin.
– Cream: Milk or a non-dairy milk can work in place of heavy cream.
– Chocolate chips: Swap for white chocolate chips or add nuts for a crunchy texture.
These substitutions can help you adapt the recipe to your kitchen and taste preferences!
Step-by-Step Instructions
Prepping Your Oven and Equipment
First, set your oven to 400°F (200°C). This step is key for perfect scones. While the oven heats, line a baking sheet with parchment paper. This helps prevent sticking.
Mixing the Dry Ingredients
In a large mixing bowl, combine the dry ingredients. You need 2 cups of all-purpose flour, 1/4 cup of granulated sugar, 1 tablespoon of baking powder, and 1/2 teaspoon each of baking soda and salt. Don’t forget 1 tablespoon of pumpkin spice. Whisk them together until they blend well. This mix gives your scones flavor and rise.
Incorporating the Butter
Take 1/2 cup of cold, cubed unsalted butter. Add it to your dry mix. Use a pastry cutter or your fingers to work it in. You want the mix to look like coarse crumbs. This step makes your scones flaky and tender.
Combining Wet and Dry Ingredients
In another bowl, mix the wet ingredients. You’ll need 3/4 cup of canned pumpkin puree, 1/4 cup of heavy cream, 1 large egg, and 1 teaspoon of vanilla extract. Whisk until smooth. Then, pour this mixture into your dry ingredients. Stir gently until just combined. Avoid over-mixing to keep your scones light.
Shaping and Cutting the Scones
Turn the dough out onto a lightly floured surface. Pat it into a circle about 1 inch thick. You can cut it into 8 wedges or use a round cutter for individual scones. This step helps shape them for even baking.
Baking and Cooling Tips
Transfer the shaped scones to the prepared baking sheet. Brush the tops with a bit of extra cream. If you want, sprinkle extra sugar on top for crunch. Bake for 15-18 minutes until golden brown and firm. After baking, let them cool on a wire rack for a few minutes. Enjoy them warm for the best taste!
Tips & Tricks
Common Mistakes to Avoid
When making pumpkin chocolate chip scones, some mistakes can ruin your batch. First, avoid over-mixing the dough. This makes scones tough instead of light. Also, be sure to use cold butter. Warm butter will change the texture. Lastly, don’t skip the chilling step. Chilling helps the scones rise and stay flaky.
Achieving the Perfect Texture
To get the best texture, focus on how you mix. Start by cutting in the butter until it looks like crumbs. This creates pockets of air. When mixing wet and dry, stir just until you see no dry flour. This keeps the scones tender. After cutting the dough, handle it gently. Too much handling makes the scones dense.
Enhancing Flavor with Additional Ingredients
You can boost flavor by adding fun ingredients. Try mixing in chopped nuts or different types of chocolate. A dash of cinnamon or nutmeg adds a warm spice. You can also fold in dried fruit like cranberries for a tart kick. For a sweet touch, sprinkle a bit of brown sugar on top before baking.

Variations
Adding Different Mix-Ins
You can switch up the flavors of your scones with different mix-ins. Try adding nuts like pecans or walnuts for crunch. Dried fruits, like cranberries or raisins, add a nice chew. You can even swap the chocolate chips for white chocolate or butterscotch chips. Each mix-in gives a new twist to the scone.
Making it Gluten-Free
Want to enjoy these scones without gluten? You can use a gluten-free flour blend. Make sure the blend has a good balance of starches and proteins. This will help the scones rise and hold their shape. You can also add a bit of xanthan gum, which helps bind the ingredients together.
Flavoring Variants (e.g. Maple, Cinnamon)
For a different flavor profile, consider adding maple syrup to the wet ingredients. This adds a sweet, earthy taste. You can also mix in extra spices like cinnamon or nutmeg for warmth. Try replacing some of the pumpkin puree with applesauce for a fruity twist. Each flavor change makes the scones unique and fun to explore.
Storage Info
How to Store Leftovers
To store your leftover scones, place them in an airtight container. They stay fresh for about two days at room temperature. If you want to keep them longer, consider refrigerating them. Just be sure to wrap them tightly in plastic wrap before placing them in the fridge. This helps prevent them from drying out.
Reheating Instructions
When you’re ready to enjoy a scone again, reheating is simple. Preheat your oven to 350°F (175°C). Place the scones on a baking sheet and warm them for about 5 to 10 minutes. This keeps them soft and brings back their fresh-baked taste. If you’re in a hurry, you can also microwave a scone for about 15 to 20 seconds. Just be careful not to overheat it, or it may become tough.
Freezing for Later Use
If you want to save scones for later, freezing works well. First, let them cool completely. Then, wrap each scone tightly in plastic wrap. Place the wrapped scones in a freezer-safe bag or container. They can last up to three months in the freezer. When you’re ready to eat them, thaw overnight in the fridge. You can reheat them as mentioned earlier for a warm treat.
FAQs
Can I use fresh pumpkin instead of canned?
Yes, you can use fresh pumpkin! Start by roasting the pumpkin until soft. Once it cools, scoop out the flesh and mash it. Make sure to drain any excess water. This way, you get the same rich pumpkin flavor. Fresh pumpkin gives a lovely, vibrant taste.
How do I know when my scones are done baking?
Your scones are done when they turn golden brown. Gently press the top of a scone. It should feel firm and spring back. You can also use a toothpick. Insert it into the center; it should come out clean. This means they are baked perfectly.
Can I make the dough ahead of time?
Yes, you can make the dough ahead of time. After mixing, wrap the dough tightly in plastic wrap. Store it in the fridge for up to 24 hours. When you’re ready to bake, just shape and cut the scones as normal. This saves time and keeps the scones fresh.
This blog post covers how to make tasty scones. We looked at the best ingredients and why quality matters. I shared tips to avoid common mistakes and ways to enhance flavor. You learned variations for different tastes and how to store leftover scones.
Remember, practice makes perfect. Try these steps and tips to bake delicious scones. Enjoy the process and share them with your friends!