![- 1 cup canned chickpeas, drained and rinsed - 4 cloves roasted garlic - 3 tablespoons tahini - 2 tablespoons lemon juice - 2 tablespoons olive oil, plus extra for drizzling - 1/2 teaspoon ground cumin - Salt to taste - Fresh parsley, for garnish - Paprika, for garnish - Food processor - Oven - Baking foil Getting the right ingredients is key to great roasted garlic hummus. I love using canned chickpeas because they are quick and easy. They provide a creamy base that blends well. Roasted garlic adds a sweet and rich flavor. It transforms the dish. To roast the garlic, I wrap it in foil and bake it until soft. Tahini is another must-have. It gives hummus a nutty taste and creamy texture. Fresh lemon juice brightens up the flavors. I always use fresh lemon juice instead of bottled. It makes a big difference. You can add olive oil for a smoother finish. Ground cumin adds warmth. Just a pinch of salt enhances all the flavors. For garnishing, I love using fresh parsley and a sprinkle of paprika. These add color and a hint of freshness. The tools are simple. A food processor makes blending easy. An oven is needed for roasting garlic. Baking foil helps keep the garlic moist while it cooks. Check out the Full Recipe for more details on how to make this delicious dish. First, you need to preheat the oven to 400°F (200°C). This step warms your kitchen and gets the garlic ready to roast. Next, slice the top off a whole head of garlic. Drizzle it with olive oil to add flavor. Then, wrap the garlic in foil to keep it moist. Roast it for about 30-35 minutes. You will know it’s done when the cloves feel soft and look caramelized. Once finished, let it cool for a bit. When cool enough to handle, squeeze the roasted cloves into a bowl. This will give your hummus a rich, sweet flavor. Now, it’s time to blend the hummus. In a food processor, combine the chickpeas, roasted garlic, tahini, lemon juice, olive oil, ground cumin, and a pinch of salt. Blend the mixture until it turns smooth. This should take about one minute. If you prefer a creamier hummus, keep blending. If it feels too thick, add water a little at a time. Blend again until you reach your desired consistency. You want it to be thick but still spreadable. After blending, taste your hummus. If it needs more flavor, add a little more salt or lemon juice. Blend again to mix in any additions. For serving, transfer the hummus to a nice bowl. Drizzle some olive oil on top. Then, sprinkle paprika and fresh parsley for a pop of color. This makes it look beautiful and adds extra flavor. For a great meal, serve the hummus with warm pita bread and crunchy veggie sticks like carrots and cucumbers. For the complete recipe, check out the [Full Recipe]. To make your roasted garlic hummus shine, you need to balance lemon juice and salt well. Start with the juice of one lemon. Taste your hummus, then add more if it needs a tang. Salt enhances the flavor, so sprinkle in a little at a time. Always taste as you go to get it just right. You can customize the garlic intensity based on your taste. If you love garlic, add an extra clove or two. If you prefer a milder flavor, use fewer cloves. Roasted garlic is sweet and nutty, so adjust until it feels perfect for you. For the best texture, adjust the consistency with water. If your hummus is thick, add water slowly. Blend after each addition, until you reach your desired creaminess. A smooth texture makes it easier to scoop up with pita or veggies. You can also include additional spices to enhance the flavor. For a kick, try adding cayenne pepper or smoked paprika. For freshness, mix in fresh herbs like cilantro or dill. These small changes can create exciting new flavors in your hummus. Serving suggestions can elevate your hummus. Place it in a shallow bowl for a beautiful look. Drizzle extra olive oil on top for shine and richness. Garnish with paprika and chopped parsley for a pop of color. For visual appeal, serve your hummus with warm pita bread and colorful veggie sticks like carrots, cucumbers, and bell peppers. The mix of colors makes it inviting. This makes your dish not just tasty but also a feast for the eyes! Refer to the [Full Recipe] for detailed steps on making this delicious hummus. {{image_2}} You can spice up your roasted garlic hummus with different flavors. For a kick, try adding red pepper flakes or jalapeños. This gives the hummus a nice heat. You can also blend in herbs like basil or cilantro for fresh notes. These herbed variations add depth and richness to the dish. If you need a nut-free option, sunflower seed tahini works well. It has a similar creamy texture. You can also use white beans instead of chickpeas. Cannellini or navy beans make great substitutes. They offer a different flavor but keep the hummus smooth. This hummus is naturally gluten-free and vegan-friendly. It fits many diets. You can serve it with gluten-free pita or veggie sticks. For a vegan twist, use agave syrup instead of honey in any dips. This keeps everything plant-based and delicious. For the Full Recipe, refer to the earlier section. To keep your roasted garlic hummus fresh, store it in airtight containers. This helps prevent spoilage. Place the hummus in the fridge as soon as you're done enjoying it. When stored properly, roasted garlic hummus lasts about five to seven days in the fridge. Always check for any off smells or changes in texture before eating. If you want to save some hummus for later, freezing is a great option. Portion it into small containers or freezer bags. This way, you can thaw only what you need. Roasted garlic hummus can stay good in the freezer for up to three months. When you are ready to eat it, simply place it in the fridge overnight to thaw. For a quicker method, you can use the microwave. Reheat in short bursts, stirring in between, until warm. Remember to taste and adjust the seasoning after thawing, as flavors may change slightly. To make roasted garlic hummus, follow these basic steps: 1. Roast the Garlic: Preheat your oven to 400°F (200°C). Cut the top off a head of garlic, drizzle with olive oil, and wrap it in foil. Roast for 30-35 minutes until soft. 2. Blend Ingredients: In a food processor, mix drained chickpeas, roasted garlic, tahini, lemon juice, olive oil, ground cumin, and salt. Blend until smooth. 3. Adjust Consistency: If the hummus is thick, add water one tablespoon at a time while blending. 4. Taste and Adjust: Taste your hummus and adjust the salt or lemon juice as needed. 5. Serve: Transfer to a bowl, drizzle olive oil on top, and garnish with paprika and parsley. For the full recipe, check the details above. The best pairings for roasted garlic hummus are: - Warm pita bread - Fresh veggie sticks like carrots, cucumbers, and bell peppers - Crackers or chips - Toasted bread slices This hummus makes a great dip for any of these options. Roasted garlic can last in the fridge for about one week. Store it in an airtight container to keep it fresh. You can also freeze it for up to three months. You can use raw garlic, but it will taste very different. Raw garlic adds a sharp bite, while roasted garlic is sweet and nutty. If using raw, start with one clove and adjust to your taste. Roasted garlic hummus is healthy and packed with nutrients. It contains protein from chickpeas, healthy fats from olive oil, and vitamins from garlic and lemon juice. A typical serving has about 100 calories, making it a nutritious snack option. You can find roasted garlic hummus at most grocery stores. Look for brands like Sabra or Tribe. Some local markets may also offer fresh, homemade versions. This post covered everything you need to know about making roasted garlic hummus. We discussed key ingredients, tools, and step-by-step instructions for the best results. I shared tips for perfecting flavor and texture, plus variations for different diets. Remember to store hummus correctly for freshness. With this knowledge, you can now make your own delicious hummus from scratch. Enjoy experimenting with flavors and impress your friends with your culinary skills!](https://lisadishes.com/wp-content/uploads/2025/07/25e969f9-f38b-460a-8d06-5add66795a72-768x768.webp)
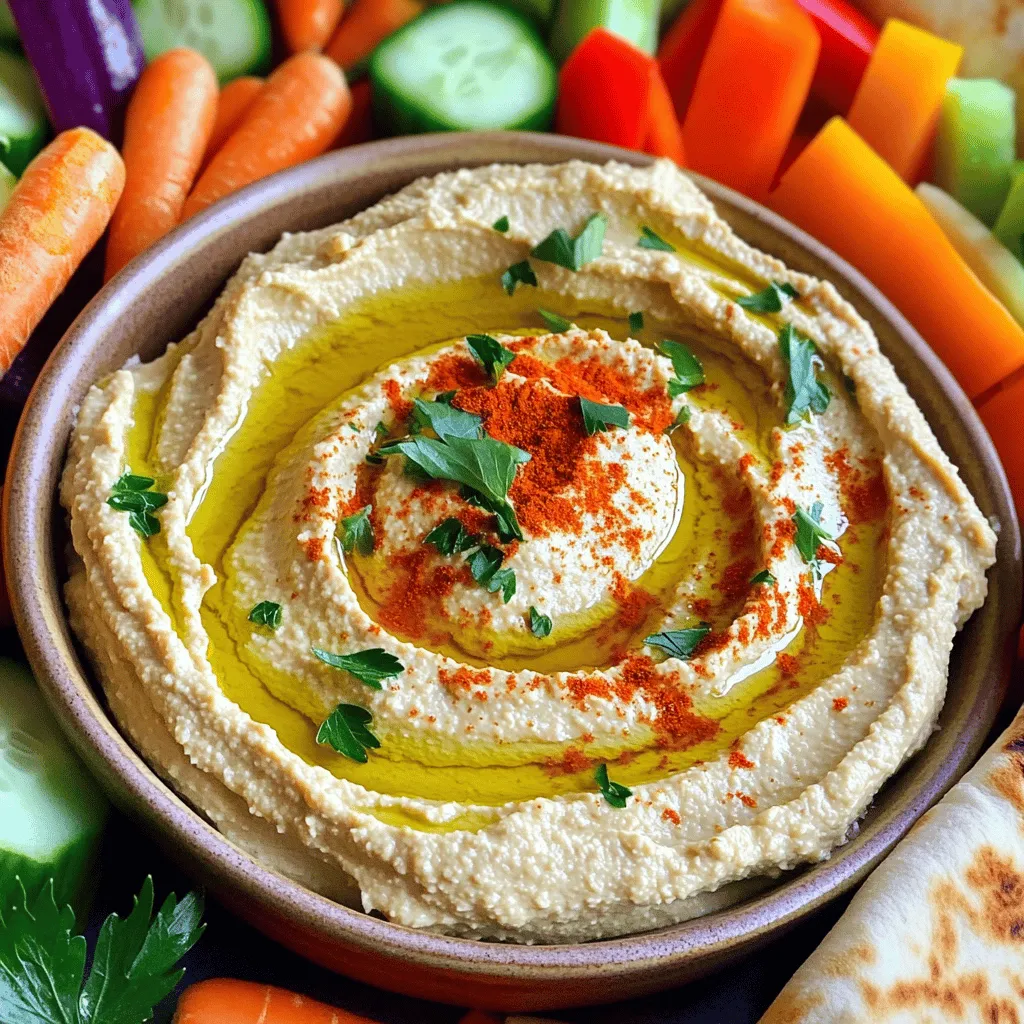
Welcome to your new favorite snack—Roasted Garlic Hummus! This creamy, flavorful treat is both easy to make and perfect for any gathering. Using just a few key ingredients, including canned chickpeas, roasted garlic, tahini, and lemon juice, you can whip up a dip that will impress everyone. Join me as I guide you through simple steps and helpful tips to create the best hummus you’ve ever tasted!
Ingredients
Main Ingredients
– 1 cup canned chickpeas, drained and rinsed
– 4 cloves roasted garlic
– 3 tablespoons tahini
– 2 tablespoons lemon juice
Optional Ingredients
– 2 tablespoons olive oil, plus extra for drizzling
– 1/2 teaspoon ground cumin
– Salt to taste
– Fresh parsley, for garnish
– Paprika, for garnish
Tools Needed
– Food processor
– Oven
– Baking foil
Getting the right ingredients is key to great roasted garlic hummus. I love using canned chickpeas because they are quick and easy. They provide a creamy base that blends well. Roasted garlic adds a sweet and rich flavor. It transforms the dish. To roast the garlic, I wrap it in foil and bake it until soft.
Tahini is another must-have. It gives hummus a nutty taste and creamy texture. Fresh lemon juice brightens up the flavors. I always use fresh lemon juice instead of bottled. It makes a big difference.
You can add olive oil for a smoother finish. Ground cumin adds warmth. Just a pinch of salt enhances all the flavors. For garnishing, I love using fresh parsley and a sprinkle of paprika. These add color and a hint of freshness.
The tools are simple. A food processor makes blending easy. An oven is needed for roasting garlic. Baking foil helps keep the garlic moist while it cooks.
Step-by-Step Instructions
Preparing the Roasted Garlic
First, you need to preheat the oven to 400°F (200°C). This step warms your kitchen and gets the garlic ready to roast. Next, slice the top off a whole head of garlic. Drizzle it with olive oil to add flavor. Then, wrap the garlic in foil to keep it moist. Roast it for about 30-35 minutes. You will know it’s done when the cloves feel soft and look caramelized. Once finished, let it cool for a bit. When cool enough to handle, squeeze the roasted cloves into a bowl. This will give your hummus a rich, sweet flavor.
Blending the Hummus
Now, it’s time to blend the hummus. In a food processor, combine the chickpeas, roasted garlic, tahini, lemon juice, olive oil, ground cumin, and a pinch of salt. Blend the mixture until it turns smooth. This should take about one minute. If you prefer a creamier hummus, keep blending. If it feels too thick, add water a little at a time. Blend again until you reach your desired consistency. You want it to be thick but still spreadable.
Final Adjustments and Serving
After blending, taste your hummus. If it needs more flavor, add a little more salt or lemon juice. Blend again to mix in any additions. For serving, transfer the hummus to a nice bowl. Drizzle some olive oil on top. Then, sprinkle paprika and fresh parsley for a pop of color. This makes it look beautiful and adds extra flavor. For a great meal, serve the hummus with warm pita bread and crunchy veggie sticks like carrots and cucumbers.
Tips & Tricks
Perfecting the Flavor
To make your roasted garlic hummus shine, you need to balance lemon juice and salt well. Start with the juice of one lemon. Taste your hummus, then add more if it needs a tang. Salt enhances the flavor, so sprinkle in a little at a time. Always taste as you go to get it just right.
You can customize the garlic intensity based on your taste. If you love garlic, add an extra clove or two. If you prefer a milder flavor, use fewer cloves. Roasted garlic is sweet and nutty, so adjust until it feels perfect for you.
Textural Enhancements
For the best texture, adjust the consistency with water. If your hummus is thick, add water slowly. Blend after each addition, until you reach your desired creaminess. A smooth texture makes it easier to scoop up with pita or veggies.
You can also include additional spices to enhance the flavor. For a kick, try adding cayenne pepper or smoked paprika. For freshness, mix in fresh herbs like cilantro or dill. These small changes can create exciting new flavors in your hummus.
Presentation Tips
Serving suggestions can elevate your hummus. Place it in a shallow bowl for a beautiful look. Drizzle extra olive oil on top for shine and richness. Garnish with paprika and chopped parsley for a pop of color.
For visual appeal, serve your hummus with warm pita bread and colorful veggie sticks like carrots, cucumbers, and bell peppers. The mix of colors makes it inviting. This makes your dish not just tasty but also a feast for the eyes!
Variations
Flavor Additions
You can spice up your roasted garlic hummus with different flavors. For a kick, try adding red pepper flakes or jalapeños. This gives the hummus a nice heat. You can also blend in herbs like basil or cilantro for fresh notes. These herbed variations add depth and richness to the dish.
Nut-Free Alternatives
If you need a nut-free option, sunflower seed tahini works well. It has a similar creamy texture. You can also use white beans instead of chickpeas. Cannellini or navy beans make great substitutes. They offer a different flavor but keep the hummus smooth.
Dietary Considerations
This hummus is naturally gluten-free and vegan-friendly. It fits many diets. You can serve it with gluten-free pita or veggie sticks. For a vegan twist, use agave syrup instead of honey in any dips. This keeps everything plant-based and delicious.
Storage Info
Refrigeration Guidelines
To keep your roasted garlic hummus fresh, store it in airtight containers. This helps prevent spoilage. Place the hummus in the fridge as soon as you’re done enjoying it. When stored properly, roasted garlic hummus lasts about five to seven days in the fridge. Always check for any off smells or changes in texture before eating.
Freezing Instructions
If you want to save some hummus for later, freezing is a great option. Portion it into small containers or freezer bags. This way, you can thaw only what you need. Roasted garlic hummus can stay good in the freezer for up to three months. When you are ready to eat it, simply place it in the fridge overnight to thaw. For a quicker method, you can use the microwave. Reheat in short bursts, stirring in between, until warm. Remember to taste and adjust the seasoning after thawing, as flavors may change slightly.
FAQs
How to make roasted garlic hummus from scratch?
To make roasted garlic hummus, follow these basic steps:
1. Roast the Garlic: Preheat your oven to 400°F (200°C). Cut the top off a head of garlic, drizzle with olive oil, and wrap it in foil. Roast for 30-35 minutes until soft.
2. Blend Ingredients: In a food processor, mix drained chickpeas, roasted garlic, tahini, lemon juice, olive oil, ground cumin, and salt. Blend until smooth.
3. Adjust Consistency: If the hummus is thick, add water one tablespoon at a time while blending.
4. Taste and Adjust: Taste your hummus and adjust the salt or lemon juice as needed.
5. Serve: Transfer to a bowl, drizzle olive oil on top, and garnish with paprika and parsley.
What can I serve with roasted garlic hummus?
The best pairings for roasted garlic hummus are:
– Warm pita bread
– Fresh veggie sticks like carrots, cucumbers, and bell peppers
– Crackers or chips
– Toasted bread slices
This hummus makes a great dip for any of these options.
How long does roasted garlic last?
Roasted garlic can last in the fridge for about one week. Store it in an airtight container to keep it fresh. You can also freeze it for up to three months.
Can I use raw garlic instead of roasted garlic?
You can use raw garlic, but it will taste very different. Raw garlic adds a sharp bite, while roasted garlic is sweet and nutty. If using raw, start with one clove and adjust to your taste.
What is the nutritional value of roasted garlic hummus?
Roasted garlic hummus is healthy and packed with nutrients. It contains protein from chickpeas, healthy fats from olive oil, and vitamins from garlic and lemon juice. A typical serving has about 100 calories, making it a nutritious snack option.
Where can I buy roasted garlic hummus?
You can find roasted garlic hummus at most grocery stores. Look for brands like Sabra or Tribe. Some local markets may also offer fresh, homemade versions.
This post covered everything you need to know about making roasted garlic hummus. We discussed key ingredients, tools, and step-by-step instructions for the best results. I shared tips for perfecting flavor and texture, plus variations for different diets. Remember to store hummus correctly for freshness. With this knowledge, you can now make your own delicious hummus from scratch. Enjoy experimenting with flavors and impress your friends with your culinary skills!
![- 1 cup canned chickpeas, drained and rinsed - 4 cloves roasted garlic - 3 tablespoons tahini - 2 tablespoons lemon juice - 2 tablespoons olive oil, plus extra for drizzling - 1/2 teaspoon ground cumin - Salt to taste - Fresh parsley, for garnish - Paprika, for garnish - Food processor - Oven - Baking foil Getting the right ingredients is key to great roasted garlic hummus. I love using canned chickpeas because they are quick and easy. They provide a creamy base that blends well. Roasted garlic adds a sweet and rich flavor. It transforms the dish. To roast the garlic, I wrap it in foil and bake it until soft. Tahini is another must-have. It gives hummus a nutty taste and creamy texture. Fresh lemon juice brightens up the flavors. I always use fresh lemon juice instead of bottled. It makes a big difference. You can add olive oil for a smoother finish. Ground cumin adds warmth. Just a pinch of salt enhances all the flavors. For garnishing, I love using fresh parsley and a sprinkle of paprika. These add color and a hint of freshness. The tools are simple. A food processor makes blending easy. An oven is needed for roasting garlic. Baking foil helps keep the garlic moist while it cooks. Check out the Full Recipe for more details on how to make this delicious dish. First, you need to preheat the oven to 400°F (200°C). This step warms your kitchen and gets the garlic ready to roast. Next, slice the top off a whole head of garlic. Drizzle it with olive oil to add flavor. Then, wrap the garlic in foil to keep it moist. Roast it for about 30-35 minutes. You will know it’s done when the cloves feel soft and look caramelized. Once finished, let it cool for a bit. When cool enough to handle, squeeze the roasted cloves into a bowl. This will give your hummus a rich, sweet flavor. Now, it’s time to blend the hummus. In a food processor, combine the chickpeas, roasted garlic, tahini, lemon juice, olive oil, ground cumin, and a pinch of salt. Blend the mixture until it turns smooth. This should take about one minute. If you prefer a creamier hummus, keep blending. If it feels too thick, add water a little at a time. Blend again until you reach your desired consistency. You want it to be thick but still spreadable. After blending, taste your hummus. If it needs more flavor, add a little more salt or lemon juice. Blend again to mix in any additions. For serving, transfer the hummus to a nice bowl. Drizzle some olive oil on top. Then, sprinkle paprika and fresh parsley for a pop of color. This makes it look beautiful and adds extra flavor. For a great meal, serve the hummus with warm pita bread and crunchy veggie sticks like carrots and cucumbers. For the complete recipe, check out the [Full Recipe]. To make your roasted garlic hummus shine, you need to balance lemon juice and salt well. Start with the juice of one lemon. Taste your hummus, then add more if it needs a tang. Salt enhances the flavor, so sprinkle in a little at a time. Always taste as you go to get it just right. You can customize the garlic intensity based on your taste. If you love garlic, add an extra clove or two. If you prefer a milder flavor, use fewer cloves. Roasted garlic is sweet and nutty, so adjust until it feels perfect for you. For the best texture, adjust the consistency with water. If your hummus is thick, add water slowly. Blend after each addition, until you reach your desired creaminess. A smooth texture makes it easier to scoop up with pita or veggies. You can also include additional spices to enhance the flavor. For a kick, try adding cayenne pepper or smoked paprika. For freshness, mix in fresh herbs like cilantro or dill. These small changes can create exciting new flavors in your hummus. Serving suggestions can elevate your hummus. Place it in a shallow bowl for a beautiful look. Drizzle extra olive oil on top for shine and richness. Garnish with paprika and chopped parsley for a pop of color. For visual appeal, serve your hummus with warm pita bread and colorful veggie sticks like carrots, cucumbers, and bell peppers. The mix of colors makes it inviting. This makes your dish not just tasty but also a feast for the eyes! Refer to the [Full Recipe] for detailed steps on making this delicious hummus. {{image_2}} You can spice up your roasted garlic hummus with different flavors. For a kick, try adding red pepper flakes or jalapeños. This gives the hummus a nice heat. You can also blend in herbs like basil or cilantro for fresh notes. These herbed variations add depth and richness to the dish. If you need a nut-free option, sunflower seed tahini works well. It has a similar creamy texture. You can also use white beans instead of chickpeas. Cannellini or navy beans make great substitutes. They offer a different flavor but keep the hummus smooth. This hummus is naturally gluten-free and vegan-friendly. It fits many diets. You can serve it with gluten-free pita or veggie sticks. For a vegan twist, use agave syrup instead of honey in any dips. This keeps everything plant-based and delicious. For the Full Recipe, refer to the earlier section. To keep your roasted garlic hummus fresh, store it in airtight containers. This helps prevent spoilage. Place the hummus in the fridge as soon as you're done enjoying it. When stored properly, roasted garlic hummus lasts about five to seven days in the fridge. Always check for any off smells or changes in texture before eating. If you want to save some hummus for later, freezing is a great option. Portion it into small containers or freezer bags. This way, you can thaw only what you need. Roasted garlic hummus can stay good in the freezer for up to three months. When you are ready to eat it, simply place it in the fridge overnight to thaw. For a quicker method, you can use the microwave. Reheat in short bursts, stirring in between, until warm. Remember to taste and adjust the seasoning after thawing, as flavors may change slightly. To make roasted garlic hummus, follow these basic steps: 1. Roast the Garlic: Preheat your oven to 400°F (200°C). Cut the top off a head of garlic, drizzle with olive oil, and wrap it in foil. Roast for 30-35 minutes until soft. 2. Blend Ingredients: In a food processor, mix drained chickpeas, roasted garlic, tahini, lemon juice, olive oil, ground cumin, and salt. Blend until smooth. 3. Adjust Consistency: If the hummus is thick, add water one tablespoon at a time while blending. 4. Taste and Adjust: Taste your hummus and adjust the salt or lemon juice as needed. 5. Serve: Transfer to a bowl, drizzle olive oil on top, and garnish with paprika and parsley. For the full recipe, check the details above. The best pairings for roasted garlic hummus are: - Warm pita bread - Fresh veggie sticks like carrots, cucumbers, and bell peppers - Crackers or chips - Toasted bread slices This hummus makes a great dip for any of these options. Roasted garlic can last in the fridge for about one week. Store it in an airtight container to keep it fresh. You can also freeze it for up to three months. You can use raw garlic, but it will taste very different. Raw garlic adds a sharp bite, while roasted garlic is sweet and nutty. If using raw, start with one clove and adjust to your taste. Roasted garlic hummus is healthy and packed with nutrients. It contains protein from chickpeas, healthy fats from olive oil, and vitamins from garlic and lemon juice. A typical serving has about 100 calories, making it a nutritious snack option. You can find roasted garlic hummus at most grocery stores. Look for brands like Sabra or Tribe. Some local markets may also offer fresh, homemade versions. This post covered everything you need to know about making roasted garlic hummus. We discussed key ingredients, tools, and step-by-step instructions for the best results. I shared tips for perfecting flavor and texture, plus variations for different diets. Remember to store hummus correctly for freshness. With this knowledge, you can now make your own delicious hummus from scratch. Enjoy experimenting with flavors and impress your friends with your culinary skills!](https://lisadishes.com/wp-content/uploads/2025/07/25e969f9-f38b-460a-8d06-5add66795a72-250x250.webp)
