If you’re craving a tasty treat, my Crispy Coconut Shrimp recipe is for you! This dish combines juicy shrimp with a crunchy coconut coating that’s mouthwateringly delicious. It’s easy to make, perfect for parties or a fun dinner at home. Just follow my step-by-step guide, and you’ll wow your family and friends. Ready to dive in? Let’s get cooking!
Ingredients
Main Ingredients
– 1 pound large shrimp, peeled and deveined
– 1 cup all-purpose flour
– 2 large eggs
– 1 cup shredded coconut
Seasoning and Coating
– 1 cup panko breadcrumbs
– 1 teaspoon garlic powder
– 1 teaspoon paprika
– Salt and pepper to taste
Cooking Essentials
– Vegetable oil for frying
– Fresh lime wedges for serving
– Sweet chili sauce for dipping
To make crispy coconut shrimp, you need a few key items. Start with large shrimp. They should be peeled and deveined for the best taste. Next, gather your dry ingredients. You will need flour, eggs, and shredded coconut. The coconut adds that sweet crunch we love.
For the coating, panko breadcrumbs work wonders. They make everything extra crispy. Garlic powder and paprika add flavor. Don’t forget to season with salt and pepper. This gives the shrimp a nice taste.
You’ll also need vegetable oil for frying. This helps create that golden crust. Fresh lime wedges and sweet chili sauce are great for serving. They add a fun twist to your meal.Happy cooking!
Step-by-Step Instructions
Preparing the Shrimp
First, rinse the shrimp under cold water. Next, dry them with paper towels. This step is key for a crispy outside. After that, season the shrimp with salt and pepper. Just a light sprinkle will do!
Setting Up the Dredging Station
Now, prepare your dredging station. You need three shallow bowls. In the first bowl, add 1 cup of all-purpose flour. In the second bowl, beat 2 large eggs. In the third bowl, mix 1 cup of shredded coconut, 1 cup of panko breadcrumbs, 1 teaspoon of garlic powder, and 1 teaspoon of paprika. Don’t forget a pinch of salt and pepper!
Coating the Shrimp
Start coating the shrimp. Dip each shrimp into the flour first. Make sure it’s fully covered. Shake off any extra flour. Then, dip it into the beaten eggs, allowing any extra to drip off. Finally, coat it in the coconut-panko mix. Press gently to help it stick. Repeat this for all your shrimp.
Heating the Oil
In a large skillet, heat about 1/2 inch of vegetable oil over medium-high heat. To check if the oil is hot enough, drop in a small piece of coconut. If it sizzles, you’re ready to fry!
Frying the Shrimp
Carefully add the coated shrimp to the hot oil in batches. Don’t overcrowd the pan. Fry each shrimp for about 2-3 minutes on each side. Look for a golden brown color before removing them.
Draining and Serving
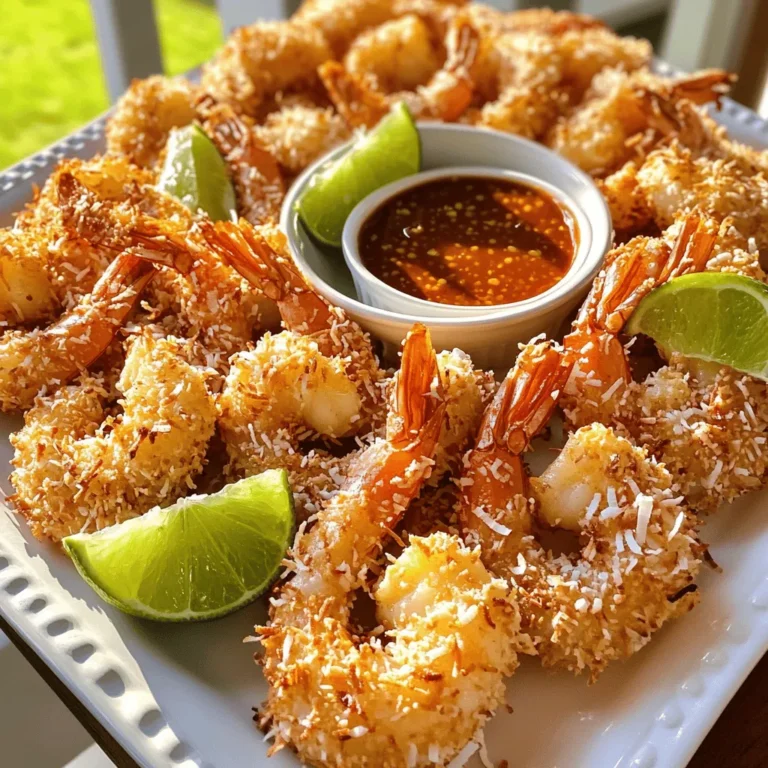
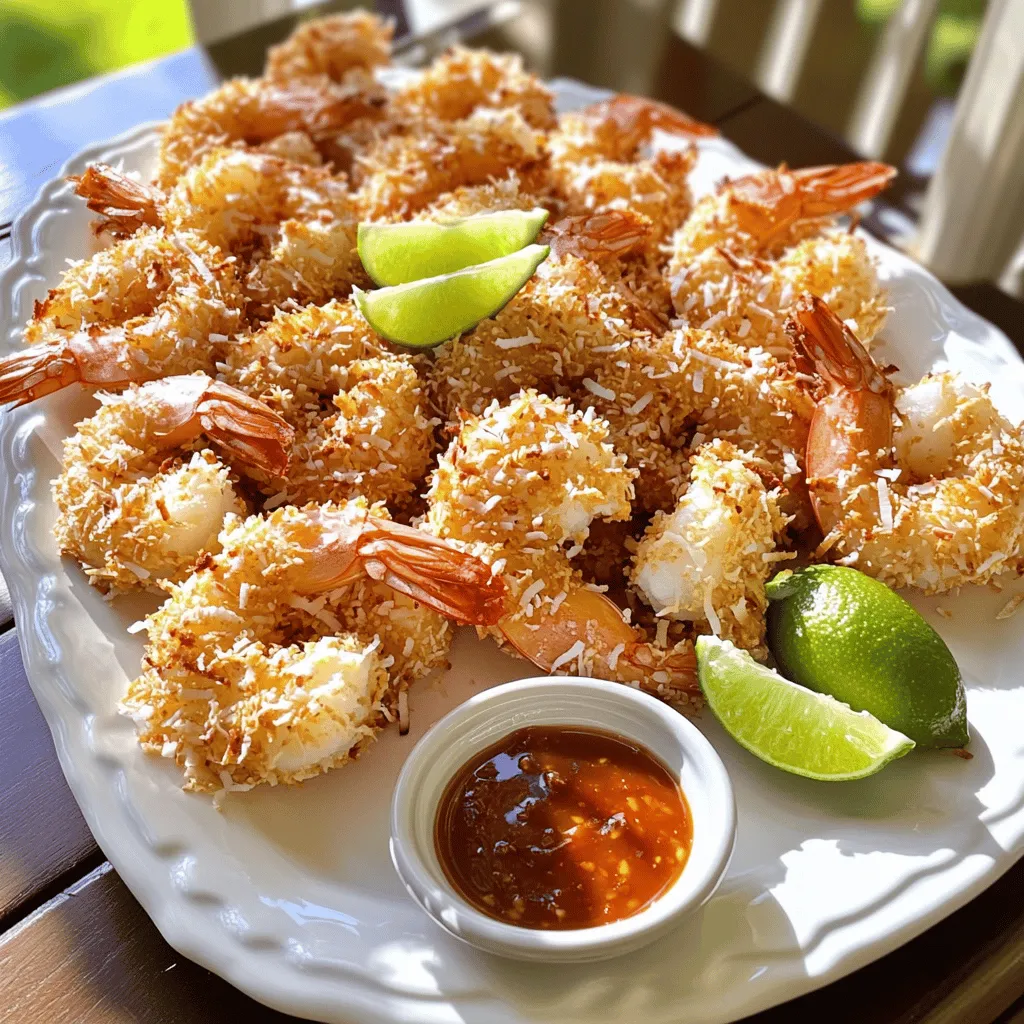
After frying, use a slotted spoon to take out the shrimp. Place them on a paper towel-lined plate. This helps drain any excess oil. For a nice presentation, arrange the shrimp on a serving platter. Add fresh lime wedges and a small bowl of sweet chili sauce for dipping.
Tips & Tricks
Achieving the Perfect Crisp
To get that perfect crunch, oil temperature matters. Heat the vegetable oil to about 350°F (175°C). A simple test is to drop a small piece of coconut in the oil. If it sizzles, you’re ready to fry. This heat ensures the shrimp cook fast and stay crispy.
To prevent shrimp from sticking, avoid overcrowding the pan. Fry in small batches. Each shrimp needs space to cook evenly. If they stick together, they won’t get that nice, golden color.
Flavor Enhancements
You can boost flavor by adding spices to the coconut mixture. Consider mixing in a pinch of cayenne for heat or a pinch of cumin for a warm, earthy taste. You can also marinate the shrimp in lime juice and garlic before coating them. This step adds a fresh punch.
Serving Suggestions
Crispy coconut shrimp pairs well with many sides. Consider a light salad with citrus vinaigrette. It balances the richness of the shrimp. You can also serve it with coconut rice for a tropical flair. Don’t forget sweet chili sauce for dipping; it adds a sweet and spicy kick. For a fun twist, serve with grilled corn on the side. Try these ideas to elevate your meal.
Variations
Ingredient Swaps
You can switch up the breadcrumbs for a new crunch. Try using crushed cornflakes, which add a nice texture. For a gluten-free option, use almond flour or gluten-free breadcrumbs. Each swap gives a new twist to the dish. Feel free to experiment with different coatings like crushed pretzels or even crushed nuts for added flavor.
Flavor Twists
Spice up your coconut mixture to add kick. You can mix in cayenne pepper for heat or curry powder for a fun twist. Adding a bit of lime zest brightens the flavor, too. If you love garlic, increase the garlic powder. These small changes make a big difference in taste.
Cooking Methods
You can make crispy coconut shrimp by baking or frying. Frying gives a crispy outside faster, but baking is healthier. If you bake, set your oven to 400°F. Bake for about 15-20 minutes, flipping halfway. Adjust the time based on your oven. Either way, you’ll get a delicious meal.
Storage Info
Refrigeration
To store your leftover crispy coconut shrimp, place them in an airtight container. Make sure they cool completely before sealing. This keeps them fresh and tasty. You can store them in the fridge for up to three days. For the best flavor, eat them within the first day or two.
Reheating Guidelines
Reheating crispy coconut shrimp can be tricky. You want to keep them crunchy. The best method is to use an oven. Preheat it to 350°F (175°C). Place the shrimp on a baking sheet and heat for about 10 minutes. Check often to avoid overcooking. This method keeps the shrimp crispy and delicious.
Freezing Tips
You can freeze both uncooked and cooked shrimp. For uncooked shrimp, place them in a single layer on a baking sheet. Once frozen, transfer them to a freezer bag. This prevents sticking. They can stay frozen for up to three months. For cooked shrimp, let them cool down before placing them in a freezer bag. Remove as much air as possible. Use cooked frozen shrimp within two months for the best taste.
FAQs
What is the best type of shrimp to use for crispy coconut shrimp?
The best shrimp for this dish is large shrimp. I like to use peeled and deveined shrimp. They cook evenly and have a great texture. Choose fresh shrimp when possible. If fresh is not an option, frozen shrimp works too. Just make sure to thaw them completely before cooking. This helps the coating stick better.
Can I make crispy coconut shrimp in the oven?
Yes, you can make crispy coconut shrimp in the oven! Preheat your oven to 400°F. Place the coated shrimp on a baking sheet lined with parchment paper. Spray them lightly with cooking oil. Bake for 15-20 minutes, flipping halfway through. The shrimp will be crispy and delicious. This method is a great way to cut down on oil.
How do I prevent the shrimp from becoming soggy?
To prevent soggy shrimp, follow a few simple steps. First, make sure the shrimp are dry before coating. Use paper towels to pat them dry. Second, avoid overcrowding the pan when frying. This keeps the oil hot and ensures even cooking. Lastly, let the fried shrimp drain on paper towels. This removes excess oil and keeps them crispy.
What can I serve with crispy coconut shrimp?
Crispy coconut shrimp pairs well with many sides. You can serve it with a fresh salad or rice. I love to add a sweet chili sauce for dipping. Lime wedges also add a nice zing. For a tropical touch, try serving it with mango salsa or coleslaw.
How long does it take to cook crispy coconut shrimp?
Cooking crispy coconut shrimp takes about 6-8 minutes. Fry each batch for 2-3 minutes on each side. Look for a golden brown color. If baking, it may take about 15-20 minutes in the oven. Always check that the shrimp are cooked through before serving.
Crispy coconut shrimp is a tasty dish that’s fun to make. We covered the main ingredients, from shrimp to panko breadcrumbs, and shared tips for frying. You learned how to coat shrimp and keep it crispy. You can also try different flavors and cooking methods.
With these techniques, you can create delicious meals at home. Enjoy your cooking journey!

