WANT TO SAVE THIS RECIPE?
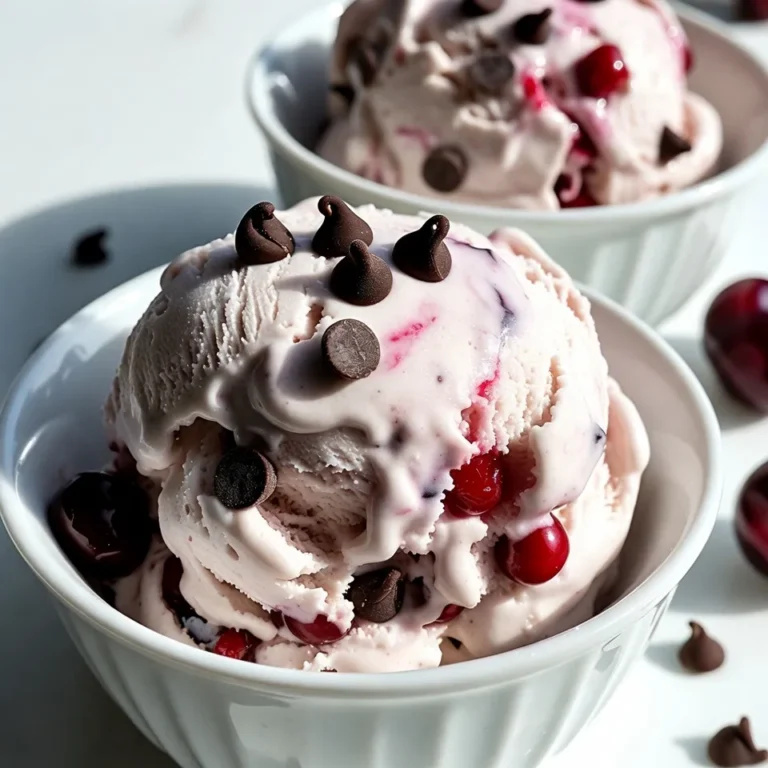
Get ready to indulge in the sweet joy of homemade cherry chocolate chip ice cream! With just a few simple ingredients and easy steps, you can create a delightful and creamy treat that will impress everyone. From fresh cherries to rich dark chocolate, this ice cream delivers delicious flavor in every scoop. Join me as we dive into the fun of making this refreshing dessert that captures the essence of summer!
Why I Love This Recipe
- Delicious Flavor Combination: The sweet cherries paired with rich dark chocolate create a harmonious blend that is truly irresistible.
- Simple to Make: This recipe requires minimal ingredients and straightforward steps, making it easy for anyone to whip up a batch.
- Perfect for Summer: This ice cream is a refreshing treat that’s perfect for hot days, bringing joy to every scoop.
- Customizable: You can easily adapt this recipe by adding different fruits or types of chocolate to suit your taste.
Ingredients
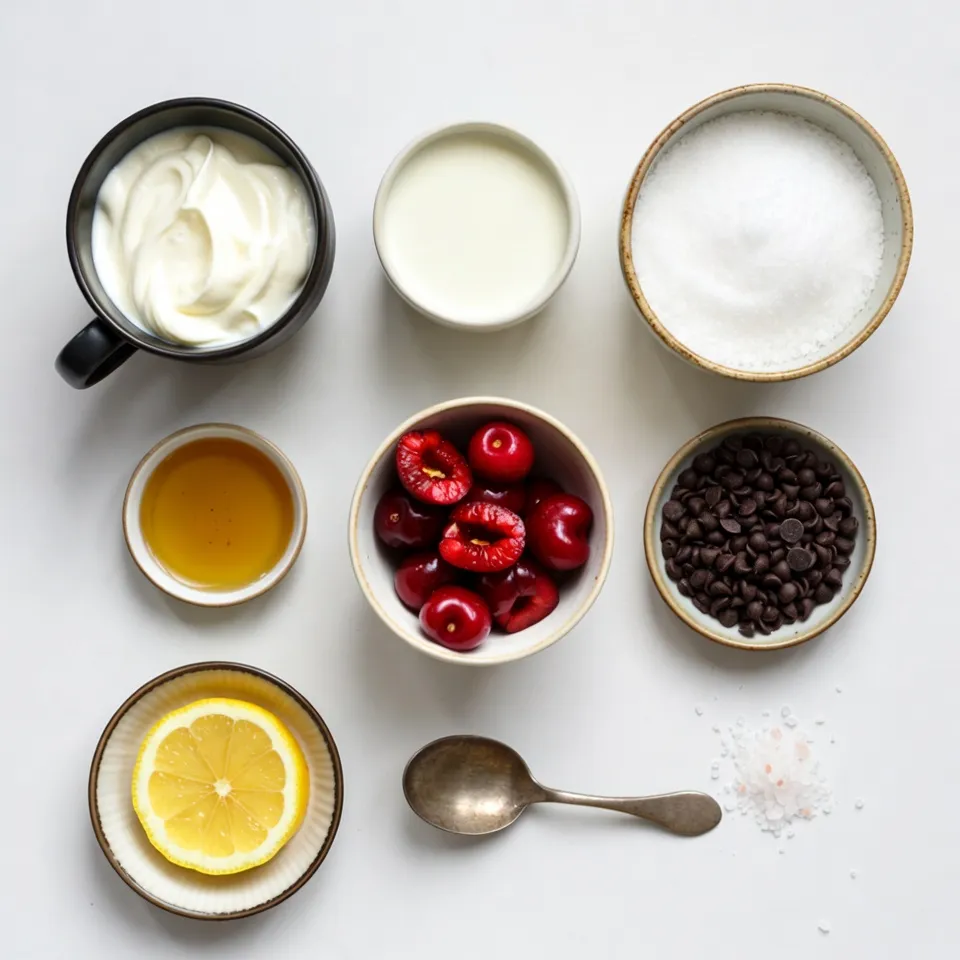
List of Ingredients
– 2 cups heavy cream
– 1 cup whole milk
– 1 cup granulated sugar
– 1 teaspoon vanilla extract
– 1 cup fresh cherries, pitted and halved
– 1/2 cup dark chocolate chips
– 1 tablespoon lemon juice
– A pinch of salt
To make this Cherry Chocolate Chip Ice Cream, you need to gather a few key ingredients. Each one plays a big role in flavor and texture.
Heavy cream gives the ice cream its rich and creamy base. Using whole milk adds smoothness and helps balance the cream’s richness.
You will also need granulated sugar. This sweetens the mix and makes it delightful. Vanilla extract adds a warm, sweet note that enhances all the flavors.
The fresh cherries bring a burst of fruity goodness. Make sure to pit and halve them for the best result. Dark chocolate chips add a decadent touch, contrasting nicely with the cherries.
A splash of lemon juice helps balance the sweetness of the cherries. Lastly, a pinch of salt is key to bringing out all the flavors.
With these eight simple ingredients, you can create a delicious treat that everyone will love. They work together to create a creamy, sweet, and tangy ice cream that will brighten any day.

Step-by-Step Instructions
Mixing the Cream Base
First, take a medium bowl. In this bowl, whisk together:
– 2 cups heavy cream
– 1 cup whole milk
– 1 cup granulated sugar
Keep whisking until the sugar dissolves. This step makes the base smooth and sweet. Next, add in:
– 1 teaspoon vanilla extract
– A pinch of salt
Stir well. This blend gives your ice cream a rich flavor and depth.
Preparing the Cherries
Now, grab a smaller bowl. Toss together:
– 1 cup fresh cherries, pitted and halved
– 1 tablespoon lemon juice
This adds a sweet-tart kick. The lemon juice helps keep the cherries bright and fresh.
Folding and Churning
Next, gently fold the cherries and dark chocolate chips into the cream base. You want to keep the cherries intact. Then, pour the mixture into your ice cream maker.
Churn according to the manufacturer’s instructions. This usually takes about 20-25 minutes. You want it to look like soft-serve ice cream.
Freezing and Serving
After churning, transfer the ice cream into an airtight container. Freeze it for at least 4 hours. This step firms up the ice cream for serving.
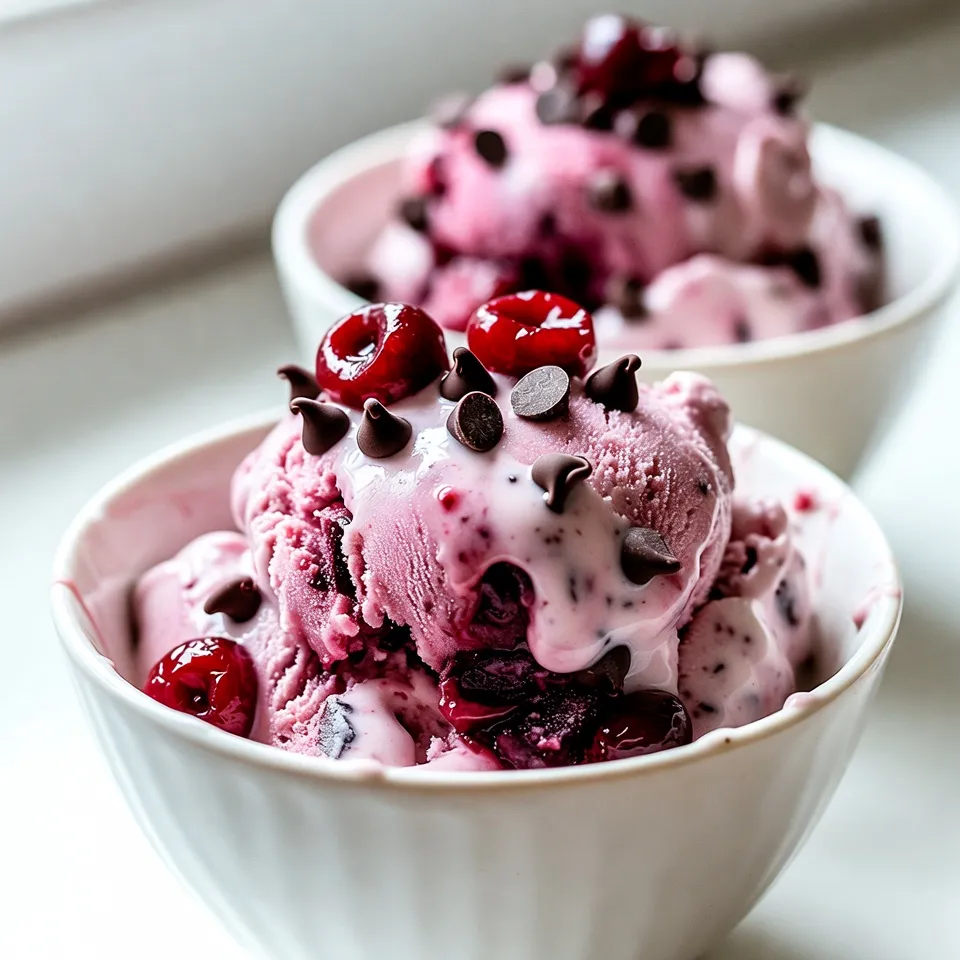
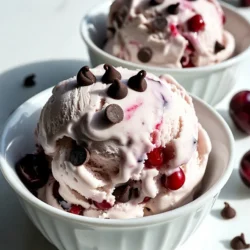
For a lovely presentation, serve the ice cream in chilled bowls. Sprinkle extra chocolate chips on top. Add a few whole cherries for a pop of color!
Tips & Tricks
Achieving the Perfect Texture
Churning time is key for smooth ice cream. If you churn too little, it stays icy. If you churn too long, it gets too hard. Aim for about 20 to 25 minutes. This gives it that soft-serve feel before freezing.
For freezing, use an airtight container. This helps keep out air and ice crystals. Freeze the ice cream for at least four hours. This ensures it firms up well.
Enhancing Flavor
Add-ins can boost your ice cream’s taste. Try a swirl of raspberry puree or a splash of almond extract. These flavors pair nicely with cherry and chocolate.
Balancing sweetness is a must. The lemon juice in this recipe helps. It adds a nice tartness. This makes the ice cream less sweet and more complex.
Tools and Equipment
An ice cream maker is the best tool for this recipe. A good one makes the process easy and fun. Look for models with a compressor for best results.
If you don’t have an ice cream maker, don’t worry! You can use a simple no-churn method. Just mix the ingredients and freeze them in a container. Stir every 30 minutes for the first two hours. This helps break up ice crystals.
Pro Tips
- Chill Your Ingredients: Ensure that your heavy cream and milk are well chilled before mixing to help the ice cream churn faster and achieve a creamier texture.
- Use Fresh Cherries: Fresh cherries will give your ice cream the best flavor and texture. If using frozen cherries, make sure to thaw and drain them well.
- Experiment with Chocolate: Try using different types of chocolate chips such as milk chocolate or even white chocolate for a unique flavor twist.
- Storage Tips: To prevent ice crystals from forming, make sure to store your ice cream in an airtight container and press a piece of parchment paper directly against the surface before sealing.
Variations
Dairy-Free Options
If you want a dairy-free treat, use coconut milk or almond milk. Both options work great. They give a creamy texture similar to heavy cream. For best results, choose full-fat coconut milk. It adds richness to your ice cream. Almond milk is lighter but still tasty. When using these, keep the same amount as in the recipe.
Vegan Version
Making this ice cream vegan is easy! Swap the heavy cream and whole milk with plant-based options. Use coconut cream for a rich base. Almond milk is a lighter choice. For sweetening, you can use maple syrup or agave nectar instead of sugar. This change keeps it sweet and delicious while being vegan-friendly.
Mix-Ins and Swaps
Feel free to get creative with your mix-ins! Instead of cherries, try strawberries or raspberries. Both fruits add a burst of flavor. You can also use white chocolate chips for a different twist. Consider adding nuts for extra crunch or even a splash of coffee for a mocha flavor. These swaps make your ice cream unique and exciting!
Storage Info
Best Storage Practices
To keep your cherry chocolate chip ice cream fresh, store it in an airtight container. Make sure to press plastic wrap directly onto the surface of the ice cream. This helps prevent ice crystals from forming. Label the container with the date and flavor. Always scoop with a warm spoon to avoid melting the ice cream too much.
Shelf Life of Homemade Ice Cream
Homemade ice cream can last about two weeks in the freezer. After that, it may lose flavor and texture. For the best taste and quality, try to eat it within two weeks. The longer it sits, the more likely it will develop freezer burn.
Signs Ice Cream Has Gone Bad
Check for signs of freezer burn, which looks like dry spots or ice crystals. If your ice cream has an odd texture or strange smell, it’s time to toss it. Off-flavors often mean the ice cream has been in the freezer too long. Enjoy your cherry chocolate chip ice cream while it’s fresh for the best experience!
FAQs
How do I make cherry chocolate chip ice cream without an ice cream maker?
You can still enjoy homemade ice cream without a machine. Use a simple method called the freeze and stir technique. Start by mixing your cream, milk, sugar, and vanilla as usual. After combining, pour the mix into a large, shallow dish. Freeze it for about 45 minutes.
– Take it out and stir well with a fork.
– Return it to the freezer and repeat every 30 minutes for about 3 hours.
This method breaks up ice crystals, giving you a creamy treat.
Can I use frozen cherries for this recipe?
Yes, you can use frozen cherries! Just adjust your recipe slightly. First, thaw the cherries and drain any excess juice. This keeps your ice cream from becoming too watery.
– Toss thawed cherries with lemon juice.
– Then, fold them into your cream mixture as you would with fresh cherries.
Frozen cherries work great and still offer a burst of flavor.
What are some serving suggestions for cherry chocolate chip ice cream?
Serving this ice cream can be fun and creative. Here are a few ideas:
– Scoop it into chilled bowls for a fancy touch.
– Top with extra chocolate chips or whole cherries for color.
– Serve it with a drizzle of chocolate sauce for added sweetness.
– Pair it with a slice of warm pie for a delicious contrast.
These ideas make your dessert even more delightful!
Making cherry chocolate chip ice cream is simple and fun. We mixed rich cream, sweet cherries, and dark chocolate, creating a treat everyone will love. Followed the steps closely to get a smooth texture. Remember to freeze it well for the best taste.
As you try this recipe, be open to swapping ingredients or adding flavors. Enjoy every scoop, and don’t forget to share your creation. You’ll impress friends and family with your homemade desser
Cherry Chocolate Chip Bliss Ice Cream
A delightful ice cream featuring fresh cherries and dark chocolate chips, perfect for a sweet treat.
Prep Time 15 minutes mins
Cook Time 25 minutes mins
Total Time 4 hours hrs 25 minutes mins
Course Dessert
Cuisine American
Servings 6
Calories 250 kcal
- 2 cups heavy cream
- 1 cup whole milk
- 1 cup granulated sugar
- 1 teaspoon vanilla extract
- 1 cup fresh cherries, pitted and halved
- 1/2 cup dark chocolate chips
- 1 tablespoon lemon juice
- 1 pinch salt
In a medium mixing bowl, whisk together the heavy cream, whole milk, and granulated sugar until the sugar is dissolved and the mixture is well combined.
Stir in the vanilla extract and a pinch of salt to enhance the flavor.
In a separate smaller bowl, toss the pitted and halved cherries with lemon juice. This will help to balance the sweetness and add a nice tangy flavor.
Fold the cherries and dark chocolate chips gently into the cream mixture. Be careful not to smash the cherries too much; you want to maintain their shape and burst of flavor.
Pour the mixture into an ice cream maker and churn according to the manufacturer's instructions, typically around 20-25 minutes, until it reaches a soft-serve consistency.
Transfer the churned ice cream into an airtight container and freeze for a minimum of 4 hours to firm up before serving.
Serve the ice cream in chilled bowls and sprinkle with extra chocolate chips and a few whole cherries on top for a gorgeous finishing touch!
Keyword cherry, chocolate chip, dessert, ice cream
WANT TO SAVE THIS RECIPE?