Skip to content
DisclaimerTerms Of UseGDPR PolicyCookie Policy

Lisa Dishes

  • Home
  • Drinks
  • Appetizers
  • Dinner
  • Dessert
  • About
  • Contact
  • Privacy Policy
DisclaimerTerms Of UseGDPR PolicyCookie Policy

NO-ING-IMG

- 2 pounds chicken wings - 1 tablespoon baking powder - 2 tablespoons olive oil - 1 teaspoon salt - 1 teaspoon black pepper - 1 teaspoon garlic powder - 1 teaspoon onion powder - 1 teaspoon smoked paprika - ½ teaspoon cayenne pepper (optional for heat) - 1 tablespoon honey - Fresh parsley, chopped For my crispy baked chicken wings, I focus on quality. First, you need fresh chicken wings. Look for wings that feel firm and look bright. Baking powder is key. It helps make the skin extra crispy. Olive oil adds flavor and helps with that crunch too. Now, let’s talk spices. Salt and black pepper are must-haves. Garlic powder and onion powder bring out great flavors. Smoked paprika adds a nice, subtle smokiness. If you like a kick, cayenne pepper works well. Just a pinch can give your wings a nice heat. For the finish, honey adds a sweet glaze. It makes the wings look shiny and taste great. Fresh parsley gives color and a fresh taste. You can find the full recipe to get all the details you need. - Preheat the oven to 425°F (220°C). - Rinse and dry the chicken wings thoroughly. I always start by preheating the oven. This makes sure the wings cook evenly. Rinsing the wings is key. It helps to remove any unwanted flavors. After rinsing, dry the wings well with paper towels. The drier the wings, the crispier they will get. - Combine spices in a bowl. - Coat chicken wings with the seasoning mix. In a bowl, mix together the baking powder, salt, black pepper, garlic powder, onion powder, smoked paprika, and cayenne pepper. This blend packs a punch. Next, add this spice mix to the dried chicken wings. Toss them well until every wing is covered. This step is vital for great flavor. - Drizzle with olive oil and arrange on baking sheet. - Bake for 40-45 minutes, flipping halfway through. Now, drizzle olive oil over the wings. This helps achieve that golden color. Place the wings on a baking sheet in a single layer. They should not touch each other. This helps them cook evenly. Bake them for 40-45 minutes. Flip them halfway through to ensure both sides crisp up nicely. For the full recipe, you can check the details above. Enjoy your crispy baked chicken wings! To get crispy baked chicken wings, start by drying them well. Use paper towels to pat the wings until they are dry. This step is very important. Moisture makes the skin soggy. The drier the wings, the better! Next, we add baking powder. This ingredient helps create a crunchy texture. It raises the pH of the skin. This process allows it to brown and crisp up nicely in the oven. Flipping the wings is key for even cooking. Halfway through baking, about 20 minutes in, take them out and flip each wing. This ensures all sides get that golden color. It also helps them cook evenly. Use tongs to turn them over carefully. This way, you keep their shape and avoid mess. Crispy wings taste great with dips! Ranch and blue cheese are classic pairings. You can also try a spicy buffalo sauce for extra flavor. To serve, use a platter lined with fresh lettuce. This makes the wings look delightful and keeps them from sticking. Add toothpicks for easy eating! You can find the full recipe above to impress your guests with these wings! {{image_2}} You can change the flavor of your wings with different spice blends. Try adding cumin or chili powder for a kick. A smoked spice blend can give a rich taste. After baking, drizzle sauces like BBQ or buffalo for extra flavor. You can also toss the wings in a lemon-garlic sauce for a zesty finish. These additions keep things fun and tasty. To adjust the heat, play with the cayenne pepper in the recipe. If you want it hotter, add more cayenne. For a milder flavor, cut out the cayenne entirely. You can also switch it with paprika for a sweet taste. Another option is to use a mild hot sauce after baking to control the spice level. Both the oven and air fryer can make crispy wings. The oven is great for a large batch. It cooks evenly and gives that nice crunch. The air fryer cooks faster and can be more energy-efficient. To air-fry, set your air fryer to 400°F (200°C). Cook the wings for about 25-30 minutes, flipping halfway. This method also makes them crispy and delicious. For the complete details, check out the Full Recipe. To keep your leftover wings fresh, follow these tips: - Refrigeration: Place the wings in an airtight container. They can last up to 3 days in the fridge. - Freezing: For longer storage, freeze the wings. Use a freezer-safe bag and remove as much air as possible. They can stay good for up to 3 months. When you want to enjoy your wings again, reheating is key: - Oven Method: Preheat your oven to 350°F (175°C). Spread wings on a baking sheet. Heat for about 15-20 minutes until warm and crispy. - Microwave Method: Place wings on a microwave-safe plate. Heat in 30-second bursts. This method may make them less crispy, but it is quick. - Crispiness Tips: To keep wings crispy, consider using the oven method. You can cover them with foil for the first few minutes, then remove it to crisp up the skin. For the full recipe, check the details above. To get crispy chicken wings, bake them for 40-45 minutes at 425°F (220°C). Flip them halfway through. This helps them brown and crisp up evenly. The high heat works wonders in creating that delicious crunch. If you use a meat thermometer, the internal temperature should reach 165°F (74°C). Yes, you can prep these wings in advance! Marinate them in the spice mix up to 24 hours ahead. Store them in an airtight container in the fridge. When you’re ready to bake, just spread them out on the baking sheet and bake as directed. This saves time and still gives you tasty wings. The secret lies in using baking powder. It helps draw moisture away from the skin. Drying the wings thoroughly is crucial too. Proper spacing on the baking sheet allows hot air to circulate. This mimics frying, giving you that crispy texture without the oil. Yes, you can use frozen wings! Just don’t thaw them. Bake them straight from the freezer, adding 10-15 minutes to the cooking time. Check for crispiness and doneness. If they stick together, run them under cold water for a moment before baking. This ensures they cook evenly and get that perfect crunch. For the full recipe, check out the details in the article. Crispy baked chicken wings are simple to make with the right ingredients and steps. You need chicken wings, baking powder, olive oil, and spices. Drying the wings well is key for crispiness. You have plenty of options for flavors and dips. Proper storage and reheating keep your wings tasty. By following these tips and methods, you can enjoy delicious wings anytime. Happy cooking!

Crispy Baked Chicken Wings Perfectly Seasoned Recipe

Are you ready to elevate your game day snacks? My Crispy Baked Chicken Wings Perfectly Seasoned Recipe is your go-to

When making loaded veggie quesadillas, you need fresh and tasty ingredients. Here’s what you will use: - 4 large whole wheat tortillas - 1 cup bell peppers (red, yellow, and green), diced - 1 cup zucchini, thinly sliced - 1 cup mushrooms, sliced - 1 cup fresh spinach leaves - 1 cup shredded cheese (Cheddar and Monterey Jack mix) - 1 small red onion, thinly sliced - 2 cloves garlic, minced - 1 tablespoon olive oil - 1 teaspoon cumin - 1 teaspoon smoked paprika - Salt and pepper to taste - Salsa and sour cream (for serving) These ingredients bring a burst of flavor and color to your dish. Whole wheat tortillas offer fiber and a nutty taste. Fresh veggies add crunch and nutrients. The mix of Cheddar and Monterey Jack cheese melts beautifully. Garlic, cumin, and smoked paprika infuse the quesadillas with warmth and depth. Using fresh, high-quality ingredients makes all the difference. They ensure your quesadillas taste great and look appetizing. If you want to explore more, check the [Full Recipe]. - Sauté the onions and garlic: Heat one tablespoon of olive oil in a large skillet over medium heat. Add one small red onion, sliced, and two cloves of minced garlic. Sauté for 2-3 minutes until the onion turns soft and clear. - Cook the mixed vegetables: Next, add one cup each of diced bell peppers, zucchini slices, and mushrooms to the skillet. Cook for 5-7 minutes, stirring often. You want the veggies to soften but not lose all their crunch. - Prepare the tortillas with cheese and veggies: Once the veggies are soft, stir in one cup of fresh spinach, one teaspoon of cumin, one teaspoon of smoked paprika, and salt and pepper to taste. Cook until the spinach wilts, which takes about 2 minutes. Now, lay out two large whole wheat tortillas on a clean surface. Sprinkle half of one cup of shredded cheese evenly over each tortilla. Then, layer the sautéed veggie mix on top of the cheese. Finish by sprinkling the rest of the cheese over the veggies. Top with another tortilla to make a full quesadilla. - Heat the skillet for cooking: Grab a non-stick skillet and heat it over medium heat. This helps to get that nice, crispy texture on the outside of the quesadilla. - Fry the quesadillas: Carefully transfer one quesadilla to the skillet. Cook it for about 3-4 minutes on each side. You want the tortillas to turn golden and crispy while the cheese melts inside. Repeat this step for the second quesadilla. - Cutting and plating instructions: Once cooked, remove both quesadillas from the skillet. Use a sharp knife or pizza cutter to slice them into wedges. Arrange the wedges on a plate for a beautiful presentation. - Recommended accompaniments: Serve your loaded veggie quesadillas hot with a side of salsa and sour cream. These add a nice coolness and flavor contrast. - Presentation tips: For an eye-catching look, garnish the plate with fresh herbs like cilantro. You can also add a few extra veggies around the quesadillas for color. Enjoy this tasty and colorful meal! For the full recipe, check the details above. For crispy quesadillas, use medium heat. This helps the tortillas get golden brown. If the heat is too low, they may not crisp up. If it's too high, they can burn before the cheese melts. To ensure even cooking, flip the quesadillas gently. Use a spatula to check the bottom. When they are golden, flip them carefully. Each side should cook for about 3-4 minutes. To boost flavor, add spices and herbs. Cumin and smoked paprika add warmth to the filling. Fresh herbs like cilantro can brighten the dish. Mixing cheeses enhances the taste, too. Try adding pepper jack for a spicy kick or mozzarella for a gooey melt. The combination of Cheddar and Monterey Jack is perfect, but feel free to get creative! You can add protein to make these quesadillas heartier. Black beans or chickpeas make great options. If you want meat, grilled chicken works well too. For alternative vegetables, think outside the box! Try corn for sweetness or jalapeños for heat. Even sweet potatoes can add a nice twist. The key is to mix flavors and textures for a satisfying bite. For the full recipe, check the section above. {{image_2}} You can switch up the cheese to add new flavors. Try using mozzarella for a gooey texture or pepper jack for a spicy kick. If you prefer vegan options, use plant-based cheese. Brands like Daiya and Violife melt well and taste great. Want more protein? Add black beans or shredded chicken for a hearty meal. You can also mix in cooked quinoa for a boost. For toppings, consider fresh avocado, chopped cilantro, or a drizzle of hot sauce. These add freshness and a burst of flavor. If you're gluten-free, use corn tortillas instead of whole wheat. They hold up well and taste delicious. For a low-carb version, try using large lettuce leaves instead of tortillas. Fill them with your favorite veggies and cheese for a fun twist. To keep your loaded veggie quesadillas fresh, start by cooling them to room temperature. Then, wrap each quesadilla in plastic wrap or aluminum foil. Place them in an airtight container. This helps keep them moist and tasty. Refrigerate them if you plan to eat them within a few days. For long-term storage, you can freeze them. Wrap each quesadilla tightly in plastic wrap, then place them in a freezer bag. This way, they won’t get freezer burn. You can freeze them for up to three months. Reheating quesadillas can be simple. You can use a skillet, microwave, or oven. For the skillet method, heat it over medium heat. Place the quesadilla in the skillet for about 3-4 minutes on each side. This gives a nice crisp texture. If you use a microwave, wrap the quesadilla in a damp paper towel. Heat for 30-45 seconds, but it won’t be as crispy. For the oven, preheat to 350°F (175°C). Place the quesadilla on a baking sheet for about 10-15 minutes. This keeps them crispy on the outside. Stored quesadillas last about 3-4 days in the fridge. If frozen, they last up to three months. To know if they spoil, check for a sour smell or visible mold. If you see either, throw them away. Enjoy your quesadillas fresh for the best taste. For the full recipe, refer back to the earlier sections. I recommend using whole wheat tortillas. They add a nice texture and flavor. Flour tortillas also work well if you prefer a softer bite. Corn tortillas are great too for a gluten-free option. Yes, you can! Prepare the filling and store it in the fridge. You can assemble the quesadillas later. This saves time and allows for easy cooking. If you don't like spinach, try kale or chard. You can also use arugula for a peppery taste. Just make sure to cook it until wilted. To keep your quesadillas crispy, use less filling. Make sure to drain any excess moisture from veggies. Also, don’t cover them while cooking. This helps maintain crunchiness. Yes, they are! These quesadillas are packed with veggies and whole grains. They provide fiber, vitamins, and minerals. Plus, you can adjust the cheese amount for a lighter option. Salsa is a classic choice. You can also serve sour cream or guacamole. For a twist, try a chipotle mayo or a yogurt dip. These add flavor and richness. For the full recipe, check out the section above for step-by-step instructions and ingredient details. In this article, we explored how to make loaded veggie quesadillas. We covered ingredients, step-by-step instructions, cooking tips, and variations. The right mix of veggies, spices, and cheeses can elevate your quesadilla game. Remember to experiment with flavors and storage to enjoy them longer. Whether you serve them fresh or reheat leftovers, they remain a tasty choice. Enjoy creating your perfect quesadilla!

Loaded Veggie Quesadillas Easy and Flavorful Delight

Looking for a quick and tasty meal? Loaded Veggie Quesadillas are your answer! Packed with colorful veggies and gooey cheese,

- 1 pound large shrimp, peeled and deveined - 6 tablespoons unsalted butter - 4 cloves garlic, minced - 1/2 teaspoon red pepper flakes (adjust according to heat preference) - 1 teaspoon lemon zest - 2 tablespoons fresh lemon juice - 8 ounces linguine or spaghetti - 1/4 cup fresh parsley, chopped - Grated Parmesan cheese (optional, for serving) For this dish, I always choose large shrimp. They have a nice bite and cook quickly. Unsalted butter gives us the rich flavor we want. Garlic is key as it adds a wonderful aroma and taste. I like to add red pepper flakes for a little kick. You can adjust the amount to suit your taste. The lemon zest and juice brighten up the dish. They balance the richness of the butter. For pasta, I prefer linguine or spaghetti. Both work well and catch the sauce nicely. If you want to make it look pretty, consider garnishing with fresh parsley. A sprinkle of grated Parmesan cheese adds a nice touch, too. For the full recipe, check out the details above! First, bring a large pot of salted water to a boil. Add 8 ounces of linguine or spaghetti. Cook the pasta according to the package instructions until it is al dente. This means it should be firm to the bite. After cooking, reserve 1/2 cup of pasta water. Then, drain the pasta and set it aside. Next, grab a large skillet and place it over medium heat. Add 6 tablespoons of unsalted butter. Let it melt slowly. Once the butter is melted, add 4 cloves of minced garlic and 1/2 teaspoon of red pepper flakes. Sauté this mixture for about 1-2 minutes. You want the garlic to smell great but not turn brown. Now, increase the heat to medium-high. Add 1 pound of peeled and deveined shrimp to the skillet. Season with salt, pepper, and 1 teaspoon of lemon zest. Cook the shrimp for about 2-3 minutes. Flip them halfway through this time. They should turn pink and opaque when done. Once the shrimp are cooked, add the reserved pasta and 2 tablespoons of fresh lemon juice to the skillet. Toss everything together well. If the dish seems dry, slowly add the reserved pasta water. This will help you reach the right consistency. Finally, remove the skillet from the heat. Stir in 1/4 cup of freshly chopped parsley. Taste the dish and adjust the seasoning if needed. Your Garlic Butter Shrimp Scampi is now ready to serve! For the full recipe, check the instructions again to make sure you followed each step. To make the best Garlic Butter Shrimp Scampi, cook your pasta al dente. This means it should be firm but not hard. Follow the package instructions for timing. Next, ensure your shrimp don’t overcook. Cook them just until they turn pink and opaque. This usually takes about 2-3 minutes. When they curl into a "C" shape, they’re done! You can adjust the heat by adding red pepper flakes. Start with a small amount and taste as you go. This lets you control the spice level to your liking. Infuse extra flavors by adding fresh herbs like basil or thyme. A splash of lemon juice brightens the dish too. Use lemon zest for a stronger citrus flavor. Serve your Garlic Butter Shrimp Scampi on a warm plate. This keeps the dish hot longer. For a lovely touch, add a slice of lemon on the side. Garnish with fresh parsley and grated cheese for a pop of color. This makes your dish look fancy and inviting. For the full recipe, check out the details above! {{image_2}} You can switch shrimp for other proteins in this dish. Scallops work well and cook fast. They bring a sweet flavor that pairs perfectly with garlic. Chicken is another option. Just cut it into small pieces and cook until it’s no longer pink. For a vegetarian twist, use mushrooms or mixed vegetables. They add texture and taste, making the dish satisfying. If you want a gluten-free option, use gluten-free pasta. There are many great brands that taste just as good. You can also serve the scampi over rice. It soaks up the sauce nicely. Zucchini noodles are fun, too. They add a fresh crunch and are light. To make a creamy garlic scampi, add heavy cream. It gives the sauce a rich feel. You can also add a splash of white wine. This adds depth and a hint of acidity. For a twist, try adding diced tomatoes. They brighten the dish with a pop of color and flavor. For the full recipe, check out the details above. To store leftovers, cool your Garlic Butter Shrimp Scampi to room temperature. Place it in an airtight container. This keeps it fresh for up to three days in the fridge. When you're ready to eat, reheat gently on the stove. You can also use a microwave. Add a splash of water or broth to keep it moist. Yes, you can freeze Garlic Butter Shrimp Scampi! To do this, let it cool completely. Use airtight freezer bags or containers for best results. Remove as much air as possible before sealing. It will keep for about two months in the freezer. When you’re ready to enjoy it again, thaw overnight in the fridge. Reheat gently on the stove or in the microwave. This method ensures the shrimp remain tender. For the full recipe, check out the steps above. To keep shrimp tender, cook them for just 2-3 minutes. Make sure the heat is medium-high. You want them pink and opaque. If you cook them too long, they get tough. Use a timer to help you. This way, you can focus on all the flavors in the dish. Yes, you can use frozen shrimp. Just be sure to thaw them first. Place the shrimp in a bowl of cold water for about 20-30 minutes. This helps them thaw quickly and stay firm. Pat them dry before cooking to avoid extra water in your dish. Great sides for shrimp scampi include fresh salads and crusty bread. A simple green salad with lemon dressing works well. Garlic bread is a classic choice too. For a veggie side, try sautéed spinach or roasted asparagus. These sides add color and flavor to your meal. Garlic butter shrimp scampi has about 400-500 calories per serving. It contains healthy fats from the butter. Each serving offers around 25 grams of protein. This dish is filling and satisfying, making it a great choice for dinner. For exact values, check the Full Recipe for more details. This dish combines fresh shrimp, buttery garlic, and pasta for a tasty meal. You learned key steps, from cooking the pasta to perfecting the shrimp texture. Remember to adjust flavors with lemon and red pepper flakes. Feel free to explore variations like using chicken or making it vegetarian. Store any leftovers correctly for the best taste. With these tips, you can impress anyone with your Garlic Butter Shrimp Scampi. Dive in and enjoy this simple yet delicious recipe!

Garlic Butter Shrimp Scampi Savory and Simple Dish

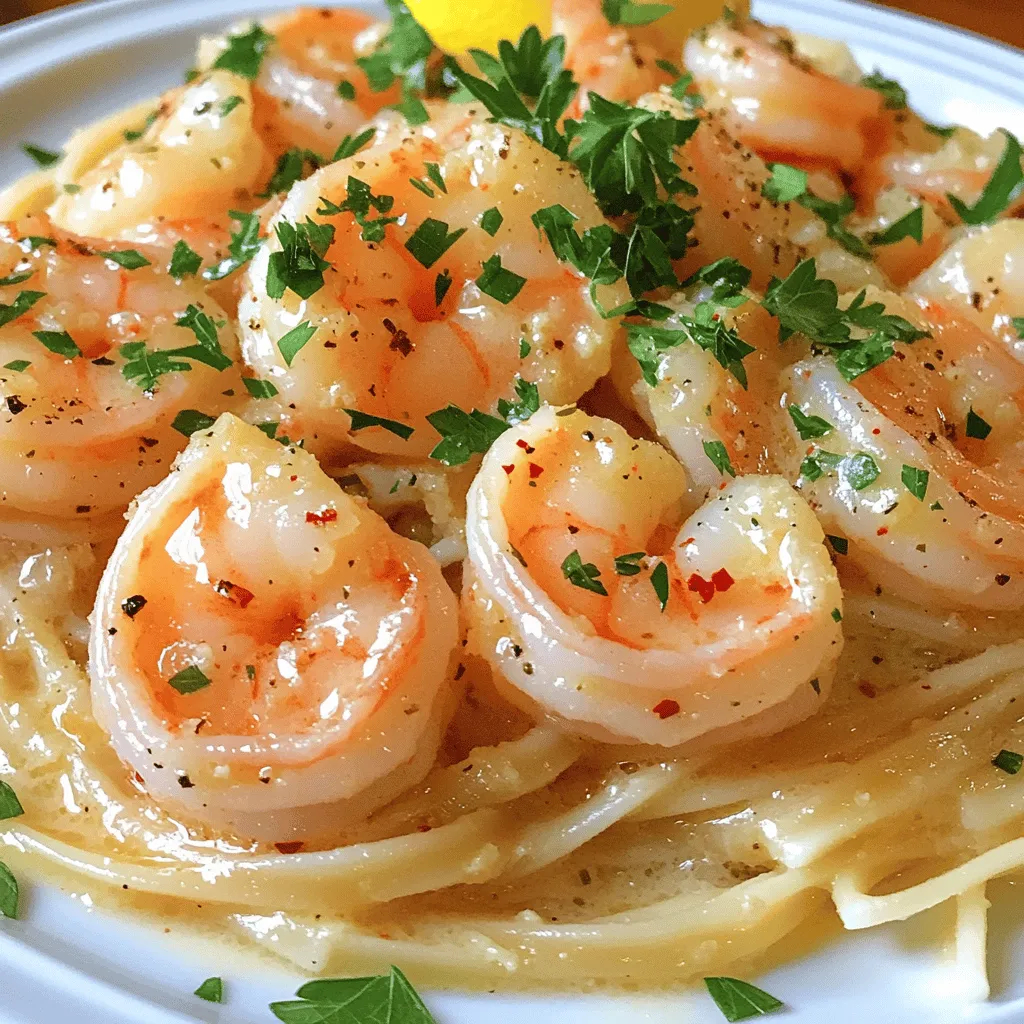
Ready to impress your taste buds with a dish that’s both savory and simple? Garlic Butter Shrimp Scampi is a

- Whole grain bread - Ripe avocado - Eggs To make this dish, you need three key items. First, use whole grain bread for a healthy base. This bread adds fiber and flavor. Next, grab a ripe avocado. A soft avocado gives the best creamy texture. Lastly, eggs are a must. They provide protein and a rich taste. - Olive oil - Feta cheese - Fresh herbs You can enhance your toast with extras. Drizzle olive oil on top for a smooth finish. Crumbled feta cheese adds a salty kick. Fresh herbs like cilantro or parsley bring brightness and color. - Salt and pepper - Red pepper flakes - Fresh lemon juice Seasoning makes your dish pop. Sprinkle salt and pepper for basic flavor. Add red pepper flakes for some heat. A squeeze of fresh lemon juice brightens the avocado and keeps it green. Don't forget to enjoy the full recipe for the best results! To start, toast the bread. Use whole grain bread for a hearty base. I like to toast it until it is golden brown and crispy. This texture holds up well against the creamy avocado. Next, choose a ripe avocado. Cut it in half and scoop out the flesh into a bowl. Mash it lightly with a fork. I like to leave some chunks for texture. Add fresh lemon juice to keep it bright. Season with salt and pepper to taste. This adds flavor and balance to the dish. Now, let’s poach the eggs. Fill a pot with 2-3 inches of water and bring it to a gentle simmer. If you want, add a splash of vinegar to help keep the egg whites together. Crack one egg into a small bowl. Gently slide it into the water. Do the same with the second egg. Cook for about 3-4 minutes for a runny yolk. If you like a firmer yolk, cook a bit longer. Use a slotted spoon to remove the eggs and let them drain on a paper towel. It’s time to assemble! Spread a generous layer of mashed avocado on each slice of toasted bread. Place a poached egg on top of the avocado. For the final touches, drizzle olive oil over everything. Sprinkle with salt, pepper, and a dash of red pepper flakes for some heat. If you like, add crumbled feta cheese and fresh herbs to make it look nice. For the full recipe, visit the detailed instructions provided. Enjoy your delicious creation right away! Choosing the best avocados Pick avocados that yield slightly when you press them. Look for dark green or black skin. These avocados are ripe and creamy. Avoid ones that feel too soft or have dark spots. Preventing browning To stop your avocado from browning, use fresh lemon juice. The acid slows down oxidation. You can also cover your avocado with plastic wrap. Press it down to eliminate air pockets. Tips for perfect poached eggs Use fresh eggs for the best results. They hold their shape better. Add a splash of vinegar to the water. This helps keep the egg whites together. Cook your eggs for three to four minutes for a runny yolk. Alternative cooking methods You can also poach eggs in the microwave. Fill a bowl with water and crack an egg into it. Cover the bowl with a plate and microwave for about a minute. This method is quick and effective! Additional toppings to try Mix in some crumbled feta for a salty kick. Fresh herbs like cilantro or parsley add a nice touch. Try sliced radishes or cherry tomatoes for extra crunch and color. Suggested serving ideas Serve your toast with a side of fresh fruit. This adds sweetness and balance. You can also pair it with a hot cup of coffee or tea for a perfect breakfast. For the full recipe, check out the detailed instructions above! {{image_2}} You can get really creative with your avocado toast. One fun idea is to add jalapeños for a spicy kick. The heat from the jalapeños pairs well with the creamy avocado. Just slice them thin and sprinkle them on top. If you love Mediterranean flavors, try adding chopped tomatoes and olives. The fresh taste of tomatoes and the saltiness of olives make a great mix. If you're vegan, you can still enjoy this dish. Skip the poached eggs and use chickpeas instead. Mash them with the avocado for a protein boost. For those who need gluten-free options, choose gluten-free bread. There are many tasty gluten-free breads made from almond or coconut flour. Think about using seasonal ingredients for your toast. In spring, add fresh radishes for a crunchy bite. In summer, you can top it with sliced peaches or heirloom tomatoes. For fall, try using roasted pumpkin seeds. During the holidays, you could make a festive version with pomegranate seeds and herbs. For more details on making the perfect avocado toast, check the [Full Recipe]. To store avocados, keep them whole if possible. If you cut one, use lemon juice on the flesh to slow browning. Place it in an airtight container. Wrap the pit in the container to help keep it fresh longer. For toasted bread, store it in a paper bag. This helps keep it crisp. Avoid plastic bags, as they can make the bread soggy. If you have leftover toast, let it cool completely before storing. To reheat toast, use a toaster or an oven. This keeps the bread crunchy. Avoid microwaving, as it makes the toast chewy. For poached eggs, gently warm them in hot water for a minute. This helps keep the yolk runny. Avoid boiling the water to keep the eggs from cooking too much. For the full recipe, check the details above and get ready to enjoy your meal! How do you poach an egg perfectly? To poach an egg perfectly, start by heating water in a pot. Bring it to a gentle simmer. Add a splash of vinegar, as this helps the egg whites stay together. Crack the egg into a small bowl first. Then, gently slide the egg into the water. Cook it for about 3 to 4 minutes if you want a runny yolk. If you like it firmer, let it cook longer. Use a slotted spoon to remove the egg when it’s done. Can you make avocado toast ahead of time? You can prep some parts ahead but not the whole toast. Toast the bread in advance and store it in a bag. You can also mash the avocado and keep it in the fridge. Just add a bit of lemon juice to slow browning. However, it's best to assemble the toast right before eating. This keeps it fresh and tasty. Why does my avocado turn brown so quickly? Avocados turn brown because of a process called oxidation. This happens when the fruit is exposed to air. To slow this down, add lemon juice to the mashed avocado. You can also store it in an airtight container. Cover the surface with plastic wrap to reduce air contact. What can I use instead of feta cheese? If you don't have feta cheese, try goat cheese or ricotta. Both will add a creamy texture. You can also skip cheese altogether for a vegan option. Nutritional yeast can add a cheesy flavor without dairy. Nutritional value of avocado toast Avocado toast is not just tasty; it’s also healthy. A typical serving provides healthy fats, fiber, and protein. Whole grain bread adds complex carbs and extra fiber. Avocados are rich in vitamins like E and K. They also contain potassium, which is good for heart health. Health benefits of ingredients used The ingredients in avocado toast offer many health benefits. Whole grain bread helps keep you full longer. Avocados can lower bad cholesterol and improve heart health. Eggs provide high-quality protein and essential nutrients. Olive oil is a good fat that supports brain health. Each bite of this toast is not just delicious; it also nourishes your body. Enjoy it as a balanced breakfast or snack! Avocado toast is simple but packed with flavor and nutrients. We explored key ingredients like ripe avocados and whole grain bread. I shared step-by-step instructions for perfecting each layer, including poaching eggs and seasoning your dish. Don’t forget the tips for storing and reheating leftovers. Incorporating seasonal ingredients or variations keeps your toast fresh and exciting. Enjoy experimenting with flavors and adjustments that suit your taste. With these tips, you can make a delicious meal that’s both nutritious and easy!

Delicious Avocado Toast with Poached Egg Recipe

If you crave a quick, tasty meal, this Delicious Avocado Toast with Poached Egg recipe is perfect for you. With

For the perfect Tomato Basil Bruschetta, you need these main ingredients: - 6 ripe Roma tomatoes, diced - 1 cup fresh basil leaves, chopped - 3 cloves garlic, minced - 1 tablespoon balsamic vinegar - 3 tablespoons extra-virgin olive oil - Salt and pepper to taste - 1 French baguette, sliced into 1/2-inch pieces These ingredients come together to create fresh, vibrant flavors. The Roma tomatoes give a sweet base. Fresh basil adds a lovely aroma. Garlic brings a nice kick, while balsamic vinegar adds deep flavor. The olive oil ties everything together. You can enhance your bruschetta with these optional ingredients: - 1/4 cup crumbled feta cheese Feta cheese adds a creamy, salty touch. It contrasts nicely with the sweet tomatoes. You can also try adding red pepper flakes for heat or a drizzle of honey for sweetness. To make this dish, gather these tools: - A large mixing bowl - A baking sheet - A sharp knife - A cutting board - A spoon for mixing Having the right tools helps make cooking easier. A sharp knife ensures you get clean cuts on your tomatoes and baguette. A baking sheet is perfect for toasting your bread. With these tools, you’ll create a beautiful Tomato Basil Bruschetta that is sure to impress. For the full recipe, check out the instructions provided. Start by gathering your ingredients. You need fresh Roma tomatoes, basil, garlic, balsamic vinegar, and olive oil. Dice the tomatoes into small pieces and place them in a large bowl. Next, chop the fresh basil leaves and add them to the bowl. Mince the garlic and mix it in too. Pour in the balsamic vinegar and two tablespoons of olive oil. Season with salt and pepper as you like. Stir gently to combine everything. Let it sit for 10-15 minutes. This helps the flavors blend well. While the tomato mixture sits, preheat your oven to 400°F (200°C). Take your French baguette and slice it into half-inch pieces. Arrange the slices on a baking sheet. Brush one side of each slice with the last tablespoon of olive oil. Make sure you cover it well. Place the baking sheet in the oven. Toast the bread for about 5-7 minutes. Look for a golden brown color. Once done, remove the sheet from the oven and let the bread cool slightly. Now it’s time to put everything together. Take the toasted baguette slices and place them on a serving platter. Spoon a generous amount of the tomato mixture onto the toasted side of each slice. If you want, sprinkle some crumbled feta cheese on top for added flavor. This step is optional but tasty! Garnish with a fresh basil leaf for a nice touch. Serve your Tomato Basil Bruschetta right away. Enjoy the burst of flavors in every bite! For the full recipe, check out the Heavenly Tomato Basil Bruschetta section above. To make the best tomato basil bruschetta, use fresh ingredients. Ripe Roma tomatoes work best. They are sweet and juicy. Look for tomatoes that feel heavy and have no blemishes. Fresh basil leaves add vibrant flavor. Choose bright green leaves with no brown spots. For garlic, use fresh cloves. They will give a stronger taste than pre-minced garlic. Lastly, use high-quality extra-virgin olive oil. It adds depth and richness to your dish. One common mistake is not letting the tomato mixture sit. Allowing the mixture to rest for 10-15 minutes helps the flavors blend. Avoid using stale bread; it will not toast well. Make sure to toast the bread until golden brown. This gives it a crispy texture. Don’t skip the balsamic vinegar; it adds a nice tang. Lastly, avoid over-seasoning. Start with a pinch of salt and pepper, and adjust to taste. You can add fun toppings to your bruschetta. Crumbled feta cheese gives a nice salty kick. You can also try goat cheese or fresh mozzarella. For a spicy twist, add sliced jalapeños or a drizzle of hot sauce. Fresh arugula or spinach can add a peppery flavor. Finally, a sprinkle of toasted pine nuts adds a nice crunch. These toppings can take your bruschetta from simple to gourmet. For the full recipe, look back at the section above. {{image_2}} You can use many types of bread for bruschetta. I love using a French baguette for its crispiness. A ciabatta loaf works well too. You can even try sourdough for a tangy twist. If you want a gluten-free option, use gluten-free bread. Just make sure to toast it well. The right bread makes a big difference in texture and flavor. Tomato basil bruschetta is so flexible. You can add toppings to change the flavor. Consider adding sliced olives for a briny taste. You can also use roasted red peppers for sweetness. If you like heat, try adding jalapeños or crushed red pepper flakes. For creaminess, sprinkle some crumbled feta cheese on top. These add-ins make your bruschetta even more exciting. Make your bruschetta seasonal for fresh flavors. In summer, use heirloom tomatoes for sweetness. In fall, add some roasted butternut squash for warmth. In winter, try using sun-dried tomatoes for a rich taste. In spring, mix in some fresh peas or asparagus. Changing the toppings helps you celebrate each season's produce. Each variation offers a new taste adventure. To keep your bruschetta fresh, store it in an airtight container. Place the tomato mixture and toasted bread in separate containers. This prevents soggy bread. You can keep them in the fridge for up to two days. When ready to eat, prepare to add the tomato mix to the bread. When reheating, I suggest using the oven. Preheat it to 350°F (175°C). Place the bruschetta on a baking sheet and warm for about 5-7 minutes. This keeps the bread crisp while warming the toppings. Avoid the microwave, as it can make the bread chewy. You can freeze the tomato mixture for later use. Just place it in a freezer-safe bag or container. It will stay good for about three months. When you’re ready to enjoy, thaw it in the fridge overnight. Toast fresh bread for the best taste. Do not freeze the assembled bruschetta, as it will lose its texture. For the best flavor, always make the bread fresh. For a complete guide, check the Full Recipe. Bruschetta comes from Italy. It started as a peasant food. People used stale bread and topped it with fresh ingredients. The classic topping is simply garlic, olive oil, and salt. Over time, recipes grew. Now, we enjoy many toppings, like Tomato Basil Bruschetta. You can prepare the tomato mixture ahead of time. Mix the tomatoes, basil, garlic, and vinegar. Store it in the fridge for up to 4 hours. The flavors will blend well. However, do not toast the bread early. Toast it right before serving for the best crunch. Bruschetta pairs well with many dishes. Serve it as a starter or snack. It goes great with soups and salads. You can also enjoy it with grilled meats or fish. For drinks, try serving wine or sparkling water. Check out the Full Recipe for more ideas! Tomato Basil Bruschetta is simple, fresh, and enjoyable. We explored the key ingredients, tools, and steps to make it. I shared tips to pick the best tomatoes and avoid common errors. Variations let you be creative with bread and toppings. For leftovers, I explained the best storage methods. Making this dish can impress anyone. Enjoy every bite of your tasty creation, and don’t hesitate to try new flavors!

Tomato Basil Bruschetta Flavorful and Simple Recipe

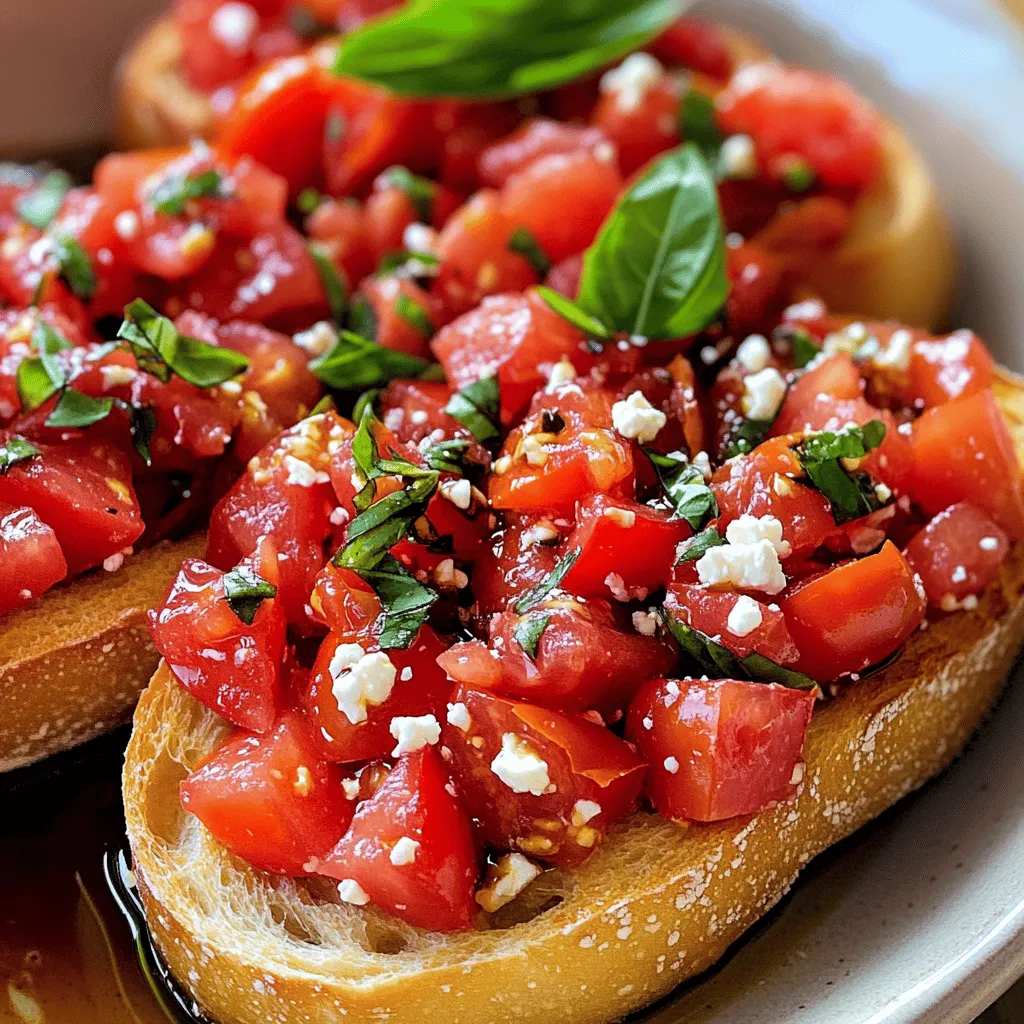
If you’re craving a fresh and tasty snack, Tomato Basil Bruschetta is perfect for you! This easy recipe blends juicy

For a classic carrot cake, you need simple and fresh ingredients. Here’s what you’ll need: - 2 cups all-purpose flour - 2 cups granulated sugar - 1 teaspoon baking powder - 1 teaspoon baking soda - 1 teaspoon ground cinnamon - ½ teaspoon ground nutmeg - ½ teaspoon salt - 1 cup vegetable oil - 4 large eggs - 2 cups finely grated carrots (about 4 medium carrots) - 1 cup crushed pineapple, drained - 1 cup chopped walnuts (optional) - 1 teaspoon vanilla extract All-purpose flour and sugar form the base. They give the cake its structure and sweetness. Spices for flavor like cinnamon and nutmeg add warmth and depth. These spices make your cake smell amazing. Wet ingredients and mix-ins are key to moist cake. The vegetable oil keeps it tender, while the eggs help it rise. Grated carrots add sweetness and texture. Crushed pineapple gives extra moisture and a hint of tang. You can add walnuts for crunch, or leave them out if you prefer. For the full recipe, check the [Full Recipe]. First, you need to preheat your oven to 350°F (175°C). This step is key. A hot oven helps the cake rise and bake evenly. While the oven heats, grease and flour two 9-inch round cake pans. This prevents the cake from sticking. Use a cooking spray or butter to coat the pans well. Flour them lightly to make sure the cake releases easily. Using the right pans is important. Round pans help the cake bake evenly. If you use a different shape, adjust the baking time. Next, let’s mix the dry ingredients. In a large bowl, combine 2 cups of all-purpose flour, 2 cups of granulated sugar, 1 teaspoon of baking powder, 1 teaspoon of baking soda, 1 teaspoon of ground cinnamon, ½ teaspoon of ground nutmeg, and ½ teaspoon of salt. Whisk these together. This helps blend the flavors and ensures even baking. To avoid lumps, sift the flour and sugar before mixing. This simple step makes a big difference in the final texture of the cake. Now, let’s move to the wet ingredients. In another bowl, whisk together 1 cup of vegetable oil and 4 large eggs. Mix until smooth. Then, add 2 cups of finely grated carrots, 1 cup of crushed pineapple (make sure it’s drained), and 1 teaspoon of vanilla extract. If you want, you can add 1 cup of chopped walnuts for crunch. Mix these ingredients well. This mixture adds moisture and flavor to your cake. It’s time to bake! Gradually add the wet mixture to the dry ingredients. Gently fold them together until just combined. Be careful not to overmix. This can make your cake tough. Divide the batter evenly between the two prepared pans. Bake in the preheated oven for 25-30 minutes. To check if it's done, insert a toothpick into the center. If it comes out clean, the cake is ready. Once baked, remove the cakes and let them cool in the pans for 10 minutes. After that, transfer them to a wire rack to cool completely. For the full recipe, check out the complete instructions above. To get a great texture in your carrot cake, avoid overmixing. When you mix the wet and dry ingredients, do it gently. You want to combine them just until you see no dry flour. Overmixing can lead to a tough cake. Measuring ingredients accurately is key. Use a kitchen scale if you have one. If not, spoon flour into your measuring cup and level it off. Too much flour can make your cake dry. For that classic taste, cream cheese frosting is a must. Softened cream cheese works best. Mix it with unsalted butter, powdered sugar, and vanilla. Beat until it’s smooth and creamy. This frosting really adds to the flavor. If you want to try something else, consider a simple buttercream. Just mix butter, sugar, and a splash of milk. You can add lemon juice or zest for a fresh twist. How you present your carrot cake can make a big difference. You could sprinkle chopped walnuts on top for a nice crunch. Thin slices of carrot can add color and charm. For serving, slice the cake into even pieces. Use a sharp knife dipped in warm water for clean cuts. Serve it on a pretty cake stand to impress your guests. Enjoy your delicious creation! For a complete guide, check out the Full Recipe. {{image_2}} If you want to make this carrot cake fit your diet, it's easy to adjust! - Gluten-free alternatives: Swap all-purpose flour for a gluten-free blend. Look for one that works for baking. This will keep your cake light and fluffy. - Vegan substitutions: Replace the eggs with flaxseed meal or applesauce. Use plant-based oil and dairy-free cream cheese for frosting. Your cake will still taste amazing! Changing flavors can make your carrot cake special! - Adding fruits or nuts: You can mix in raisins, coconut, or apples for more flavor. Chopped pecans or almonds can add a nice crunch too. - Spice adjustments for different tastes: If you love spice, add more cinnamon or try ginger. You can even add cardamom for a unique twist. Adjust based on what you enjoy! You can change the style of your cake too! - Making a layered cake: Divide the batter into three pans instead of two. Stack the layers with cream cheese frosting in between. This will add height and wow your guests! - Converting the recipe into cupcakes: Use a muffin tin instead of cake pans. Fill each cup about two-thirds full. Bake for 18-20 minutes. You’ll have cute, easy-to-serve carrot cake cupcakes! For more details, check the Full Recipe to enjoy this classic treat! You can store your carrot cake at room temperature or in the fridge. If you plan to eat it within a few days, keep it at room temperature. Use a cake dome or wrap it in plastic wrap. This helps keep it moist. If you want it to last longer, refrigerate it. The fridge slows down spoilage, but it may dry out the cake. To keep it fresh in the fridge, cover it well. Freezing carrot cake is a great way to save leftovers. First, let the cake cool completely. Then, wrap each piece in plastic wrap. This layer helps prevent freezer burn. After wrapping, place the cake in a freezer bag or airtight container. Label it with the date. To thaw the cake, take it out of the freezer. Leave it in the fridge overnight. This slow thaw helps keep the cake moist. If you're in a hurry, you can thaw it at room temperature for a few hours instead. For the best taste, use frozen cake within three months. You can find the full recipe for carrot cake above. To make your carrot cake more moist, add extra oil or crushed pineapple. Both ingredients bring moisture and flavor. You can also use grated apples or yogurt. These ingredients help keep the cake soft and tender. Avoid overbaking, as that can dry out your cake. Check for doneness with a toothpick. If it comes out clean but the cake feels dry, it may have baked too long. Yes, you can swap walnuts for other nuts, like pecans or almonds. Both options add a nice crunch and flavor. If you want to skip nuts entirely, that's fine too! The cake will still taste great without them. Just make sure to keep the texture in mind. You could add raisins or shredded coconut for added depth. Frosting a layered carrot cake is simple. Start with a smooth, even base. Place one layer on a cake stand. Spread a layer of frosting on top. Then, add the second layer and frost the top and sides. Use a spatula for a smooth finish. You can create a pattern or texture for a beautiful look. For extra touch, sprinkle some chopped nuts on top. To modify the recipe for allergies, consider these swaps: use gluten-free flour for those with gluten issues. For egg allergies, try a flaxseed or chia seed mixture. Combine one tablespoon of seeds with three tablespoons of water to replace one egg. For dairy allergies, use a dairy-free cream cheese for frosting. Always check labels to ensure all ingredients are safe for your needs. For the full recipe, refer to the earlier section. You learned the key ingredients and steps for making classic carrot cake. I shared tips for texture, frosting, and creative serving ideas. Dietary adjustments and flavor variations make this cake even more exciting. Remember to store your cake properly and know how to freeze it. Now, you can enjoy a delicious carrot cake that suits your taste. With these skills, you’ll impress family and friends at your next gathering. Happy baking!

Classic Carrot Cake Simple and Delicious Recipe

Are you ready to bake a delicious classic carrot cake? This simple recipe combines the richness of spices and the

- 4 boneless, skinless chicken breasts - 1 tablespoon olive oil - 4 cloves garlic, minced - 1 teaspoon dried thyme - 1 teaspoon dried oregano - 1 teaspoon dried rosemary - 1 teaspoon paprika - Salt and pepper to taste - 1 lemon, sliced - 1 cup cherry tomatoes, halved - 2 cups fresh spinach The ingredients for One-Pan Garlic Herb Chicken are simple and fresh. You start with chicken breasts, which are the star of the dish. I like using boneless and skinless chicken for ease. The olive oil adds flavor and helps the chicken brown nicely. Garlic is a must in this recipe. The minced garlic brings a strong taste that pairs well with the chicken. Herbs and spices are key to achieving that delightful flavor. Dried thyme, oregano, rosemary, and paprika each add their unique touch. Don’t forget the salt and pepper to season things just right. Fresh ingredients brighten this dish. The lemon slices add a zesty note, while cherry tomatoes provide sweetness. Fresh spinach adds color and nutrition. These ingredients work together to create a colorful and tasty meal. You can find the full recipe to guide you through making this dish. - Preheat your oven to 400°F (200°C). - Heat a large oven-safe skillet over medium-high heat and add the olive oil. You want to get your oven nice and hot before starting. Preheating helps cook the chicken evenly. The skillet should be hot too. This makes sure the chicken gets a nice brown crust. - Season and sear chicken breasts for about 4-5 minutes per side. - Add minced garlic and sauté carefully. Next, season your chicken with salt, pepper, and spices. Once the skillet is hot, place the chicken in it. Sear each side for about 4-5 minutes. You want it golden brown. After that, add the minced garlic. Stir it for one minute. Be careful not to burn it; burnt garlic can taste bitter. - Place lemon slices, tomatoes, and spinach in the skillet. - Transfer skillet to the oven and bake for 15-20 minutes. Now, it’s time to add the lemon slices, tomatoes, and fresh spinach around the chicken. These not only add flavor but also color. Then, transfer the skillet to the oven. Bake it for 15-20 minutes. You want the chicken to reach 165°F (75°C). This ensures it is safe to eat and juicy. For the full recipe, check the earlier section. To make sure your chicken is juicy, check for an internal temperature of 165°F (75°C). This means the chicken is safe to eat and perfectly cooked. After cooking, let the chicken rest for a few minutes. Resting helps the juices settle, enhancing the flavor. To boost the taste, marinate your chicken for at least an hour. This allows the flavors to soak in deeply. You can also play with different herbs. Try basil, parsley, or even a spice mix to suit your taste. For a beautiful serving, place the chicken on a nice platter. Add garnished lemon slices and fresh herbs on top. Arrange spinach and tomatoes around the chicken. This makes the dish look colorful and appealing. For the full recipe, you can refer to the earlier sections. {{image_2}} You can easily change the protein in this dish. Substitute chicken with turkey for a leaner option. Pork works well too and adds a different flavor. If you prefer a vegetarian option, use tofu. Just press it to remove excess moisture. Then, season and cook it just as you would the chicken. You can add different vegetables for more flavor and nutrition. Bell peppers, zucchini, and asparagus all work great. Feel free to switch out the vegetables based on the season. Fresh vegetables not only taste better but also add color to your plate. This dish pairs well with many sides. Serve it with rice or quinoa for a hearty meal. A fresh salad adds a nice crunch. Crusty bread is perfect to soak up the tasty juices. Enjoy your meal with these simple sides to enhance the flavor of your One-Pan Garlic Herb Chicken. For the full recipe, check out the previous section. After you enjoy your One-Pan Garlic Herb Chicken, store any leftovers. Use an airtight container to keep the chicken fresh. You can keep it in the fridge for up to 3 days. This way, you can enjoy the flavors again! When reheating, you have two great options. Reheat in the oven to keep the chicken's nice texture. This method works best if you want a crispy edge. If you're in a hurry, use the microwave for quick heating. Just make sure to check the chicken is hot all the way through. If you want to save some for later, freezing is a smart choice. You can freeze the chicken for up to 3 months. Be sure to seal it well in a freezer-safe bag or container. This helps prevent freezer burn and keeps your dish tasty when you're ready to eat it again. Yes, but adjust cooking time for skin and bone. Skin-on chicken can add rich flavor. However, you need to cook it longer. Use a meat thermometer to check the internal temperature. You can use avocado oil or butter as alternatives. Both options work well in this dish. Avocado oil has a high smoke point, making it great for searing. Butter adds a rich taste but may brown faster. Use a meat thermometer to ensure it reaches 165°F (75°C). This is the safe temperature for chicken. Insert the thermometer into the thickest part of the chicken. If it reads 165°F, your chicken is ready! Yes, prep the ingredients and store them in the fridge before cooking. You can marinate the chicken for extra flavor. Just keep everything in separate containers. When you’re ready, cook it as per the Full Recipe. This blog post shared a simple and tasty one-pan garlic herb chicken recipe. You learned about key ingredients like chicken, garlic, and fresh herbs. I provided step-by-step instructions for cooking, along with tips for tender chicken and flavor boosts. You can even switch up proteins and veggies for variety. Finally, I covered storage and reheating to keep your meal fresh. Enjoy your flavorful meal and have fun experimenting with different tastes!

One-Pan Garlic Herb Chicken Simple and Flavorful Meal

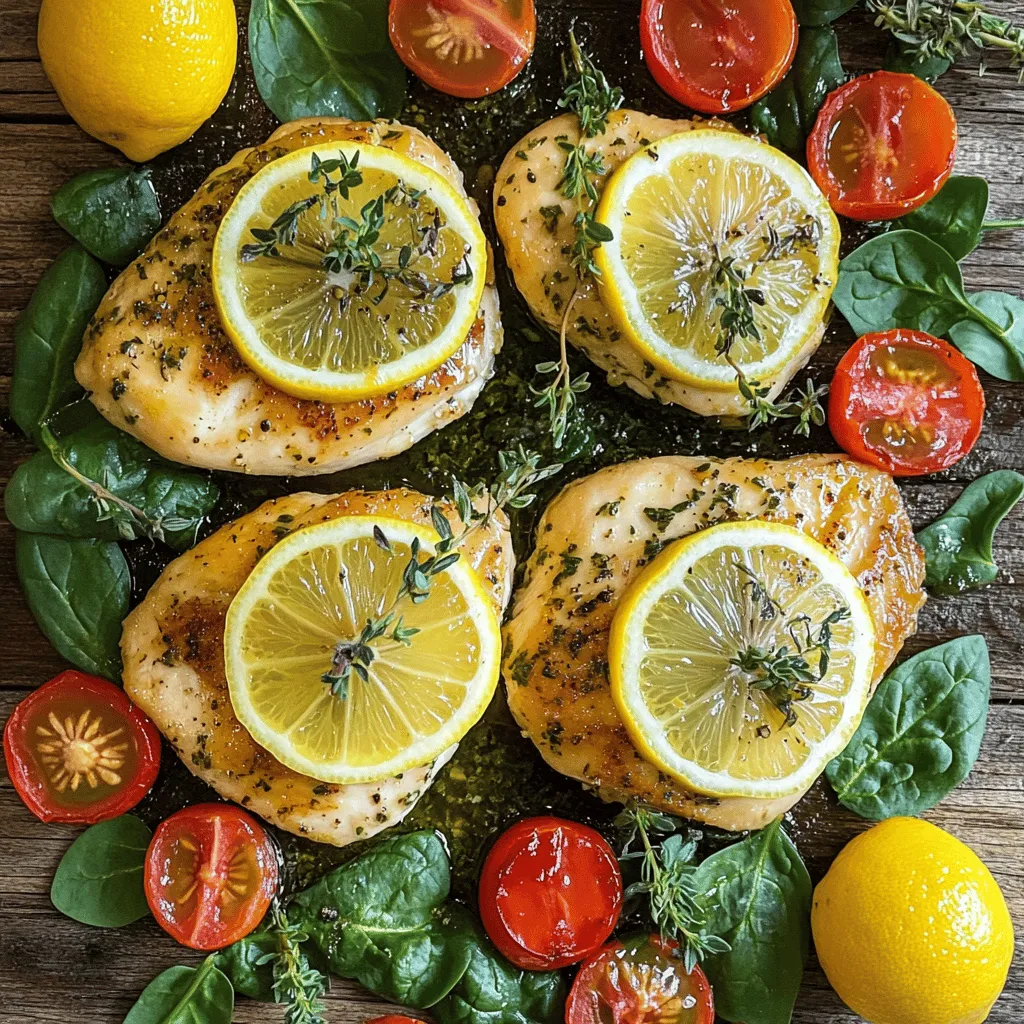
Are you looking for a quick and tasty meal? One-Pan Garlic Herb Chicken is your answer. This dish packs bold

- 4 large bell peppers (any color) - 1 cup cooked quinoa (or rice) - 1 cup black beans, rinsed and drained - 1 teaspoon cumin - 1 teaspoon paprika - 1 teaspoon garlic powder - 1 cup shredded cheese (cheddar or mozzarella) - Fresh cilantro for garnish (optional) To make cheesy stuffed bell peppers, we start with fresh ingredients. I love using large bell peppers. They come in many colors, so pick your favorite. Each pepper needs to be hollowed out. This creates a perfect pocket for the tasty filling. Next, I usually use cooked quinoa or rice. Both add a nice texture. The black beans bring protein to the dish. They also add great flavor. Rinse and drain the beans before mixing them in. This keeps the dish light and fresh. Seasonings are key. I always add cumin, paprika, and garlic powder. These spices boost the flavor. They make the filling aromatic and savory. Finally, I top it all with shredded cheese. Cheddar or mozzarella works best. They melt well and create a cheesy crust. If you want, sprinkle fresh cilantro on top for a bright finish. This recipe is simple and fun to make. You can find the full recipe to guide you in the kitchen. Enjoy the process! - Preheat the oven to 375°F (190°C). - Slice the tops off the bell peppers and remove the seeds. First, set your oven to 375°F (190°C). This step warms the oven for even cooking. Next, take your bell peppers and cut off the tops. Make sure to remove all the seeds and membranes. This will give you a nice space to fill with the tasty mixture. Lightly brush the outside with olive oil to enhance flavor and help them brown nicely. - Sauté onions and add remaining ingredients. - Season to taste and mix. In a large skillet, heat some olive oil over medium heat. Add the chopped onion and cook for about 3-4 minutes until they become soft and clear. Now, mix in the cooked quinoa, black beans, corn, and diced tomatoes. Add the spices: cumin, paprika, and garlic powder. Stir it all together and cook for another 3-5 minutes. This helps the flavors blend. Don’t forget to season it with salt and pepper to suit your taste! - Fill the peppers with the mixture. - Cover with foil and bake. Now it’s time to fill the peppers. Carefully spoon the filling into each pepper, pressing it down gently. This will help fit all that yummy goodness inside. Sprinkle the remaining shredded cheese on top of each pepper. Cover your baking dish with foil and place it in the oven. Bake for 25 minutes. After that, take off the foil and bake for another 10 minutes. You want the cheese to be bubbly and golden. Enjoy your cheesy stuffed bell peppers! For more delicious details, check out the Full Recipe. To create a tasty filling, use a mix of grains and beans. This adds nice texture and flavor. I suggest using one cup of cooked quinoa or rice. Quinoa gives a nutty taste, while rice is soft and fluffy. You can also combine both for a unique touch! Cooking times will change based on the pepper size. For large peppers, bake them for about 35 minutes. Smaller peppers may need only 25 minutes. If you want to speed up cooking, you can steam them before baking. This helps them soften well. Different cheeses melt differently. Cheddar melts beautifully and gets that great golden color. Mozzarella also melts well but stays gooey. To get a bubbly cheese top, bake uncovered for the last 10 minutes. This gives you that perfect crispy crust. For the full recipe, check out the details above and enjoy making your cheesy stuffed bell peppers! {{image_2}} You can make your stuffed peppers vegetarian by switching grains or legumes. Try using farro, bulgur, or lentils. These options add great texture and flavor. You can also add more vegetables. Chopped spinach, zucchini, or mushrooms work well. They not only boost nutrition but also make your dish colorful and tasty. For a heartier meal, add ground meat. You can use beef, chicken, or turkey. Just brown it in the skillet before mixing with the other ingredients. If you have leftover proteins, use them too. Shredded rotisserie chicken or cooked sausage can add great flavor. It’s a smart way to avoid waste and create a quick meal. Spices can take your dish to the next level. Mix in chili powder, oregano, or even a dash of hot sauce for a kick. You can also play with different cheese combinations. Mozzarella, feta, or pepper jack each bring unique tastes. Experiment with these to find your favorite mix. For more detailed instructions on making these delicious variations, check out the Full Recipe. To keep your cheesy stuffed bell peppers fresh, place them in the fridge. Use an airtight container to prevent moisture loss. You can store them for up to three days. If you have more than you can eat, consider freezing them for later. You can reheat your stuffed peppers in two ways: the oven or the microwave. - Oven Method: Preheat the oven to 350°F (175°C). Place the peppers in a baking dish and cover them with foil. Heat for about 15-20 minutes or until warm. - Microwave Method: Place one pepper on a microwave-safe plate. Cover it with a damp paper towel. Heat for 1-2 minutes or until it is hot. Both methods work well, but the oven gives a better texture. If you want to freeze the peppers, let them cool completely first. Wrap each pepper tightly in plastic wrap, then place them in a freezer bag. They can last up to three months in the freezer. To thaw, take them out of the freezer and place them in the fridge overnight. You can then reheat them using one of the methods above. Enjoy your cheesy stuffed bell peppers anytime! For the full recipe, check the [Full Recipe]. Yes, you can make these stuffed peppers ahead. To do this, prepare the filling and stuff the peppers. You can store them in the fridge for up to two days. Just wrap them tightly in plastic wrap or foil. When ready to bake, take them out, and let them sit at room temperature for about 30 minutes. This helps them cook evenly. You can also freeze the uncooked stuffed peppers for up to three months. Just remember to thaw them overnight in the fridge before baking. If you want an alternative to quinoa, rice is a great choice. Cooked brown rice adds a nice nutty flavor. You can also use couscous or farro. Just make sure to follow the cooking times on the package. For couscous, it usually cooks in about five minutes. Farro takes about 30 minutes. Each grain gives a different taste and texture, so pick what you like best! To add some heat, you can include diced jalapeños in your filling. They give a nice kick. Another option is to sprinkle red pepper flakes into the mix. If you want a sauce on top, try a spicy salsa or hot sauce. You can even use pepper jack cheese instead of regular cheese. This will spice things up and still keep it cheesy. Cheesy stuffed bell peppers blend tasty ingredients and fun steps. Start with fresh peppers and a hearty filling, as shown in the blog. Remember, you can personalize them with your favorite flavors. I love how easy it is to make these meals ahead and store them. Whether you add meat or go vegetarian, these peppers are a great choice. Enjoy making them your own. Your taste buds will thank you!

Cheesy Stuffed Bell Peppers Tasty and Easy Recipe

Looking for a delicious and easy meal? Cheesy stuffed bell peppers are a perfect choice! With vibrant colors and hearty

- 1.5 lbs boneless, skinless chicken breasts - 3 tablespoons olive oil - Zest and juice of 1 large lemon - 2 teaspoons dried oregano - 2 teaspoons garlic powder - 1 teaspoon onion powder - 1 teaspoon paprika - Salt and pepper, to taste For these easy Greek chicken skewers, you want the best chicken. I use boneless, skinless chicken breasts. They stay juicy and cook quickly. The olive oil adds richness, while lemon gives a bright flavor. Dried oregano and garlic powder pack a punch. Onion powder and paprika add depth. Don't forget the salt and pepper to bring it all together. - 1 red bell pepper, cut into 1-inch pieces - 1 green bell pepper, cut into 1-inch pieces - 1 red onion, cut into wedges Adding vegetables makes these skewers even better. I like using red and green bell peppers for color. They add sweetness and crunch. The red onion gives a nice bite. Make sure to cut them into pieces that match the chicken size for even cooking. - Fresh parsley, chopped, for garnish A sprinkle of fresh parsley brings everything to life. It adds color and freshness. You can use it just before serving. It makes your dish look nice and adds a pop of flavor. For the full recipe, check out the details. To start, you need to make the marinade. In a big bowl, mix together: - 3 tablespoons olive oil - Zest and juice of 1 large lemon - 2 teaspoons dried oregano - 2 teaspoons garlic powder - 1 teaspoon onion powder - 1 teaspoon paprika - Salt and pepper to taste Whisk this together until smooth. Next, add the chicken cubes. Toss them well to coat. Cover the bowl with plastic wrap. Let the chicken marinate in the fridge for at least 30 minutes. For more flavor, you can let it sit for up to 2 hours. While the chicken marinates, you need to prepare your skewers. If you are using wooden skewers, soak them in water for 30 minutes. This prevents them from burning on the grill. If you use metal skewers, you can skip this step. Once the chicken is ready, it's time to thread the skewers. Alternate chicken cubes with red and green bell pepper pieces and red onion wedges. This will add color and flavor to your skewers. Next, preheat your grill to medium-high heat. This step is important for even cooking. After that, place the skewers on the grill. Cook them for about 10 to 12 minutes. Turn them occasionally to ensure they cook evenly. The chicken should reach an internal temperature of 165°F (75°C). Once cooked, remove the skewers from the grill. Let them rest for a couple of minutes before serving. This helps keep the juices inside. Enjoy your Easy Greek Chicken Skewers from the Full Recipe! For the best taste, marinate the chicken for at least 30 minutes. You can go up to 2 hours for even more flavor. To boost the marinade, try adding fresh herbs or a splash of red wine vinegar. A bit of honey can also add a nice touch of sweetness. To avoid burnt skewers, soak wooden ones in water for 30 minutes before grilling. This keeps them from catching fire. For perfect grill marks, make sure your grill is hot. Place the skewers at an angle and don’t move them for a minute. Flip them once to get nice lines. Serve these skewers on a large platter. Drizzle some olive oil on top for shine. Add a sprinkle of fresh herbs for color. Pair with tzatziki sauce and warm pita bread for a tasty combo. You can also add a fresh Greek salad on the side to complete your meal. {{image_2}} You can change the protein in this recipe for more options. If you don't want chicken, try pork or shrimp. Both cook fast and soak up the marinade well. For a vegetarian twist, use firm tofu or seitan. These options taste great and are full of protein. Just make sure to marinate these like chicken for the best flavor. Adding different herbs can change the taste a lot. Try fresh basil, dill, or rosemary for new flavors. You can also swap spices. If you want heat, add cayenne pepper or chili powder. This will make the dish more exciting. Experiment with different herbs and spices to find your favorite mix. You can serve the skewers in different ways. Skewers are fun and easy to eat. However, you can also make salad bowls with the cooked ingredients. Just toss the chicken and veggies with greens. For a tasty touch, use tzatziki sauce. You can change tzatziki by adding mint or even avocado. This adds a new flavor and keeps it fresh. Explore these options to find what you love! To keep your Easy Greek Chicken Skewers fresh, store leftovers in an airtight container. This helps lock in moisture and flavor. You can refrigerate them for up to three days. If you want them to last longer, consider freezing. When you’re ready to enjoy your skewers again, reheating is key. I recommend using an oven or a grill. Preheat your oven to 350°F (175°C) and bake for about 10 minutes. If using a grill, heat it to low and warm the skewers for about 5 minutes. This keeps the chicken juicy and tasty. Avoid the microwave, as it can dry out the chicken. To freeze your skewers, allow them to cool completely first. Then, wrap each skewer in plastic wrap and place them in a freezer-safe bag. Make sure to remove as much air as possible. You can freeze them for up to three months. When ready to eat, take them out and thaw in the fridge overnight for the best results. This helps maintain the flavor and texture. You should marinate the chicken for at least 30 minutes. For more flavor, let it sit for up to 2 hours. This gives the chicken time to soak up all the tasty goodness from the marinade. If you want the best flavor, I recommend the full 2-hour wait. Yes, you can use store-bought marinade if you're short on time. Just pick a lemon or herb-based one. However, making your own is easy and lets you control the flavors. You can adjust it to your taste, which is always a plus. The best way to check is to use a meat thermometer. The chicken should reach an internal temperature of 165°F (75°C). If you don’t have a thermometer, cut into a piece. The meat should be white, not pink. Absolutely! If you don’t have a grill, you can bake them. Preheat your oven to 400°F (200°C) and place the skewers on a baking sheet. Cook for about 15-20 minutes, turning halfway through. This method will still give you tasty skewers. For the full recipe, check the details above! This blog post covered how to create delicious grilled chicken skewers. You learned about key ingredients like chicken, fresh veggies, and herbs. I shared step-by-step instructions for marinating, prepping, and grilling. Tips helped you boost flavors and avoid common mistakes. In the end, don't shy away from experimenting with proteins and spices. Enjoy your skewers with friends and family for a perfect meal!

Easy Greek Chicken Skewers Flavorful and Simple Recipe

Looking for a simple and tasty meal? Try my Easy Greek Chicken Skewers! They burst with flavor and come together

- 8 oz fettuccine or linguine pasta - 1 lb large shrimp, peeled and deveined - 2 tablespoons Cajun seasoning - 2 tablespoons olive oil - 3 cloves garlic, minced - 1 cup cherry tomatoes, halved - 1 red bell pepper, sliced - 1 cup heavy cream - 1/2 cup grated Parmesan cheese - Salt and pepper to taste - Fresh parsley, chopped for garnish - Lemon wedges for serving The key flavors in this dish come from the Cajun seasoning and heavy cream. Cajun seasoning gives the shrimp a spicy kick. It often contains paprika, cayenne, garlic powder, and herbs like thyme. This mix adds warmth and depth to the dish. Heavy cream brings richness and smoothness. It balances the spice and makes the sauce creamy and delicious. If you want a different pasta, try gluten-free options like brown rice pasta. It has a similar texture and works well. For a lighter dish, use zucchini noodles or spaghetti squash. For dietary needs, you can make this dish vegan. Swap shrimp with firm tofu or chickpeas. Use coconut milk instead of heavy cream for a creamy texture. You can also skip the cheese or use a plant-based version. Adjust the Cajun seasoning to your spice level. Enjoy customizing this dish to fit your taste! {{ingredient_image_1}} To start, fill a large pot with water and add salt. Bring it to a boil. Once it bubbles, add 8 oz of fettuccine or linguine pasta. Cook it according to the package directions. You want the pasta to be al dente, which means it should be firm to the bite. This usually takes about 8-10 minutes. After cooking, drain the pasta in a colander. Make sure to set it aside for later. Next, take 1 lb of large shrimp that are peeled and deveined. Place them in a mixing bowl. Add 2 tablespoons of Cajun seasoning to the shrimp. Toss them well until every shrimp is coated with the seasoning. This step adds a lot of flavor. Now, heat 2 tablespoons of olive oil in a large skillet over medium-high heat. Once the oil is hot, add the seasoned shrimp. Cook them for about 2-3 minutes on each side. Look for the shrimp to turn pink and opaque. Once done, remove the shrimp from the skillet and set them aside. In the same skillet, add 3 cloves of minced garlic, 1 sliced red bell pepper, and 1 cup of halved cherry tomatoes. Sauté these for about 5 minutes until they are tender. Then, lower the heat to medium-low. Pour in 1 cup of heavy cream and bring it to a gentle simmer. Stir in 1/2 cup of grated Parmesan cheese. Keep stirring until it melts and the sauce thickens slightly, which should take about 2-3 minutes. Finally, add the cooked pasta and shrimp back to the skillet. Toss everything gently to coat the pasta and shrimp in the creamy sauce. Season with salt and pepper to taste. When plating, add the pasta and shrimp to a dish. Garnish with chopped fresh parsley. Serve it with lemon wedges on the side for some extra zest. Enjoy this delightful meal! To cook shrimp just right, start with fresh or thawed shrimp. They should be pink and firm. Use a large skillet for even cooking. Heat olive oil over medium-high heat. When the oil shimmers, it’s ready for the shrimp. Cook for 2-3 minutes on each side. You know they are done when they turn opaque. Avoid overcooking; this can make them tough. Remove them from the skillet right away to keep them tender. To amp up the flavor, add more spices or herbs. You can try cayenne pepper for more heat. Fresh basil or oregano can add a nice touch, too. A squeeze of lemon juice brightens the dish. For a smoky flavor, consider adding a bit of smoked paprika. Mixing in some crushed red pepper can also give it a nice kick. Experiment to find your perfect blend! Pair your Spicy Cajun Shrimp Pasta with a simple side salad. A fresh green salad with a light vinaigrette works well. Garlic bread is another favorite to soak up the tasty sauce. You can also serve it with lemon wedges for extra zest. For a touch of color, sprinkle some chopped parsley on top. These sides will complement the pasta and enhance your meal. Pro Tips Perfectly Cooked Pasta: Always cook your pasta al dente to ensure it retains a firm texture and doesn't become mushy when mixed with the sauce. Customize Cajun Spice: Adjust the amount of Cajun seasoning to your heat preference. Start with less if you're unsure, and add more for extra kick. Fresh Ingredients: Use fresh shrimp and seasonal vegetables for the best flavor. Frozen shrimp can be used but make sure to thaw them properly. Garnish for Flavor: Fresh parsley not only adds color but also a fresh flavor. Consider adding a squeeze of lemon juice right before serving for brightness. {{image_2}} You can change the proteins in this dish. Instead of shrimp, try chicken or sausage. For chicken, use about 1 pound of boneless thighs or breasts. Cut them into bite-sized pieces and season with Cajun spices. For sausage, sliced Andouille works great. Cook it until brown before adding in the vegetables. Want less heat? Use less Cajun seasoning. Start with 1 tablespoon and adjust to taste. If you love spice, add a pinch of cayenne or crushed red pepper flakes. You can also add a dash of hot sauce to the sauce for an extra kick. For a low-carb option, swap the pasta for zucchini noodles or spaghetti squash. If you're dairy-free, use coconut cream instead of heavy cream and skip the cheese. For a vegetarian version, replace shrimp with mushrooms or tofu, and make sure to use vegetable broth for added flavor. To store your Spicy Cajun Shrimp Pasta, first let it cool. Place leftovers in an airtight container. This helps keep the pasta fresh. You can store it in the fridge for up to three days. When you're ready to eat, just reheat it in the microwave or on the stove. If you want to freeze the pasta, let it cool completely. Transfer it to a freezer-safe container. You can also use freezer bags. Make sure to remove as much air as possible before sealing. You can freeze it for up to three months. To reheat, thaw it in the fridge overnight. Then heat it on the stove with a splash of cream to keep it creamy. When stored properly, this dish can stay safe to eat for three days in the fridge. In the freezer, it can last for up to three months. Always check for any off-smells or changes in texture before eating. If it looks or smells strange, it's best to toss it out. You can use several spices to replace Cajun seasoning. Some common options include: - Creole seasoning: This has a similar flavor and spice level. - Chili powder: It adds warmth but is milder. - Paprika and cayenne pepper: Mix these for a smoky, spicy kick. - Garlic and onion powder: These add depth without heat. Feel free to mix and match these to suit your taste! Yes! You can prepare Spicy Cajun Shrimp Pasta in advance. Here are some tips: - Cook the pasta: Boil and drain it. Toss it lightly in olive oil to prevent sticking. - Prepare the shrimp and sauce: Sauté the shrimp and make the sauce as usual. Let them cool before storing. - Store separately: Keep the pasta, shrimp, and sauce in separate containers in the fridge. This keeps the pasta from getting soggy. - Reheat gently: When ready to eat, warm the shrimp and sauce in a skillet. Add the pasta and toss until heated through. I recommend using fettuccine or linguine. They hold the creamy sauce well. However, you can also try: - Penne: It adds a fun shape and texture. - Spaghetti: A classic choice that works nicely too. - Gluten-free pasta: Use rice or corn pasta for a gluten-free option. Pick your favorite, and enjoy the dish! You learned about making Spicy Cajun Shrimp Pasta, from key ingredients to tasty variations. We discussed how to cook pasta, season shrimp, and make a flavorful sauce. I shared helpful tips for enhancing flavors and suggested side dishes. You now know how to store leftovers and meal prep this dish. This pasta is flexible and delicious. Use your creativity to adjust it to your taste. Enjoy cooking and savor every bite of your Spicy Cajun Shrimp Pasta!

Spicy Cajun Shrimp Pasta Flavorful and Easy Recipe

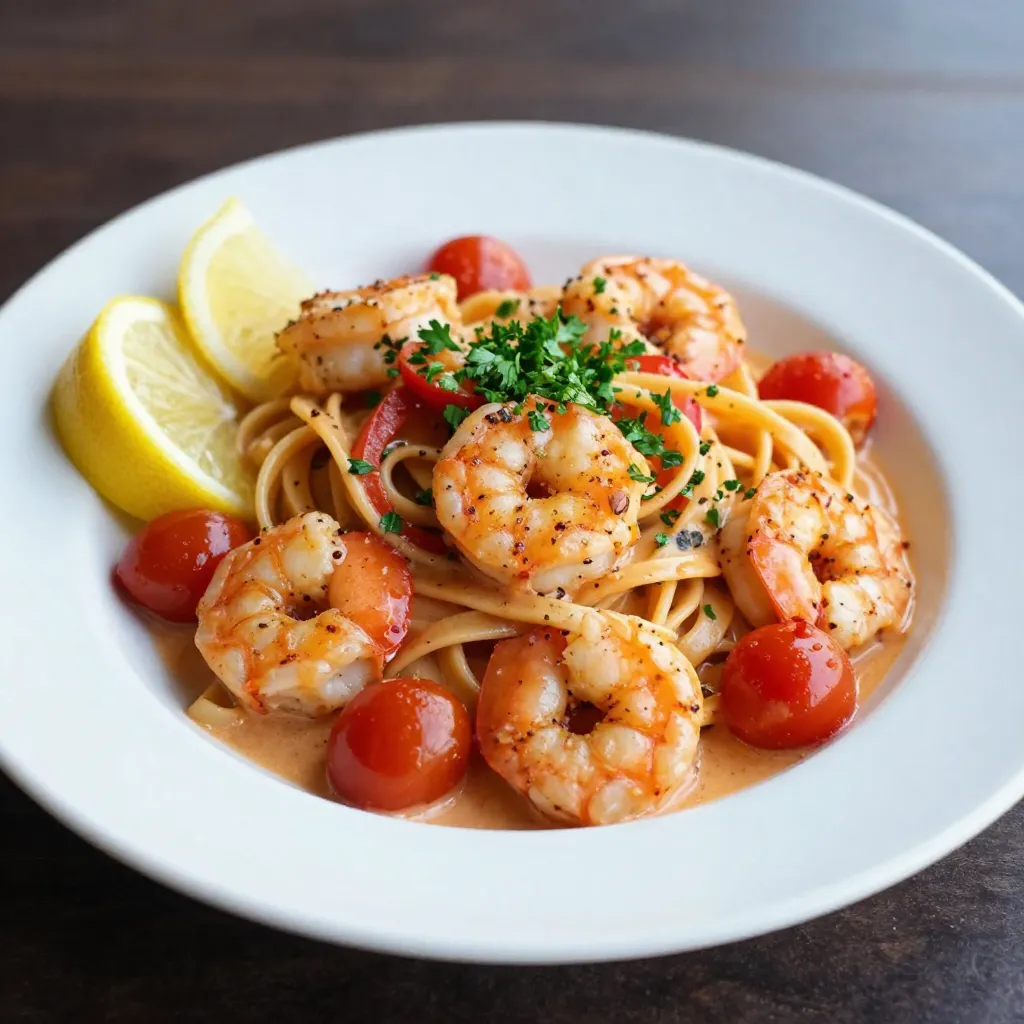
Are you ready to spice up your dinner routine? My Spicy Cajun Shrimp Pasta is not just a meal; it’s

Older posts
Newer posts
← Previous Page1 … Page57 Page58 Page59 … Page84 Next →

dsad

© 2026 Lisa Dishes • Built with GeneratePress

Our Policies

  • Copyright Policy
  • Cookie Policy
  • GDPR Policy
  • Privacy Policy
  • Disclaimer
  • Terms Of Use

More Information

  • Home
  • About
  • Contact
  • Appetizers
  • Dessert
  • Dinner
  • Drinks
©2026, Lisa Dishes About Back To Top