Skip to content
DisclaimerTerms Of UseGDPR PolicyCookie Policy

Lisa Dishes

  • Home
  • Drinks
  • Appetizers
  • Dinner
  • Dessert
  • About
  • Contact
  • Privacy Policy
DisclaimerTerms Of UseGDPR PolicyCookie Policy

NO-ING-IMG

- 1 pound ground beef or Italian sausage - 1 can (28 ounces) crushed tomatoes - 1 can (15 ounces) tomato sauce - 8 lasagna noodles, broken into pieces - 1 cup ricotta cheese - 1 cup shredded mozzarella cheese - 1/2 cup grated Parmesan cheese The heart of this dish lies in its main ingredients. I love using ground beef or Italian sausage for a rich flavor. Crushed tomatoes and tomato sauce create a thick, savory base. The lasagna noodles add that classic texture. Finally, the mix of ricotta, mozzarella, and Parmesan brings a creamy finish that makes each bite delightful. - 4 cups beef or vegetable broth - 2 teaspoons Italian seasoning - 1 teaspoon red pepper flakes (optional) - Salt and pepper to taste Seasonings bring this dish to life. I use Italian seasoning for that familiar taste. Red pepper flakes add a hint of heat, but you can skip them if you prefer mild. Choosing between beef or vegetable broth is key. Beef adds depth, while vegetable broth keeps it light. Adjust salt and pepper to enhance the flavors. - Fresh basil or parsley Garnishes elevate your soup. I like to add fresh basil or parsley for a burst of color and flavor. They make the dish look inviting and add a fresh note. You can sprinkle these herbs on top right before serving for that extra touch. For the complete cooking experience, check out the Full Recipe. Start by browning your ground beef or Italian sausage in a skillet. Use medium heat. Cook until the meat is brown and crumbly. This usually takes about 5 to 7 minutes. Drain any extra fat. Then, move the meat to the crockpot. Next, add the diced onion and minced garlic right to the crockpot. Stir everything together. The heat will soften the onion and garlic, adding flavor to your soup. Now it's time to layer in the other ingredients. Pour the crushed tomatoes and tomato sauce into the crockpot. Then, add the broth. You can use beef or vegetable broth based on your taste. Sprinkle in the Italian seasoning and red pepper flakes. Season with salt and pepper to taste. Stir everything well. This mix of flavors will make your soup yummy. Finally, break the lasagna noodles into pieces and add them to the pot. Cover the crockpot and choose your cooking time. If you cook on low, it will take 6 to 8 hours. If you need it faster, high heat cooks it in 3 to 4 hours. About 30 minutes before you serve, stir in the broken lasagna noodles. When the noodles are soft and the soup is bubbling, it’s time for the final touches. Mix the ricotta cheese with a pinch of salt and pepper in a small bowl. Once the soup is ready, ladle it into bowls. Top each serving with a dollop of ricotta. Finish with shredded mozzarella and grated Parmesan cheese. Garnish with fresh basil or parsley for a nice look. Enjoy your hearty and comforting Crockpot Lasagna Soup! For the complete recipe, check out the Full Recipe. For a rich taste, adjust your seasoning. You can add more Italian seasoning or black pepper. If the soup is too acidic, a little sugar can help. Just one teaspoon can balance the flavors nicely. Cook the lasagna noodles right in the soup. Break them into smaller pieces. Stir them in about 30 minutes before serving to soften. For creamy texture, mix the ricotta well. You can add it directly to the soup or serve it on top. Want it faster? You can use an Instant Pot. Cook on high pressure for about 10 minutes. For leftovers, let them cool before freezing. Use airtight containers to keep the soup fresh. {{image_2}} You can switch up the meat in this dish. Ground turkey or chicken works great. They offer a lighter taste while still adding protein. If you want a vegetarian option, try lentils or mushrooms. Both add great texture and flavor. Lentils provide protein and fiber, while mushrooms add umami. Cheese makes this soup creamy and rich. You can use cottage cheese instead of ricotta. Cottage cheese gives a nice texture and taste. If you're avoiding dairy, explore dairy-free cheese alternatives. They melt well and can still give you that cheesy goodness. Feel free to add extra veggies to boost nutrition. Spinach or bell peppers are great choices. They add color and flavor. You can also try different pasta shapes. Shells or small elbows work well too. They soak up the broth and add fun bites to the soup. After you enjoy your Crockpot Lasagna Soup, store any leftovers in good containers. Use airtight containers to keep it fresh. Glass or BPA-free plastic containers work great. If you plan to freeze it, make sure to leave some space at the top for expansion. This helps prevent spills. You can keep your lasagna soup in the fridge for about 3 to 4 days. To reheat it, warm it on the stove over low heat. Stir it often to prevent sticking. You can also use the microwave, but cover it to keep moisture in. This keeps your soup creamy and tasty. Prep your ingredients ahead for easy cooking. Chop the onion and garlic the night before. You can also brown the meat and store it in the fridge. For busy nights, make the soup earlier in the week. Just reheat it when ready to serve. This makes dinner quick and easy! For the full recipe, check out the detailed steps to create this hearty dish. Yes, you can make this soup in advance. To do this, prepare the soup but do not add the noodles yet. Store the soup in the fridge for up to three days. When you're ready to eat, heat the soup and add the noodles. This keeps the noodles from getting too soft. You can also freeze the soup without noodles. Just thaw it overnight in the fridge and cook the noodles when you reheat it. Yes, you can use no-boil lasagna noodles. These noodles work well in the soup. Just break them into pieces and add them to the crockpot about 30 minutes before serving. This way, they soak up the broth and become tender. Be sure to check the package instructions for cooking times, as they can vary. Absolutely! To add heat, you can mix in hot peppers or spicy sausage. If you want a mild spice, use red pepper flakes as mentioned in the recipe. For more heat, try adding diced jalapeños or crushed red pepper. You can adjust the spice level to suit your taste. Crockpot lasagna soup combines simple ingredients and easy steps. You prepare the meat, mix it with tomatoes and seasonings, then let it cook. Use tips to adjust flavors and textures. You can also try different proteins and cheeses for variety. Proper storage helps keep leftovers fresh. This dish is tasty and flexible, perfect for families or busy nights. Enjoy your delicious meal and the fun of experimenting.

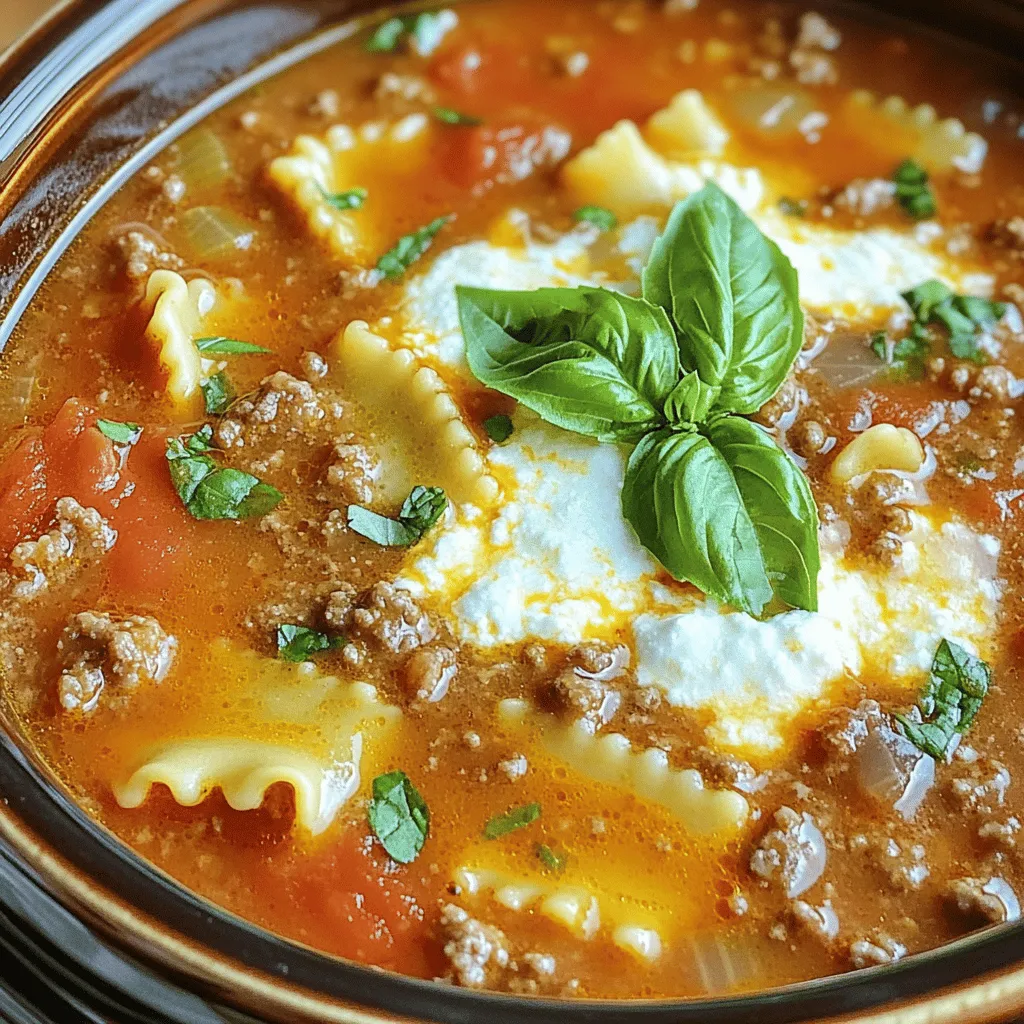
Crockpot Lasagna Soup Hearty and Comforting Dish

If you’re craving a warm, hearty dish that’s easy to make, I’ve got just the thing: Crockpot Lasagna Soup. This

- 2 cans (8 oz each) of refrigerated cinnamon roll dough - 1/4 cup melted butter - 1/4 cup brown sugar - 1 teaspoon cinnamon - 4 medium apples, peeled, cored, and sliced (Granny Smith or Honeycrisp work well) - 1/4 cup granulated sugar - 1 teaspoon vanilla extract - 1 teaspoon ground cinnamon - 1 tablespoon lemon juice - 2 tablespoons all-purpose flour - 1 cup powdered sugar - 2 tablespoons milk - 1/2 teaspoon vanilla extract To make this dessert, you need specific ingredients. The cinnamon roll crust gives the pie its unique twist. For the apple filling, choose apples that are crisp and tart. I like Granny Smith or Honeycrisp. They hold up well and add great flavor. The topping adds a sweet glaze that brings it all together. Each ingredient plays a key role in creating the perfect balance of flavors. For the full recipe, follow the details I provided above. This dessert is simple to prepare and sure to impress everyone at your table. First, set your oven to 350°F (175°C). While it warms up, take a 9-inch pie dish and grease it lightly. This helps the pie come out easily after baking. Open the two cans of cinnamon roll dough. Take each roll and separate them. Use your hands or a rolling pin to flatten them to about 1/4 inch thick. In a bowl, mix the melted butter, brown sugar, and cinnamon. Dip each flattened roll into this mix. Layer them in the pie dish, overlapping them to cover the bottom and sides. Make sure there are no gaps. This crust is the perfect base for your pie. Now, grab four medium apples. Peel, core, and slice them thinly. Place them in a large bowl. Add the granulated sugar, vanilla extract, ground cinnamon, lemon juice, and flour. Toss the apples well so they are all coated. Pour this apple filling over the cinnamon roll crust. Spread it evenly so every bite has that tasty apple flavor. Put the pie in the oven. Bake for about 30-35 minutes. You want the apples to be tender and the crust to turn golden brown. While the pie bakes, prepare the topping. In a small bowl, mix the powdered sugar, milk, and vanilla extract. Whisk until smooth. Once the pie is done baking, let it cool for 10-15 minutes. Then, drizzle the glaze over the top. Your cinnamon roll apple pie is now ready to enjoy! For the complete recipe, check the full recipe above. The type of apple you choose makes a big difference. I love using Granny Smith apples. They are tart and hold their shape well. Honeycrisp apples are another great choice. They are sweet, crisp, and add a nice flavor. Mix different types for more depth. Aim for a balance of sweet and tart apples. A soggy bottom can ruin your pie. To keep it crispy, always pre-bake your crust. This step helps set the base before adding the filling. You can also sprinkle some flour or breadcrumbs on the crust. This creates a barrier against moisture. Another tip is to drain excess liquid from the apple filling. Less liquid means a firmer bottom. Serve your cinnamon roll apple pie warm. A scoop of vanilla ice cream on top is a perfect match. The cold ice cream contrasts with the warm pie. You can also add a sprinkle of cinnamon for extra flavor. For a fun twist, drizzle caramel sauce over the top. Serve it with a cup of coffee or tea for a cozy treat. {{image_2}} You can add nuts or raisins to the filling for extra flavor. Chopped walnuts or pecans give a nice crunch. They also add a rich taste that pairs well with apples. If you prefer sweetness, add raisins for a chewy bite. Mix in about 1/2 cup of either option to the apple filling. This small change can make your pie even more delicious. The glaze can be swapped for different flavors. Try a caramel sauce for a rich, sweet finish. You can also use cream cheese frosting for a tangy twist. Just whip cream cheese with butter, powdered sugar, and a splash of vanilla. For a fruity touch, top with fresh berries or sliced bananas. Each option adds a unique flair to your cinnamon roll apple pie. To make a gluten-free pie, use gluten-free cinnamon roll dough. There are many brands available that taste great. For a vegan version, look for plant-based dough and substitute butter with coconut oil. You can also replace milk in the glaze with almond or soy milk. These simple swaps allow everyone to enjoy this tasty treat. You can find the full recipe in the complete guide above. To keep your leftover cinnamon roll apple pie fresh, let it cool first. Then, cover the pie with plastic wrap or aluminum foil. You can also place it in an airtight container. Store it in the fridge for up to 3 days. This helps keep the crust soft and the filling tasty. When you're ready to enjoy the pie again, preheat your oven to 350°F (175°C). Place a slice of pie on a baking sheet. Cover it with foil to prevent burning. Heat it in the oven for about 10-15 minutes. This keeps the crust crisp and warms the filling. If you're in a hurry, you can use the microwave. Heat each slice for 30 seconds, checking until it's warm. If you want to save some pie for later, freezing is easy. First, let the pie cool completely. Wrap the pie tightly in plastic wrap. Then, place it in a freezer-safe bag or container. You can freeze it for up to 2 months. When you are ready to eat it, thaw the pie in the fridge overnight. Reheat it in the oven as mentioned above. For the best taste, enjoy it fresh! For the full recipe, check the earlier sections. Yes, you can prepare the cinnamon roll crust in advance. Just keep it in the fridge. This helps save time when you want to bake the pie. When you're ready to bake, take it out and let it warm up a bit. This makes it easier to work with. I recommend using Granny Smith or Honeycrisp apples. These apples hold their shape well and have the right balance of sweet and tart. You can also mix different apples for more flavor. Try using Fuji or Gala apples for a sweeter taste. To adjust the sweetness, simply change the sugar amount in the apple filling. If you want a sweeter pie, add more granulated sugar. For less sweetness, cut back on the sugar. You can also use a sweetener like honey or maple syrup for a different flavor. Yes, you can double the recipe. Just use a larger pie dish and increase the baking time. Make sure to check the apples for tenderness. Doubling the recipe means more deliciousness for everyone! Enjoy sharing this treat with friends and family. For the complete instructions, see the Full Recipe. This blog post covered how to create a delicious cinnamon roll apple pie. We explored key ingredients, including the crust, filling, and toppings. I provided step-by-step instructions for baking, along with tips to avoid a soggy bottom. You can even try fun variations or store leftovers easily. Remember, the best pies come from experimenting and enjoying the process. Feel free to personalize this recipe. Make it your own and delight in the tasty results!

Cinnamon Roll Apple Pie Irresistible Dessert Delight

If you love warm, sweet desserts, you have to try my Cinnamon Roll Apple Pie! This treat combines soft cinnamon

To make ranch seasoned pretzels, gather these simple ingredients: - 10 oz pretzel bites (store-bought or homemade) - 1/4 cup unsalted butter, melted - 1 packet ranch seasoning mix (about 1 oz) - 1 teaspoon garlic powder - 1 teaspoon onion powder - 1 teaspoon dried dill - 1/2 teaspoon black pepper - 1/2 teaspoon salt - Optional: Fresh parsley for garnish Each ingredient plays a role in creating a tasty snack. The pretzel bites provide a crunchy base, while the melted butter helps the seasoning stick. Ranch seasoning adds that classic flavor we all love. The garlic and onion powders boost the taste, and dill gives a fresh note. Black pepper and salt round out the flavors, making these pretzels irresistible. Using fresh parsley as a garnish brightens up the dish and adds color. This combination makes ranch seasoned pretzels a perfect snack for any occasion. For the full recipe, check out the recipe section above. 1. Preheat the oven: Start by setting your oven to 350°F (175°C). This helps the pretzels bake nicely. 2. Prepare the baking sheet: Line a baking sheet with parchment paper. This keeps the pretzels from sticking. 3. Thaw or cook the pretzels: If you have frozen pretzel bites, let them thaw first. If you made them from scratch, ensure they are cooked and cooled. 1. Combine seasoning ingredients: In a small bowl, mix together the ranch seasoning, garlic powder, onion powder, dried dill, black pepper, and salt. This blend adds great flavor. 2. Toss pretzels in melted butter: In a large bowl, pour the melted butter over the pretzel bites. Toss them well so they get coated evenly. 1. Spread seasoned pretzels on the baking sheet: Place the butter-coated pretzels on the prepared sheet. Make sure they are in a single layer for even baking. 2. Baking time: Bake the pretzels for 10-12 minutes. Check them until they turn golden and slightly crispy. This gives them a nice crunch. Enjoy making your Ranch Seasoned Pretzels with this full recipe! To get great flavor, you need to coat the pretzels well. First, toss the pretzel bites in melted butter. This helps the seasoning stick. Then, mix your spices in a bowl. Use your hands or a spoon to sprinkle the seasoning evenly. If you want more zest, add extra ranch seasoning or garlic powder. Always taste your mix and adjust it as needed. Perfectly baked pretzels are golden and crispy. Spread them out on the baking sheet without crowding. This way, hot air can circulate. Bake at 350°F for 10-12 minutes. Keep an eye on them to avoid burning. If you want a faster option, try using an air fryer. Set it at 350°F for about 5-7 minutes for a crunchy finish. Ranch seasoned pretzels pair well with many drinks. Try soda, lemonade, or even beer. For gatherings, serve them in a big bowl with dips like ranch or salsa. You can also add them to a snack platter with veggies and cheese. They make a great addition to any party! For the full recipe, check the details above. {{image_2}} You can make ranch seasoned pretzels even better. Try spicy ranch seasoning for a kick. Adding cheddar cheese powder gives them a rich flavor. You can also switch up the pretzel shapes. Use pretzel rods for a fun twist. Different shapes can change the crunch factor too. If you want to skip butter, try olive oil. It will help the seasonings stick. For a dairy-free option, you can use vegan butter. Fresh herbs can also add a nice touch. Chopped parsley or dill can brighten the flavor. Air frying is a quick way to make these pretzels crispy. Set your air fryer to 350°F and cook for 8-10 minutes. You can also bake them in the oven as in the Full Recipe. For a fun snack mix, combine ranch seasoned pretzels with nuts and popcorn. This mix makes a great party snack. You can find ranch seasoned pretzels at most grocery stores. Popular brands include Snyder's and Utz. These brands are often available in large bags or smaller snack packs. Check the snack aisle for the best selection. Store-bought pretzels can last about 6 months if unopened. Once opened, they stay fresh for about 2-3 weeks. Keep them in a cool, dry place. A sealed container helps them stay crunchy longer. Cooling your homemade pretzels is key for freshness. After baking, let them cool on a wire rack. This step prevents moisture buildup. Once cool, store them in an airtight container. This keeps the flavor and crunch intact for up to a week. If you want to reheat them, a quick bake at 350°F for 5-7 minutes works well. This restores their crunch without making them too hard. Freezing your homemade ranch seasoned pretzels is easy and extends their life. After they cool, place them in a freezer-safe bag. Remove as much air as possible to prevent freezer burn. They can last up to 3 months in the freezer. To thaw, simply take them out and let them sit at room temperature for an hour. For a quicker method, you can use a microwave. Just use a low setting so they don’t get soggy. Enjoy them warm for the best taste! Homemade ranch seasoned pretzels last about 1 week in an airtight container. Store-bought versions often last longer, up to a few months. Check the packaging for the best-by date. After opening, consume them within a week for the best taste. Yes, you can make ranch seasoned pretzels without butter. Use olive oil or coconut oil instead. These options keep the pretzels moist and add a nice flavor. You can also use unsweetened applesauce for a lighter choice. Ranch seasoned pretzels pair well with many dips. Try them with ranch dressing, hummus, or guacamole. These dips add flavor and creaminess. They also make a great snack for parties or movie nights. Absolutely! Use vegan ranch seasoning or make your own. Combine garlic powder, onion powder, and dried herbs. For the pretzels, stick with plant-based butter or olive oil. This way, everyone can enjoy this tasty treat! Check the [Full Recipe] for more details on making them. You learned how to make tasty ranch seasoned pretzels today. We covered the ingredients, step-by-step instructions, and tips to make them perfect. Remember, you can adjust flavors and try different pretzel types for fun. Don't forget storage and serving ideas for your pretzels. Experiment with new tastes to keep things fresh. Enjoy sharing these snacks at your next gathering or during movie night! Keep trying new variations to find your favorite. Happy snacking!

Ranch Seasoned Pretzels Crunchy and Flavorful Snack

Craving a crunchy, flavorful snack? Look no further than these Ranch Seasoned Pretzels! This simple recipe combines store-bought or homemade

To make the best Hazelnut Espresso Brownies, gather these ingredients: - 1 cup unsalted butter - 2 cups granulated sugar - 1 cup packed brown sugar - 4 large eggs - 1 tablespoon pure vanilla extract - 1 cup all-purpose flour - 1 cup unsweetened cocoa powder - 1 teaspoon baking powder - 1/2 teaspoon salt - 1 cup hazelnuts, chopped (toasted for extra flavor) - 1 tablespoon espresso powder (or finely ground coffee) - 1 cup dark chocolate chips Accuracy matters in baking. Use standard measuring cups and spoons. - For butter, pack it well into the cup. - When measuring brown sugar, make sure to pack it tightly. - Use a kitchen scale for precision, especially for cocoa powder and flour. Choose high-quality ingredients for the best taste. - Use unsalted butter for fresh flavor; it allows you to control salt levels. - Select dark chocolate chips with at least 60% cocoa for a rich taste. - Fresh hazelnuts enhance flavor; toast them lightly to bring out their oils. - Opt for pure vanilla extract; it adds depth and richness compared to imitation. For a full recipe, check the details provided earlier. Start by getting your 9x13 inch baking pan ready. You can grease it with butter. Alternatively, line it with parchment paper. This makes it easier to lift out the brownies later. Next, gather your ingredients. You need unsalted butter, both granulated and brown sugar, eggs, and vanilla extract. Don’t forget the all-purpose flour, cocoa powder, baking powder, salt, hazelnuts, espresso powder, and dark chocolate chips. Now, let’s move on to the wet mix. In a medium saucepan, melt the butter over low heat. Stir often to prevent burning. Once it’s fully melted, take it off the heat. Add both sugars to the melted butter. Mix them well until they blend nicely. Then, crack in the eggs one by one. Make sure to stir well after each egg. Finally, mix in the vanilla extract. This helps to enhance the flavor of your brownies. Next, grab a separate bowl for the dry ingredients. In this bowl, combine flour, cocoa powder, baking powder, salt, chopped hazelnuts, and espresso powder. Mix these dry ingredients until they are well combined. Now, carefully fold the dry mix into the wet mix using a spatula. Be gentle; you don’t want to over-mix. The batter should feel thick and fudgy. Before finishing, fold in the dark chocolate chips. They will add extra richness to your brownies. Now it’s time to bake! Pour the brownie batter into your prepared pan. Spread it evenly using a spatula. Place the pan in the preheated oven at 350°F (175°C). Bake for 25 to 30 minutes. To check if they’re ready, insert a toothpick into the center. If it comes out with a few moist crumbs, they are done. Once baked, take the brownies out and let them cool in the pan. After they cool completely, you can transfer them to a wire rack. Cut them into squares, and enjoy! For the full recipe, check the recipe card above. To get rich and fudgy brownies, focus on mixing. When you mix the wet and dry ingredients, do not over-mix. Stir just until you see no dry flour. This keeps the brownies moist and chewy. The batter should feel thick and creamy. You can also try adding an extra egg yolk. This gives the brownies a bit more richness. To boost the flavor, use high-quality chocolate. Dark chocolate chips add depth. You can also toast the hazelnuts for a nutty crunch. Just spread them on a pan and bake for about 10 minutes. This brings out their oils and enhances their taste. If you love coffee, add more espresso powder or a splash of brewed coffee. This deepens the chocolate flavor. One big mistake is not measuring the flour. Too much flour can make the brownies dry. Always spoon flour into the cup and level it off. Another mistake is not cooling the brownies before cutting. Letting them cool helps them hold their shape better. Lastly, avoid opening the oven while baking. This can make the brownies sink in the middle. Follow these tips, and your brownies will be a hit! For the complete guide, check out the Full Recipe. {{image_2}} You can switch hazelnuts for other nuts like walnuts or pecans. Each nut adds its own taste and texture. For a different twist, try using almonds. They pair well with chocolate and coffee. You can also add flavorings like sea salt or orange zest. Both bring out the rich chocolate flavor. Consider adding a splash of almond extract for a nutty kick. To make these brownies gluten-free, use a gluten-free flour blend. Many blends work well in brownies. Just make sure it includes xanthan gum for the right texture. You can also use almond flour for a nutty flavor. This adds moisture and a unique taste. Just remember to adjust the amount slightly, as almond flour is denser. You can easily make these brownies vegan. Replace eggs with flaxseed meal or applesauce. For each egg, use one tablespoon of flaxseed mixed with three tablespoons of water. Let it sit until it thickens. Use dairy-free butter and dark chocolate chips for a vegan treat. This keeps the richness while remaining plant-based. For the full recipe, check out Hazelnut Espresso Brownies. To keep your hazelnut espresso brownies fresh, store them in an airtight container. This keeps out air and moisture. Place a piece of parchment paper between layers to avoid sticking. You can also wrap them tightly in plastic wrap. Store them at room temperature for the best taste. If your brownies lose their soft touch, you can refresh them. Place a brownie in the microwave for about 10-15 seconds. This brings back the warmth and gooeyness. You can also reheat them in the oven. Set the oven to 350°F (175°C) and warm for about 5-10 minutes. Brownies stay fresh for about 3-4 days at room temperature. If you want to keep them longer, freezing is a great option. Wrap the brownies well in plastic wrap, then in foil. They can last up to 3 months in the freezer. When you're ready to enjoy, thaw them at room temperature or reheat them. For more details, check the Full Recipe for tips on how to keep these delicious treats at their best. The best way to cut brownies is with a sharp knife. First, let them cool completely. This helps keep their shape. For clean cuts, dip the knife in hot water before each slice. Wipe the knife with a cloth after each cut. This keeps the edges clean. You can also use a ruler for even squares. Yes, you can make these brownies ahead of time. Bake them a day or two before you need them. Store them in an airtight container at room temperature. This keeps them fresh. If you want to hold them for longer, freeze them. Wrap each piece tightly in plastic wrap. Then, place them in a freezer bag. When ready, thaw them at room temperature or warm them in the oven. To adjust the sweetness level, you can modify the sugar amounts. Use less granulated and brown sugar for a less sweet treat. You can also add more cocoa powder for a darker flavor. If you want sweetness without extra sugar, try adding a ripe banana or applesauce. These options can add moisture while reducing sugar. In this article, I covered the essential ingredients and steps for perfect brownies. You learned how to gather and measure ingredients, mix, bake, and cool them. I shared tips for the best texture and flavor, plus common mistakes to avoid. Variations make it easy to change up recipes. You also learned how to store brownies and answer key questions. Now, you’re ready to create delicious brownies. Enjoy baking and sharing them with others!

Hazelnut Espresso Brownies Rich and Decadent Treat

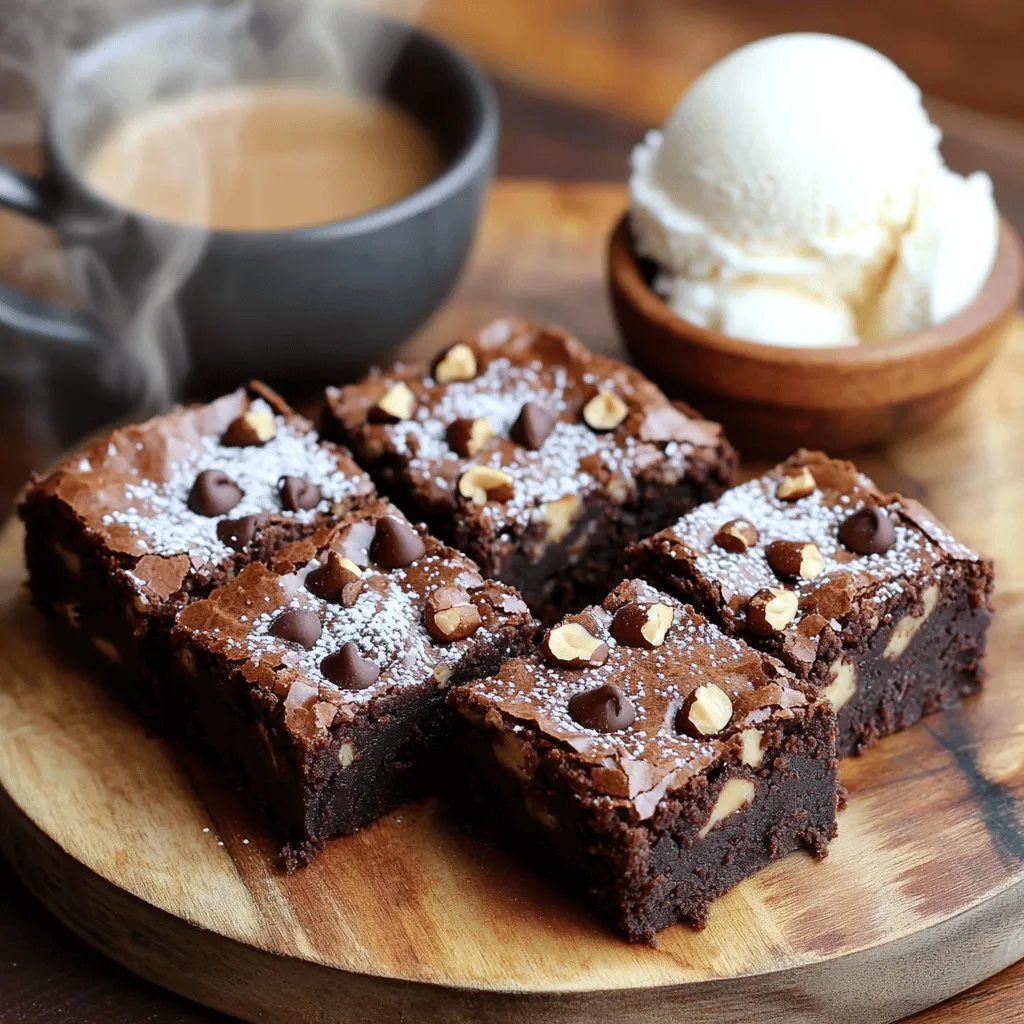
Get ready to indulge in a treat that’s rich and decadent! Hazelnut espresso brownies combine bold coffee flavors with nutty

To make Vegan Sweet Potato Black Bean Chili, gather the following ingredients: - 2 medium sweet potatoes, peeled and diced - 1 can (15 oz) black beans, rinsed and drained - 1 can (15 oz) diced tomatoes (with juices) - 1 medium onion, chopped - 3 cloves garlic, minced - 1 bell pepper (any color), diced - 2 cups vegetable broth - 2 tablespoons chili powder - 1 teaspoon cumin - 1/2 teaspoon smoked paprika - 1/4 teaspoon cayenne pepper (adjust for heat preference) - Salt and pepper to taste - 2 tablespoons olive oil - Fresh cilantro, for garnish - Avocado slices, for serving Each ingredient has a role. The sweet potatoes add a creamy texture. Black beans bring protein and heartiness. Diced tomatoes create a rich base. Onion and garlic give depth and aroma. Bell pepper adds sweetness and color. Vegetable broth enhances the flavor and keeps it vegan. Spices are key. Chili powder brings warmth. Cumin adds earthiness. Smoked paprika gives a subtle smokiness. Cayenne pepper can boost the heat. Salt and pepper balance the flavors. Lastly, garnishes like cilantro and avocado make the dish pop. They add freshness and creaminess. You can find the full recipe in our main article. Enjoy this hearty chili! 1. Sautéing the base ingredients Start by heating the olive oil in a large pot over medium heat. Add the chopped onion and diced bell pepper. Sauté them for about 5 to 7 minutes. You want them soft and fragrant. This step builds a great base for your chili. 2. Adding sweet potatoes and spices Next, stir in the minced garlic and let it cook for 1 to 2 minutes. Then, toss in the diced sweet potatoes. Add chili powder, cumin, smoked paprika, cayenne pepper, salt, and pepper. Mix well to coat the sweet potatoes in spices. This will give your chili a nice, warm flavor. 3. Incorporating the liquids Now, pour in the vegetable broth and the can of diced tomatoes, juices included. Also, add the rinsed black beans. Stir everything together and bring it to a gentle simmer. This is where the magic begins! 4. Simmering the chili Cover the pot and let it cook for about 25 to 30 minutes. Stir occasionally. The sweet potatoes should become tender. This simmering time helps all the flavors blend together beautifully. 5. Adjusting seasonings After simmering, taste your chili. Add more salt, pepper, or chili powder if you want more flavor. This step allows you to make the chili just right for your taste. 6. Serving suggestions Once the chili is ready, remove it from heat. Let it sit for a few minutes before serving. Serve hot, and top it with fresh cilantro and avocado slices. These garnishes add a nice touch and extra flavor. For a complete guide, check out the Full Recipe. To make the best Vegan Sweet Potato Black Bean Chili, start by enhancing the flavor. Use fresh spices. Toasting the spices in olive oil brings out their taste. This simple step adds depth. The simmering time is crucial. Let the chili cook slowly. This helps the flavors blend well. Aim for at least 25-30 minutes. Stir occasionally to prevent sticking. For the right texture, check the sweet potatoes. They should be tender but not mushy. If they break down too much, the chili may become too thick. You can switch up the beans. Try kidney beans or pinto beans for a different taste. Each type brings its own flavors and textures. Feel free to add other vegetables too. Corn, zucchini, or carrots can work well. They add sweetness and color to your dish. For gluten-free options, ensure your broth is gluten-free. Most vegetable broths are safe. Always check the label to be sure. For the full recipe, you can refer to the provided recipe details. {{image_2}} You can change the taste of your Vegan Sweet Potato Black Bean Chili in many ways. - Adding more spices for heat: If you like spice, add a bit more cayenne pepper or try some chopped jalapeños. This will give your chili a nice kick. - Incorporating herbs for freshness: Fresh herbs like cilantro or parsley can brighten the dish. Add them at the end for the best flavor. - Making it creamier: Want a creamier texture? Stir in some coconut milk or cashew cream before serving. This adds richness and smoothness. You can also adjust the chili to meet different dietary needs. - Low-carb variations: For a low-carb dish, swap sweet potatoes for cauliflower. It still tastes great, and it cuts down on carbs. - Whole30 or paleo adjustments: To make it Whole30 compliant, ensure all ingredients are Whole30 approved. This means no added sugar or grains. You can still enjoy the flavors without losing the spirit of the dish. For the full recipe, check out the details above. Enjoy experimenting with these variations! To keep your Vegan Sweet Potato Black Bean Chili fresh, store it in an airtight container. Place it in the fridge for up to five days. If you want to save it longer, freezing is a great option. Divide the chili into portions and use freezer-safe bags or containers. It can last for up to three months in the freezer. Just remember to label them with the date! When ready to enjoy your leftovers, reheat the chili gently. You can use the microwave or a pot on the stove. For the microwave, place the chili in a bowl and cover it. Heat it for one to two minutes, stirring halfway through. On the stove, warm it over low heat, stirring occasionally. This helps keep the flavor and texture perfect. If it looks too thick, add a splash of vegetable broth or water to thin it out. Can I make this chili in advance? Yes, you can make Vegan Sweet Potato Black Bean Chili in advance. It tastes even better the next day. Store it in the fridge for up to five days. Just heat it up when you are ready to serve. Is it possible to use fresh beans? You can use fresh beans, but they require cooking first. Soak them overnight for the best results. This adds time but can enhance flavor. How to adjust the spiciness level? To adjust the spiciness, add more cayenne pepper for heat. Alternatively, you can add a pinch of sugar to balance out the spice. What to serve with Vegan Sweet Potato Black Bean Chili? This chili pairs well with rice, bread, or tortilla chips. You can also top it with avocado slices or fresh cilantro for added flavor. Overview of calorie content This chili has about 300 calories per serving. It's a filling dish with lots of nutrients. Breakdown of macronutrients - Carbohydrates: 50g - Protein: 12g - Fat: 9g Health benefits of key ingredients Sweet potatoes offer vitamins A and C. Black beans provide protein and fiber. Together, they create a hearty meal that supports your health. For the full recipe, check out the recipe section above. This blog post guided you through making Vegan Sweet Potato Black Bean Chili. We covered key ingredients, simple cooking steps, and useful tips. You learned about variations and how to store and reheat leftovers. Enjoy making this chili your own. The flavors and nutrients are sure to please. Simple changes let you make it fit your needs. Dive into cooking with these steps, and enjoy the tasty results. You have all the tools now to create a delicious dish!

Vegan Sweet Potato Black Bean Chili Flavorful Dish

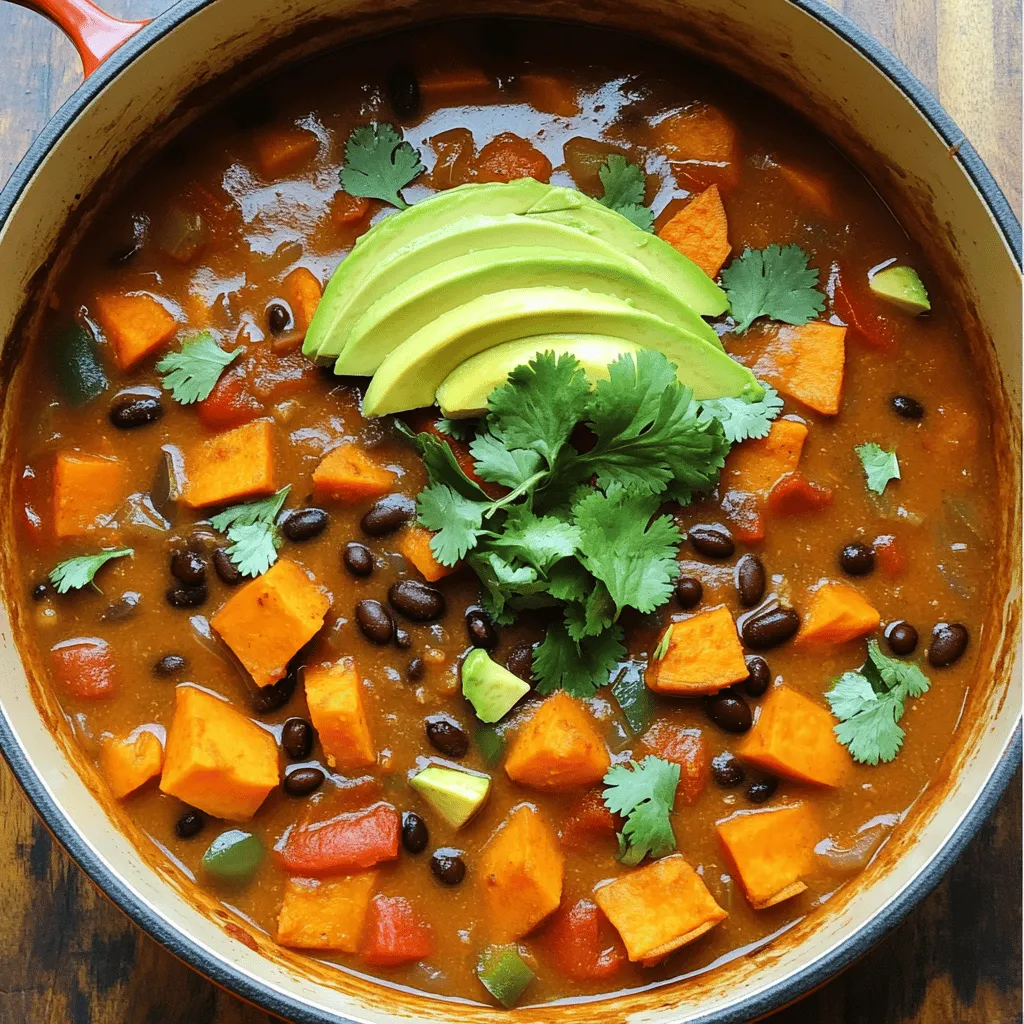
Looking for a delicious and healthy dinner option? Try my Vegan Sweet Potato Black Bean Chili! Packed with nutrients and

- 1 cup cornmeal - 1 cup all-purpose flour - 1 tablespoon baking powder - 1 teaspoon salt Cornmeal gives these muffins a great texture and flavor. It’s the base of our recipe. All-purpose flour adds lightness and helps the muffins rise. Baking powder acts as our leavening agent, making them fluffy. Salt enhances all the flavors, bringing it all together. - 1 cup milk - 1/4 cup vegetable oil - 2 large eggs Milk adds moisture and richness to the muffins, making them soft. Vegetable oil keeps them tender. Eggs bind everything and help the muffins rise. They also add a bit of richness, making each bite delightful. - 1 cup shredded sharp cheddar cheese - 1/2 cup pickled jalapeños, chopped - 1/4 cup fresh chives, finely chopped (optional) Sharp cheddar cheese gives a creamy, cheesy flavor that pairs well with the cornbread. Pickled jalapeños add a spicy kick, which you can adjust based on your taste. Fresh chives offer a mild onion flavor, adding brightness and color to the mix. For the full recipe, refer to the complete instructions provided above. First, preheat your oven to 400°F (200°C). This heat is perfect for baking. While the oven heats, grease your muffin tin or line it with paper liners. This helps the muffins come out easily. In a large bowl, combine 1 cup of cornmeal, 1 cup of all-purpose flour, 1 tablespoon of baking powder, 1 teaspoon of salt, and 1/4 cup of sugar. Mix these dry ingredients well with a whisk. This step ensures even flavor in each bite. In a separate bowl, whisk together 1 cup of milk, 1/4 cup of vegetable oil, and 2 large eggs. Make sure this mixture is smooth and well combined. The wet ingredients will add moisture and richness to the muffins. Now, pour the wet mixture into the dry ingredients. Stir gently until just mixed. It's okay if you see a few lumps; overmixing can lead to tough muffins. Next, fold in 1 cup of shredded sharp cheddar cheese and 1/2 cup of chopped pickled jalapeños. These ingredients add a cheesy, spicy kick. Scoop the batter into your prepared muffin tin, filling each cup about two-thirds full. This allows room for the muffins to rise. Bake them in the oven for 18-22 minutes. To check for doneness, insert a toothpick into the center of a muffin. If it comes out clean, your muffins are ready! For the full recipe, click here to explore more baking fun! To get the best texture in your Cheesy Jalapeño Cornbread Muffins, avoid overmixing the batter. Mix just until the ingredients come together. A few lumps are okay. This keeps your muffins light and fluffy. Aim for a muffin height that rises nicely without spilling over. You want each muffin to be golden brown on top. After baking, you can add a pat of butter on top of each muffin. This adds richness and flavor. Chives make a great garnish too. Just sprinkle them over the muffins for a fresh look. If you like heat, consider adding spicy toppings. A slice of fresh jalapeño or a drizzle of hot sauce can take your muffins to the next level. These muffins taste best when served warm. The cheese melts and the flavors shine through. They pair well with chili, soups, or a fresh salad. You can also enjoy them as a snack. For a fun twist, serve them with honey or a sweet spread. This mix of savory and sweet makes each bite special. Enjoy your muffins fresh from the oven for the best experience. Don't forget to check out the Full Recipe for a detailed guide! {{image_2}} You can change the spice level to fit your taste. Use milder jalapeños for less heat. If you love spice, add more jalapeños to the mix. This way, you can make the muffins just right for you. If you need gluten-free options, swap all-purpose flour for a gluten-free blend. This keeps the texture nice. For a vegan version, replace milk with plant-based milk and use flax eggs instead of real eggs. These changes help everyone enjoy the muffins. Want to make the muffins even better? Try adding corn kernels for extra sweetness. You can also use different types of cheese, like pepper jack or mozzarella. Each cheese brings a unique flavor, making your muffins even more special. Check out the Full Recipe for all the details! You can store leftover muffins at room temperature for up to two days. Keep them in an airtight container to stay fresh. If you want to keep them longer, put them in the fridge. They will last about a week when chilled. Just remember, refrigeration can change their texture slightly. If you prefer soft muffins, room temperature is best for short-term storage. For longer storage, freezing is a great option. Wrap each muffin tightly in plastic wrap, then place them in a freezer bag. This keeps out air and prevents freezer burn. You can freeze them for up to three months. When you're ready to eat one, remove it from the freezer. Let it thaw at room temperature or microwave it for about 30 seconds. This way, you can enjoy a warm muffin anytime! These cheesy jalapeño cornbread muffins are best eaten fresh. However, they can still taste great for several days. The ideal time to enjoy them is within three days at room temperature. If refrigerated, try to eat them within a week. Freezing them preserves their flavor and texture much longer! For the best taste, aim to eat them within three months of freezing. Yes, you can make these muffins ahead of time. To meal prep, bake the muffins and let them cool. Once cool, store them in an airtight container. Place them in the fridge for up to a week. You can also freeze them for longer storage. Just wrap each muffin in plastic wrap, then place them in a freezer bag. When you're ready to eat, thaw them overnight in the fridge and reheat in the oven. You can easily adjust this recipe. If you want more muffins, simply double the ingredients. For fewer muffins, cut the ingredients in half. Use measuring cups to get the right amounts. Keep the ratios the same. This way, your muffins will still taste great. Just remember that baking time may change slightly based on the batch size. These muffins pair well with many dishes. They fit nicely with chili, soups, or barbecued meats. You can serve them with a side salad for a light meal. They also work great as a snack with butter or cream cheese. Feel free to get creative and try them with your favorite dip or spread! To check if the muffins are done, use the toothpick method. Insert a toothpick into the center of a muffin. If it comes out clean or with a few crumbs, they are ready. If it comes out wet, bake them for a few more minutes. Keep an eye on them to avoid overbaking, which can make them dry. Enjoy your perfectly baked Cheesy Jalapeño Cornbread Muffins! For the complete recipe, check out the Full Recipe. In this article, we explored the key ingredients and steps to make Cheesy Jalapeño Cornbread Muffins. We covered how to blend dry and wet ingredients, bake, and enhance flavor with cheese and jalapeños. Perfect muffins are warm, flavorful, and great for pairing with meals. These tips on variations and storage help you enjoy them longer. Overall, baking is simple and fun. You can create your own delicious version!

Cheesy Jalapeño Cornbread Muffins Flavorful Treat

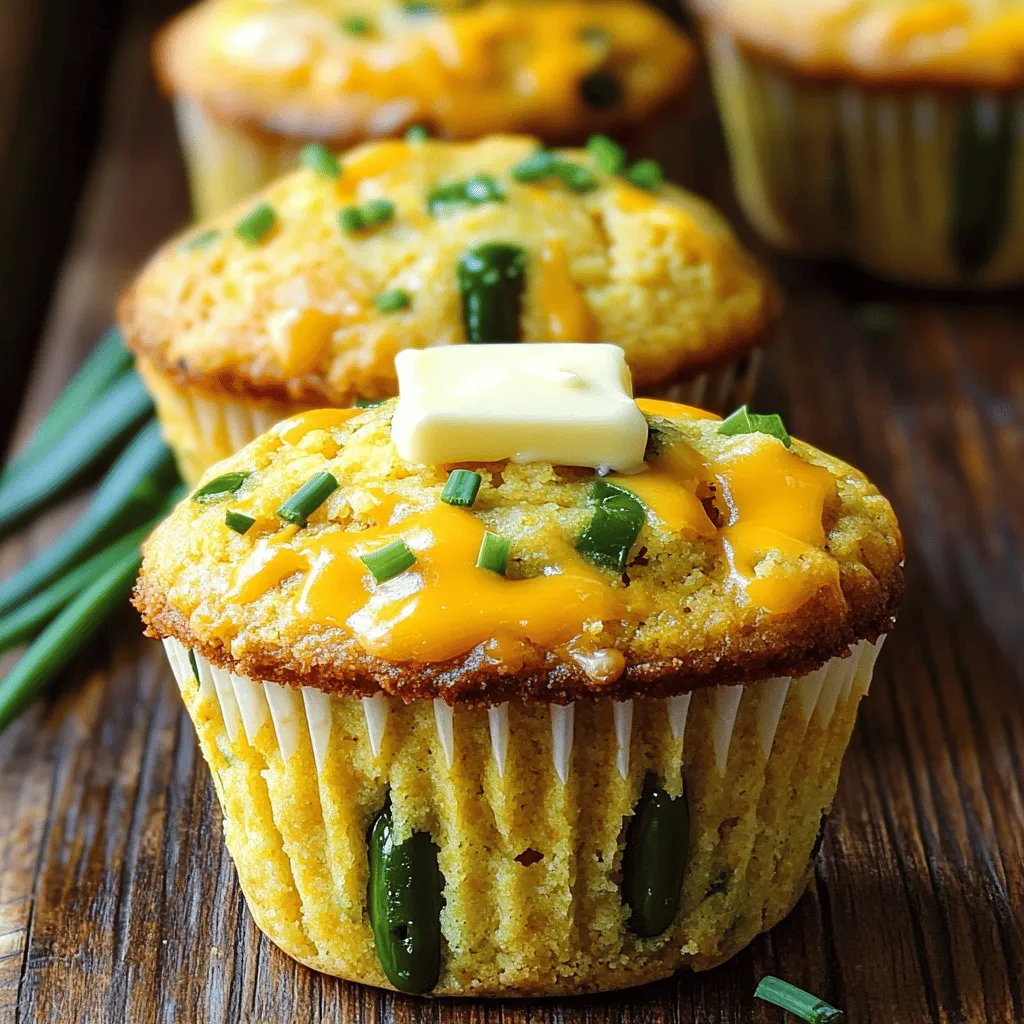
If you crave a warm, cheesy bite with a kick, you’ll love these Cheesy Jalapeño Cornbread Muffins! They are easy

- 1 lb large shrimp, peeled and deveined - 4 tablespoons unsalted butter, melted - 4 garlic cloves, minced - 1 teaspoon smoked paprika - 1 teaspoon old bay seasoning - 1 lemon, zested and juiced - 2 cups broccoli florets - 1 red bell pepper, sliced - 1 cup cherry tomatoes, halved Gathering the right ingredients makes this dish shine. For the shrimp, I prefer large ones. They soak up the garlic butter flavor well. Using fresh garlic is key. Minced garlic adds a strong, rich taste. The butter helps carry this flavor into every bite. For seasonings, smoked paprika adds a nice warmth. Old bay seasoning brings a classic touch. The lemon zest and juice brighten up the dish. They balance the richness of the butter. When it comes to veggies, broccoli adds crunch. The red bell pepper brings sweetness. Cherry tomatoes burst with flavor as they cook. Each vegetable adds color and nutrients to your meal. Check the full recipe for more details. Trust me, this dish is a delight! First, you need to preheat your oven to 400°F (200°C). This high heat will help cook the shrimp and veggies quickly. While the oven heats, line a large baking sheet with parchment paper. This makes cleanup easy and keeps your food from sticking. Next, let's mix the garlic butter. In a bowl, combine these ingredients: - 4 tablespoons unsalted butter, melted - 4 garlic cloves, minced - 1 teaspoon smoked paprika - 1 teaspoon old bay seasoning - Zest and juice of 1 lemon Stir well and set this mixture aside. Now, it’s time to prepare the veggies. In a separate bowl, toss together: - 2 cups broccoli florets - 1 red bell pepper, sliced - 1 cup cherry tomatoes, halved - 2 tablespoons olive oil - Salt and pepper, to taste Make sure you coat the veggies well with the oil. Spread them in an even layer on one half of the prepared baking sheet. Next, take your cleaned shrimp and place them in the bowl with the garlic butter mixture. Toss the shrimp until they are well coated. Arrange the shrimp on the other half of the baking sheet in a single layer. Now you are ready to bake. Slide the baking sheet into your preheated oven. Bake for about 12 to 15 minutes. Check for doneness by looking for pink and opaque shrimp. The veggies should be tender and slightly charred. When done, remove the baking sheet from the oven. Garnish with chopped fresh parsley and enjoy your meal! You can find the Full Recipe for more details. Choosing the right shrimp size For this dish, I recommend using large shrimp. They cook quickly and stay juicy. Look for shrimp that are 16-20 count per pound. This size gives you a nice bite without being too small. Signs of perfectly cooked shrimp You can tell shrimp are done when they turn pink and opaque. They should curl slightly but not be tight. Overcooked shrimp become rubbery, so watch them closely. Tips for adjusting seasonings Feel free to taste the garlic butter mix before you add the shrimp. If you love spice, add a pinch of cayenne or red pepper flakes. For a fresh twist, try adding a splash of white wine to the butter. Alternatives to garlic butter If you want to change it up, use lemon herb oil or a spicy chili oil. You can also try a vegan butter for a dairy-free option, which still tastes great. Adjusting baking time for larger shrimp If you choose larger shrimp, increase the baking time by a couple of minutes. Check them after 15 minutes to see if they are cooked through. The key is to avoid overcooking. How to avoid overcooking Set a timer for the lower end of the cooking time, around 12 minutes. This way, you can check for doneness. It’s better to undercook slightly and let them rest than to overdo it. {{image_2}} You can change up the veggies in this dish. Use seasonal vegetables for fresh taste. Try asparagus in spring or zucchini in summer. Carrots add a nice crunch and color. Sweet potatoes bring a hearty feel, too. Mix in some green beans for a lovely green touch. To make your meal more colorful, add purple cabbage or yellow squash. A mix of colors makes the dish more fun and appetizing. Plus, you get more nutrients from various veggies. You can also switch up the flavors. If you want less salt, try using herbs like thyme or oregano. These add great taste without high sodium. You can also swap the smoked paprika for chili powder for a spicy kick. For a fresh twist, add fresh basil or cilantro before serving. If you like heat, sprinkle some red pepper flakes on top. You can even use lemon pepper seasoning for a zesty flavor. Pair your shrimp dish with tasty sides. Rice or quinoa works great to soak up the garlic butter. A simple green salad adds freshness and crunch. Garlic bread is also a crowd-pleaser and perfect for dipping. For dipping sauces, try a lemon aioli or tartar sauce. A spicy mayo can add a fun twist, too. These options bring new flavors to your plate and make eating more exciting. If you're looking for the full recipe, check out the details above! To store leftovers from your sheet pan garlic butter shrimp, let them cool first. Place the shrimp and veggies in an airtight container. This helps keep them fresh. I recommend using glass or BPA-free plastic containers for safety. They can last in the fridge for up to three days. If you want to freeze garlic butter shrimp, follow these steps: 1. Wait until the dish cools completely after cooking. 2. Place the shrimp and veggies in a freezer-safe bag or container. 3. Remove as much air as possible to prevent freezer burn. When you're ready to enjoy them again, thaw in the fridge overnight. To reheat, warm them in the oven at 350°F (175°C) for about 10-15 minutes. This keeps the shrimp juicy and the veggies crisp. In the fridge, garlic butter shrimp lasts about three days. Check for signs of spoilage. If you notice any unusual smell, slimy texture, or discoloration, it’s best to toss it. Always prioritize food safety to enjoy your meals worry-free! It usually takes about 12 to 15 minutes to cook shrimp in the oven. The time can change based on shrimp size. For larger shrimp, you may need a few extra minutes. Always check that the shrimp turn pink and opaque. These signs mean they are done and safe to eat. Yes, you can use frozen shrimp! It’s best to thaw them before cooking. You can place them in the fridge overnight or run them under cold water for quick thawing. Just be sure to dry them well before mixing with the garlic butter. If you want a dairy-free option, try using olive oil or coconut oil. Both will add great flavor. You can also use dairy-free butter if you prefer. This way, you can still enjoy a rich taste without the dairy. To make this dish healthier, you can reduce the butter used. Try cutting it down to just two tablespoons. You can also add more veggies to boost nutrition. Swap out white potatoes for sweet potatoes for extra fiber and vitamins. Absolutely! You can use scallops or fish fillets as great alternatives. Just adjust the cooking time for each type. Fish fillets may cook faster, while scallops might take about the same time as shrimp. This way, you can enjoy different flavors and textures! For the full recipe, check out Sheet Pan Garlic Butter Shrimp & Veggies! This blog post covers how to make a tasty sheet pan garlic butter shrimp dish. We looked at the key ingredients, including shrimp, butter, and fresh vegetables. I explained step-by-step instructions and shared tips for perfecting your shrimp. You can also explore fun variations and proper storage techniques. In summary, this dish is simple, flavorful, and customizable. With these tips, you can impress anyone with your cooking skills. Enjoy creating this easy meal that is sure to please!

Sheet Pan Garlic Butter Shrimp Quick and Easy Meal

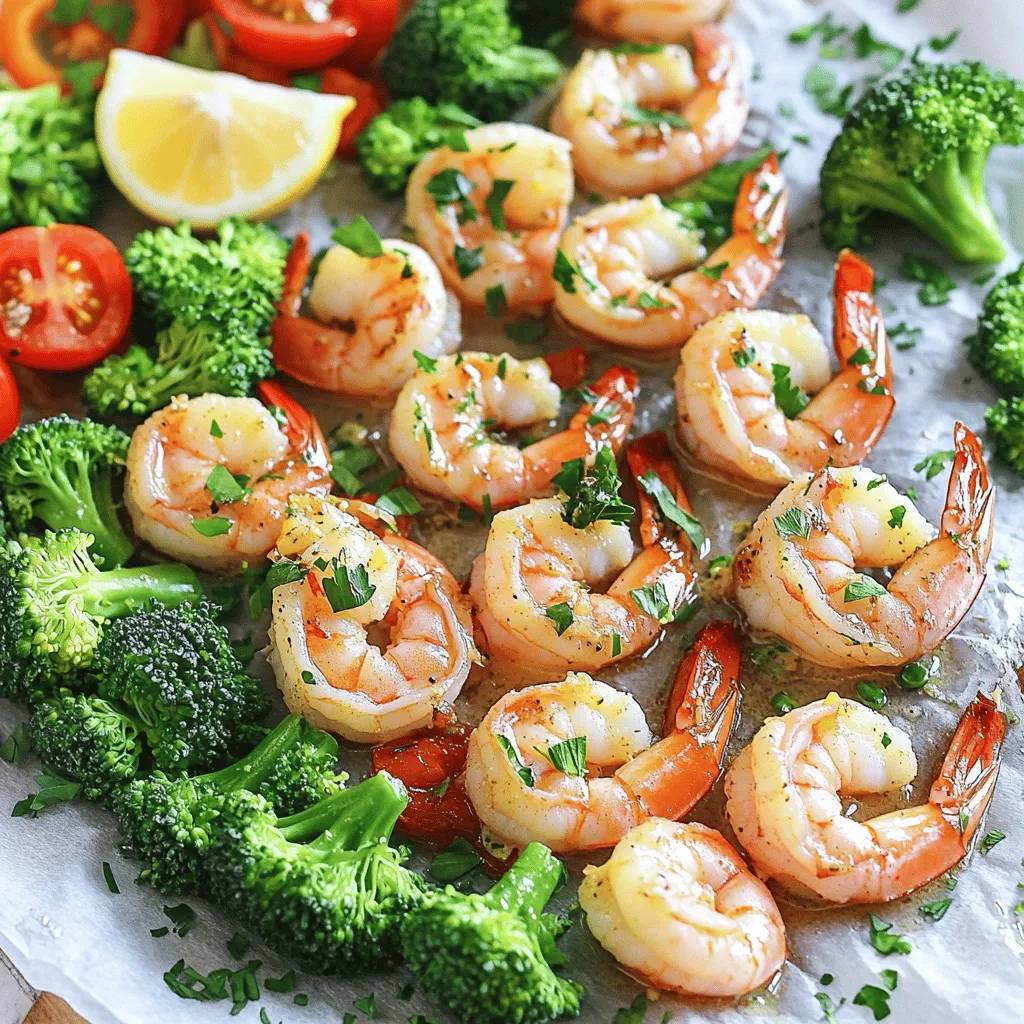
Looking for a quick and easy meal that bursts with flavor? This Sheet Pan Garlic Butter Shrimp is your answer!

For a tasty honey garlic chicken stir fry, gather these ingredients: - 500g boneless chicken breast, sliced thinly - 2 tablespoons honey - 3 tablespoons soy sauce - 3 cloves garlic, minced - 1 tablespoon ginger, grated - 1 bell pepper (red or yellow), sliced - 1 cup broccoli florets - 1 carrot, julienned - 2 tablespoons vegetable oil - 1 teaspoon sesame oil - Salt and pepper to taste - Chopped green onions for garnish - Sesame seeds for garnish When measuring ingredients, use a scale for the chicken. This ensures even cooking. For honey, a liquid measuring cup works best. Always use fresh garlic and ginger for strong flavors. If possible, buy organic vegetables. They taste better and are healthier. You can swap out the chicken for tofu or shrimp. Both work well with the sauce. If you want a gluten-free option, use tamari instead of soy sauce. For a spicy kick, add red pepper flakes or sliced chili peppers. You can also use frozen vegetables if fresh ones are not available. First, gather all your ingredients. It helps to have everything ready. Slice the chicken breast into thin pieces. Mince the garlic and grate the ginger. Chop the bell pepper, broccoli, and carrot. This makes the cooking part easier and faster. Heat a large pan or wok over medium-high heat. Add the vegetable oil. Once hot, toss in the sliced chicken. Sprinkle with salt and pepper. Cook the chicken for about 5 to 7 minutes. You want it brown and cooked through. Once done, take the chicken out and set it aside. In the same pan, add the chopped broccoli, bell pepper, and carrot. Stir-fry these for about 3 to 4 minutes. You want them tender but still crisp. This keeps the vegetables bright and tasty. Next, return the cooked chicken to the pan. Pour the honey garlic sauce over everything. Toss the chicken and veggies together. Make sure the sauce coats them well. Cook for another 2 to 3 minutes. Finally, drizzle sesame oil on top and mix. Serve hot and garnish with green onions and sesame seeds. For the full recipe, check out the [Full Recipe]. To get juicy chicken, slice it thin. This helps it cook fast and evenly. Heat your pan well before adding the chicken. This creates a nice sear. Cook the chicken in batches if your pan is small. Crowding the pan can cause steaming instead of frying. If you want a thicker sauce, mix a little cornstarch with cold water. Add this mix to the sauce while cooking. Stir it well until it thickens. If the sauce is too thick, just add a splash of water or more soy sauce. This keeps the flavor balanced and delicious. Use a large pan or wok for the best results. A non-stick surface helps prevent sticking. A wooden spatula works great to toss the ingredients. You’ll also need a good knife for slicing the chicken and veggies. For the best taste, keep everything fresh and high quality. For the full recipe, check the recipe section. {{image_2}} You can easily make this dish vegetarian or vegan. Instead of chicken, use tofu or tempeh. Both options soak up flavors well. Cut them into small cubes for a nice texture. You can follow the same cooking steps as the chicken. Just cook the tofu until golden brown. Use the same honey garlic sauce, but swap honey for maple syrup or agave. This keeps the sweet taste while making it vegan. Feel free to add more vegetables to your stir fry. Snow peas, snap peas, and mushrooms work well. You can also try zucchini or bok choy for a fresh crunch. Just remember to cut them into small pieces for even cooking. Mix and match veggies based on your taste. The more colors, the better the dish looks and tastes! If you want a change from chicken, try shrimp or beef. Shrimp cooks quickly and adds a nice seafood twist. Beef can be sliced thin and stir-fried until tender. You can also use seitan for a hearty, protein-packed option. Each protein brings a unique flavor to the dish. Make sure to adjust cooking times based on what you use. For the full recipe, check back to the ingredients list. To store your honey garlic chicken stir fry, let it cool first. Place it in an airtight container. It can stay fresh in the fridge for about 3-4 days. Make sure to keep it sealed to prevent drying out. If you want to enjoy it later, follow the freezing instructions below. You can freeze this stir fry for longer storage. First, cool it completely. Then, transfer it to a freezer-safe container. It can last for up to 3 months in the freezer. When you're ready to eat, thaw it in the fridge overnight before reheating. To reheat your honey garlic chicken stir fry, use a pan over medium heat. Add a splash of water or oil to keep it moist. Stir it frequently until it's heated through. You can also use the microwave for quick reheating. Just cover it and heat in short bursts, stirring in between. This keeps the chicken tender and the veggies crisp. For the full recipe, check the section above. You can serve Honey Garlic Chicken Stir Fry with rice or noodles. Steamed jasmine rice works well. You can also try brown rice for a healthier option. Noodles, like lo mein or udon, are tasty too. Add a side of spring rolls or a salad for extra crunch. Yes, you can use many sauces for stir fry. Teriyaki sauce gives a sweet touch. Soy sauce alone adds a salty flavor. You can mix hoisin sauce for more depth. Just keep in mind the taste balance when you switch sauces. Each sauce will change the flavor of your dish. To make it less sweet, reduce the honey. You can cut the honey by half. Also, add more soy sauce to balance the flavor. Incorporating more vegetables can also help. Vegetables like broccoli and carrots add natural sweetness. This makes the dish more savory overall. Yes, this recipe can be healthy. It uses lean chicken and lots of veggies. You control the sugar by adjusting the honey. The dish is low in fat when you use less oil. This meal also provides protein and fiber, making it filling and nutritious. Enjoy it in moderation for a balanced diet. You learned about the key ingredients for a great dish. We went step-by-step through cooking chicken and veggies. I shared tips to make your meal just right. You also saw how to switch things up with veggie options and more. Remember, cooking is fun, so don’t be scared to try new things. Enjoy your time in the kitchen and make this recipe your own!

Honey Garlic Chicken Stir Fry Easy and Flavorful Meal

If you’re craving a quick, tasty meal that packs a punch, you’re in the right place! My Honey Garlic Chicken

- 1 cup unsalted butter, melted - 1 cup brown sugar, packed - 1/2 cup granulated sugar - 1/4 cup pure maple syrup These main ingredients create a rich, sweet base for the blondies. I always use unsalted butter for better control over the saltiness. The combination of brown and granulated sugar gives depth to the flavor. Pure maple syrup adds a lovely, natural sweetness. - 2 cups all-purpose flour - 1 teaspoon baking powder - 1/2 teaspoon baking soda - 1/2 teaspoon salt The dry ingredients play an important role in the texture. All-purpose flour gives a sturdy structure. Baking powder and baking soda help the blondies rise, while salt enhances the other flavors. Make sure to mix these well so your blondies bake evenly. - 1 cup pecans, roughly chopped - 1/2 cup white chocolate chips These add-ins give the blondies their unique character. Chopped pecans add crunch and a nutty flavor. White chocolate chips melt into sweet pockets of goodness. You can adjust the amounts based on your taste, but I find this mix is just right. For the complete recipe, check the Full Recipe section. 1. Preheat your oven to 350°F (175°C). Line a 9x13 inch baking pan with parchment paper. Let some paper hang over the sides. This helps with easy removal later. 2. In a large bowl, mix the melted butter, brown sugar, and granulated sugar. Whisk until smooth and combined. 3. Stir in the maple syrup until it blends well. Add the eggs one at a time. Whisk well after each egg. Then, add the vanilla extract. 1. In another bowl, whisk the flour, baking powder, baking soda, and salt together. 2. Gradually fold the dry mix into the wet mix. Stir until just combined. 3. Gently fold in the chopped pecans and white chocolate chips. Make sure they spread evenly in the batter. 1. Pour the batter into the prepared pan. Use a spatula to spread it evenly. 2. Bake in the preheated oven for 25 to 30 minutes. The edges should turn golden brown. A toothpick inserted in the center should come out with a few moist crumbs. 3. Let the blondies cool in the pan for about 10 minutes. Use the parchment paper to lift them out. Transfer to a wire rack to cool completely. 4. Once cool, cut into squares and enjoy your chewy maple pecan blondies! You can find the full recipe [here](#). - Use room temperature ingredients. This helps them mix better. - Mix the batter gently. Overmixing can make the blondies tough. - Serve the blondies on a rustic wooden board. - Dust them with powdered sugar for a nice look. - Drizzle with more maple syrup for extra sweetness. - Enjoy them with a glass of cold milk or a warm cup of coffee. - Watch your baking time. Overbaking makes them dry. - Undercooking can lead to a gooey center. - Don’t skip the parchment paper. It helps you lift them out easily. {{image_2}} You can easily swap out ingredients for your chewy maple pecan blondies. Try using almonds or walnuts instead of pecans. Both nuts add a nice crunch and flavor. If you want a chocolatey twist, dark chocolate chips work well instead of white chocolate. This simple change can make your blondies feel new and exciting. To boost the flavor, consider adding spices like cinnamon or nutmeg. These spices can bring warmth and depth to your blondies. If you want to change the sweetener, swap maple syrup with honey or agave. Each option offers a unique taste that complements the other flavors nicely. For a gluten-free version, use almond or coconut flour instead of all-purpose flour. This makes the blondies safe for those with gluten issues. If you need a vegan option, replace the eggs with flaxseed meal and the butter with coconut oil or vegan butter. These small changes let everyone enjoy your delicious blondies! For the [Full Recipe], check out the section above. To keep your chewy maple pecan blondies fresh, use an airtight container. This method prevents them from drying out. You can store them at room temperature for a few days. If you want to keep them longer, consider refrigeration. Cold storage extends their life but may change the texture slightly. These blondies last about 3 to 5 days at room temperature. If you freeze them, they can last up to 3 months. When freezing, wrap each piece tightly in plastic wrap. Then, place them in a freezer-safe bag. This prevents freezer burn and keeps them tasty. When you want to enjoy your blondies again, reheating is key. For the best taste, use the oven. Preheat it to 350°F (175°C). Place the blondies on a baking sheet. Heat for about 5 to 10 minutes. This method keeps them soft and chewy. You can also microwave them for about 15 to 20 seconds. Just be careful not to overheat them, as this can make them tough. Enjoy your blondies warm for the best flavor! You can use several egg replacements in baking. Here are some common options: - 1/4 cup unsweetened applesauce - 1/4 cup mashed banana - 1 tablespoon ground flaxseed mixed with 2.5 tablespoons water (let sit for 5 minutes) These substitutes help bind the ingredients and keep the blondies moist. Yes, you can make these blondies in advance. Bake them and let them cool completely. Then, store them in an airtight container. They stay fresh at room temperature for up to three days. If you want to keep them longer, freeze them. Just wrap them tightly in plastic wrap and foil. Dry blondies can happen for a few reasons. Here are some common causes: - Overbaking your blondies will dry them out. - Using too much flour can lead to dryness. - Not enough fat or sugar can also cause a dry texture. To fix this, always measure ingredients carefully and check for doneness early. Serving these blondies is easy and fun. You can: - Cut them into squares and place them on a pretty plate. - Dust them with powdered sugar for a nice touch. - Drizzle with extra maple syrup for added sweetness. Pair them with a scoop of vanilla ice cream or a hot cup of coffee for a delightful treat. You can find the Full Recipe for these blondies to explore more serving ideas. This blog post covered the main ingredients, step-by-step instructions, and helpful tips for making chewy maple pecan blondies. You learned about ingredient substitutions, storage info, and how to avoid common mistakes. Baking these blondies is simple and fun. With different variations, you can customize them to fit your taste. Enjoy making these treats, sharing them, and savoring each bite!

Chewy Maple Pecan Blondies Tasty and Simple Recipe

Are you ready to indulge in a treat that’s both chewy and sweet? These Chewy Maple Pecan Blondies are not

To make Crispy Baked Eggplant Parmesan, you need fresh and simple ingredients. Here’s what you will use: - 2 medium eggplants, sliced into ¼ inch rounds - 1 teaspoon salt - 1 cup all-purpose flour - 2 large eggs, beaten - 1 cup breadcrumbs (preferably panko for extra crunch) - ½ cup grated Parmesan cheese - 2 cups marinara sauce - 1 cup shredded mozzarella cheese - 1 teaspoon dried oregano - 1 teaspoon garlic powder - Fresh basil leaves, for garnish - Olive oil spray or a drizzle These ingredients work together to create a delicious dish. The eggplants give a nice texture, while the cheeses add creaminess. The breadcrumbs, especially panko, help achieve that perfect crunch. Seasonings like oregano and garlic powder enhance flavor and aroma. It's all about balance. For the full recipe, you can check the complete steps. Enjoy this wholesome delight! Start by slicing the eggplants into ¼ inch rounds. Lay them on a clean kitchen towel. Sprinkle salt on the slices. This step draws out moisture and bitterness. Let them sit for about 30 minutes. Rinse the eggplant under cold water. Pat each slice dry with a paper towel. This helps the breading stick better later. Next, preheat your oven to 400°F (200°C). This temperature makes the eggplant crisp and golden. Prepare three shallow dishes for the breading. Fill the first dish with flour. In the second, add the beaten eggs. In the third dish, mix breadcrumbs, Parmesan cheese, oregano, and garlic powder. This mixture gives great flavor. Now, it's time to coat the eggplant slices. Take one slice and dip it into the flour. Shake off any excess flour. Next, dip it into the beaten eggs until coated. Finally, place it in the breadcrumb mixture. Press gently to ensure it sticks. Repeat this for all the eggplant slices. Line a baking sheet with parchment paper. This prevents sticking and makes cleanup easy. Place the breaded eggplant slices on the sheet. Spray or drizzle them lightly with olive oil. Bake for 25-30 minutes. Flip the slices halfway through cooking. This helps them brown evenly. For the next step, grab a large baking dish. Spread a thin layer of marinara sauce on the bottom. Layer half of the crispy eggplant over the sauce. Sprinkle half of the shredded mozzarella cheese on top. Repeat with the remaining eggplant, sauce, and cheese. This creates a tasty layered effect. Now, bake the assembled dish for an additional 15-20 minutes. Watch for the cheese to bubble and turn golden. Once done, let the dish cool for a few minutes. This makes cutting easier. Garnish with fresh basil leaves before serving. You'll love the look and taste! To make your eggplant crispy, I recommend using panko breadcrumbs. They have a great texture that adds crunch. Regular breadcrumbs can work, but panko gives a better bite. Make sure to coat each eggplant slice evenly. Dip it in flour first, then in egg, and finally in the breadcrumb mix. This order helps the crumbs stick well. To boost flavor, add herbs and spices. I love using dried oregano and garlic powder. They work wonders in this dish. You can also experiment with fresh herbs like thyme or rosemary for a unique taste. Using different types of cheese can enhance the flavor profile, too. Try mixing in some provolone or fontina cheese. They melt nicely and add a rich taste. Choosing the right baking sheets is key. Use a heavy-duty, rimmed baking sheet. This will help distribute heat evenly. If you have a nonstick sheet, it can also reduce sticking. An oven thermometer is a must-have tool. It ensures your oven heats to the right temperature. This small step can make a big difference in baking. For the full recipe, check out the details above. {{image_2}} You can add more veggies to your eggplant parmesan. Think zucchini, bell peppers, or spinach. These extras boost flavor and nutrition. You can also swap in cheese alternatives. Try vegan cheese or a mix of nutritional yeast and cashews. This keeps it tasty and healthy. If you need a gluten-free option, use almond flour or chickpea flour instead of regular flour. For breadcrumbs, try crushed gluten-free crackers or ground nuts. You can also use cornmeal for a different crunch. These swaps keep the dish crispy without gluten. Want to boost protein? Incorporate some ground meat, like turkey or beef, into the marinara sauce. This adds heartiness and makes it a full meal. You can also serve it with protein-rich sides, like a bean salad or quinoa. These additions make your meal more balanced and satisfying. For the full recipe, check out the Crispy Baked Eggplant Parmesan . To store leftovers, let the eggplant cool completely. Place it in an airtight container. It stays fresh for about 3 to 4 days in the fridge. When you're ready to enjoy it again, follow these best practices for reheating. Preheat your oven to 350°F (175°C). Place the eggplant in a baking dish and cover it with foil. Heat for about 15-20 minutes. This keeps the cheese from burning and helps it warm evenly. If you want to save some for later, you can freeze eggplant parmesan. First, let it cool completely. Wrap it tightly in plastic wrap, then in foil. This helps prevent freezer burn. It will stay good for about 2-3 months. When it’s time to eat, thaw it in the fridge overnight. Reheat it in the oven at 350°F (175°C) for about 30-40 minutes. This way, you’ll get that crispy texture back. For the full recipe, check out the details above. Yes, you can make this dish ahead of time. Here’s how: - Prepare and bread the eggplant slices. - Bake them until crispy. - Let them cool, then cover and store in the fridge. - When you are ready to serve, layer with sauce and cheese. - Bake until heated through. This method keeps the flavors intact and saves time. To keep the eggplant crispy: - Salt the slices and let them sit for 30 minutes. - Rinse and pat them dry to remove moisture. - Use panko breadcrumbs for extra crunch. - Bake them on a wire rack to allow air circulation. These tips help maintain that delightful crispiness. Absolutely! You can use other vegetables like: - Zucchini - Portobello mushrooms - Cauliflower These options add variety and unique flavors. Keep the prep similar for best results. Pair this dish with: - A simple green salad - Garlic bread - Roasted vegetables These sides complement the flavors well and create a complete meal. To make a vegan version, swap out these ingredients: - Use flax eggs or chickpea flour instead of eggs. - Replace Parmesan and mozzarella with vegan cheese. - Ensure your breadcrumbs are vegan-friendly. These changes keep the dish tasty and plant-based while still being satisfying. For the full recipe, check the detailed instructions. Crispy baked eggplant parmesan is simple and rewarding to make. We covered the essential ingredients and step-by-step instructions. The tips can help achieve the perfect crisp and flavor. You can also explore variations based on your diet. Remember how to store leftovers for later enjoyment. Cooking should be fun, and this dish offers a tasty way to explore new flavors. Give it a try and enjoy the delicious results!

Crispy Baked Eggplant Parmesan Healthy Flavorful Delight

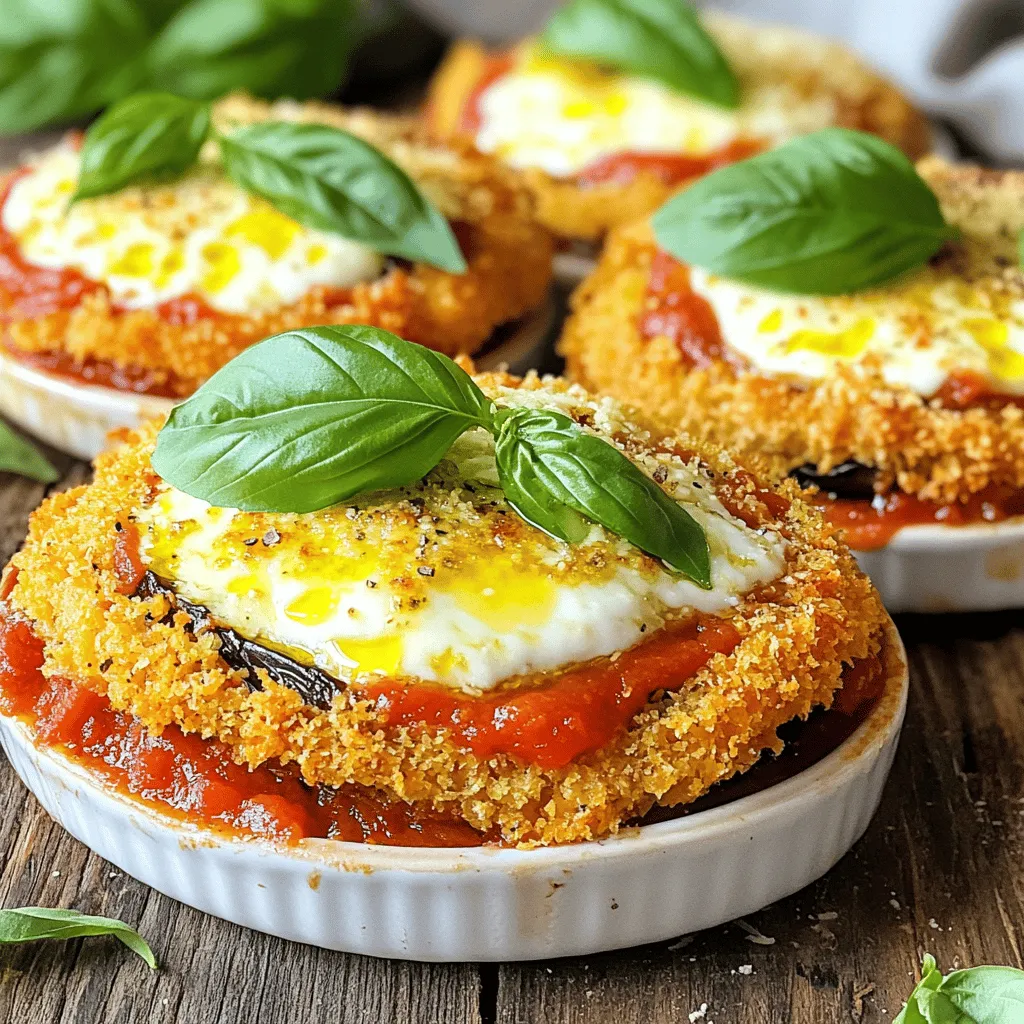
Are you ready to enjoy a delicious twist on a classic dish? My Crispy Baked Eggplant Parmesan is a healthy

Older posts
Newer posts
← Previous Page1 … Page52 Page53 Page54 … Page84 Next →

dsad

© 2026 Lisa Dishes • Built with GeneratePress

Our Policies

  • Copyright Policy
  • Cookie Policy
  • GDPR Policy
  • Privacy Policy
  • Disclaimer
  • Terms Of Use

More Information

  • Home
  • About
  • Contact
  • Appetizers
  • Dessert
  • Dinner
  • Drinks
©2026, Lisa Dishes About Back To Top