Skip to content
DisclaimerTerms Of UseGDPR PolicyCookie Policy

Lisa Dishes

  • Home
  • Drinks
  • Appetizers
  • Dinner
  • Dessert
  • About
  • Contact
  • Privacy Policy
DisclaimerTerms Of UseGDPR PolicyCookie Policy

NO-ING-IMG

- 1 pound boneless skinless chicken thighs - 1 cup freshly squeezed orange juice - 2 tablespoons soy sauce - 3 tablespoons honey - 2 cloves garlic, minced - 1 tablespoon grated ginger - 1 tablespoon cornstarch mixed with 2 tablespoons water - 1 tablespoon sesame oil - 1 teaspoon chili flakes (optional) - Green onions and sesame seeds for garnish Sticky orange chicken starts with fresh, high-quality ingredients. The chicken thighs give a rich, juicy bite. The orange juice adds a bright and tangy flavor. Soy sauce brings a deep umami taste. Honey sweetens the dish and helps it stick. Garlic and ginger add warmth and aroma. For the sauce, a cornstarch slurry thickens it just right. Sesame oil gives a nutty note. If you like spice, add chili flakes for heat. Garnish with green onions and sesame seeds. They add color and crunch. You can find the full recipe to get all the details needed to make this delicious dish. Start by making the marinade. In a bowl, whisk together these ingredients: - 1 cup freshly squeezed orange juice - 2 tablespoons soy sauce - 3 tablespoons honey - 2 cloves garlic, minced - 1 tablespoon grated ginger - 1 tablespoon sesame oil Once mixed well, add the chicken pieces. Make sure each piece is coated in the marinade. Cover the bowl and let it sit in the fridge for at least 30 minutes. If you have time, let it marinate for up to 2 hours. This step is key for flavor. Heat a large skillet over medium-high heat. Once hot, add the marinated chicken. Sauté it for about 5-7 minutes. You want it cooked through and lightly caramelized. After that, reduce the heat to medium. Pour in the reserved marinade. Let it simmer for about 3-4 minutes. This will help deepen the flavors. Now it’s time to thicken the sauce. Stir in a cornstarch slurry made from 1 tablespoon of cornstarch mixed with 2 tablespoons of water. Keep cooking for another 1-2 minutes. Stir constantly until the sauce reaches that sticky consistency. This is where your sticky orange chicken gets its name. For full details on the ingredients and prep time, check the Full Recipe. To make your sticky orange chicken shine, coat the chicken well in the marinade. This step ensures maximum flavor. When you add the chicken, use your hands or a spoon to mix it in. For the best taste, marinate your chicken for at least 30 minutes. If you have time, aim for 2 hours. The longer it sits, the more the flavors will soak in. To get the right sauce thickness, keep an eye on it as it cooks. If it seems too thin, let it simmer longer. If it’s too thick, add a splash of water or more orange juice. Balancing sweet and savory is key. Taste your sauce and adjust as needed. You can add a bit more soy sauce for saltiness or honey for sweetness. Sticky orange chicken pairs well with white or brown rice. The rice soaks up the sauce nicely. You might also try it with steamed veggies for color and crunch. For a beautiful presentation, serve the chicken in a shallow bowl over rice. Drizzle extra sauce on top, and add green onions and sesame seeds. A lime wedge on the side adds a pop of color and freshness. {{image_2}} You can easily switch up the protein in sticky orange chicken. Instead of chicken thighs, try using chicken breasts, shrimp, or tofu. Each option brings its own taste and texture. If you want a lighter dish, fish like salmon works well too. For a fruity twist, use different juices. Pineapple juice adds a tropical flair. Apple juice provides a sweet touch, while lime juice gives a zesty kick. Each juice changes the flavor in a fun way. To make this dish gluten-free, choose tamari instead of soy sauce. This keeps the same savory taste without gluten. Check your honey to ensure it’s pure, as some brands may contain additives. For vegetarian options, swap chicken for cauliflower or chickpeas. Both options absorb the flavors well. You can still enjoy all the great taste with these swaps. If you like heat, add more chili flakes or fresh chopped chilies. You can also try sriracha or chili paste for extra spice. Mix in these ingredients while cooking for the best flavor. For a milder version, reduce or skip the chili flakes. Serve this dish with a side of steamed broccoli or carrots. These veggies balance the flavors and are kid-friendly. After cooking, you can store your sticky orange chicken in the fridge. Place it in an airtight container. This keeps it fresh and tasty. Your leftovers last about three to four days in the refrigerator. Make sure to let it cool down before sealing it up. This helps prevent moisture buildup. If you want to save it for later, freezing is a great option. First, let the chicken cool completely. Then, place it in a freezer-safe container or bag. Try to remove as much air as possible. This helps prevent freezer burn. Sticky orange chicken can stay in the freezer for up to three months. When you are ready to eat it, take it out and thaw it overnight in the fridge. When it’s time to enjoy your leftovers, you have two good options: the microwave or the stovetop. - Microwave: This is quick and easy. Place the chicken in a microwave-safe dish. Cover it with a lid or a damp paper towel. Heat it in short bursts, stirring in between. This helps keep it moist. - Stovetop: This way helps maintain the texture and flavor. Heat a skillet over medium heat. Add a splash of water or broth to keep it from drying out. Cook until it's hot, stirring often. Both methods work well, but the stovetop keeps the sticky sauce nice and thick. To add heat to your Sticky Orange Chicken, use chili flakes. You can add them while cooking. Start with a teaspoon and adjust to your taste. For a stronger kick, consider fresh chopped chili peppers. These can add a nice crunch too. Yes, you can use chicken breasts. They will work well in this recipe. However, thighs have more fat, which makes them juicier. If you choose breasts, be careful not to overcook them. This will keep them tender and juicy. Sticky Orange Chicken pairs well with many sides. Here are some great options: - Steamed rice - Fried rice - Stir-fried vegetables - Noodles - Salad with a light dressing These sides balance the sweet and tangy flavor of the chicken. Store leftovers in an airtight container. Keep them in the fridge for up to three days. Make sure the chicken cools down before sealing it. This keeps the chicken fresh and safe to eat. Reheat Sticky Orange Chicken on the stove for best results. Use low heat and stir often. This will keep it from drying out. You can also use the microwave. Just cover it and heat in short bursts. Check often to avoid overheating. For the full recipe, check the section above. This blog post covered how to make Sticky Orange Chicken with simple steps and tasty tips. We discussed key ingredients, marinating, cooking, and thickening the sauce. I shared storage info, variations, and answers to common questions. Try this recipe for a fun dinner or gathering. It’s tasty and easy to adjust! Enjoy making it your own and impressing your friends with your cooking skills. Stick to these steps for a dish that’s sure to please.

Sticky Orange Chicken Irresistible Flavor Explosion

If you’re craving bold and bright flavors, Sticky Orange Chicken is a must-try! With juicy chicken thighs bathed in a

To make the best Southwest Chicken Tortilla Soup, gather these fresh ingredients: - 1 lb boneless, skinless chicken thighs (or breasts) - 1 medium onion, diced - 3 cloves garlic, minced - 1 can (14.5 oz) diced tomatoes (with juice) - 1 can (15 oz) black beans, rinsed and drained - 1 can (15 oz) corn kernels, drained - 4 cups chicken broth - 1 tablespoon chili powder - 1 teaspoon cumin - 1 teaspoon smoked paprika - 1 cup bell peppers (red and yellow), diced - 2 tablespoons olive oil - Salt and pepper to taste - Tortilla strips for garnish - Fresh cilantro, chopped for garnish - 1 avocado, diced (for serving) - Lime wedges (for serving) These ingredients create a warm and flavorful soup. The chicken adds protein, while beans and corn offer fiber and sweetness. Spices like chili powder and cumin bring heat and depth. Fresh toppings like avocado and cilantro add a bright touch. You can find the full recipe at the link provided. Enjoy preparing this comforting dish! 1. Sauté the Onion and Garlic Heat two tablespoons of olive oil in a large pot over medium heat. Add one diced onion and sauté it for about 3-4 minutes. You want it to become soft and clear. Then, add three minced garlic cloves. Cook for one more minute. The smell will be amazing! 2. Brown the Chicken Place one pound of boneless, skinless chicken thighs or breasts into the pot. Season the chicken with salt, pepper, one tablespoon of chili powder, one teaspoon of cumin, and one teaspoon of smoked paprika. Cook it for 5-6 minutes. You want it browned on all sides. 3. Add Broth and Vegetables Pour in four cups of chicken broth, one can of diced tomatoes (with juice), one can of rinsed black beans, one can of drained corn, and one cup of diced bell peppers. Stir it well to mix everything. This mix adds a lot of great flavor. 1. Bring to Boil and Simmer Turn the heat up to high and bring the soup to a boil. Once it boils, lower the heat to low. Cover the pot and let it simmer for 20-25 minutes. This allows the chicken to cook through and the flavors to blend. 2. Shred the Chicken After simmering, take the chicken out of the pot. Use two forks to shred it into pieces. This makes it easy to eat. Return the shredded chicken back to the soup. Stir everything together. 3. Adjust Seasoning Taste the soup and see if it needs more salt, pepper, or spices. Add what you think it needs. This step is key to making the soup just right for your taste. 1. Garnish Options Serve the soup hot and make it pretty with tortilla strips on top. Add diced avocado, fresh cilantro, and a squeeze of lime juice. These toppings give great crunch and flavor. 2. Recommended Side Dishes This soup pairs well with warm tortillas or a side salad. You can also serve it with rice for a filling meal. 3. Best Pairings with Southwest Chicken Tortilla Soup Try it with a refreshing drink like iced tea or a cold beer. The flavors mix well together, making your meal even better. For the full recipe, check out the complete guide. - Ensuring Tender Chicken To keep chicken tender, use thighs instead of breasts. Thighs have more fat, which makes them juicy. Cook them until they reach 165°F. This ensures they stay moist. - Best Practices for Flavor Depth For deeper flavor, sauté the onion and garlic until golden. This brings out their natural sweetness. Adding spices early while cooking also helps build layers of taste in the soup. - How to Achieve Perfect Consistency To get the right thickness, let the soup simmer longer. This reduces liquid and thickens the broth. If it’s too thick, add a bit more chicken broth to loosen it. - Proper Storage Techniques Store leftover soup in an airtight container. Let it cool to room temperature before sealing. This keeps the soup fresh and prevents spoilage. - Best Ways to Reheat the Soup Reheat the soup on the stove over medium heat. Stir often to prevent sticking. If using a microwave, heat in short intervals, stirring in between for even warming. - Freezing Tips for Long-Term Storage To freeze, let the soup cool completely. Use freezer-safe containers, leaving space for expansion. It keeps well for up to three months. Thaw overnight in the fridge before reheating. For the full recipe, be sure to check the detailed instructions above. {{image_2}} Gluten-Free Options To make this soup gluten-free, use corn tortillas for garnish. Avoid any pre-made tortilla strips that may contain gluten. All other ingredients are naturally gluten-free. Vegetarian or Vegan Alternatives For a vegetarian version, skip the chicken and use vegetable broth instead of chicken broth. You can add more beans or tofu for protein. For a vegan option, ensure the broth is plant-based and use avocado and lime for toppings. Low-Calorie Variations To reduce calories, cut back on olive oil and use skinless chicken. You can also add more vegetables like zucchini or spinach to increase volume without adding too many calories. Adding Spice If you like heat, add jalapeños or use a spicier chili powder. You can also sprinkle in cayenne pepper for a kick. Taste it as you go to find the right balance for you. Creative Ingredient Swaps Swap black beans for pinto beans or use quinoa instead of chicken for a hearty meal. You can replace bell peppers with diced carrots or sweet potatoes for a different flavor profile. International Twists on the Recipe To give this soup a twist, add curry powder for an Indian flair or miso paste for a touch of umami. Experiment with coconut milk for a creamy base, or add fresh herbs like basil for a unique taste. For the full recipe, check out the Southwest Chicken Tortilla Soup section. Calories per Serving Each serving of Southwest Chicken Tortilla Soup has about 350 calories. This soup is filling while remaining light. Macronutrient Content - Protein: 30 grams - Carbohydrates: 40 grams - Fat: 10 grams This balance of macronutrients helps fuel your body without overloading it. Health Benefits of Ingredients - Chicken: Packed with protein, it supports muscle growth. - Beans: These add fiber, helping digestion and keeping you full. - Vegetables: Diced tomatoes and bell peppers boost vitamins and minerals, promoting overall health. - Spices: Chili powder and cumin not only add flavor but also can aid digestion and reduce inflammation. Recommended Portion Sizes I suggest one to one and a half cups per person. This amount offers a hearty meal without being too heavy. Adjusting Servings for Meal Prep To make more, simply double or triple the recipe. Each ingredient scales easily, so no need to worry. Suitability for Different Diets This soup fits many diets. It is gluten-free and can be made dairy-free. Just skip any cheese toppings or use dairy-free options. How do I make Southwest Chicken Tortilla Soup from scratch? To make this soup from scratch, gather your ingredients. Start by heating olive oil in a pot. Sauté diced onion for about 3-4 minutes. Add minced garlic and cook for another minute. Then, add the chicken and seasonings. Brown the chicken for 5-6 minutes. Next, pour in the broth, tomatoes, beans, corn, and bell peppers. Bring to a boil, then simmer for 20-25 minutes. Shred the chicken and stir it back in. Serve hot with toppings. Can I make this soup in a slow cooker? Yes, you can make this soup in a slow cooker. Brown the chicken and onion in a pan first. Then, add everything to the slow cooker. Cook on low for 6-8 hours or high for 3-4 hours. Shred the chicken before serving. What can I substitute for chicken broth? If you don’t have chicken broth, you can use vegetable broth. You can also use water with added seasonings. It will change the flavor a bit, but it still works. Can I use frozen chicken in this recipe? Yes, using frozen chicken is fine. Just add the frozen chicken to the pot at the start. Keep in mind it may take longer to cook. Ensure the chicken reaches 165°F for safety. What other beans can I use besides black beans? You can use pinto beans or kidney beans instead of black beans. These options will add a nice texture and flavor. You can even mix different beans for more variety. What should I do if my soup is too spicy? If your soup is too spicy, add more broth or water. You can also add more corn or beans. These will help balance the heat. A dollop of sour cream can cool it down, too. How can I fix a soup that’s too thick? To fix thick soup, simply add more broth or water. Stir well until you reach the desired consistency. You can also add some diced tomatoes for added liquid. This blog covered the key ingredients and easy steps to make Southwest Chicken Tortilla Soup. You learned how to prep ingredients, cook the soup, and serve it with tasty garnishes. I also shared tips for storing and reheating, along with variations for different diets. Remember, this soup is flexible and packed with flavor. Feel free to customize it! Enjoy cooking and sharing this warm dish with friends and family. Happy cooking!

Savory Southwest Chicken Tortilla Soup Recipe Guide

Are you ready for a delicious twist on chicken soup? This Savory Southwest Chicken Tortilla Soup recipe is packed with

To make these tasty apple cider glazed donut holes, you will need: - Main ingredients: - 1 cup apple cider - 2 cups all-purpose flour - 1/2 cup granulated sugar - 1/4 cup unsalted butter, melted - 1 large egg - 1/2 cup whole milk - Spices: - 1/2 teaspoon ground cinnamon - 1/4 teaspoon ground nutmeg - 1/2 teaspoon salt - Glaze ingredients: - 1 cup powdered sugar These ingredients create a warm, sweet treat that captures the essence of fall. The apple cider adds moisture and flavor. The spices bring warmth, while the powdered sugar glaze gives a sweet finish. Each ingredient plays a key role in the final taste. By using fresh apple cider, you enhance the flavor. This simple list allows you to create delicious donut holes with ease. For the full recipe, check the complete cooking instructions above. To make great apple cider glazed donut holes, you must reduce the apple cider. Reducing concentrates the flavor, making it richer. Start by pouring one cup of apple cider into a small saucepan. Bring it to a boil over medium heat. Then, lower the heat and let it simmer. This process takes about 10 to 15 minutes. You want the cider to reduce to about a quarter cup. Once it reaches this point, take it off the heat and let it cool slightly. This step is key for a strong apple flavor in your glaze. Next, it's time to prepare the donut batter. In a large mixing bowl, combine your dry ingredients. This includes two cups of all-purpose flour, one tablespoon of baking powder, half a teaspoon of salt, half a teaspoon of ground cinnamon, and a quarter teaspoon of ground nutmeg. In another bowl, mix the wet ingredients. Whisk together a quarter cup of melted unsalted butter, one large egg, half a cup of whole milk, one teaspoon of vanilla extract, and the reduced apple cider. Now, combine the wet and dry mixtures. Pour the wet mixture into the dry bowl. Stir gently until just combined. Be careful not to overmix, as this can make your donut holes tough. A few lumps are okay, so don’t stress about perfection. Now comes the fun part—frying! Heat oil in a deep frying pan or pot to 350°F (175°C). Make sure there is enough oil to submerge the donut holes. Use a thermometer for accuracy. Once the oil is hot, form small balls of dough, about one inch in diameter. You can use a small cookie scoop or your hands. Carefully drop the dough balls into the hot oil. Fry them in batches to avoid crowding. Each batch takes about 2 to 3 minutes. Watch for a golden-brown color. Turn them occasionally for even cooking. Once they are done, remove them with a slotted spoon and place them on a paper towel-lined plate. This helps drain excess oil. Your donut holes are almost ready! Now you can move on to glazing them with the delicious apple cider glaze. For the full recipe, check out the complete instructions above. To make great apple cider glazed donut holes, focus on the dough. Do not overwork it. Overmixing makes the donut holes dense. Stir until just combined. This keeps them light and fluffy. Frying time and temperature are key. Heat your oil to 350°F (175°C). This is the sweet spot for frying. If the oil is too cool, the donut holes will absorb more oil. Cook each batch for about 2-3 minutes. Flip them halfway for even cooking. Look for a golden-brown color as your cue to remove them. Want to spice things up? You can add more flavor to your donut holes. Try mixing in ground ginger or allspice for a twist. These spices bring warmth and depth to your treats. For toppings, think outside the box. You can sprinkle cinnamon sugar on top for a sweet crunch. Or, mix in mini chocolate chips before frying for a fun surprise. Drizzle caramel sauce over the glazed donut holes for an extra treat. There are many ways to make this recipe your own. {{image_2}} You can change the flavor of your donut holes by using different spices. Try adding ginger for warmth or allspice for a unique twist. Seasonal flavors like pumpkin spice work great in the fall. These spices make the donut holes taste fresh and fun. Mix and match to find your favorite blend! If you want a lighter treat, you can swap sugar and flour for healthier options. Use whole wheat flour or almond flour for a nutty taste. Instead of granulated sugar, try honey or maple syrup. These swaps can make your donut holes tasty and healthier. You can also bake the donut holes instead of frying them. Just scoop the batter into a mini muffin tin and bake at 350°F for about 12-15 minutes. This method cuts down on oil and calories while still giving you a delicious treat. To keep your donut holes fresh, store them in an airtight container. This helps them stay soft and tasty. If you leave them out at room temperature, they last about two days. However, if you place them in the fridge, they can remain good for up to a week. Just remember, the fridge can make them a bit dry. If you want to save some for later, freezing is a great option. First, let the donut holes cool completely. Then, place them in a single layer on a baking sheet. Freeze them for about an hour. After they are firm, transfer them to a freezer bag or container. They can stay frozen for up to three months. To enjoy them again, thaw them in the fridge overnight. For a warm treat, pop them in the microwave for about 10 seconds. You can also reheat them in an oven at 350°F for about five minutes. This will make them nice and warm again. Yes, you can prepare these donut holes ahead of time. Make them and let them cool completely. Store them in an airtight container at room temperature for up to two days. If you want to keep them longer, you can freeze them. Just place them in a freezer bag and remove as much air as possible. When ready to eat, thaw them at room temperature. You can warm them in the oven for a few minutes to bring back that fresh taste. To make a thicker glaze, you can add more powdered sugar. Mix the sugar slowly into the apple cider until you reach your desired thickness. If it’s still too thin, keep adding sugar a little at a time. You can also reduce the apple cider more to make it thicker. Just simmer it longer on the stove. This will give your glaze a strong apple flavor as well. For frying donut holes, I recommend using oils with high smoke points. Good choices include vegetable oil, canola oil, or peanut oil. These oils heat evenly and keep the donut holes from absorbing too much grease. Heat the oil to 350°F (175°C) for the best frying results. This ensures a crispy outside and fluffy inside. In this post, we explored making delicious apple cider glazed donut holes. We covered the key ingredients needed and detailed each step of the process. I shared tips for getting the texture just right and suggested fun variations to try. Remember, practice makes perfect. Enjoy experimenting with flavors and find what makes your taste buds happy. With proper storage, these treats can last a while, letting you savor them longer. Happy frying!

Apple Cider Glazed Donut Holes Tasty and Simple Treat

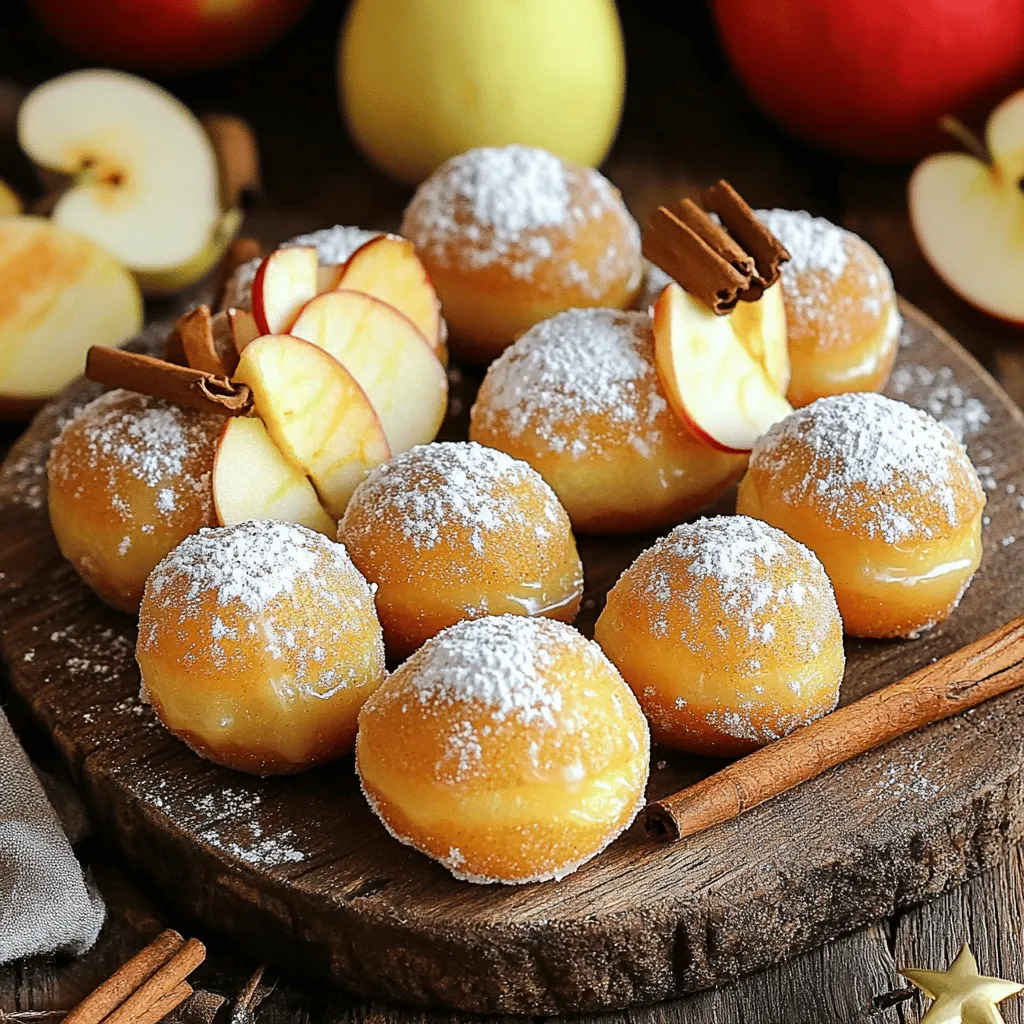
Are you ready to indulge in a fun fall treat? My Apple Cider Glazed Donut Holes are simple to make

- 1 cup rolled oats - 1/2 cup natural peanut butter (smooth or crunchy) - 1/3 cup honey or maple syrup - 1/4 cup cocoa powder - 1/4 cup chocolate chips (dark or semi-sweet) - 1/4 cup ground flaxseed - 1 teaspoon vanilla extract - A pinch of salt These energy balls pack a punch of nutrients. Rolled oats provide fiber, which helps keep you full. Peanut butter adds healthy fats and protein, giving you energy. Cocoa powder is rich in antioxidants, and it adds a chocolatey taste. Ground flaxseed contains omega-3 fatty acids, which are great for heart health. Honey or maple syrup gives a bit of sweetness and energy boost. Together, these ingredients make a healthy snack. You can swap out some ingredients if needed. Use almond butter or cashew butter instead of peanut butter for a nut-free option. Try agave syrup if you want a lower-glycemic sweetener. For a gluten-free version, use certified gluten-free oats. If you want to skip the chocolate chips, you can use dried fruit or nuts for added texture. These swaps keep the energy balls tasty and healthy. Making Peanut Butter Chocolate Energy Balls is simple and fun. Start by gathering all your ingredients. You will need rolled oats, peanut butter, honey or maple syrup, cocoa powder, chocolate chips, ground flaxseed, vanilla extract, and a pinch of salt. This recipe takes about 10 minutes to prep. 1. Mix the Dry Ingredients: In a large bowl, combine 1 cup of rolled oats, 1/4 cup of cocoa powder, and 1/4 cup of ground flaxseed. Stir these dry ingredients well until they blend smoothly. 2. Combine the Wet Ingredients: In a separate bowl, add 1/2 cup of peanut butter, 1/3 cup of honey or maple syrup, 1 teaspoon of vanilla extract, and a pinch of salt. Mix these until they become smooth and creamy. 3. Combine Wet and Dry: Gradually pour the wet mixture into the dry ingredients. Stir until everything is mixed well. 4. Add Chocolate Chips: Finally, fold in 1/4 cup of chocolate chips. Make sure they are evenly mixed into the batter. 1. Chill the Mixture: Once you mix all the ingredients, cover the bowl and place it in the fridge for about 30 minutes. This makes it easier to form the balls. 2. Form the Balls: After chilling, take the mixture out. Use your hands to roll small balls, about 1 inch in size. Place them on a parchment-lined baking sheet. 3. Final Chill: After forming all the balls, chill them again in the fridge for an extra 15-20 minutes. This helps them firm up. 4. Store: Keep the energy balls in an airtight container in the fridge. They stay fresh for up to a week. You can enjoy them as a quick snack anytime! For the full recipe, check the details above. To get the best texture in your energy balls, start with the right ingredients. Use rolled oats, as they provide a chewy base. Ground flaxseed adds a nice crunch. If you prefer a smoother texture, use smooth peanut butter. For a chunkier bite, go with crunchy peanut butter. Make sure to chill your mixture before rolling. This helps the balls hold their shape. Accurate measurements are key for tasty energy balls. Use dry measuring cups for the oats and cocoa powder. For sticky ingredients like peanut butter and honey, a liquid measuring cup works better. Always pack the peanut butter into the cup. This ensures you get the right amount. If you want a sweeter snack, add a little more honey or maple syrup. Prepare these energy balls with simple tools. A large mixing bowl makes combining ingredients easy. Use a spatula for mixing; it helps scrape the sides well. An ice cream scoop works great for portioning the mixture into balls. Line your baking sheet with parchment paper. This keeps the balls from sticking. Finally, keep a small bowl of water nearby. Wet your hands when rolling to prevent sticking. For the complete recipe, check the detailed instructions. {{image_2}} To make these energy balls vegan, use maple syrup instead of honey. Both options offer sweetness, but maple syrup fits a vegan diet. You can also swap the chocolate chips for dairy-free options. Look for brands that offer dark chocolate with no milk. This keeps the flavor while sticking to a plant-based diet. If you need a gluten-free snack, these energy balls are easy to adapt. Rolled oats are naturally gluten-free, but ensure they are certified gluten-free. Some brands may process oats with gluten products. Check the label before using. You can also use gluten-free chocolate chips to avoid any gluten contamination. Want to add some flair? You can mix in protein powder for an extra boost. This makes them great after workouts. If you love nuts, try adding chopped almonds or walnuts. They add crunch and healthy fats. Dried fruits like raisins or cranberries also work well. They bring a sweet taste and chewy texture to the mix. Feel free to experiment with these additions to find your perfect flavor combination. For the full recipe, refer to the earlier section. To keep your Peanut Butter Chocolate Energy Balls fresh, place them in an airtight container. Store them in the fridge for up to a week. I like to layer them with parchment paper to avoid sticking. This simple step keeps them neat and easy to grab. If you want to save some for later, freezing is a great option. You can freeze the energy balls in a single layer on a baking sheet. Once they are firm, transfer them to a freezer-safe bag. This way, you can enjoy them for up to three months. Just thaw them in the fridge overnight before eating. Check your energy balls before eating. If they smell off or have a slimy texture, it's best to toss them. Fresh energy balls should have a rich, nutty aroma and a firm feel. Always trust your senses when it comes to food safety. These energy balls last about one week in the fridge. To keep them fresh, store them in an airtight container. If you want to enjoy them longer, freeze them. They can last for up to three months in the freezer. Just thaw them before eating. Yes, you can swap peanut butter for other nut butters. Almond butter, cashew butter, or sunflower seed butter all work well. Each option will give a unique taste and texture. Just keep the measurements the same for best results. To boost nutrition, add seeds or nuts. Chia seeds, pumpkin seeds, or walnuts are great choices. You can also mix in dried fruits like raisins or cranberries. This adds fiber and vitamins. A scoop of protein powder can enhance the protein content too. Yes, this recipe is a no-bake treat! You simply mix the ingredients and chill them. This makes it easy and quick to prepare. The chilling step helps the balls firm up. You won't need an oven for this recipe. You can find the full recipe for Peanut Butter Chocolate Energy Balls in the recipe section. It includes all the steps and tips for making these tasty snacks. Making Peanut Butter Chocolate Energy Balls is simple and fun. We covered the key ingredients and their health perks. You can easily swap out common ingredients and still enjoy the taste. I shared easy steps to mix and chill your energy balls for the perfect bite. With tips for great texture and measuring, you’ll succeed every time. Don’t forget the variations for special diets or added flavors! Storing them right keeps them fresh and tasty. Follow the freezing tips for long life. Now you’re ready to make your own delicious snacks. Enjoy your healthy treats!

Peanut Butter Chocolate Energy Balls Easy Healthy Snack

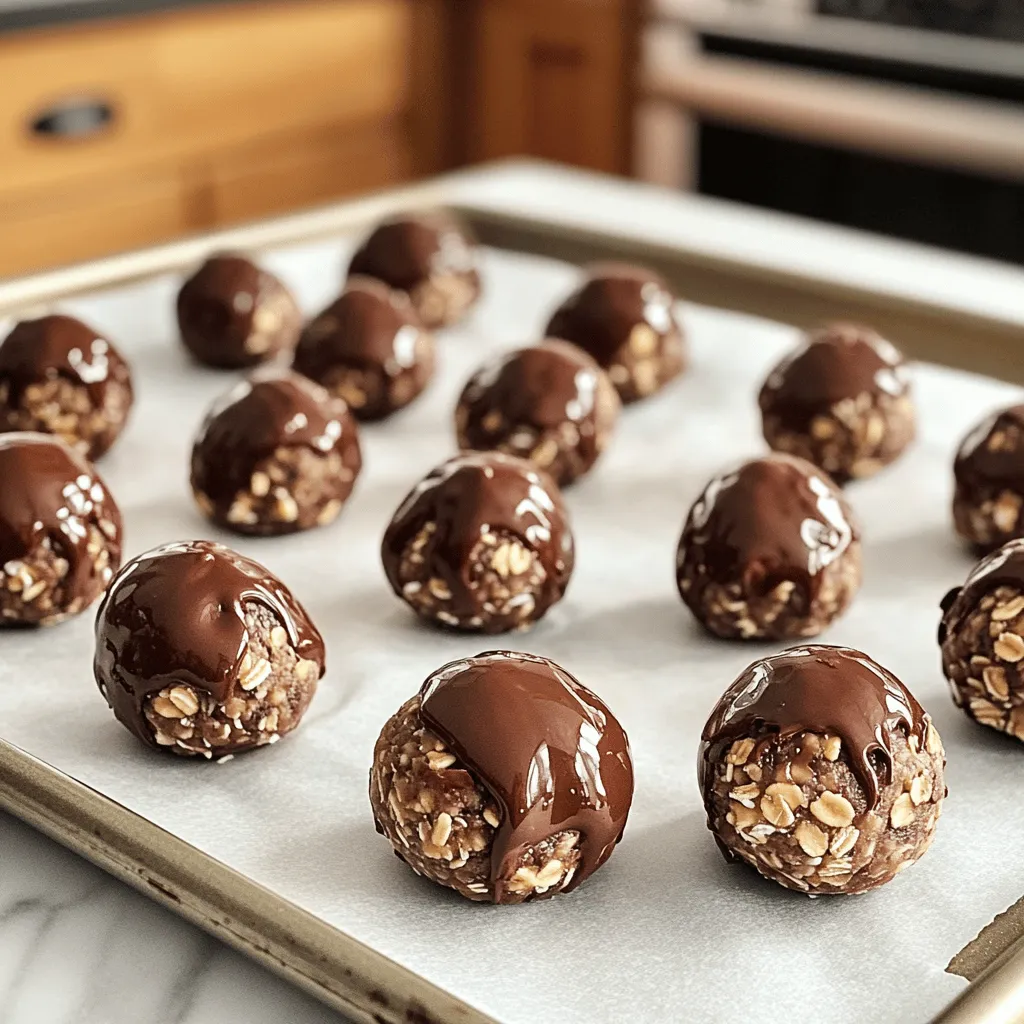
Are you looking for a quick, healthy snack that satisfies your cravings? Peanut Butter Chocolate Energy Balls are your answer!

To make these sticky buns, you need basic ingredients. Here’s what you will need: - 3 cups all-purpose flour - 1/4 cup granulated sugar - 1 packet (2 1/4 teaspoons) instant yeast - 1/2 teaspoon salt - 1/2 teaspoon ground cinnamon - 1/4 cup unsalted butter, melted - 1 cup warm milk (around 110°F) - 1 large egg - 1 cup pecans, chopped - 1 cup brown sugar, packed - 1/2 cup maple syrup - 1/4 cup unsalted butter, softened (for filling) - 1 teaspoon vanilla extract Each ingredient plays a key role in flavor and texture. The flour gives structure, while the sugar adds sweetness. The yeast helps the dough rise, making it fluffy. The pecans add crunch, and maple syrup gives a rich, sweet taste. While the core ingredients shine, you can tweak the taste. Consider adding: - A sprinkle of extra ground cinnamon - Raisins or dried cranberries for sweetness - A touch of nutmeg for warmth - A splash of bourbon for depth These extras can enhance the flavor. Feel free to experiment and find what you love! To make the process smooth, gather these tools: - Mixing bowls - Whisk - Rolling pin - Baking dish - Kitchen towel - Measuring cups and spoons - Knife for slicing Having the right tools will make baking easier. This way, you can focus on creating your delicious sticky buns! {{ingredient_image_1}} To start, grab a mixing bowl. Combine 2 cups of all-purpose flour, granulated sugar, instant yeast, salt, and ground cinnamon. Mix these dry ingredients well. In another bowl, whisk together the melted butter, warm milk, and egg. This mix needs to be smooth and fully combined. Now, slowly pour the wet mix into the dry mix. Stir until they blend together. Next, add the remaining flour gradually, one cup at a time. You want a soft dough to form. Knead the dough on a floured surface for about 5 to 7 minutes. Aim for a smooth and elastic texture. Once the dough feels right, place it in a greased bowl. Cover it with a kitchen towel and let it rise in a warm spot for about 1 hour. It should double in size. While the dough rises, it’s time to work on the sticky topping. Take a medium saucepan and set it over low heat. Combine the brown sugar, maple syrup, and softened butter in the pan. Stir this mix constantly until the sugar dissolves and everything is smooth. Once done, remove it from the heat. Add in the chopped pecans and stir. After the dough has risen, it’s time to shape the buns. Punch the dough down gently, then roll it out on a floured surface into a rectangle about 12x18 inches. Spread the softened butter over the dough. If you want extra flavor, sprinkle some cinnamon and sugar on top. Now, roll the dough tightly into a log from one long edge. Slice the log into 12 equal pieces. Place these pieces cut-side up in the baking dish, which has your sticky topping in it. Cover the dish with a kitchen towel, and let the buns rise for another 30 minutes. Preheat your oven to 350°F (175°C). Bake the sticky buns for 25 to 30 minutes. Look for a golden brown color. After baking, let them cool for about 5 minutes in the dish. Then, invert them onto a serving platter. Enjoy these delicious buns warm! Kneading dough is a key step. Start with clean hands and a floured surface. Use the heel of your hand to push the dough away. Fold it over and repeat. You want to knead for about 5-7 minutes. The dough should feel smooth and elastic when done. For rising, place your dough in a warm spot. Cover it with a kitchen towel. This helps keep it cozy. Let it rise until it doubles in size. To get the best flavor, always use fresh ingredients. Use warm milk, not hot. This helps the yeast grow. Mix the dough well but don’t overwork it. The right texture is soft and slightly tacky. Add a bit of cinnamon to the filling for extra warmth. You can also sprinkle some on top before baking. This adds a lovely aroma. These sticky buns shine when served warm. Drizzle extra maple syrup on top. It adds sweetness and makes them shine. Garnish with whole pecans for a nice touch. Serve with whipped cream cheese on the side. It adds creaminess and balances the sweetness. You can also enjoy them with a cup of coffee or tea. This makes for a perfect treat at breakfast or brunch. Pro Tips Use Fresh Ingredients: Always use fresh yeast and high-quality maple syrup for the best flavor in your sticky buns. Check Dough Consistency: If your dough feels too sticky, add a little extra flour. It should be soft but not overly tacky. Perfect Rise: For a perfect rise, place your dough in a warm, draft-free area. An oven preheated to the lowest setting and then turned off works great. Let Them Cool: Allow the buns to cool for a few minutes after baking before inverting them to prevent the sticky topping from sliding off. {{image_2}} You can change the flavor of your sticky buns by adding spices or nuts. Try adding nutmeg for a warm taste. A pinch of cardamom gives a sweet and spicy kick. You can also use walnuts or hazelnuts instead of pecans. Each nut brings a unique flavor and crunch. If you want to make these buns vegan or dairy-free, it is easy. Replace the egg with flaxseed meal or applesauce. Use almond or soy milk instead of regular milk. For the butter, use coconut oil or vegan butter. These swaps keep the buns soft and tasty. Get fun with glazes and toppings! You can mix powdered sugar with almond milk for a sweet glaze. A chocolate drizzle adds a rich twist. For a fresh touch, use fruit jams or preserves. These ideas can make your sticky buns special and unique. After enjoying your sticky buns, store any leftovers in an airtight container. Keep them at room temperature for up to two days. If you want to keep them longer, refrigerate them. Just remember, refrigeration can dry them out a bit. To help, wrap each bun in plastic wrap before placing them in a container. When you're ready to enjoy those leftover sticky buns, reheating them is key. Preheat your oven to 350°F (175°C). Place the buns on a baking sheet. Cover them with foil to keep them moist. Heat for about 10-15 minutes. If you prefer the microwave, warm them for 15 seconds at a time. Just be careful not to overheat, or they may become tough. Freezing is a great option if you want to save some sticky buns for later. Allow the buns to cool completely after baking. Then wrap each one tightly in plastic wrap. Place the wrapped buns in a freezer-safe bag or container. They can last in the freezer for up to three months. When you're ready to eat, thaw them overnight in the fridge. Reheat as mentioned above for the best taste. Yes, you can make Maple Pecan Sticky Buns ahead of time. You can prepare the dough and let it rise. After rolling the dough, slice the buns and place them in the sticky topping. Cover the dish and refrigerate overnight. In the morning, let the buns sit at room temperature for about 30 minutes before baking. This saves time and gives you fresh buns in the morning. If you need a substitute for pecans, try walnuts or almonds. Both nuts add a nice crunch. You can also skip nuts entirely if you prefer. For a different flavor, try adding raisins or dried cranberries. These options keep the sticky buns tasty and fun. You know the sticky buns are done when they turn golden brown. They should feel soft but not doughy. You can also check the temperature with a food thermometer. The center should reach about 190°F (88°C). Let them cool for five minutes before serving for the best taste. Maple pecan sticky buns bring joy to any meal. We covered essential and optional ingredients that enhance flavor. Preparing the dough and topping is key to success. I shared best practices for kneading and rising. You can add spices or go vegan for your taste. Remember to store leftovers properly and reheat for freshness. Embrace these tips for a delicious treat. Enjoy making these sticky buns, and share them with friends and family!

Maple Pecan Sticky Buns Irresistible Homemade Treat

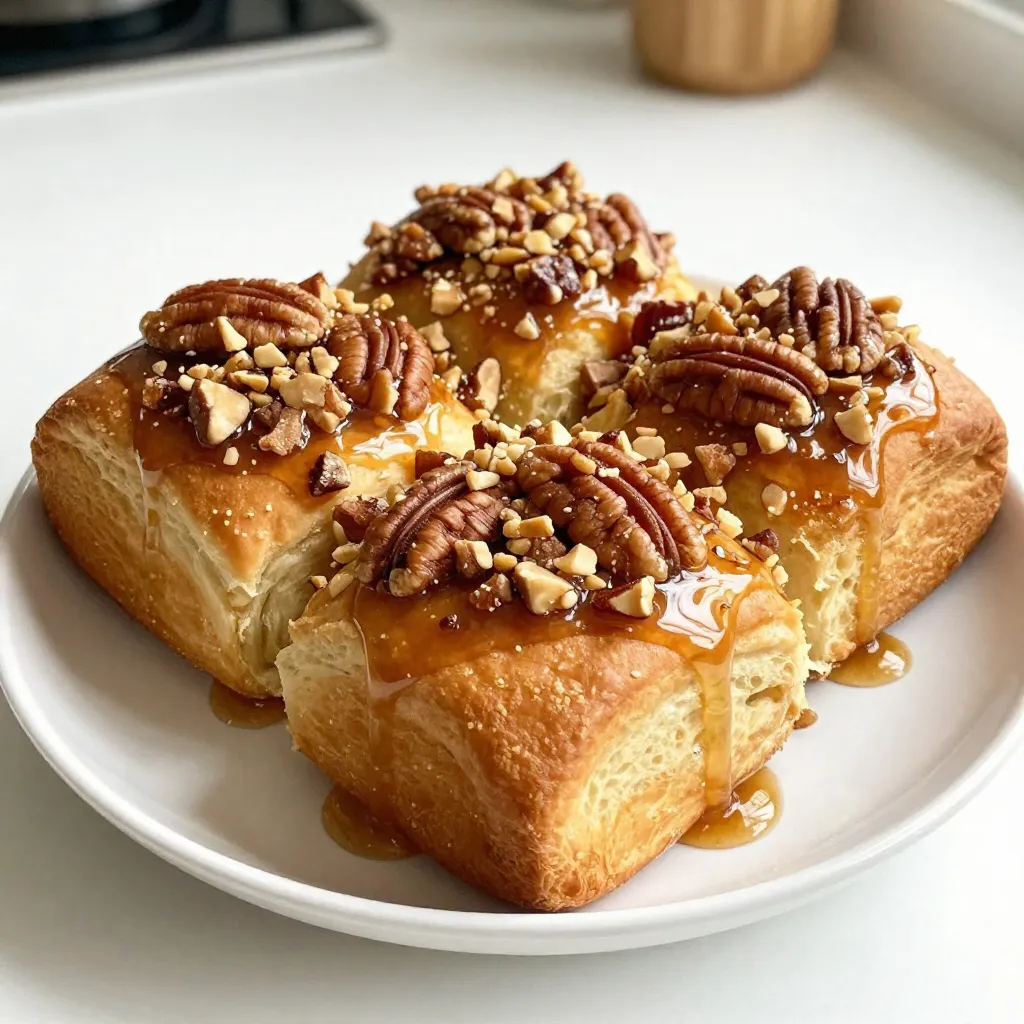
Welcome to your new favorite baking adventure! In this post, I’ll show you how to make mouthwatering Maple Pecan Sticky

- 1 package of refrigerated pizza dough - 4 tablespoons unsalted butter, melted - 4 cloves garlic, minced - 1 teaspoon dried oregano - 1 teaspoon garlic powder - ½ cup grated Parmesan cheese - 1 tablespoon fresh parsley, chopped These ingredients form the base of your garlic parmesan knots. The refrigerated pizza dough is easy to use and saves time. Unsalted butter gives a rich flavor when you brush it on. Fresh garlic adds a strong aroma and taste. Dried oregano brings a hint of earthiness, while garlic powder boosts the garlic flavor. Grated Parmesan cheese melts perfectly over the knots, adding a salty bite. Finally, fresh parsley gives a pop of color and freshness. - Crushed red pepper flakes - Fresh herbs (basil, thyme) - Cheese variations (mozzarella, cheddar) These optional add-ins let you customize your knots. Crushed red pepper flakes add heat if you like spice. Fresh herbs like basil or thyme can give a unique twist. For cheese lovers, mozzarella or cheddar can make the knots even cheesier. - Gluten-free pizza dough - Vegan butter options - Nutritional yeast as a Parmesan substitute You can easily adjust this recipe for different diets. If you're gluten-free, use gluten-free pizza dough. For a vegan option, try plant-based butter. Nutritional yeast can replace Parmesan if you want a dairy-free version. This flexibility makes garlic parmesan knots a crowd-pleaser for everyone. For the full recipe, check the details above. - Preheat your oven to 400°F (200°C). - Line a baking sheet with parchment paper. - On a floured surface, roll out the pizza dough into a rectangle about ½ inch thick. - Cut the dough into strips that are about 1 inch wide. - Take each strip and twist it into a knot shape. - Place the knots on the prepared baking sheet, leaving some space between each. - In a small bowl, mix melted butter, minced garlic, oregano, garlic powder, salt, and pepper. - Brush half of the garlic butter mixture over the knots. Make sure they are well coated. You can find the full recipe and more details in the main section. Follow these steps closely for a tasty treat! To make the best garlic parmesan knots, you need to coat them evenly with butter. This step gives every bite rich flavor. Use a brush to apply the melted garlic butter mix. It helps all the flavors stick well. Adjust the baking time for the crispiness you want. If you like them soft, bake for about 12 minutes. For a crunchier knot, let them bake for 15 minutes. Keep an eye on them to avoid burning. Garlic parmesan knots taste great with marinara sauce or a garlic dip. These dips add extra flavor and make the knots even better. They are perfect for parties or game days. Everyone loves to snack on them while they watch a game or enjoy a gathering. If you have leftover knots, you can reheat them easily. The best method is to use an oven. Set it to 350°F (175°C) and place the knots on a baking sheet. Bake for about 5-7 minutes. This method keeps them crisp. Avoid sogginess by storing the knots in an airtight container. Make sure they cool completely before sealing. This way, they stay fresh and tasty for your next snack. {{image_2}} You can take garlic parmesan knots to new heights with flavor variations. One tasty twist is to add cheese-stuffed centers. Simply roll the dough around small pieces of mozzarella or cheddar. This gives each knot a gooey surprise. Another option is to experiment with different herb blends. Try mixing in thyme or rosemary for a fragrant kick. You might also consider adding crushed red pepper flakes for a bit of spice. For those needing gluten-free options, you can use gluten-free pizza dough. Many brands make good choices that work well. This way, everyone can enjoy these tasty knots. If you want vegan adaptations, swap out the butter for vegan butter. You can also replace Parmesan cheese with nutritional yeast. This will still give you a cheesy flavor without using dairy. Bring some global flair with international twists. For an Italian-style version, add extra herbs like basil or oregano to the butter mixture. This will enhance the aroma and flavor. If you crave heat, try spicy twists. You can mix in jalapeño pieces or drizzle sriracha on top before serving. These variations keep your garlic parmesan knots exciting and fresh. For the full recipe, check out [Full Recipe]. To store leftover garlic parmesan knots, let them cool first. Place them in an airtight container. You can also wrap them tightly in plastic wrap or aluminum foil. This keeps them fresh longer. Store them in the fridge for up to three days. After that, they may lose their taste and texture. You can freeze the knots before or after baking. To freeze before baking, shape the knots and place them on a baking sheet. Freeze them until solid, then transfer them to a freezer bag. For freezing after baking, let them cool completely. Then, wrap them well and place in a freezer bag. They can last up to three months in the freezer. To thaw, place the frozen knots in the fridge overnight. For quick thawing, you can use the microwave on low power. When ready to eat, reheat them in the oven at 350°F (175°C) for about 10 minutes. This helps them regain their crispy texture. Serve your garlic parmesan knots warm for the best taste. The cheese melts and the garlic aroma shines when they’re fresh. Serve them with marinara sauce or garlic dip for added flavor. Always check the temperature before serving. Hot knots are more enjoyable than cold ones. Enjoy your delicious Garlic Parmesan Knots using the Full Recipe! To make garlic parmesan knots, you need just a few ingredients. First, gather: - 1 package of refrigerated pizza dough - 4 tablespoons unsalted butter, melted - 4 cloves garlic, minced - 1 teaspoon dried oregano - 1 teaspoon garlic powder - ½ cup grated Parmesan cheese - 1 tablespoon fresh parsley, chopped (for garnish) - Salt and pepper to taste Start by preheating your oven to 400°F (200°C). Line a baking sheet with parchment paper. Roll out the pizza dough into a rectangle about ½ inch thick. Cut it into strips that are 1 inch wide. Twist each strip into a knot shape and place them on the baking sheet with a little space between each. In a bowl, mix the melted butter, minced garlic, oregano, garlic powder, salt, and pepper. Brush half of this mixture over the knots. Bake for 12-15 minutes until they are golden brown. Once done, drizzle the rest of the garlic butter over the knots and sprinkle with Parmesan cheese while hot. Garnish with parsley. Enjoy your delicious garlic parmesan knots! Yes, you can prepare garlic parmesan knots ahead of time. You can shape the knots and place them on the baking sheet. Cover them with plastic wrap and store in the fridge for up to 24 hours. When you're ready to bake, just remove the wrap and brush with garlic butter. If you have leftovers, you can reheat them in the oven. Set the oven to 350°F (175°C) and bake for about 5-7 minutes. This keeps them warm and crispy. Garlic parmesan knots are great with many dips. Here are some tasty options: - Marinara sauce - Garlic butter sauce - Ranch dressing - Pesto sauce - Cheese dip These dips add extra flavor and make for a fun appetizer. To keep garlic parmesan knots fresh, store them in an airtight container. Place parchment paper between layers if needed. They can last for 2-3 days in the fridge. For longer storage, freeze them. To freeze, place the knots on a baking sheet and freeze until solid. Then transfer them to a freezer bag. When you're ready to enjoy them, thaw in the fridge overnight and reheat in the oven. This keeps them tasty and warm. Garlic Parmesan knots are tasty and fun to make. You learned about the key ingredients and ways to customize them. We covered step-by-step instructions, tips for perfecting your knots, and fun variations. With these ideas, you can impress guests at any gathering. Whether you stick to the basics or try something new, these knots will be a hit. Enjoy your cooking and happy knot-making!

Garlic Parmesan Knots Irresistible Appetizer Recipe

Are you ready to impress your guests with a delightful treat? Garlic Parmesan Knots are the perfect appetizer, bursting with

To make your Pumpkin Spice Energy Bites, gather these ingredients: - 1 cup rolled oats - 1/2 cup canned pumpkin puree - 1/4 cup nut butter (peanut or almond) - 1/4 cup honey or maple syrup - 1 teaspoon vanilla extract - 1 teaspoon pumpkin spice mix - 1/4 teaspoon salt - 1/4 cup mini chocolate chips (optional) - 1/4 cup chopped nuts or seeds (e.g., walnuts or sunflower seeds) These ingredients work together to create a tasty and filling snack. Each ingredient in these bites brings something good for your body. - Rolled oats provide fiber. Fiber keeps you full and helps with digestion. - Canned pumpkin puree is rich in vitamins A and C. These vitamins support your immune system. - Nut butter adds healthy fats and protein. Protein helps build and repair your muscles. - Honey or maple syrup adds natural sweetness without refined sugar. - Pumpkin spice mix has cinnamon, ginger, and nutmeg. These spices may improve digestion. - Chocolate chips and nuts add flavor and healthy fats. If you have allergies, you can still enjoy these bites. Here are some swaps: - Nut butter: Use sunflower seed butter for a nut-free option. - Honey: Maple syrup is a great vegan alternative. - Oats: Ensure they are gluten-free if you need to avoid gluten. - Chocolate chips: Look for dairy-free chips if you want a vegan choice. These swaps help you make tasty energy bites that fit your diet. Making Pumpkin Spice Energy Bites is simple and fun. First, gather all your ingredients. You will need rolled oats, pumpkin puree, nut butter, honey or maple syrup, vanilla extract, pumpkin spice mix, salt, and optional items like chocolate chips and nuts. In a large mixing bowl, combine the rolled oats, pumpkin puree, nut butter, honey, and vanilla extract. Stir until everything is well mixed. Next, add the pumpkin spice and salt. Mix again until all the ingredients blend completely. If you want extra texture, fold in the mini chocolate chips and chopped nuts. To get the best texture, keep the mixture slightly sticky. If it is too dry, add a bit more nut butter or pumpkin puree. If it feels too wet, sprinkle in some extra oats. When forming the bites, use your hands or a small cookie scoop. Shape them into small balls, about one inch in diameter. This size helps them hold together well and makes them easy to eat. Refrigerating the energy bites is key. Once you shape them, place them on a parchment-lined baking sheet. Chill them in the fridge for at least 30 minutes. This time lets them firm up nicely. If you skip this step, the bites may fall apart when you pick them up. After chilling, store the bites in an airtight container in the fridge. They stay fresh for up to a week. For more details, check the Full Recipe. To keep your Pumpkin Spice Energy Bites fresh, store them in an airtight container. This helps prevent moisture and keeps them tasty. If you plan to eat them within a week, keep them in the fridge. For longer storage, you can freeze them. Place the bites in a single layer on a baking sheet. Once frozen, transfer them to a freezer bag. This method allows you to grab one when you need a quick snack. You can easily change the flavor of your energy bites. Try adding different spices like cinnamon or nutmeg for extra warmth. If you enjoy a bit of crunch, toss in some chopped apples or dried cranberries. You can also swap the nut butter for sun butter or tahini if you want something different. Consider adding toppings too! Rolling the bites in shredded coconut or crushed nuts can add fun textures. Sometimes, your mixture might be too dry. If this happens, add a bit more nut butter or pumpkin puree. Mix well until you reach the right consistency. If your mixture is too wet, add more oats a tablespoon at a time. This will help bind everything together. Remember, you want a sticky but manageable consistency to form perfect bites. {{image_2}} You can easily change the flavor of your energy bites. Adding cocoa powder gives a rich taste. Dried fruits like cranberries or raisins add natural sweetness. You can even mix in shredded coconut for a tropical twist. Get creative with spices, too! A pinch of cinnamon or nutmeg can elevate the flavor profile. Seasonal ingredients can make these bites festive. For Halloween, try adding mini candy corn or festive sprinkles. During Christmas, toss in crushed peppermint or gingerbread spices. For spring, consider using citrus zest for a bright, fresh taste. Each holiday can inspire a new version of these bites. If you want a protein boost, add protein powder to the mix. You can also use Greek yogurt instead of nut butter for creaminess. If you need nut-free options, use sun butter or pumpkin seed butter. These swaps ensure everyone can enjoy these tasty bites without worry. For vegan options, swap honey for maple syrup and use a plant-based protein source. For the complete recipe, check out the [Full Recipe]. To keep your Pumpkin Spice Energy Bites fresh, store them in an airtight container. This helps keep moisture out and maintains flavor. Place the container in the refrigerator. They will stay good for up to one week. You can also separate layers with parchment paper to prevent sticking. If you want to save some bites for later, freezing is a great option. First, line a baking sheet with parchment paper. Place the energy bites on the sheet in a single layer. Freeze them for about two hours until firm. After that, transfer them to a freezer bag. They can last in the freezer for up to three months. When you’re ready to eat, let them thaw in the fridge overnight. Check your energy bites before eating them. If you see mold or an off smell, it's best to toss them. A change in texture can also be a bad sign. If they feel very hard or dry, they may not taste good. Always trust your senses; if something seems off, don’t eat it. Pumpkin Spice Energy Bites last up to one week in the fridge. Store them in an airtight container. This keeps them fresh and tasty. After a week, they may lose flavor and texture. Yes, you can use fresh pumpkin. Cook the pumpkin until soft, then puree it. This gives a different texture and flavor. It may be a bit wetter, so adjust other ingredients if needed. Yes, they are healthy snacks. They have oats, pumpkin, and nut butter. These ingredients provide fiber, vitamins, and healthy fats. They can boost your energy and keep you full. Enjoy them as a treat anytime! We covered everything you need to make delicious Pumpkin Spice Energy Bites. You learned about the ingredients and their health benefits. We explored how to prepare the bites and tips for perfect texture. Plus, you now know how to customize and store them for freshness. These energy bites are great for quick snacks or festive treats. Enjoy them all year round by tweaking flavors and ingredients. Now, it’s time to get creative in the kitchen and enjoy your healthy snacks!

Pumpkin Spice Energy Bites Tasty and Healthy Treats

Looking for a quick, tasty snack that packs a health punch? You’ve found it! These Pumpkin Spice Energy Bites are

- 2 cups heavy whipping cream - 1/2 cup powdered sugar - 1 tablespoon instant coffee granules - 1 teaspoon vanilla extract - 2 cups chocolate chips (semi-sweet) - 1 package (14 ounces) coffee-flavored or chocolate graham crackers - Optional Garnish: Chocolate shavings or cocoa powder To make the Mocha Chip Icebox Cake, gather these ingredients. The heavy whipping cream is key for rich texture. Powdered sugar adds a sweet touch. Instant coffee granules give that deep mocha flavor. Vanilla extract enhances the taste beautifully. Chocolate chips bring a delightful crunch. You can choose between coffee-flavored or chocolate graham crackers. Both options work well, but I love the coffee ones for extra flavor. If you want to make it look fancy, chocolate shavings or cocoa powder adds a nice finish. Now that you have the ingredients ready, you can move to the fun part—making the cake! Check the [Full Recipe] for detailed steps. - Whip the Cream: Start by adding heavy whipping cream, powdered sugar, instant coffee, and vanilla extract to a large bowl. Use an electric mixer on medium-high speed. Beat until you see stiff peaks. This will take about 3 to 5 minutes. - Prepare the Base: Take a 9x13 inch baking dish. Spread a thin layer of your whipped cream mixture at the bottom. This helps the graham crackers stick and stay in place. - Layer the Graham Crackers: Now, lay down a single layer of graham crackers on top of the whipped cream. You can break them if needed to fit the dish perfectly. - Add the Cream Layer: Use half of your whipped cream mixture. Spread it evenly over the graham crackers. - Sprinkle the Chocolate Chips: Take half of the chocolate chips and sprinkle them over the cream layer. - Repeat Layers: Add another layer of graham crackers on top. Then, spread the remaining whipped cream mixture. Top this with the rest of the chocolate chips. Finally, add one more layer of graham crackers as the top layer. - Chill the Cake: Cover the dish with plastic wrap. Place it in the fridge for at least 4 hours. Chilling overnight is even better. This lets the flavors blend and softens the crackers. - Cut and Serve: After chilling, take the cake out. Cut it into squares. Serve it as is or add chocolate shavings or cocoa powder for a nice touch. This Mocha Chip Icebox Cake is easy and fun to make. For the complete recipe, check out the section above. To make the whipped cream just right, start with cold cream. Using cool cream helps it whip faster and better. For stiff peaks, beat the cream until it holds its shape. You want it thick but not dry. If you overbeat, it can turn grainy. Add powdered sugar slowly while mixing. This helps sweeten it without losing volume. When layering, use a gentle touch. Start with a thin layer of cream at the bottom. This keeps the graham crackers from sticking. Spread the whipped cream evenly over each layer. Use a spatula for smooth results. You can mix flavors too! Try using different graham crackers, like chocolate or honey. You can also add fruit or nuts between layers for fun new tastes. Pair your mocha chip icebox cake with drinks. Coffee or milk complements it well. A scoop of vanilla ice cream adds extra creaminess. This cake shines at parties and family gatherings. Serve it at birthdays or holidays for a sweet treat. It looks great on a dessert table, and everyone will love it! {{image_2}} You can enjoy many flavors with your Mocha Chip Icebox Cake. Here are two tasty options: - Mocha Mint Icebox Cake: Add a splash of peppermint extract to the cream. This gives a fresh twist perfect for the holidays. You can also use mint chocolate chips for an extra minty bite. - Caramel Mocha Icebox Cake: Mix in some caramel sauce with your whipped cream. This sweet treat makes the cake richer. You can drizzle more caramel on top for a beautiful finish. You can easily adapt this cake for different diets. Here’s how: - Gluten-Free Options: Use gluten-free graham crackers. Many brands offer great-tasting options. This keeps your dessert friendly for those avoiding gluten. - Dairy Alternatives: If you need a dairy-free cake, use coconut cream instead of heavy cream. Almond milk or oat milk can replace milk in whipped options. These swaps keep your cake creamy and delicious. You can change the flavors with the seasons. Here are two fun ideas: - Chocolate Hazelnut: Use hazelnut spread in the cream. This gives a nutty flavor that pairs well with chocolate chips. It’s a great choice for nut lovers. - Pumpkin Spice Variant: Add pumpkin puree and pumpkin spice to your whipped cream. This sweet and cozy cake is perfect for fall. Top it with crushed graham crackers for a nice crunch. These variations let you play with flavors and make your Mocha Chip Icebox Cake special. Experiment and enjoy your delicious treats! For the complete recipe, check out the Full Recipe section. To keep your mocha chip icebox cake fresh, store leftovers in the fridge. Use an airtight container to maintain its moisture and flavor. If you don’t have one, cover the dish tightly with plastic wrap. This helps prevent the cake from absorbing other smells in your fridge. Can Mocha Chip Icebox Cake Be Frozen? Yes, you can freeze mocha chip icebox cake. Just remember to wrap it well. Use plastic wrap followed by aluminum foil. This keeps out air and helps maintain its taste. Thawing Tips When you're ready to enjoy it, take the cake out of the freezer. Place it in the fridge overnight to thaw slowly. This helps keep the texture nice and smooth. How Long Will It Last in the Fridge? In the fridge, the mocha chip icebox cake stays good for about 3 to 5 days. Make sure to check it before serving. Signs of Spoilage Look for changes in texture or color. If you see any mold or an off smell, it’s best to throw it away. Always trust your senses to ensure food safety. An icebox cake is a no-bake dessert. It uses layers of cookies, cream, and sometimes fruit. The name comes from early refrigerators, called iceboxes. People made this cake to chill and set in these boxes. The cake becomes soft and creamy as the layers meld. Icebox cakes are popular for their ease and deliciousness. Yes, you can use different flavors of graham crackers! Chocolate, honey, or cinnamon variations work well. Each adds a unique twist to your cake. Experimenting with flavors can make each cake special. Just ensure the crackers fit well in your dish. You should chill the cake for at least 4 hours. Chilling overnight gives the best flavor. This time allows the flavors to blend. It also helps the graham crackers soften. A well-chilled cake is creamy and easy to slice. Enjoy your tasty Mocha Chip Icebox Cake after the chill. For the full recipe, check out the detailed instructions above. This blog post detailed a delicious icebox cake recipe, perfect for all occasions. We covered key ingredients, preparation steps, and tips for the best results. You learned about flavor variations and how to store leftovers properly. In my view, this cake is a fun treat that anyone can make. Don’t hesitate to experiment with flavors or use leftovers creatively. Enjoy making this dessert and sharing it with friends and family!

Mocha Chip Icebox Cake Delightful and Easy Treat

Looking for a sweet and easy dessert? Look no further! My Mocha Chip Icebox Cake combines rich flavors and creamy

To make Honey Sriracha Brussels Sprouts, you need a few simple ingredients. Each one adds to the bold flavor of this dish. Here’s what you will need: - 1 lb Brussels sprouts, trimmed and halved - 2 tablespoons olive oil - 3 tablespoons honey - 2 tablespoons sriracha sauce - 1 tablespoon soy sauce - 1 teaspoon garlic powder - 1/2 teaspoon salt - 1/4 teaspoon black pepper - 1 tablespoon sesame seeds (for garnish) - 2 green onions, finely chopped (for garnish) These ingredients bring together a mix of sweet and spicy. The honey gives a nice glaze, while the sriracha adds heat. The olive oil helps the Brussels sprouts roast perfectly. When you combine the sauce, it coats the sprouts beautifully. This dish is not just tasty; it also looks great on a plate. Want to check out the full recipe? You can find it in the earlier section. Enjoy cooking! - Preheat the oven to 425°F (220°C). - Toss Brussels sprouts with olive oil. - Make the honey sriracha sauce. To start, I preheat my oven to 425°F. This helps the Brussels sprouts get crispy. While the oven heats, I grab a large bowl. I add my halved Brussels sprouts and drizzle in olive oil. I toss them well to coat each sprout. This oil will help them roast evenly. Next, I make the honey sriracha sauce. In a small bowl, I mix three tablespoons of honey with two tablespoons of sriracha sauce. Then, I add one tablespoon of soy sauce, one teaspoon of garlic powder, half a teaspoon of salt, and a quarter teaspoon of black pepper. I whisk it all together until it’s smooth. This sauce is where the magic happens! - Coat Brussels sprouts with sauce and spread on a baking sheet. - Roast for 25-30 minutes, stirring halfway through. - Garnish and serve. Once my sauce is ready, I pour it over the Brussels sprouts. I toss them again to ensure each one is coated well. Then, I spread the sprouts in a single layer on a baking sheet lined with parchment paper. I put the baking sheet in my preheated oven and roast the sprouts for about 25 to 30 minutes. Halfway through, I give them a good stir. This helps them brown nicely and get that caramelized flavor. After roasting, I take them out and let them cool for a few minutes. For the final touch, I sprinkle sesame seeds and chopped green onions on top. These add a nice crunch and fresh flavor. Now, they are ready to serve! Enjoy these honey sriracha Brussels sprouts as a bold and tasty dish. For the full recipe, check the recipe section. - Use fresh, firm Brussels sprouts for best flavor. They should feel heavy and tight. - Adjust sriracha for desired heat level. Start with less if you're unsure. - Stir occasionally while roasting for even browning. This keeps them from burning. Roast your Brussels sprouts at 425°F (220°C) for 25-30 minutes. This high heat caramelizes the sugar and gives them a nice crunch. Look for a deep golden color and crispy edges. They should be tender when pierced with a fork. If they’re soft and brown, they’re ready! For the full recipe, check the section above. {{image_2}} You can easily make this dish vegan. Instead of honey, use maple syrup. It adds a nice sweetness. You can also try agave nectar for a different twist. Both work well with sriracha. If you're looking for other hot sauces, consider using chili garlic sauce. It has a nice kick and flavor. You can also try a smoky chipotle sauce for a deeper taste. Each sauce brings its own unique flair to the dish. Honey Sriracha Brussels sprouts pair well with many meals. Serve them alongside grilled chicken or fish for a complete dinner. They also go great with rice or quinoa for a tasty vegetarian option. For a fun twist, try them with Asian-inspired dishes. They complement stir-fries or sushi bowls perfectly. You can also serve them with tacos for an exciting fusion meal. Don't forget to experiment and find your favorite pairings! For the full recipe, check out the complete instructions and ingredients above. To keep your Honey Sriracha Brussels sprouts fresh, use airtight containers. Make sure they cool down first. Place them in the fridge if you plan to eat them within three days. For longer storage, freeze them in freezer-safe bags. Remove as much air as you can to prevent freezer burn. This way, they stay tasty for up to three months. When you’re ready to eat the leftovers, the oven is your best friend. Preheat it to 350°F (175°C). Spread the Brussels sprouts on a baking sheet. Heat for about 10-15 minutes. This keeps them crispy. If you need a faster method, use the microwave. Just heat in short bursts and stir often. Avoid overheating to keep them from getting soggy. Enjoy your bold and flavorful dish! For the full recipe, check the earlier section. Can I make this dish ahead of time? Yes, you can prepare Honey Sriracha Brussels sprouts in advance. Roast them, let them cool, and store them in the fridge. Reheat them before serving. This method keeps the flavors intact while saving you time. How can I make this recipe gluten-free? To make this dish gluten-free, use tamari instead of soy sauce. Tamari is a gluten-free soy sauce alternative. This swap keeps the taste similar without gluten. What are the nutritional benefits of Brussels sprouts? Brussels sprouts are rich in vitamins K and C. They also provide fiber, which aids digestion. These little veggies support heart health and have antioxidants, making them great for your diet. Can I use frozen Brussels sprouts? Yes, you can use frozen Brussels sprouts. Just thaw them first and pat them dry. This step helps them crisp up nicely when roasted. How can I enhance the flavor further? To boost flavor, add a splash of lime juice or zest. You can also mix in some chopped garlic or ginger for extra zing. Experiment with different toppings, like crushed nuts or herbs, to find your perfect flavor. This blog discussed making Honey Sriracha Brussels Sprouts, a tasty side dish. We covered the key ingredients, simple steps, and tips for perfect results. You learned how to store leftovers and even how to reheat them. Finally, we answered common questions about this dish. Enjoy experimenting with different flavors or serve it with your favorite meal. Cooking should be fun, and this recipe makes it easy to impress!

Honey Sriracha Brussels Sprouts Bold and Flavorful Dish

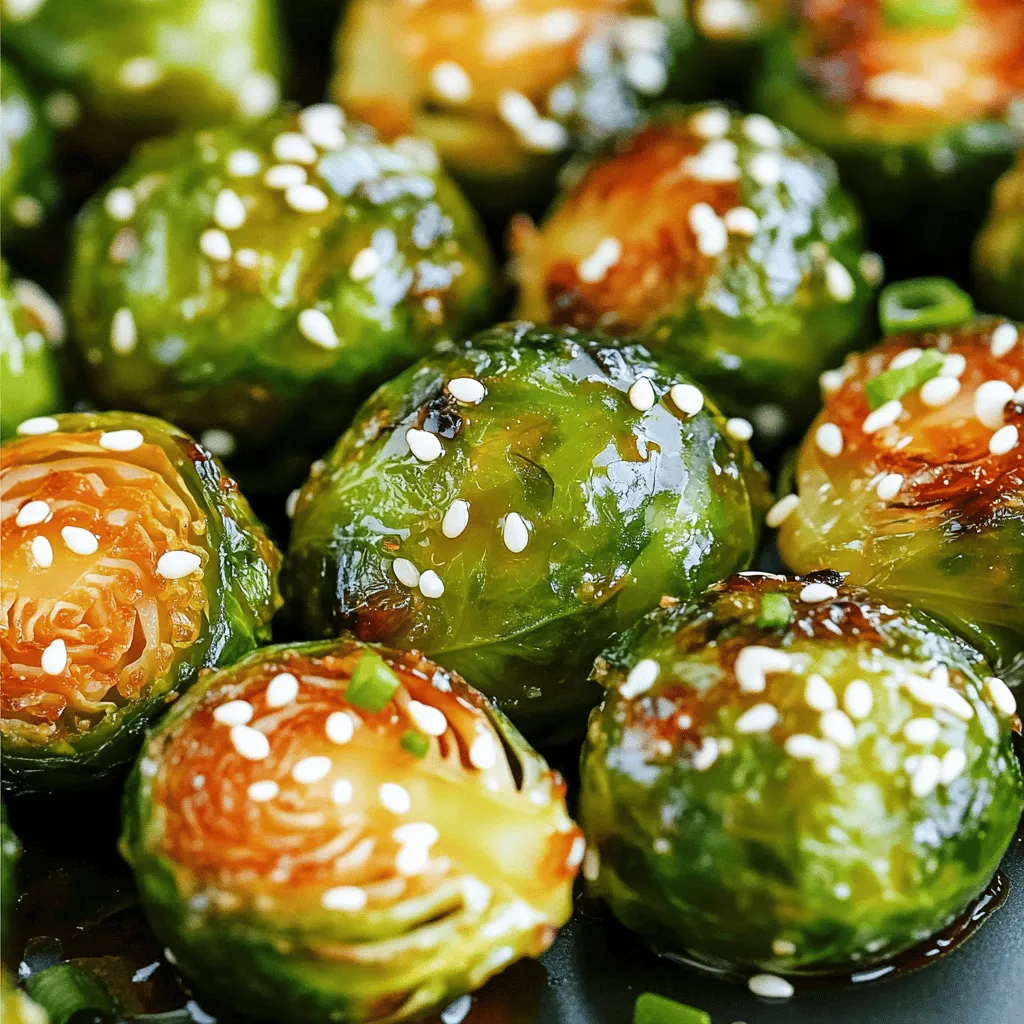
If you’re craving a bold flavor that packs a punch, you’ve landed in the right place! Honey Sriracha Brussels Sprouts

- 1 lb ground beef (or lamb for a more traditional flavor) - 1/2 cup breadcrumbs - 1/4 cup grated Parmesan cheese - 1 large egg - 1/2 cup feta cheese, crumbled - 1/4 cup fresh parsley, finely chopped The main ingredients create a strong base for these meatballs. Ground beef gives a rich taste. Lamb adds a nice twist if you want more flavor. Breadcrumbs help bind the mixture. Parmesan adds a salty depth. Feta cheese gives a creamy surprise in each bite. Fresh parsley brightens the dish with color and flavor. - 2 cloves garlic, minced - 1 teaspoon dried oregano - 1 teaspoon ground cumin - 1/4 teaspoon red pepper flakes (optional for heat) - Salt and black pepper to taste The seasonings make these meatballs truly pop. Garlic adds a warm, aromatic touch. Oregano and cumin bring an earthy note. Red pepper flakes can give a kick if you like heat. Don’t forget the salt and black pepper; they balance all the flavors. - 1/4 cup olive oil (for frying) Olive oil is key for frying the meatballs. It helps them brown nicely and adds healthy fats. Make sure to use enough oil so they do not stick. Salt and black pepper are also important for seasoning the meatballs during cooking. For the full recipe, refer to the instructions above. 1. Start by mixing the ingredients. In a large bowl, combine: - 1 lb ground beef (or lamb for a richer taste) - 1/2 cup breadcrumbs - 1/4 cup grated Parmesan cheese - 1 large egg - 2 cloves garlic, minced - 1 teaspoon dried oregano - 1 teaspoon ground cumin - 1/4 teaspoon red pepper flakes (if you like heat) - Salt and black pepper to taste Mix everything well until it blends smoothly. 2. Next, it’s time to incorporate feta and parsley. Gently fold in: - 1/2 cup crumbled feta cheese - 1/4 cup finely chopped fresh parsley Make sure the feta and parsley are evenly mixed in. This adds a burst of flavor. 1. Preheat your skillet. Set it over medium heat and add: - 1/4 cup olive oil Let the oil heat up to get a nice sear on the meatballs. 2. Now, form and fry the meatballs. With wet hands, shape the meat mixture into balls, about the size of golf balls. Place them in the hot skillet, making sure they have space. Cook the meatballs for about 5-6 minutes. Turn them occasionally until all sides are golden brown. 1. Cover and simmer the meatballs. After browning, reduce the heat to low. Cover the skillet and let them simmer for another 10-12 minutes. This allows them to cook through while keeping them juicy. 2. Ensure they reach the correct temperature. Use a meat thermometer to check. The internal temperature should be 160°F for safe eating. Enjoy the flavor-packed delight of feta stuffed Greek meatballs, following the Full Recipe for a delicious meal! Mixing the meat is key. Use your hands to combine the ingredients. Be gentle so the meat stays tender. Overworking it makes the meat tough. Here’s a simple trick: wet your hands before forming meatballs. This helps shape them without sticking. Want to amp up the taste? Add more herbs like thyme or basil. A pinch of cinnamon can also bring warmth. You can try various spices to find your favorite blend. For dips or sauces, tzatziki is a classic choice. Hummus or a spicy tomato sauce works well too. You can cook these meatballs in a skillet or bake them. Skillet cooking gives a nice brown crust. Heat your oil well before adding meatballs. This helps them brown evenly. If you bake them, use a hot oven for good results. Rotate the tray halfway through cooking for even browning. {{image_2}} You can swap ground beef for ground turkey or chicken. This change offers a lighter option without losing flavor. If you want to go plant-based, use lentils or chickpeas instead of meat. Both options provide great taste while keeping it healthy. While feta cheese shines in this recipe, you can try other cheeses too. Goat cheese adds a tangy twist, while mozzarella offers a milder flavor. Different types of feta, like herbed or aged, can change the taste profile. Experimenting with these cheeses keeps the dish exciting! Feta stuffed Greek meatballs pair well with many sides. A fresh Greek salad brings crunch and color. You can also serve them with rice for a hearty meal. For a fun twist, make wraps or pitas filled with meatballs. Add tzatziki sauce for that extra zing. These variations make your meal feel new every time! To store cooked feta stuffed Greek meatballs, let them cool first. Then, place them in an airtight container. This helps keep them fresh. They can last in the fridge for up to three days. When you want to eat them again, just take them out and enjoy! For freezing, you have two choices: uncooked or cooked meatballs. If you freeze uncooked meatballs, place them on a tray and freeze until solid. Then transfer them to a freezer bag. This way, they won’t stick together. Cooked meatballs can also be frozen. Just let them cool and store them in a container. You can keep both types in the freezer for about three months. When you’re ready to eat, thaw them in the fridge overnight for best results. To reheat meatballs evenly, you can use the oven or a skillet. If using the oven, set it to 350°F. Place meatballs on a baking sheet and heat for about 15 minutes. If you prefer the skillet, add a little olive oil and heat them on medium. This keeps them moist and tasty. Always check that they are warm all the way through before serving. You can pair these meatballs with many sides. Here are some great options: - Greek salad with cucumbers and tomatoes - Tzatziki sauce for dipping - Warm pita bread for a fun wrap - Roasted vegetables for a healthy touch - Rice pilaf for a filling side These sides will bring out the rich flavors of the meatballs. Yes, you can prepare these meatballs ahead of time! Here’s how: - Mix all the ingredients as listed in the Full Recipe. - Form the meatballs but do not cook them yet. - Place the raw meatballs on a tray and freeze them for about two hours. - Once they are firm, transfer them to a freezer bag. - When ready to cook, thaw in the fridge overnight and fry as normal. This saves time and makes meal prep easy. To check if the meatballs are done, use a meat thermometer. The internal temperature should reach 160°F. Here are more tips: - Cut one meatball in half; there should be no pink inside. - The juices should run clear when you cut into them. - If you prefer, you can cook them longer at lower heat to ensure they are fully done without burning. These steps help you serve safe and tasty meatballs. Yes, you can make these meatballs gluten-free. Here’s how: - Use gluten-free breadcrumbs instead of regular ones. - Crushed gluten-free crackers can also work well. - For a grain-free option, use ground oats or almond flour. These swaps will keep the meatballs delicious and safe for gluten-free diets. These Feta Stuffed Greek Meatballs are simple and delicious. You learned about key ingredients, seasonings, and cooking methods. We discussed options for variations and tips for storage. Being flexible with ingredients can make this dish your own. Remember, tracking cooking time is key for tasty meatballs. Use the tips shared to enhance flavor and texture. Enjoy your meatballs with great side dishes or sauces!

Feta Stuffed Greek Meatballs Flavor-Packed Delight

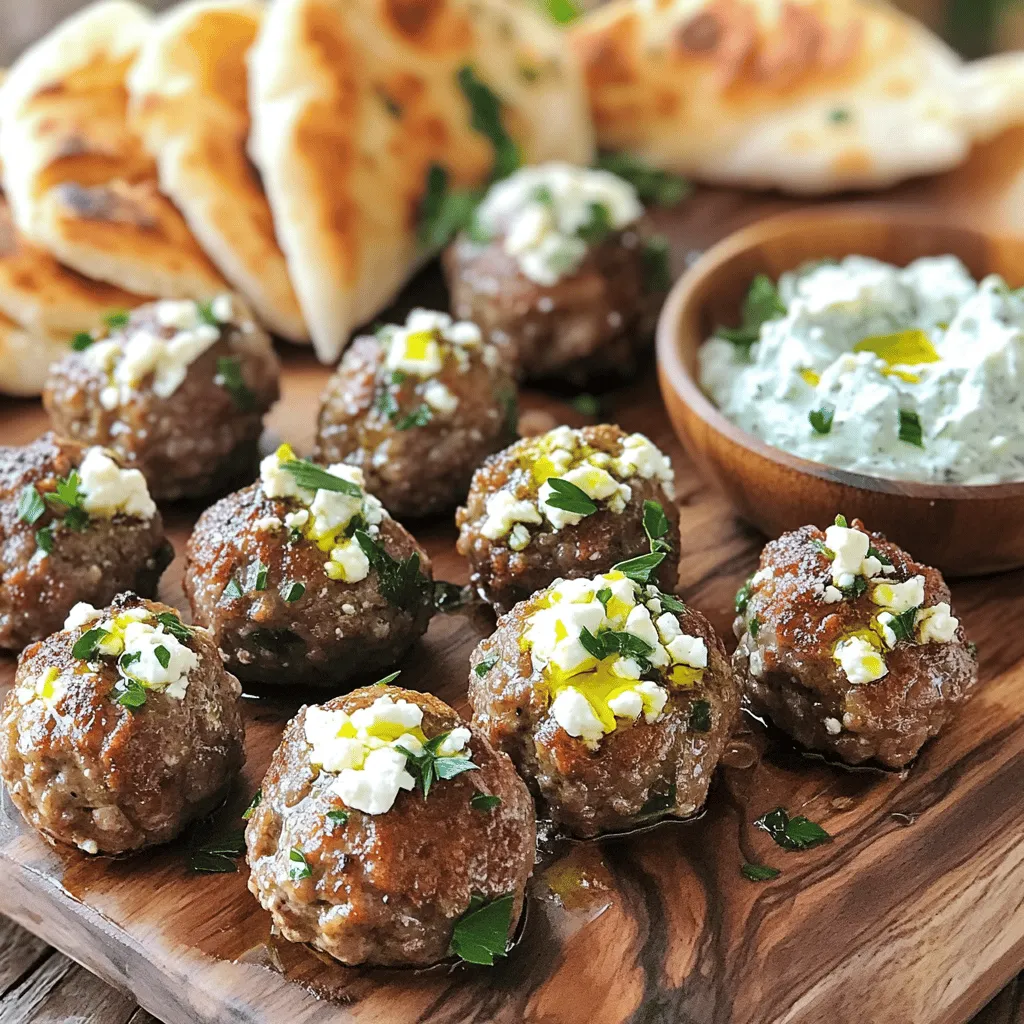
If you love bold flavors and hearty bites, you’re in for a treat! Feta Stuffed Greek Meatballs are a flavor-packed

Older posts
Newer posts
← Previous Page1 … Page51 Page52 Page53 … Page84 Next →

dsad

© 2026 Lisa Dishes • Built with GeneratePress

Our Policies

  • Copyright Policy
  • Cookie Policy
  • GDPR Policy
  • Privacy Policy
  • Disclaimer
  • Terms Of Use

More Information

  • Home
  • About
  • Contact
  • Appetizers
  • Dessert
  • Dinner
  • Drinks
©2026, Lisa Dishes About Back To Top