Skip to content
DisclaimerTerms Of UseGDPR PolicyCookie Policy

Lisa Dishes

  • Home
  • Drinks
  • Appetizers
  • Dinner
  • Dessert
  • About
  • Contact
  • Privacy Policy
DisclaimerTerms Of UseGDPR PolicyCookie Policy

NO-ING-IMG

To make strawberry basil bruschetta, you need these key ingredients: - 1 French baguette, sliced into 1/2-inch pieces - 1 cup fresh strawberries, hulled and diced - 1/4 cup fresh basil leaves, chopped - 2 tablespoons balsamic glaze - 1 tablespoon honey - 1 teaspoon lemon zest - Salt and pepper to taste - Olive oil for brushing These ingredients create a fresh and vibrant flavor. The strawberries bring sweetness, while the basil adds a nice herbal touch. You can add some extra flair with these optional ingredients: - 2 ounces goat cheese or cream cheese Cream cheese gives a rich texture. Goat cheese adds a tangy taste. Choose based on your preference. Don’t worry if you lack an ingredient; there are easy swaps! - Use sourdough bread instead of a French baguette for a different taste. - Swap honey for maple syrup if you want a vegan option. - If you don’t have balsamic glaze, try a splash of lemon juice mixed with a bit of sugar. These substitutions keep the flavor intact while making it your own. To start, preheat your oven to 400°F (200°C). This heat will help crisp the bread. Next, take your French baguette and slice it into 1/2-inch pieces. Lay the slices on a baking sheet. Brush each slice lightly with olive oil. This adds flavor and helps with browning. Bake the slices for 5-7 minutes. Keep an eye on them; you want them golden and crisp. Once done, remove them from the oven and let them cool slightly. In a medium bowl, combine 1 cup of diced strawberries and 1/4 cup of chopped basil leaves. These two ingredients bring freshness and flavor. Then, add 2 tablespoons of balsamic glaze and 1 tablespoon of honey. The glaze adds a tangy kick, while honey adds sweetness. Grate in 1 teaspoon of lemon zest for a bright touch. Finally, sprinkle in a pinch of salt and pepper. Gently toss everything together until well mixed. Now, it’s time to assemble your bruschetta. If you want a creamy layer, spread goat cheese or cream cheese on each toasted baguette slice. This is optional but adds a nice richness. Now, top each slice with a generous spoonful of your strawberry basil mixture. For a finishing touch, drizzle a little extra balsamic glaze on top. Serve these treats immediately while the bread is warm or at room temperature. Arrange them on a colorful platter and add whole basil leaves for a beautiful look. Enjoy this fresh and flavorful treat! Toasting the baguette right makes a big difference. Start by preheating your oven to 400°F (200°C). Slice the baguette into 1/2-inch pieces. Lay them on a baking sheet. Brush each slice lightly with olive oil. This adds flavor and helps them crisp up. Toast the bread for about 5-7 minutes. Watch closely for a golden color. Once toasted, let them cool slightly. This step makes the bruschetta crunchy and perfect for topping. Balsamic glaze adds sweetness and tang. Use about 2 tablespoons for this recipe. Mix it with strawberries and basil for a great balance. If you want more tang, add a little lemon juice. For extra sweetness, you can add a drizzle of honey. Taste as you mix, and adjust to your liking. This helps create a flavor that pops in your mouth. Strawberry basil bruschetta is great for many events. For casual gatherings, serve it on a colorful platter. Add whole basil leaves for a nice touch. At a fancy dinner, use small plates for each guest. Pair it with wine for an elegant feel. You can also serve it as an appetizer or a light snack. This dish works well for picnics too. Just pack it in a container and enjoy outdoors. {{image_2}} You can change the fruit in this bruschetta. Try peaches or mangoes for a twist. They add sweetness and a nice texture. You can also mix berries like blueberries or raspberries. A mix of fruits gives a colorful look and fresh taste. Always chop the fruit into small pieces for easy eating. If you want a vegan option, skip the cheese. Use avocado spread on the bread instead. This adds creaminess without dairy. You can also add a sprinkle of nutritional yeast for a cheesy flavor. Use maple syrup in place of honey for sweetness. These swaps keep the bruschetta tasty and friendly for all diets. For a filling meal, think about adding protein. Grilled chicken or shrimp pairs well with the strawberries. You can also use chickpeas mixed in the topping. This adds texture and makes your bruschetta more filling. Just be sure to season the protein well. It enhances the overall flavor of your dish. If you have leftover bruschetta, store it in a covered container. Keep it in the fridge. The bread may get soggy, but the topping stays fresh. Enjoy it within one day for the best taste. To keep the ingredients fresh, store them in separate containers. Place the diced strawberries in one container. Put the chopped basil in another. If you have extra balsamic glaze, keep that sealed too. This method helps maintain each flavor. You can freeze the baguette slices before baking. Lay them flat in a single layer. Wrap them tightly in plastic wrap or foil. When ready to use, just bake them from frozen. Add a few extra minutes to the baking time. This keeps your bruschetta fresh and ready to enjoy! You can use cream cheese if you want a smoother taste. Ricotta cheese works well too. For a dairy-free option, try cashew cheese. Each choice adds a different flavor. Feel free to be creative with your toppings. Yes, you can prep the strawberry basil mix in advance. Just store it in the fridge. The bread is best when toasted fresh. Toast it just before serving for the best crunch. Bruschetta is best enjoyed fresh. If you have leftovers, store them in an airtight container. They will last for about a day in the fridge. The bread may become soft over time, but the flavor stays good. Reheat the bread slightly in the oven. This brings back some crispness. You can also serve it cold, but fresh is always better. Drizzle some balsamic glaze before serving for extra flavor. This blog covered all you need to know about making delicious bruschetta. You learned about key ingredients and fun options to boost flavor. I shared easy step-by-step instructions for prep and assembly. Tips helped you toast bread perfectly and balance flavors well. You also explored variations for fun twists and how to store leftovers. Now, you can create tasty bruschetta at home for any occasion! Enjoy your new skills and impress your friends with your tasty creations.

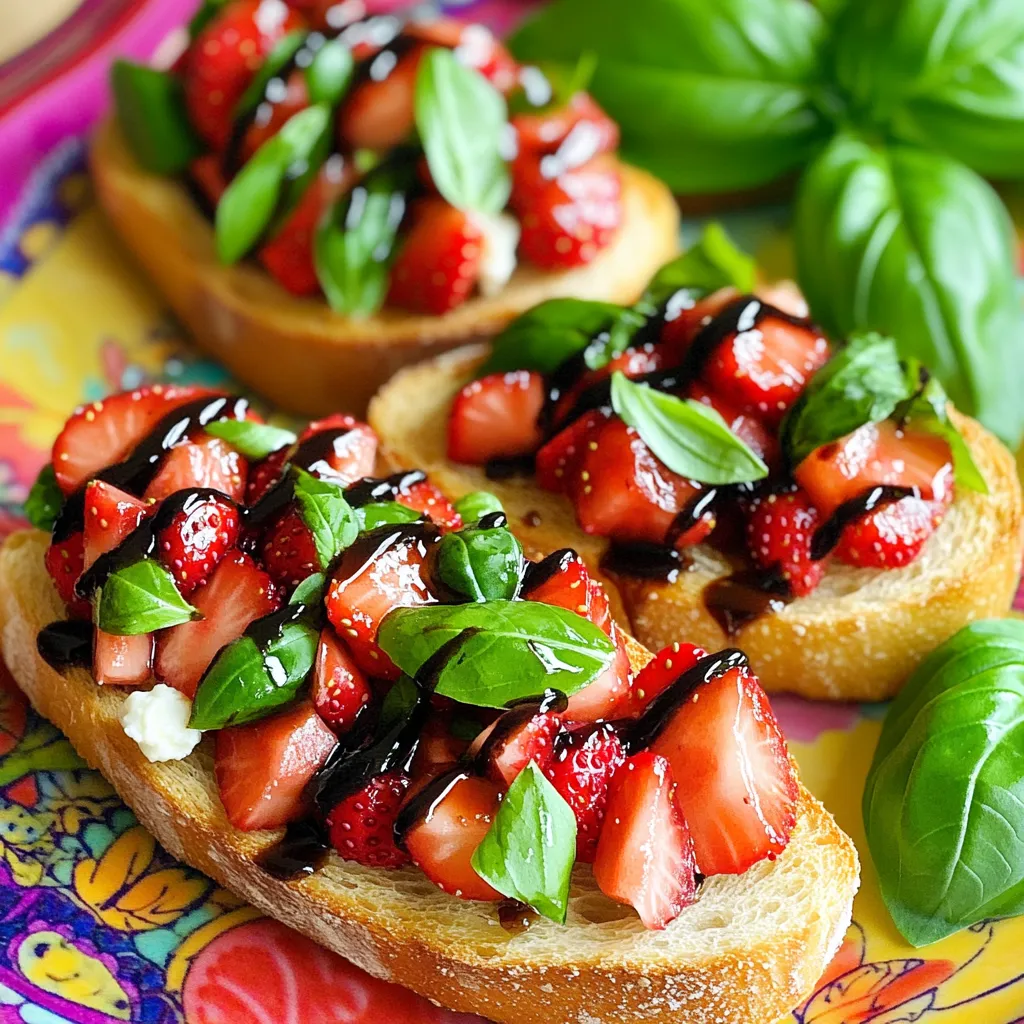
Strawberry Basil Bruschetta Fresh and Flavorful Treat

Are you ready for a fresh and tasty twist on a classic appetizer? Strawberry Basil Bruschetta combines sweet, juicy strawberries

- All-purpose flour: This forms the base of your blondies. It gives them structure. - Baking powder, baking soda, and salt: These help the blondies rise and add flavor. - Extra-virgin olive oil: This is the star ingredient. It adds moisture and a fruity taste. - Brown sugar: This sweetens the blondies and gives them a rich flavor. - Eggs: They bind all the ingredients together, creating a soft texture. - Fresh lemon juice and zest: These add bright, zesty flavor. Fresh is best for taste. - Vanilla extract: This enhances the sweetness and rounds out the flavors. - Optional ingredients: You can add white chocolate chips for sweetness. Dusting with powdered sugar gives a nice touch. Each ingredient plays an important role in your Olive Oil Lemon Blondies. The olive oil not only makes them light but also keeps them moist. The balance of sweet and lemony flavors makes these blondies a delightful treat. Start by preheating your oven to 350°F (175°C). This step is key for even baking. Next, grab an 8x8 inch baking pan. Line it with parchment paper. Leave some paper hanging over the sides. This makes it easy to lift out the blondies later. In a medium bowl, combine the following dry ingredients: - 1 cup all-purpose flour - ½ teaspoon baking powder - ¼ teaspoon baking soda - ¼ teaspoon salt Whisk these together until they blend well. This helps the blondies rise and keeps them light. Set this bowl aside while you work on the wet mix. In a large bowl, mix the wet ingredients. Start with ½ cup of extra-virgin olive oil and 1 cup of packed brown sugar. Whisk them together until smooth and creamy. Then, add 2 large eggs one by one. Whisk well after each egg. This step helps to aerate the batter. Next, stir in the zest of 1 lemon and 2 tablespoons of fresh lemon juice. Add 1 teaspoon of vanilla extract too. Mix these until they are well combined. Now, gradually fold in the dry ingredients. Use a rubber spatula for this. Be gentle and do not overmix. The batter should be just combined. If you want, fold in ½ cup of white chocolate chips for extra sweetness. These add a nice touch to the lemon flavor. Now it’s time to pour the batter into the prepared pan. Smooth the top with your spatula. You are ready to bake your blondies! To get the best texture in your Olive Oil Lemon Blondies, avoid overmixing. When mixing your wet and dry ingredients, stir just until they come together. Overmixing adds air, making your blondies dense and tough. A few small lumps are okay! Fold gently with a rubber spatula to keep them light and moist. For the best lemon taste, always use fresh lemon juice and zest when you bake. Fresh lemons pack a punch of flavor that bottled juice lacks. The zest adds a wonderful aroma and bright notes. If you use bottled juice, the flavor may not be as vibrant. So grab some fresh lemons for this recipe! These blondies are perfect with a warm cup of tea or coffee. The light lemon flavor pairs well with both drinks. Serve them plain or with a sprinkle of powdered sugar on top. You can also add a scoop of vanilla ice cream for a special treat. Enjoy these blondies with friends or family for a delightful dessert! {{image_2}} You can switch up the oil in your blondies for a new taste. For example, try using avocado oil. It has a mild flavor and adds healthy fats. Coconut oil is another great choice. It brings a lovely hint of sweetness. Just remember to melt it first if solid. Each oil will change the flavor slightly, giving you a fun twist! Adding nuts or fruits can make your blondies even more exciting. Chopped walnuts or pecans add a nice crunch. You can also mix in dried cranberries or blueberries for a fruity burst. If you want a chocolate kick, add dark chocolate chips instead of white. Mix and match to find your favorite combo! Want to make these blondies gluten-free? Use almond flour or a gluten-free flour blend. Both work well and keep the texture nice. If you're looking for a vegan option, replace the eggs. Use flaxseed meal mixed with water. It acts as a great binder. These swaps let everyone enjoy your tasty treats! To keep your olive oil lemon blondies fresh, store them in an airtight container. This keeps moisture out and helps maintain their soft texture. You can place parchment paper between layers if you stack them. This prevents sticking and makes it easy to grab a piece. At room temperature, these blondies last about three days. They can last longer in the fridge, around a week. Just make sure they are sealed tightly to keep them delicious. Freezing blondies is easy! First, let them cool completely. Then, cut them into squares. Wrap each piece in plastic wrap. Place the wrapped blondies in a freezer-safe bag or container. They can stay frozen for up to three months. To thaw, leave them at room temperature for a few hours or microwave them for a few seconds. Enjoy your treat any time! Yes, you can use different sugars. Brown sugar gives a rich flavor. You can try light brown sugar or even coconut sugar. Both will change the taste slightly but still work well. If you want a lighter blondie, try granulated sugar. Just remember that granulated sugar may make them less chewy. If you don't have olive oil, use other oils too. Canola oil works well and has a mild taste. You can also use melted coconut oil for a slight coconut flavor. Avocado oil is another good option. Each oil will change the taste a bit, so choose what you like best. To check if your blondies are done, look for a few signs. The edges should be lightly golden. The center may look slightly moist but not wet. Insert a toothpick in the middle. If it comes out clean or with a few crumbs, they are ready. Let them cool in the pan for the best texture. This blog post covered how to make delicious blondies using simple ingredients. We explored the main ingredients, steps for mixing, and tips for the perfect bake. Variations and storage methods were also discussed to enhance your baking experience. These blondies are easy to make and can fit many diets. I hope you feel ready to try this recipe and enjoy your sweet treats. Happy baking!

Olive Oil Lemon Blondies Flavorful and Light Dessert

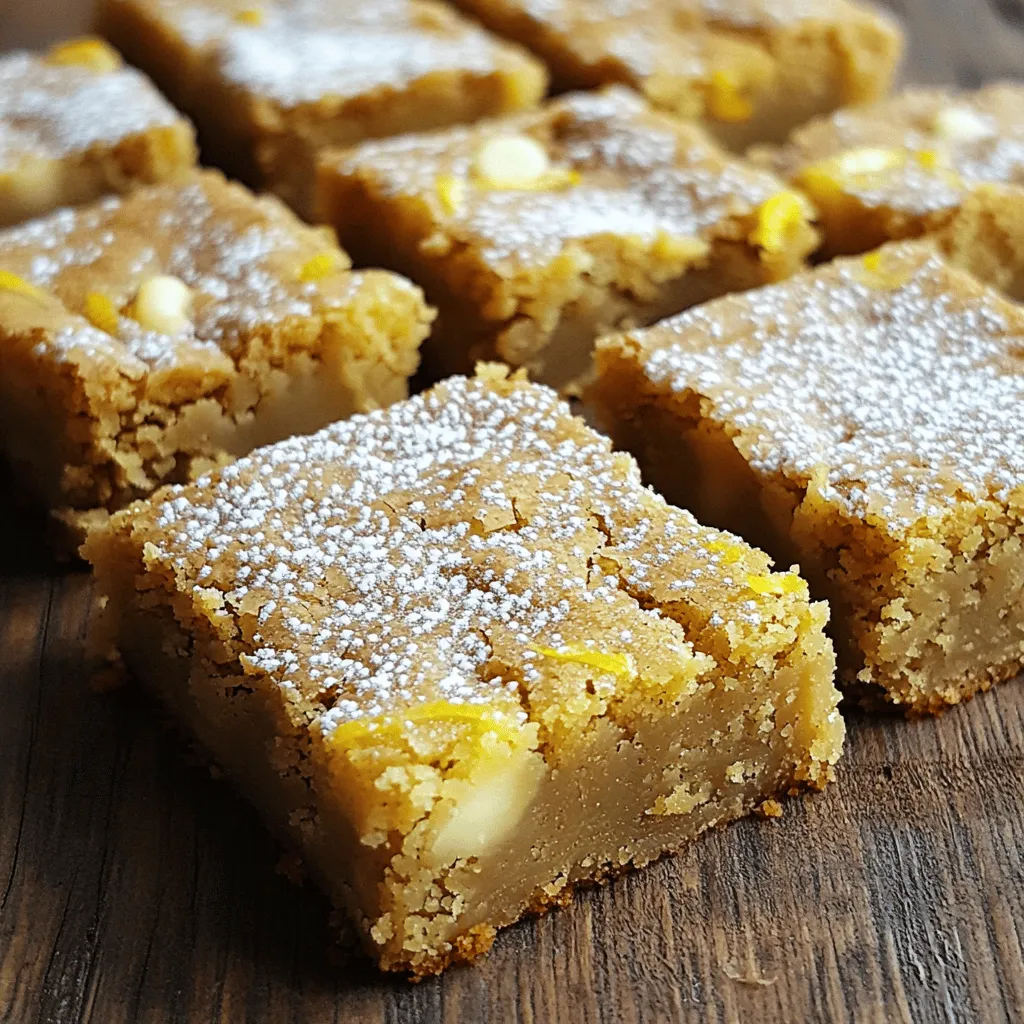
Looking for a light and flavorful dessert? These Olive Oil Lemon Blondies are your answer! With a perfect balance of

- 10 chicken drumsticks - 1/4 cup honey - 1/4 cup soy sauce - 2 tablespoons sesame oil - 4 cloves garlic, minced - 1 inch fresh ginger, grated - 1/2 teaspoon black pepper - 1/2 teaspoon salt To make sesame honey chicken drumsticks, you need fresh chicken drumsticks. I choose 10 pieces for this recipe. The marinade is vital. It consists of honey, soy sauce, sesame oil, garlic, ginger, black pepper, and salt. Each ingredient adds depth and flavor to the dish. - Honey - Soy Sauce - Sesame Oil - Garlic and Ginger Honey gives a sweet taste that balances the saltiness of soy sauce. Use 1/4 cup of each. Sesame oil adds a nutty flavor. Minced garlic and grated ginger give a spicy kick. They enhance the overall taste of the drumsticks. - Chopped Green Onions - Toasted Sesame Seeds For garnish, I like to add chopped green onions and toasted sesame seeds. They not only look great but also add texture. The green onions provide a fresh crunch. The sesame seeds bring a slight nuttiness. Use them to finish your dish beautifully. - Preheat the oven to 400°F (200°C). - Prepare a baking sheet with parchment paper. Start by turning on your oven. Set it to the right temperature so your chicken cooks well. While the oven heats, take your baking sheet. Parchment paper helps keep the drumsticks from sticking. This makes cleanup easier too! - Combining the marinade ingredients. - Tossing drumsticks in the marinade. In a large bowl, mix the honey, soy sauce, sesame oil, minced garlic, grated ginger, black pepper, and salt. Stir until all the ingredients blend well. Once the marinade is ready, add the drumsticks. Toss them in the mix until they are coated all over. Cover your bowl and let it sit. You can leave it for 30 minutes or up to 2 hours in the fridge. The longer they sit, the more flavorful they become. - Baking time and temperature. - Flipping and toasting the sesame seeds. Place the coated drumsticks on the baking sheet. Make sure they have space between them for even cooking. Bake in the oven for 30 to 35 minutes. Flip them halfway through cooking to ensure they brown nicely. The chicken should reach an internal temperature of 165°F (74°C). In the last five minutes, sprinkle sesame seeds over the drumsticks. This toasts them and adds a nice crunch. Once done, remove them from the oven. Let them rest a few minutes before serving. Marinating chicken drumsticks boosts flavor. I find the best time is at least 30 minutes. For deeper taste, try marinating for up to 2 hours. If you need more marinade, just double the ingredients. This ensures every drumstick gets a good soak. For even cooking, space drumsticks on the baking sheet. This allows heat to circulate well. Flip them halfway through cooking for a nice color. Check if the chicken is done by using a meat thermometer. It should reach 165°F (74°C) in the thickest part. Pair these drumsticks with rice or steamed vegetables for a great meal. You can also serve them with a fresh salad. For plating, stack the drumsticks neatly and sprinkle sesame seeds on top. Finish with green onions for color and crunch. {{image_2}} You can switch up the chicken type. Chicken thighs or wings work great too. Each part has its unique flavor and texture. You can also try vegetarian options. Tofu or tempeh are fantastic substitutes. They soak up the marinade well, giving you a tasty dish. Want to spice things up? Add chili flakes for a kick! This will give your sesame honey chicken a nice heat. If you prefer something fresh, try citrus. Adding lime or orange zest brightens the dish. It brings a zesty twist that pairs well with the sweetness. You can grill or bake the drumsticks. Grilling adds a smoky flavor, while baking is easier. Both methods yield juicy chicken. If you want to try something slow, use a slow cooker. This method makes the chicken tender and allows the flavors to meld beautifully. After enjoying your sesame honey chicken drumsticks, store any leftovers right away. Cool the drumsticks to room temperature first. Place them in an airtight container. Use a container that is safe for the fridge. Glass or BPA-free plastic work well. Refrigerate within two hours to keep them fresh. Properly stored, they last up to four days. To enjoy your leftovers, reheating is key. The best way is using an oven. Preheat your oven to 350°F (175°C). Place the drumsticks on a baking sheet. Heat for about 15-20 minutes or until hot. This method keeps the chicken juicy and crispy. Avoid using a microwave, as it might make them rubbery. If you want to save some drumsticks for later, freezing is a great option. Wrap each drumstick in plastic wrap. Then, place them in a freezer bag. Press out air before sealing. Label the bag with the date. They can stay frozen for up to three months. When ready to eat, thaw them in the fridge overnight. This helps retain flavor and texture. You can use skinless chicken drumsticks. However, the flavor will change. Skin adds rich taste and helps keep the meat juicy. Without skin, the drumsticks may dry out faster during cooking. You should check them often. Cooking time may also be shorter, so keep an eye on them. To check if the chicken is done, look for a few signs. The skin should be golden brown. The meat should not be pink near the bone. The best way is to use a meat thermometer. Insert it into the thickest part. The chicken should reach 165°F or 74°C to be safe to eat. Yes, you can prepare these drumsticks in advance. Marinating them overnight in the fridge will add lots of flavor. Just keep them in a sealed container. You can also store cooked drumsticks in the fridge for up to four days. Reheat them in the oven to keep them crispy. This blog post covered how to prepare tasty chicken drumsticks. We discussed key ingredients like honey and soy sauce, plus tips for marinating and cooking. I shared garnish ideas and helpful storage info. Remember, you can switch up ingredients or cooking methods to fit your tastes. Experimenting makes cooking fun. With these steps, you can enjoy delicious drumsticks anytime. Dive in and enjoy your cooking adventure!

Savory Sesame Honey Chicken Drumsticks Delight

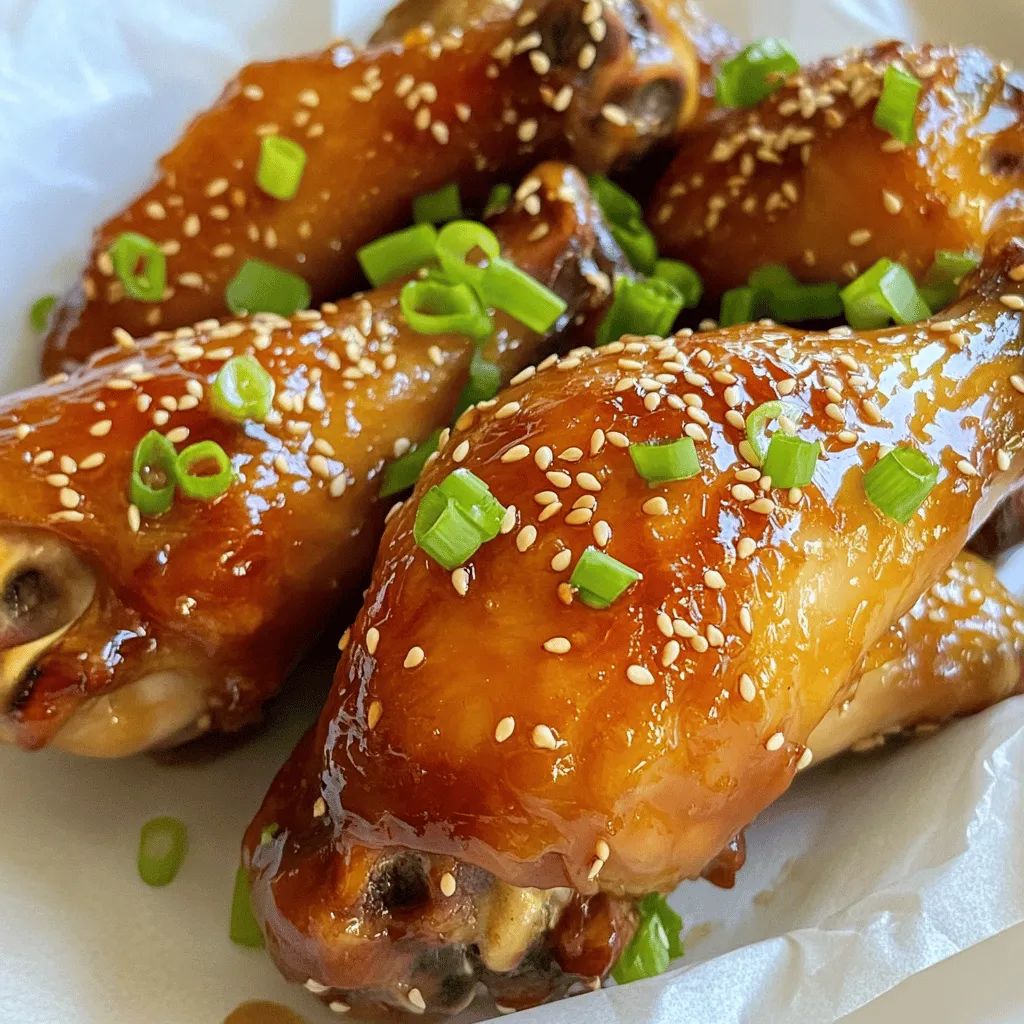
Get ready to impress your taste buds with my Savory Sesame Honey Chicken Drumsticks Delight! These drumsticks are juicy, sweet,

To make Coconut Curry Butternut Soup, gather these simple ingredients: - 1 medium butternut squash, peeled and diced - 1 tablespoon olive oil - 1 onion, chopped - 3 cloves garlic, minced - 1 tablespoon fresh ginger, grated - 2 tablespoons red curry paste - 4 cups vegetable broth - 1 can (14 oz) coconut milk - 1 tablespoon maple syrup (optional for sweetness) - Salt and black pepper to taste - Juice of 1 lime - Fresh cilantro leaves for garnish If you don't have something on hand, here are some easy swaps: - Butternut squash: You can use sweet potatoes or pumpkin instead. - Olive oil: Feel free to use coconut oil for a richer flavor. - Red curry paste: Try yellow curry paste if you want a milder taste. - Vegetable broth: Chicken broth works if you prefer a non-vegetarian version. - Coconut milk: Use almond milk or cashew cream for a lighter option. - Maple syrup: Honey can replace it if you like. Using fresh ingredients gives the best flavor. Fresh butternut squash has a nice texture and taste. Peel and dice it before cooking. Canned coconut milk offers convenience and creaminess. It saves time and still tastes great. If you choose fresh garlic and ginger, your soup will have more vibrant flavors. For garlic and ginger, use minced fresh instead of powdered for the best results. To start, gather all your ingredients. You need: - 1 medium butternut squash, peeled and diced - 1 tablespoon olive oil - 1 onion, chopped - 3 cloves garlic, minced - 1 tablespoon fresh ginger, grated - 2 tablespoons red curry paste - 4 cups vegetable broth - 1 can (14 oz) coconut milk - 1 tablespoon maple syrup (optional for sweetness) - Salt and black pepper to taste - Juice of 1 lime - Fresh cilantro leaves for garnish First, peel and dice the butternut squash. Use a sturdy knife. It can be tough to cut, so take your time. Next, chop the onion and mince the garlic. Grate the ginger too. This mix of flavors will be the base of your soup. In a large pot, heat the olive oil over medium heat. Once hot, add the chopped onion. Sauté for about 5 minutes until the onion is soft and clear. Then, add the minced garlic and grated ginger. Cook for 1-2 minutes. You want to smell those amazing scents! Next, add the diced butternut squash to the pot. Stir in the red curry paste. Make sure all the squash gets coated. Pour in the vegetable broth and bring everything to a boil. Once boiling, lower the heat, cover the pot, and let it simmer for about 20-25 minutes. This helps the squash get tender. After simmering, remove the pot from heat. It's time to blend! If you have an immersion blender, use it directly in the pot. Blend until the soup is smooth. If you don't have one, carefully transfer the soup to a regular blender. Blend in batches if needed. Once blended, pour the soup back into the pot. Now, stir in the coconut milk and maple syrup if you want a touch of sweetness. Season with salt, black pepper, and lime juice to taste. Warm the soup on low heat for about 5 minutes to let the flavors mix well. Serve your soup hot! Garnish with fresh cilantro leaves on top. Enjoy this warm, creamy delight. To make your soup shine, start with fresh ingredients. Use a ripe butternut squash for a sweet base. Peel and dice it evenly so it cooks well. Sauté the onions until they are soft. This step builds a rich flavor. When adding garlic and ginger, stir gently. Let them cook until fragrant but not brown. This helps keep their bright flavors. Use a good quality red curry paste. It adds depth and warmth. Blend the soup until smooth but not too thin. You want a creamy texture. If it's too thick, add a bit more broth. To enhance the soup, try adding a splash of lime juice. It brightens the dish and balances the curry's heat. You can also add a tablespoon of maple syrup for sweetness. This gives a nice contrast to the spices. Fresh herbs are key! Garnish with cilantro for a fresh finish. You can also add a pinch of cayenne pepper for heat. One common mistake is overcooking the butternut squash. If it’s too soft, it can lose its flavor. Watch the cooking time. Another mistake is not blending enough. Make sure it’s smooth. Chunks can ruin the creamy feel. Lastly, be careful with salt. Always taste before adding more. You can always add, but you can’t take away! {{image_2}} You can easily add protein to your Coconut Curry Butternut Soup. Some great choices are cooked chicken, shrimp, or chickpeas. - For chicken: Use shredded rotisserie chicken for a quick option. - For shrimp: Add peeled, deveined shrimp during the last few minutes of cooking. - For chickpeas: Add a can of drained chickpeas for a hearty vegan option. These proteins will make your soup more filling and nutritious. This soup is already vegetarian and can be vegan with a few tweaks. - Use vegetable broth to keep it vegetarian. - Ensure your red curry paste is vegan. Some brands add shrimp paste. - Skip the maple syrup if you want a savory soup. By making these changes, you can enjoy a tasty and plant-based version. Changing spices and herbs can take your soup to new levels. - Add a pinch of cumin for warmth. - Try turmeric for a vibrant golden color. - Fresh basil or mint can add a refreshing twist. These simple tweaks will enhance the flavor and keep your soup exciting every time you make it. Once you finish your meal, let the soup cool down. Pour it into an airtight container. This helps keep the soup fresh. Store the container in the fridge. The soup will stay good for up to five days. Always check for any signs of spoilage before eating. If you want to save the soup for later, freezing is a great option. Use a freezer-safe container or a zip-top bag. Leave some space at the top because soup expands when it freezes. Label the container with the date. The soup can last for up to three months in the freezer. When you are ready to eat, just thaw it in the fridge overnight. To reheat, pour the soup into a pot. Heat it on medium until it’s hot. Stir it often to avoid sticking. If the soup is too thick, add a splash of water or broth. You can also use a microwave. Place the soup in a microwave-safe bowl. Heat it for one minute at a time, stirring in between. Enjoy your warm, tasty soup! Coconut curry butternut soup lasts about 4-5 days in the fridge. Store it in an airtight container. Make sure it cools down before you put it in the fridge. When you want to eat it, just reheat on the stove. Stir it well to blend the flavors again. Yes, you can use fresh butternut squash instead of frozen. Fresh squash gives a great taste and texture. Just peel and dice it into small pieces. The cooking time remains the same. Fresh squash helps to keep the soup vibrant and tasty. Yes, you can make this soup in a slow cooker. Just add all the ingredients to the slow cooker. Set it on low for 6-8 hours or high for 3-4 hours. Blend the soup when it’s done cooking. This method allows the flavors to deepen and meld nicely. In this post, we explored key ingredients for coconut curry butternut soup. We covered details on substitutions and the choice between fresh and canned items. The step-by-step instructions made preparation and cooking simple. I shared tips to enhance flavors and avoid common mistakes. You can even adapt the recipe with proteins or spices. Finally, we discussed storage and reheating. With this guide, you can enjoy a delicious soup that's easy to make and full of flavor. Dive in and enjoy your cooking journey!

Coconut Curry Butternut Soup Flavorful and Nourishing

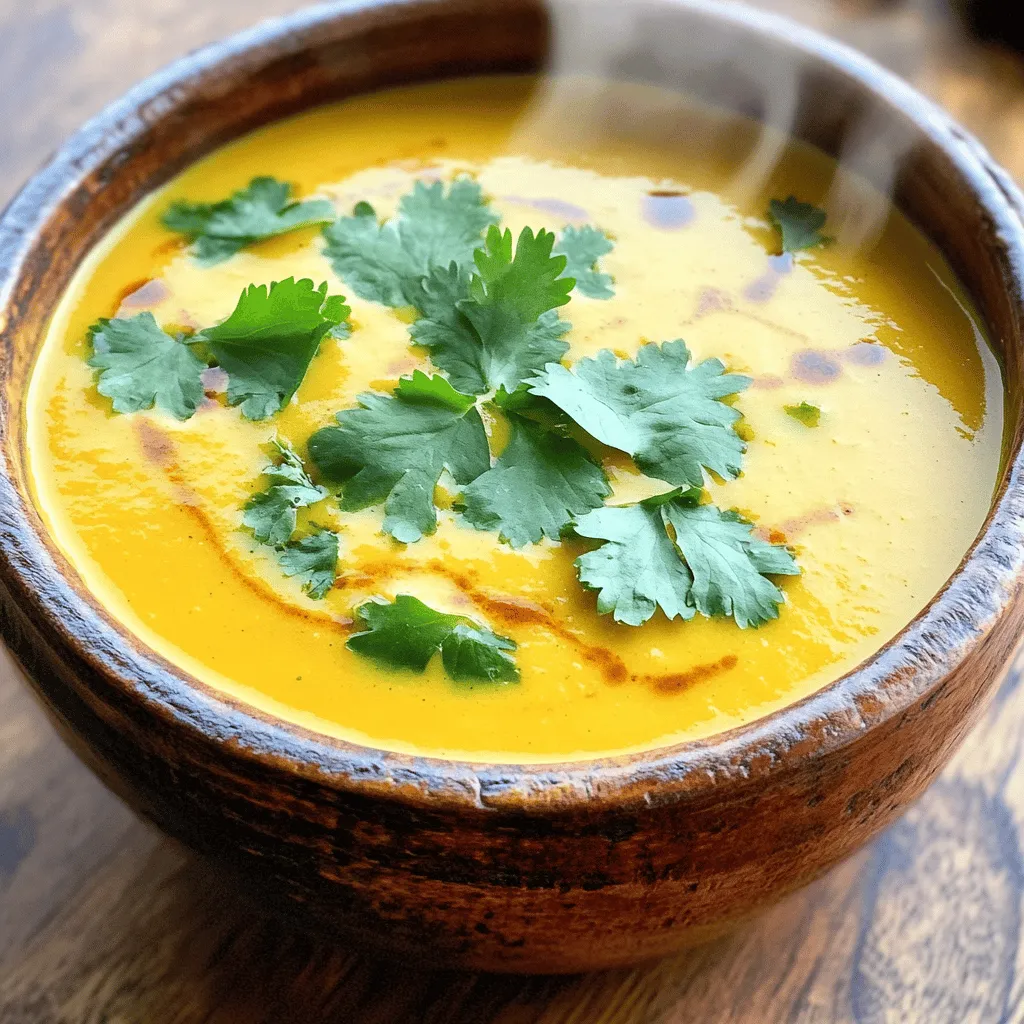
Warm, creamy, and packed with flavor, Coconut Curry Butternut Soup is a delight. This nourishing dish combines sweet butternut squash

- 2 cups canned white beans (cannellini or Great Northern), rinsed and drained - 1 whole bulb of garlic - 3 tablespoons tahini - 2 tablespoons lemon juice - 2 tablespoons olive oil - 1 teaspoon ground cumin - Salt and pepper to taste For the main ingredients, I like to use canned white beans. They are easy and save time. Cannellini or Great Northern beans work great. You’ll also need a whole bulb of garlic. Roasting garlic brings out its sweet flavor. Additionally, get tahini, which adds creaminess. Lemon juice brightens the dip, while olive oil adds richness. Don’t forget ground cumin for warmth, and season with salt and pepper. - Fresh parsley for garnish - Fresh veggie sticks or pita chips for serving For garnish, I suggest using fresh parsley. It adds a nice pop of color. Serve the dip with fresh veggie sticks. Carrots and cucumbers are great choices. Pita chips also work well and add a nice crunch. This mix of textures makes the dip fun to eat! First, preheat your oven to 400°F (200°C). This step helps the garlic roast nicely. Next, take a whole bulb of garlic and cut off the top. This exposes the cloves. Drizzle one teaspoon of olive oil over the cut garlic. Wrap it in aluminum foil. Place it in the oven and roast for 30 to 35 minutes. It should turn soft and caramelized. The smell will be amazing as it cooks! Once the garlic is cool enough to touch, squeeze the roasted cloves into a food processor. Discard the papery skins. Now, add the two cups of rinsed and drained white beans. Include three tablespoons of tahini, two tablespoons of lemon juice, and the remaining olive oil. Add one teaspoon of ground cumin, along with salt and pepper to taste. Blend everything until it is smooth. If the dip seems too thick, add a tablespoon of water. Keep blending until you reach the texture you like. Now it’s time for a taste test! Adjust the seasoning if you think it needs more flavor. Once satisfied, transfer the dip into a nice serving bowl. For a pretty finish, garnish with fresh parsley on top. This dip is now ready to serve with veggie sticks or pita chips! Enjoy your tasty creation! To boost your dip's taste, add fresh herbs like basil or thyme. These herbs bring a bright touch. You can also sprinkle in some paprika or chili powder for warmth. If you want a unique twist, try using different beans. Black beans or chickpeas can change the flavor and texture. If your dip is too thick, don't worry! Just add a tablespoon of water at a time. Blend again until it’s just right. For a creamier feel, blend longer. You can also add more tahini or olive oil for richness. Adjust slowly, and taste as you go. Serve your dip in a pretty bowl to make it pop. Drizzle some olive oil on top for shine. A sprinkle of paprika adds color and flair. Pair it with bright veggie sticks or warm pita chips. This makes your dish look inviting and fun to eat. {{image_2}} You can spice up your roasted garlic white bean dip in fun ways. - Spicy roasted garlic white bean dip: Add a pinch of cayenne pepper or some chopped jalapeños for heat. This addition gives a nice kick to the creamy texture of the dip. - Mediterranean-style variations: Mix in some chopped olives or sun-dried tomatoes. These ingredients add depth and a burst of flavor that enhances the overall taste. This dip is easy to adapt for different diets. - Vegan options and substitutions: The base of this dip is already vegan. Just ensure that any added ingredients, like tahini, come from plant sources. You can even use avocado for extra creaminess. - Gluten-free serving options: Pair the dip with fresh veggie sticks or gluten-free pita chips. This way, everyone can enjoy the dip without worry. After you make the dip, let it cool. Place it in an airtight container. I like using glass containers because they keep flavors fresh. Store the dip in your fridge. It will stay good for about 4 to 5 days. Always check for any changes in smell or color before you eat it. If you want to save some for later, freezing works great. Scoop the dip into freezer-safe bags. Make sure to remove as much air as possible. Label the bags with the date. The dip can last up to 3 months in the freezer. When you’re ready to eat it, take it out and put it in the fridge overnight to thaw. To reheat, place it in a bowl. Warm it gently in the microwave or on the stove. Stir it well to get a creamy texture again. If it seems thick, add a bit of water or olive oil to help it blend smoothly. Enjoy it as if it was just made! To roast garlic, start by preheating your oven to 400°F (200°C). Take a whole bulb of garlic and cut off the top. This exposes the cloves. Drizzle a teaspoon of olive oil on the cut side. Wrap the bulb in aluminum foil. Bake it in the oven for 30-35 minutes. The garlic is ready when it feels soft and looks caramelized. Let it cool before handling. Yes, you can use dried beans. Soak them overnight in water. The next day, drain and rinse them. Cook the beans in a pot with fresh water, bringing it to a boil. Lower the heat and simmer for 1-2 hours, or until tender. You’ll need about 2 cups of cooked beans for the dip. This dip stays fresh in the fridge for about 4-5 days. Store it in an airtight container. If you see any mold or it smells off, it’s best to toss it. Always check before enjoying leftovers! This blog post covered making a delicious roasted garlic white bean dip. You learned about key ingredients like canned white beans, garlic, and tahini. I shared tips for enhancing flavor and perfecting the dip’s consistency. We explored variations and storage options for your dip. In conclusion, don't hesitate to try this easy recipe. Experiment with flavors and enjoy serving this dip with fresh veggies or pita chips. Your taste buds will thank you!

Roasted Garlic White Bean Dip Flavorful and Easy Recipe

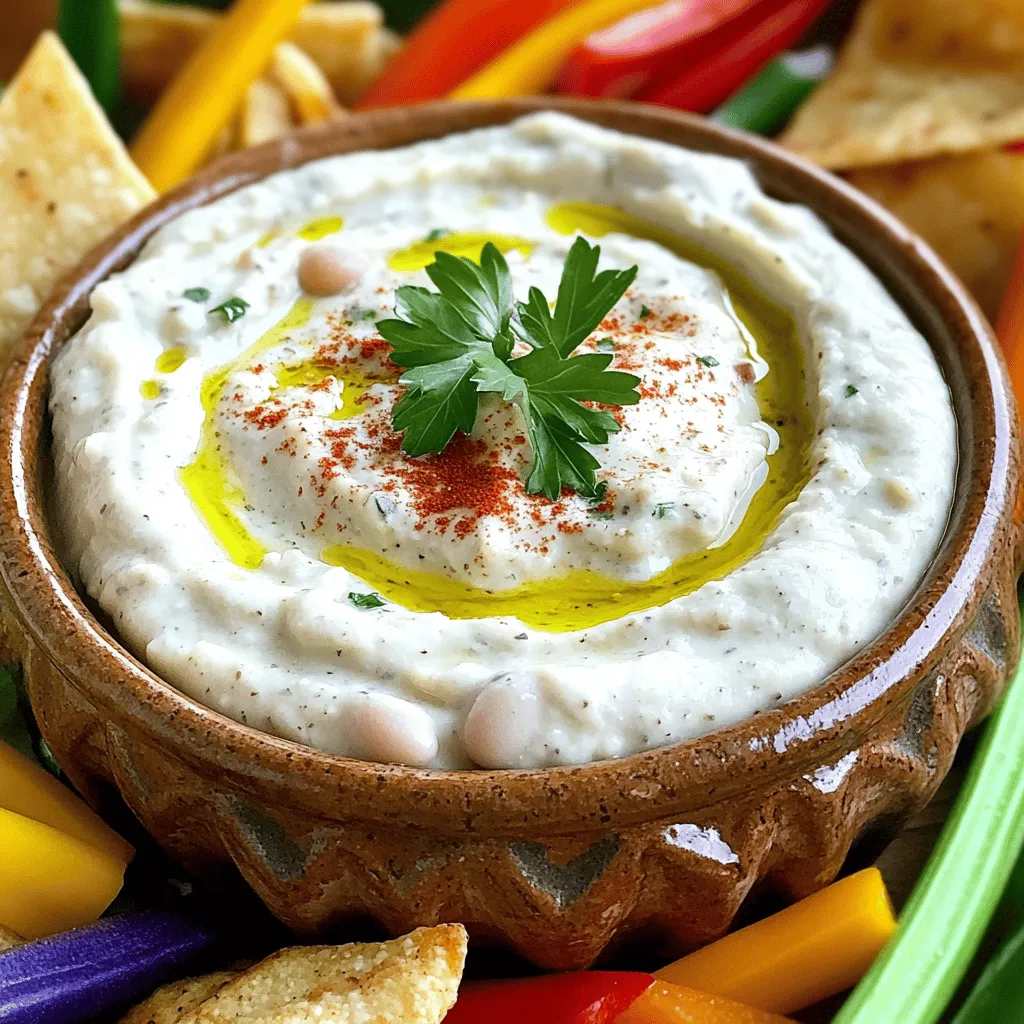
If you’re looking for a quick, tasty snack, you’ve come to the right place! This Roasted Garlic White Bean Dip

- 2 ¾ cups sweetened shredded coconut - 1 cup semi-sweet chocolate chips - ½ cup sweetened condensed milk - 1 teaspoon vanilla extract - ¼ teaspoon salt - 2 large egg whites - ½ teaspoon almond extract (optional) Sweetened shredded coconut gives macaroons their chewy texture and tropical taste. It is the star of this dessert. Semi-sweet chocolate chips add rich flavor, balancing the sweetness of the coconut. Sweetened condensed milk binds everything together, making each bite creamy and smooth. Vanilla extract enhances the overall flavor, while salt brings out the sweetness. Egg whites provide lift and structure, making the macaroons light. If you want a nutty twist, add almond extract. Fresh ingredients make a big difference in flavor and texture. Use fresh shredded coconut for the best chewiness. Old coconut can taste stale and dry. Always check the date on chocolate chips, as they can lose flavor over time. Fresh egg whites whip better, leading to fluffier macaroons. In short, fresh ingredients lead to delicious, satisfying treats. {{ingredient_image_1}} Making chocolate coconut macaroons is fun and simple. Start by gathering your ingredients. You will need sweetened shredded coconut, sweetened condensed milk, and chocolate chips. You will also use egg whites, vanilla extract, and salt. 1. Preheat your oven to 325°F (163°C). Line a baking sheet with parchment paper. 2. In a large bowl, mix the coconut, sweetened condensed milk, vanilla extract, and salt. Stir it well until the coconut is fully coated. 3. In another bowl, whip the egg whites until soft peaks form. If you like, add almond extract for extra flavor. 4. Gently fold the whipped egg whites into the coconut mix. Be careful to keep the air in the egg whites. 5. Use a small cookie scoop or your hands to form small mounds. Each should be about 1 to 1.5 inches wide. Place them on the baking sheet, leaving space between each. 6. Bake for 20 to 25 minutes. Look for golden brown tops. 7. While baking, melt the chocolate chips in a microwave-safe bowl. Heat in 30-second bursts, stirring between each until smooth. 8. Once the macaroons cool, dip the bottoms or half in the melted chocolate. Put them back on the parchment to set. If you want, drizzle more chocolate on top for style. 9. Wait until the chocolate hardens before enjoying your treats. - Use fresh, quality coconut for the best flavor. - Don’t overmix the egg whites; you want them fluffy. - Space the mounds well on the sheet for even baking. - Experiment with flavors like almond or citrus zest for a twist. - Make sure to let the chocolate cool slightly before dipping to prevent melting the macaroons. Many people make simple mistakes when making chocolate coconut macaroons. One common mistake is overmixing the coconut mixture. This can make your macaroons dense. You want to mix just until combined. Another mistake is not properly whipping the egg whites. They should form soft peaks. If they are not whipped enough, your macaroons will not rise. Lastly, avoid baking them too long. You want a golden brown top, not dark brown. To get the right texture, focus on the egg whites. Whip them until they are fluffy but not dry. Fold them gently into the coconut mixture. This keeps air in the batter. Also, using sweetened shredded coconut helps create a chewy texture. Make sure to bake at 325°F for just the right amount of time. This helps your macaroons stay moist inside. Want to add some flair? Try mixing in different flavors. Almond extract adds a nice touch. You can also sprinkle sea salt on top for a sweet-salty combo. If you love fruit, consider adding a bit of orange zest. For toppings, use melted chocolate to coat the bottoms. Drizzling more chocolate on top gives a nice look. These small changes can make your macaroons even more special. Pro Tips Use Fresh Ingredients: Always opt for fresh, high-quality coconut and chocolate to enhance the flavor of your macaroons. Egg White Whipping Technique: Ensure your mixing bowl and beaters are completely clean and free of grease for the best egg white volume. Storage Tips: Store leftover macaroons in an airtight container at room temperature for up to a week, or refrigerate for longer freshness. Experiment with Flavors: Try adding different extracts like mint or orange for a unique twist on the traditional coconut macaroon. {{image_2}} You can easily make these macaroons gluten-free. The main ingredient is shredded coconut, which is naturally gluten-free. Just be sure to use gluten-free chocolate chips. Many brands offer options that are safe for those with gluten sensitivities. This way, everyone can enjoy this treat! Want to change up the flavor? You can add a few things to make your macaroons unique. Try adding citrus zest like lemon or orange for a fresh taste. You could also mix in nuts, like almonds or pecans. These will add crunch and flavor to your macaroons. Just remember to keep the balance of ingredients right. Decorating your macaroons can make them extra special. For a festive look, drizzle melted chocolate over the tops. Add sprinkles or crushed nuts for texture. You can also dip the whole macaroon in chocolate for a rich finish. For holidays, consider using edible glitter or holiday-themed sprinkles. This adds flair for any celebration! To keep your chocolate coconut macaroons fresh, store them in an airtight container. Place parchment paper between layers to avoid sticking. This keeps them soft and chewy. Avoid direct sunlight and heat. Instead, choose a cool, dry spot in your kitchen. When stored properly, macaroons last about one week at room temperature. You can also freeze them for up to three months. To freeze, place them in a single layer on a baking sheet. Once frozen, transfer them to an airtight container. Remember to label your container with the date. After storage, let the macaroons sit at room temperature for about 10 minutes. This makes them soft again. You can also serve them with a scoop of ice cream or drizzle extra chocolate on top. Pair them with coffee or tea for a delightful treat. Macaroons and macarons are not the same. Macaroons are chewy and made with coconut. They often use sweetened coconut, egg whites, and sweeteners. You shape them into mounds before baking. Macarons, however, are delicate French cookies. They use almond flour, egg whites, and sugar. Macarons have a smooth shell and a creamy filling. The texture and ingredients make them quite different. Yes, you can make these macaroons vegan! Simply replace the egg whites with aquafaba. Aquafaba is the liquid from canned chickpeas. It whips up just like egg whites. You can also use a vegan sweetened condensed milk. You can find this in stores or make it at home. Make sure to check the chocolate chips too, as some may contain dairy. If your macaroons turn out dry, do not worry! You can fix this in a few ways. First, make sure to measure your coconut and milk properly. Too much coconut can dry them out. You can also add a bit more sweetened condensed milk to the mix. This will help them stay moist. If they are still dry after baking, dip them in melted chocolate. This adds moisture and flavor! In this blog post, we explored the key ingredients needed for chocolate coconut macaroons. We talked about proper preparation and shared tips to avoid common mistakes. You learned about fun variations, storage tips, and answers to frequently asked questions. Making macaroons can be easy and fun! Focus on freshness and practice your techniques. Enjoy creating these treats for any occasion. Happy baking!

Chocolate Coconut Macaroons Simple and Rich Delight

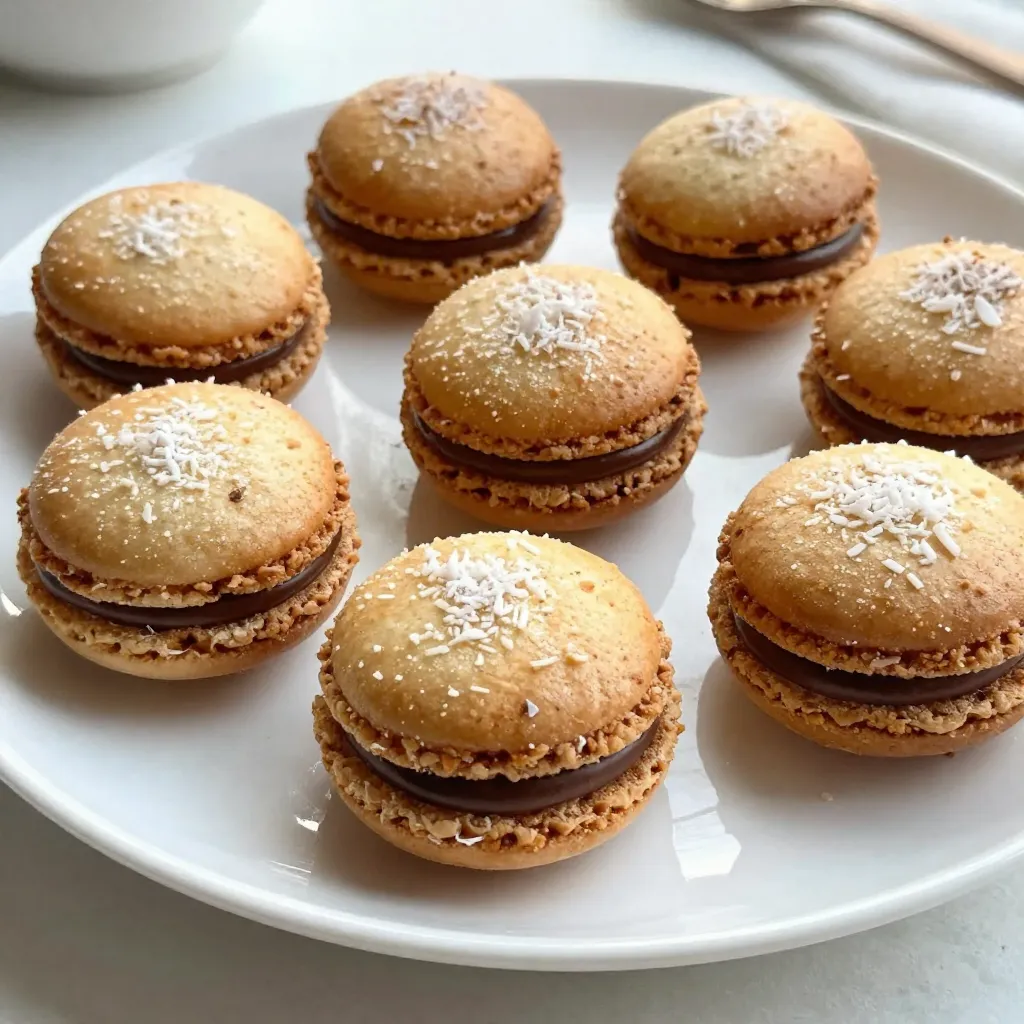
Are you ready to bake a treat that’s both simple and indulgent? Chocolate coconut macaroons are a delightful mix of

To make a tasty Orange Creamsicle Smoothie, you need a few fresh items. Here’s what you will need: - 2 ripe oranges, peeled and segmented - 1 banana, frozen - 1 cup vanilla yogurt - 1/2 cup coconut milk (or almond milk) - 1/2 teaspoon vanilla extract - Ice cubes (optional, for a thicker consistency) These main ingredients blend together to create a creamy and refreshing drink. The ripe oranges give it a bright flavor, while the frozen banana adds sweetness and creaminess. If you want your smoothie sweeter, you can add honey. Here’s how you can enhance the flavor: - 1 tablespoon honey (optional, depending on sweetness preference) Honey works well to balance the tartness of the oranges. If you like, you can skip the honey for a lighter taste. You can also add a pinch of orange zest for extra zing. You can use different types of milk based on your taste or dietary needs. Here are some ideas: - Coconut milk - Almond milk Both of these options keep the smoothie creamy. Coconut milk adds a tropical twist, while almond milk offers a nutty flavor. You can choose whichever milk you prefer. {{ingredient_image_1}} First, gather all your ingredients. You will need: - 2 ripe oranges, peeled and segmented - 1 frozen banana - 1 cup vanilla yogurt - 1/2 cup coconut milk (or almond milk) - 1 tablespoon honey (optional) - 1/2 teaspoon vanilla extract - Ice cubes (optional) Next, peel the oranges and break them into segments. You want them ready to blend. Take your frozen banana out of the freezer. A frozen banana makes the smoothie thick and creamy. If you want a sweeter drink, keep the honey close. Now, it’s time to blend. Add the orange segments and frozen banana into your blender. Pour in the vanilla yogurt and coconut milk. If you like your smoothie sweeter, add the honey and vanilla extract now. Blend on high speed. Watch how the mix comes together. You want a smooth and creamy texture. This can take about 30 seconds. If you hear chunks, keep blending. If you want a thicker smoothie, toss in a handful of ice cubes. Blend again until the ice is crushed and mixed. This makes your drink extra cold and refreshing. Taste your smoothie. If you want more sweetness, add more honey and blend again. Pour the smoothie into tall glasses. Enjoy this creamy treat right away! To make the best Orange Creamsicle Smoothie, start with fresh ingredients. Use ripe oranges for the best flavor. When you blend, add the softer items first. This means putting in the orange segments and frozen banana first. Then, add the yogurt and milk. This order helps everything blend smoothly. Always blend on high speed. This mixes the ingredients well. If your smoothie is too thick, add a splash of milk. Keep blending until you reach a creamy texture. You can easily change this smoothie to fit your taste. Want more sweetness? Add a bit more honey. If you like a creamier taste, try using Greek yogurt. You can swap out the bananas for mango or peaches for a different flavor. For a fun twist, add a scoop of vanilla protein powder. This adds nutrition and keeps you full longer. You can also throw in a handful of spinach. It won’t change the taste but will boost the nutrients. If you have extra smoothie, store it in the fridge. Use an airtight container for best results. The smoothie is best when enjoyed fresh but can last for up to a day. If you want to prep ahead, you can freeze the fruit. Place the orange segments and banana in a freezer bag. When you’re ready, blend them with yogurt and milk. This is a quick way to enjoy a refreshing drink anytime. Pro Tips Use Fresh Oranges: Fresh, ripe oranges will give your smoothie the best flavor. Make sure they are sweet and juicy for optimal taste. Frozen Banana Benefits: Using a frozen banana not only adds creaminess but also keeps your smoothie cold without needing too much ice. Yogurt Variations: Experiment with different flavors of yogurt, such as Greek or coconut, to create unique twists on the classic Orange Creamsicle flavor. Sweetness Adjustment: Always taste your smoothie before serving. You can adjust the sweetness by adding more honey or a splash of orange juice if it’s too thick. {{image_2}} To make a healthier Orange Creamsicle Smoothie, swap out some ingredients. Use Greek yogurt instead of regular vanilla yogurt. Greek yogurt adds more protein and makes the smoothie creamier. You can also replace honey with a natural sweetener like stevia or agave syrup. This cuts down on sugar while keeping the flavor strong. You can change the flavor of your Orange Creamsicle Smoothie easily. Try adding fresh berries like strawberries or blueberries. They add a nice color and taste. For a tropical twist, mix in some pineapple or mango. You can also add a dash of cinnamon or nutmeg for warmth. Each option gives you a new way to enjoy this smoothie. If you want to boost nutrition, consider adding supplements. A scoop of protein powder works well and keeps you full longer. You can also add spinach or kale for extra vitamins. These greens blend in easily and won’t change the taste much. For omega-3s, try adding ground flaxseed or chia seeds. These small additions can make your smoothie even better for your health. To store your Orange Creamsicle Smoothie, place it in an airtight container. This helps keep it fresh. You can store it in the fridge for up to 24 hours. Just remember to give it a good shake before drinking. The ingredients may separate a bit, but that’s normal. If you want to save your smoothie for longer, freezing is a great option. Pour the smoothie into ice cube trays or freezer-safe bags. This way, you can blend it later for a quick treat. When you’re ready, simply blend the frozen cubes with a splash of milk or water. This makes a tasty, slushy version of your smoothie. For the best storage, use glass jars or BPA-free plastic containers. These materials keep your smoothie fresh and tasty. Choose containers with tight lids to avoid spills and keep out air. If you plan to freeze, make sure your containers are safe for the freezer. This will prevent cracks and leaks. Yes, you can use different fruits in this smoothie. Try using mango or pineapple for a tropical twist. Berries also work well and will add a nice color. Just keep the oranges for that creamsicle flavor. To make the smoothie dairy-free, simply swap the vanilla yogurt for a dairy-free version. Use almond or coconut yogurt. You can keep the coconut milk or choose another plant-based milk. This keeps it creamy and tasty. If you want a substitute for honey, try maple syrup or agave nectar. You can also use stevia or any other sweetener you like. Adjust the amount based on your taste. Each option will give a different flavor. To make this smoothie vegan, use almond yogurt instead of regular yogurt. Choose a plant-based milk like almond or oat milk. For sweeteners, stick with maple syrup or agave. This keeps everything plant-based and delicious. This smoothie offers many health benefits. Oranges provide vitamin C, which boosts your immune system. Bananas add potassium for heart health. Yogurt gives you probiotics for gut health. Coconut milk adds healthy fats. Overall, it's a tasty way to get nutrients! In this article, we explored the tasty Orange Creamsicle Smoothie. We covered the main ingredients, sweeteners, and milk options. I shared steps for prepping, blending, and achieving the right consistency. Tips helped you blend better and customize your drink. We discussed healthy variations and how to store your smoothie. Remember, you can switch up fruits or make it vegan. Now, you’re ready to enjoy a cool, creamy treat any time!

Orange Creamsicle Smoothie Refreshing and Creamy Blend

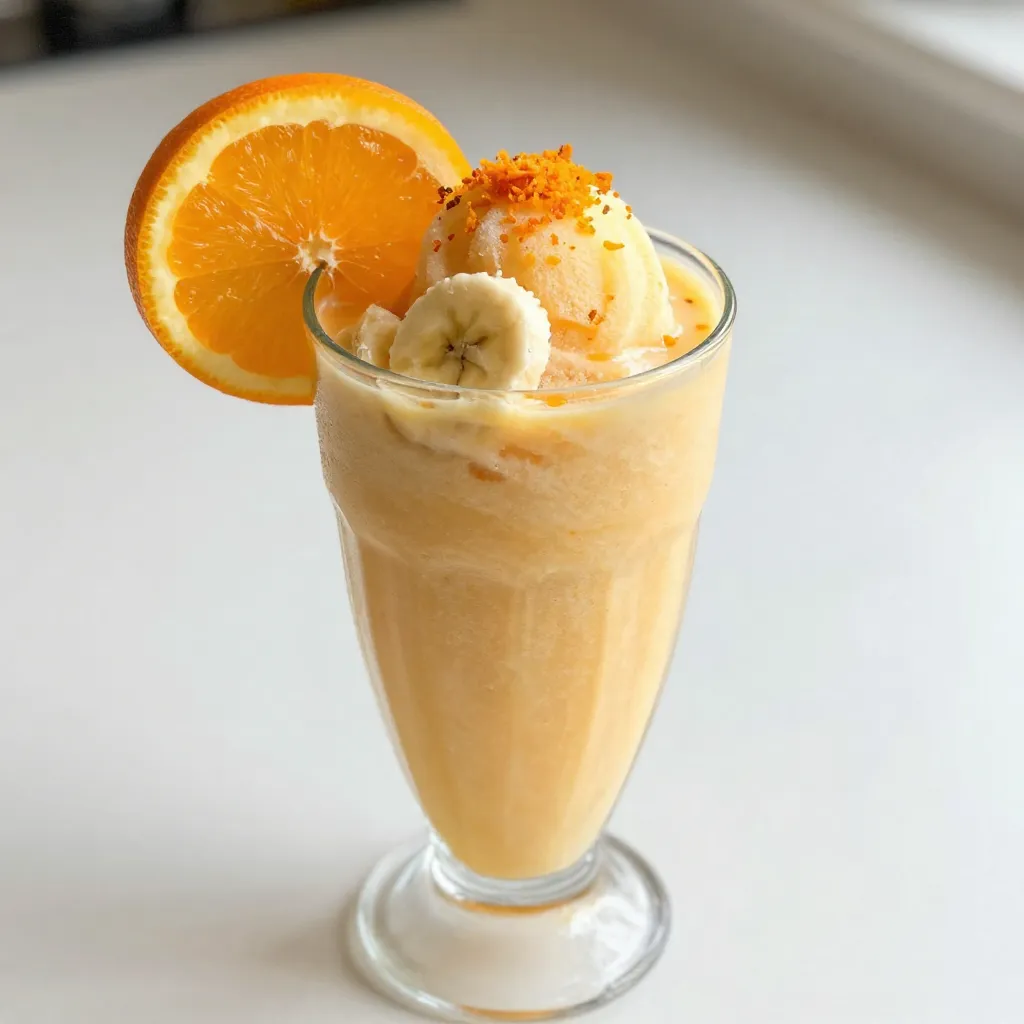
If you love refreshing drinks, you’re in for a treat! The Orange Creamsicle Smoothie is a creamy delight that brings

- 2 Ahi tuna steaks (6 oz each) - 1/4 cup sesame seeds (mix of white and black) - 6 cups mixed greens (such as arugula, spinach, and romaine) - 1 avocado, sliced - 1 cup cherry tomatoes, halved - 1/4 cucumber, thinly sliced - 1/4 red onion, thinly sliced - 2 tablespoons sesame oil - 1 tablespoon soy sauce (low sodium) - 1 tablespoon rice vinegar - 1 teaspoon honey - 1 teaspoon grated ginger The main ingredients in this dish create a delicious balance. Ahi tuna steaks are tender and rich in flavor. The sesame seeds add a nutty crunch. Mixed greens provide a fresh base. Sliced avocado brings creaminess, while halved cherry tomatoes add sweetness. The cucumber and red onion give extra crunch and flavor. For the dressing, sesame oil gives a deep, toasty essence. Low-sodium soy sauce adds umami without too much salt. Rice vinegar gives bright acidity. Honey brings sweetness, and ginger adds warmth and spice. This dressing ties all the ingredients together perfectly. - First, pat the Ahi tuna steaks dry with a paper towel. This helps the seasoning stick well. - Next, season both sides with salt and pepper. Use just enough to enhance the flavor. - Take a plate and spread the sesame seeds evenly. Press each side of the tuna steaks firmly into the seeds. Make sure they are coated evenly. - In a skillet, heat the olive oil over medium-high heat. Wait until it shimmers, then you are ready. - Add the tuna steaks and sear them for about 1-2 minutes per side. For medium-rare, that’s perfect. Adjust the time if you want it cooked more. - Once done, remove the tuna from the skillet and let it rest. This step keeps the juices in. - In a small bowl, combine the sesame oil, soy sauce, rice vinegar, honey, and grated ginger. - Whisk these ingredients together until they are well mixed. The dressing should be smooth and flavorful. - In a large bowl, combine the mixed greens, cherry tomatoes, avocado, cucumber, and red onion. - Toss the salad gently to mix the ingredients. Then, drizzle the dressing over the salad. Toss again to coat everything evenly. - After the tuna has rested, slice it thinly. This makes it easy to eat and looks nice. - Divide the salad among serving plates. Top each plate with slices of the sesame-crusted tuna. - For a beautiful presentation, add extra sesame seeds and a sprinkle of chopped green onions. A drizzle of extra dressing adds flair too. When you choose ahi tuna, look for bright color. Fresh tuna should have a rich, deep red hue. Avoid fish that looks dull or brown. Check for a clean smell, not a fishy one. Firmness is key; the fish should spring back when you press it. If you find it in a market, ask the fishmonger about its source. Sustainable options often have better flavor. Toasting sesame seeds adds a nutty taste. It makes your dish more flavorful. Heat a dry skillet over medium heat. Add the seeds and stir often. Watch them closely; they can burn quickly. You want them golden brown, not dark. Remove them from the heat as soon as they change color. Let them cool before using them in your salad. A great dish looks as good as it tastes. Add more sesame seeds on top for flair. Chopped green onions add a pop of color and flavor. Drizzle a bit of extra dressing to enhance the appeal. Serve on a bright plate to make the colors stand out. Place the tuna slices artfully over the salad for a stunning look. Enjoy the blend of colors and textures. {{image_2}} You can make your sesame crusted ahi tuna salad even more exciting! Here are some options: - Fruits: Try adding sliced mango or diced apples for a sweet touch. - Nuts: Crushed almonds or walnuts add great crunch and flavor. For a heartier salad, you can mix in: - Quinoa: This grain boosts protein and makes the dish filling. - Chickpeas: They add texture and extra nutrition. If you want to switch up the dressing, consider these ideas: - Creamy Avocado Dressing: Blend avocado with lime juice for a smooth texture. - Spicy Peanut Dressing: Mix peanut butter with soy sauce and a bit of sriracha. These options can give your salad a new twist and exciting flavor. You can cook your ahi tuna in different ways. Here are some methods to try: - Grilling: This method adds a smoky flavor. Just grill for 1-2 minutes on each side. - Searing: This is what we do in the main recipe. It gives a crisp crust. If you prefer baking, here’s a simple way: - Baking: Preheat your oven to 400°F. Bake the tuna for about 10 minutes. This keeps it tender and juicy. To keep your sesame crusted ahi tuna salad fresh, store the salad and tuna separately. This helps maintain the texture of the salad and the tuna. Place the salad in an airtight container. Store the tuna in another container with a lid. You can keep both in the fridge for up to two days. After that, the salad may wilt and the tuna may lose its taste. When reheating tuna, do it gently. Use a skillet over low heat for the best results. Heat the tuna for about one minute on each side. This keeps it tender and prevents it from becoming dry. Avoid microwaving, as this can spoil the flavor and texture. For the salad, keep it fresh by not reheating it. If you have leftover dressing, you can drizzle it on when serving. Enjoy the fresh taste of your salad with each bite! Yes, you can use frozen tuna. To defrost it, place the tuna in the fridge overnight. If you're short on time, seal it in a bag and submerge it in cold water for about an hour. Avoid using hot water, as it can cook the fish unevenly. Always check the texture after thawing; it should feel firm and not mushy. Ahi tuna is safe to eat raw if it's sushi-grade. Sushi-grade fish comes from a trusted source and is handled with care. It undergoes freezing to kill harmful parasites. Always buy from a reputable fish market and ask for the sushi-grade label. This ensures you enjoy your sesame-crusted ahi tuna salad safely. If you don’t have sesame seeds, try using crushed nuts like almonds or cashews. You can also use sunflower seeds or pumpkin seeds for a similar crunch. For a sesame flavor, consider sesame oil or tahini in your dressing. Be creative and adjust based on what you have in your kitchen. To check if the tuna is cooked right, use a food thermometer. Aim for an internal temperature of 125°F for medium-rare. If you prefer it more cooked, go for 135°F. Look for a warm, pink center when you slice it. Avoid overcooking, as it can dry out and lose flavor. Always let the tuna rest before slicing for the best texture. In this article, I shared how to make a delicious ahi tuna salad. You learned about the key ingredients, from fresh tuna to ripe avocados. I outlined step-by-step instructions for preparing and cooking the tuna, making the dressing, and assembling the salad. I also included helpful tips for selecting fresh tuna and adding flavor. Remember, you can customize this dish with different add-ins or dressings. Enjoy your cooking adventure, and don’t be afraid to try new things!

Savory Sesame Crusted Ahi Tuna Salad Delight

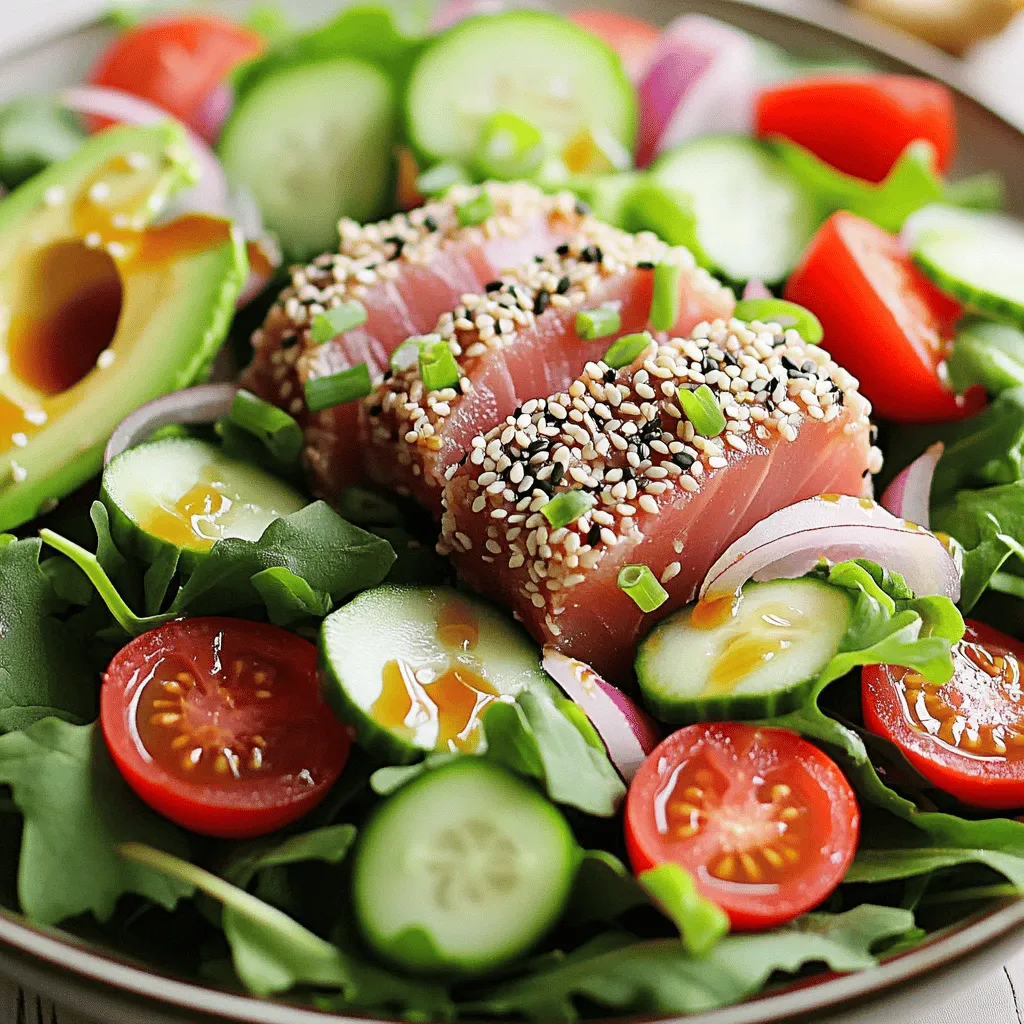
Dive into a flavorful journey with my Savory Sesame Crusted Ahi Tuna Salad Delight! This dish combines fresh ahi tuna,

- 4 boneless, skinless chicken breasts - 2 cups fresh spinach, chopped - 1 cup cream cheese, softened - 1 cup shredded mozzarella cheese - 1/2 cup grated Parmesan cheese - 2 cloves garlic, minced - 1 teaspoon Italian seasoning - Salt and pepper to taste - 1 tablespoon olive oil - 1/2 teaspoon red pepper flakes (optional for heat) Gathering the right ingredients is key to making cheesy spinach stuffed chicken. You start with chicken breasts, which are lean and juicy. Fresh spinach brings bright color and nutrients. Cream cheese adds creaminess, while mozzarella and Parmesan give a rich, cheesy flavor. The garlic gives a wonderful aroma and taste. Italian seasoning adds depth, while salt and pepper help bring it all together. Olive oil is great for sautéing the garlic and spinach. If you like a little heat, add red pepper flakes. Using fresh and quality ingredients will make your dish shine. Enjoy the process of gathering everything! Cooking is fun, and these ingredients will lead to a great meal. 1. Preheat the oven: Start by preheating your oven to 375°F (190°C). This will ensure that your stuffed chicken cooks evenly. 2. Sauté garlic and spinach: In a pan over medium heat, add a tablespoon of olive oil. Toss in two cloves of minced garlic. Cook until fragrant, about one minute. Then, add two cups of chopped spinach. Stir and cook until it wilts, which takes about two to three minutes. Once done, remove the pan from heat and let it cool slightly. 3. Prepare cheese mixture: In a large mixing bowl, combine one cup of softened cream cheese, one cup of shredded mozzarella cheese, and half a cup of grated Parmesan cheese. Add the sautéed spinach and garlic, one teaspoon of Italian seasoning, and salt and pepper to taste. If you like a kick, add half a teaspoon of red pepper flakes. Mix all the ingredients until well combined. 1. Butterfly chicken breasts: Take four boneless, skinless chicken breasts. Slice each chicken breast horizontally, but be careful not to cut all the way through. This creates a pocket for stuffing. 2. Stuff with cheesy spinach mixture: Take the cheesy spinach mixture and stuff it into each chicken breast pocket. If needed, use toothpicks to seal the openings. 3. Sear and bake the stuffed chicken: Season the outside of each stuffed chicken with salt and pepper. Heat a skillet over medium-high heat. Sear each stuffed chicken breast for three to four minutes on each side until golden brown. Then, transfer the seared chicken to a baking dish and cover it with foil. Bake in the preheated oven for 20 to 25 minutes until the internal temperature reaches 165°F (74°C). Let the chicken rest for five minutes before serving. - How to perfectly sear chicken: Start with a hot skillet. Add olive oil and wait until it shimmers. Place the chicken carefully in the pan. Cook for 3-4 minutes until golden brown. Flip it and sear the other side. This gives a nice crust. - Tips for ensuring chicken is cooked through: Use a meat thermometer. The chicken needs to reach an internal temperature of 165°F (74°C). This shows it's safe to eat. Let it rest for five minutes after cooking. This makes it juicy. - Best ways to seal chicken pockets: Use toothpicks to close the openings. This keeps the filling inside. You can also press the edges down with a fork. Make sure to remove the toothpicks before serving. - Ideal side dishes: Pair the chicken with sautéed zucchini noodles or a fresh salad. Both add color and crunch. Consider serving it with roasted vegetables for extra flavor. - Presentation tips for a beautiful dish: Place the stuffed chicken on a plate with a drizzle of olive oil. Garnish with fresh basil leaves for a pop of color. This makes the dish eye-catching and inviting. - Pairing suggestions (wine or beverage): A light white wine, like Sauvignon Blanc, complements the flavors well. For a non-alcoholic option, serve sparkling water with lemon. Both refresh your palate. {{image_2}} You can switch up the cheese for fun flavors. Try using gouda or feta instead of mozzarella. Each cheese gives a different taste. You can even mix cheeses for a richer flavor. If you want a creamy touch, use cream cheese alternatives. Consider ricotta or mascarpone. These options add smoothness while keeping the dish light. Just make sure you stick to the same amount as the cream cheese. You can add more greens to your stuffed chicken. Kale or Swiss chard works great. They provide a different texture and taste. Plus, they give you more nutrients. For extra nutrition, think about adding sun-dried tomatoes or bell peppers. Chop them small and mix them in with the spinach. These veggies not only add color but also boost flavor. You can get creative and use any veggies you love! To keep your cheesy spinach stuffed chicken fresh, store it in an airtight container. Make sure to let it cool down first. This helps avoid condensation inside the container. Leftovers can stay in the fridge for up to 3 days. If you want to enjoy it later, freezing works too. For reheating, the oven is best. Preheat it to 350°F (175°C). Place the chicken in a baking dish and cover it with foil. Heat for about 15-20 minutes, or until warm. You can also use a microwave, but this may make the chicken dry. Yes, you can freeze cheesy spinach stuffed chicken. Wrap each piece tightly in plastic wrap, then place it in a freezer bag. It can last up to 3 months in the freezer. When ready to eat, thaw it in the fridge overnight before reheating. Can I use frozen spinach instead of fresh? Yes, you can use frozen spinach. Just make sure to thaw it and squeeze out excess water. This helps keep your cheesy mixture from getting too watery. How do I know when the chicken is done cooking? To check if the chicken is done, use a meat thermometer. The inside should reach 165°F (74°C). You can also cut into it; the meat should be white, not pink. What can I substitute if I don’t have certain cheeses? If you lack cream cheese, try ricotta or goat cheese. For mozzarella, you can use provolone or gouda. These will still give you a tasty stuffed chicken. Is this recipe gluten-free? Yes, this recipe is gluten-free. All the ingredients used are safe for a gluten-free diet. Nutritional info: calories, protein, and fat content per serving - Calories: About 375 - Protein: Approximately 40g - Fat: Roughly 22g This makes it a hearty and filling meal option. Enjoy! In this blog post, we explored how to make cheesy spinach stuffed chicken from scratch. We covered the key ingredients, including chicken, spinach, and various cheeses. I shared detailed cooking steps and valuable tips to ensure great results. You can also tweak the recipe with different cheeses and veggies. Final thoughts: This dish is not just delicious but also versatile. Enjoy experimenting with flavors and serving it your way!

Cheesy Spinach Stuffed Chicken Flavorful and Easy Meal

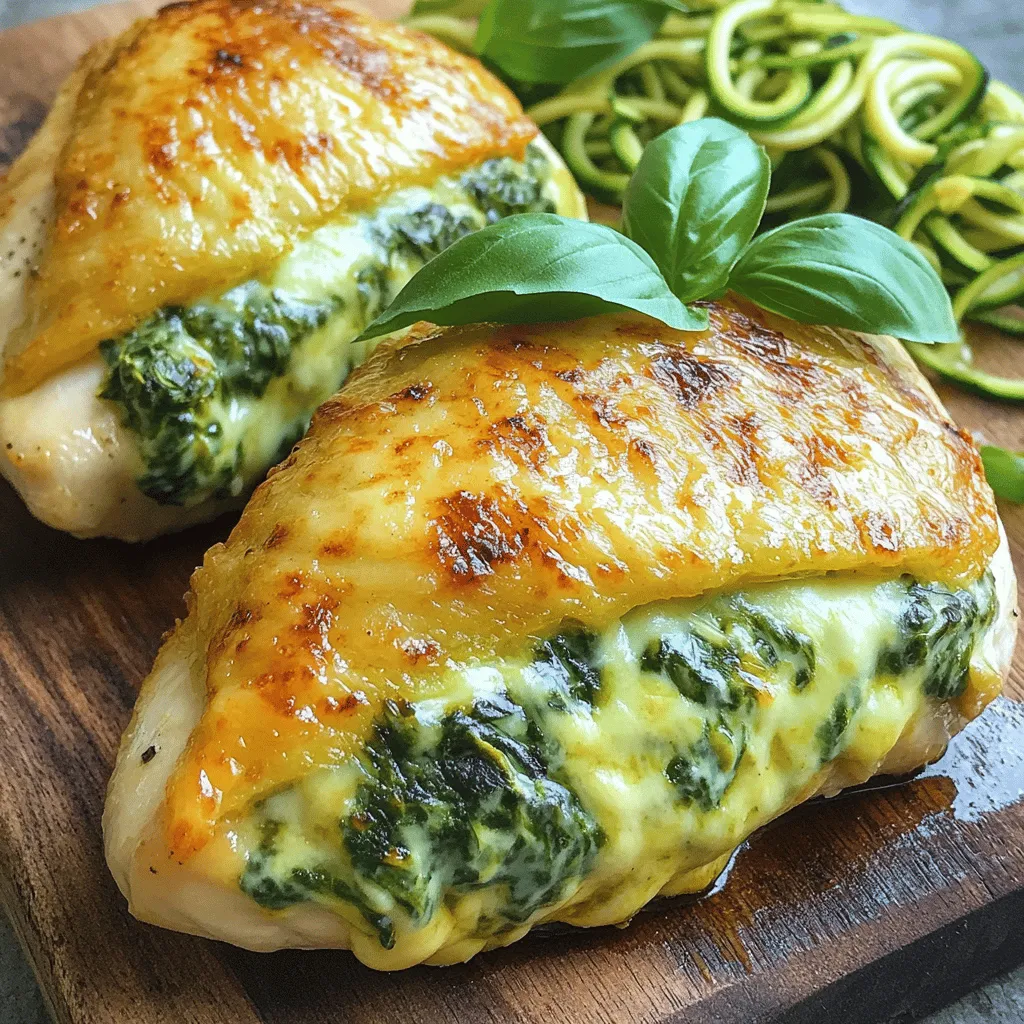
Are you ready to spice up dinner with a dish that’s both tasty and easy to make? My Cheesy Spinach

- 2 cups rolled oats - 2 cups unsweetened almond milk (or any milk of choice) - 1/3 cup maple syrup - 1 ripe banana, mashed - 1 teaspoon vanilla extract - 2 teaspoons baking powder - 1 teaspoon ground cinnamon - 1/4 teaspoon salt - 1/2 cup chopped walnuts (or pecans) - 1/4 cup raisins (optional) - 2 tablespoons brown sugar - 1 teaspoon ground cinnamon - 1 tablespoon melted coconut oil (or butter) This list has all you need to create a warm and tasty dish. I love using rolled oats as the base. They cook well and give great texture. Almond milk keeps it light, but feel free to use any milk you like. The mashed banana adds natural sweetness. It also helps bind the oats. I use maple syrup for a rich flavor. Ground cinnamon and nuts bring warmth and crunch. The brown sugar and cinnamon swirl is the best part! It gives a lovely cinnamon roll taste. You can add raisins if you want extra sweetness. Gather these ingredients, and you are ready to start cooking. Each one plays a role in making this dish special. You will enjoy every bite of this baked oatmeal. 1. Preheat your oven to 350°F (175°C). Grease a 9x9-inch baking dish. This helps prevent sticking and makes clean-up easy. 2. In a large bowl, mix the rolled oats, almond milk, maple syrup, mashed banana, vanilla extract, baking powder, ground cinnamon, and salt. Stir well until everything is blended. 1. Next, stir in the chopped walnuts and raisins, if you like them. Make sure they are evenly spread in the mix. 2. In a small bowl, prepare the cinnamon swirl mixture. Mix together the brown sugar, ground cinnamon, and melted coconut oil. This will add a lovely flavor to your oatmeal. 1. Drizzle the cinnamon mixture over the oatmeal. Use a knife to swirl it gently through the mix. This creates that classic cinnamon roll look and taste. 2. Bake in your preheated oven for about 30-35 minutes. Check for doneness by inserting a toothpick in the center. It should come out clean when it's ready. Enjoy the warm, sweet aroma filling your kitchen! Mashing the banana is key. It makes the oatmeal creamy and sweet. Use a fork to mash it well. This will help blend it into the mix. You want no lumps. A smooth banana gives better texture. For the swirling technique, drizzle the cinnamon mix slowly. Use a knife to swirl it through. Don’t over-mix, as you want pretty swirls. This gives that classic cinnamon roll look. It also adds great flavor. To achieve a golden top, bake until golden brown. Keep an eye on the oatmeal during the last few minutes. If it looks too pale, let it bake a bit more. You want it to be set in the middle and golden on top. Adjusting sweetness levels is easy. If you want it sweeter, add more maple syrup. You can also try using honey or agave. Taste the mixture before baking to find your perfect balance. For toppings, maple syrup is a must. It adds an extra layer of sweetness. Yogurt also works great for creaminess. A dusting of powdered sugar gives a nice touch too. Always serve it warm for the best experience. It tastes best fresh out of the oven. The warmth enhances the flavors and makes it feel cozy. Enjoy your delicious cinnamon roll baked oatmeal! {{image_2}} You can change the milk for this recipe. Almond milk is great, but you can try oat, soy, or regular dairy milk too. Each type gives a different taste and texture. You can also swap the nuts. If you don't like walnuts, pecans work well. You can add spices too. A pinch of nutmeg adds warmth and depth to the flavor. If you need a gluten-free option, use certified gluten-free oats. This makes your baked oatmeal safe for those with gluten sensitivities. For a vegan version, replace the cinnamon swirl butter with coconut oil. This keeps it plant-based and just as tasty. Fruits are a fun way to change this dish. Try adding blueberries, chopped apples, or even diced peaches. They bring a fresh burst of flavor. You can also top it with yogurt or a drizzle of maple syrup for extra sweetness. A sprinkle of chopped nuts or seeds on top adds crunch and nutrition. To keep your cinnamon roll baked oatmeal fresh, follow these tips: - Refrigeration: Allow it to cool completely. Place it in an airtight container. It will stay fresh in the fridge for up to five days. - Freezing: Cut leftover oatmeal into squares. Wrap each piece in plastic wrap, then place in a freezer bag. This can last up to three months in the freezer. When you're ready to enjoy it again, here are some ways to reheat: - Oven: Preheat the oven to 350°F (175°C). Place a piece of oatmeal in a baking dish. Cover with foil to keep it moist. Heat for about 15-20 minutes. - Microwave: Place a piece on a microwave-safe plate. Heat for 30-60 seconds. Add a splash of milk to keep it moist. Knowing how long it lasts is key: - Fridge: It lasts about five days if stored properly. - Signs of spoilage: Look for changes in color or smell. If it smells off or has mold, throw it away. Can I make this recipe ahead of time? Yes, you can make this recipe ahead of time. Just prepare the oatmeal, cover it, and store it in the fridge. When ready to bake, heat your oven and pop it in. It tastes great reheated! How do I make it more or less sweet? To adjust sweetness, you can add or reduce maple syrup. Taste the mixture before baking. If you want it sweeter, add a bit more syrup. If too sweet, cut back a little. Can I use another type of sweetener? Yes, you can use other sweeteners like honey or agave syrup. Just keep the amount the same as maple syrup for best results. What can I use instead of bananas? If you don’t have bananas, use unsweetened applesauce or pureed pumpkin. Both add moisture and flavor without changing the taste much. What should I do if it comes out too dry? If your oatmeal is dry, try adding a splash of milk before serving. This will help moisten it. You can also reduce the baking time next time. How to adjust cooking time for different ovens? Ovens can vary a lot. If your oatmeal looks done but is still wet, bake it a few minutes longer. Keep an eye on it to avoid burning. Use a toothpick to check for doneness. This baked oatmeal recipe is easy and flexible. We used simple ingredients like oats, almond milk, and ripe bananas. You can customize it with nuts, spices, and toppings. Remember, mashing the banana helps blend flavors well. Store leftovers safely for quick meals later. Enjoy serving it warm with your favorite toppings. This dish is perfect for breakfast or snack time. Try different variations to make it your own. Happy baking!

Cinnamon Roll Baked Oatmeal Simple and Tasty Breakfast

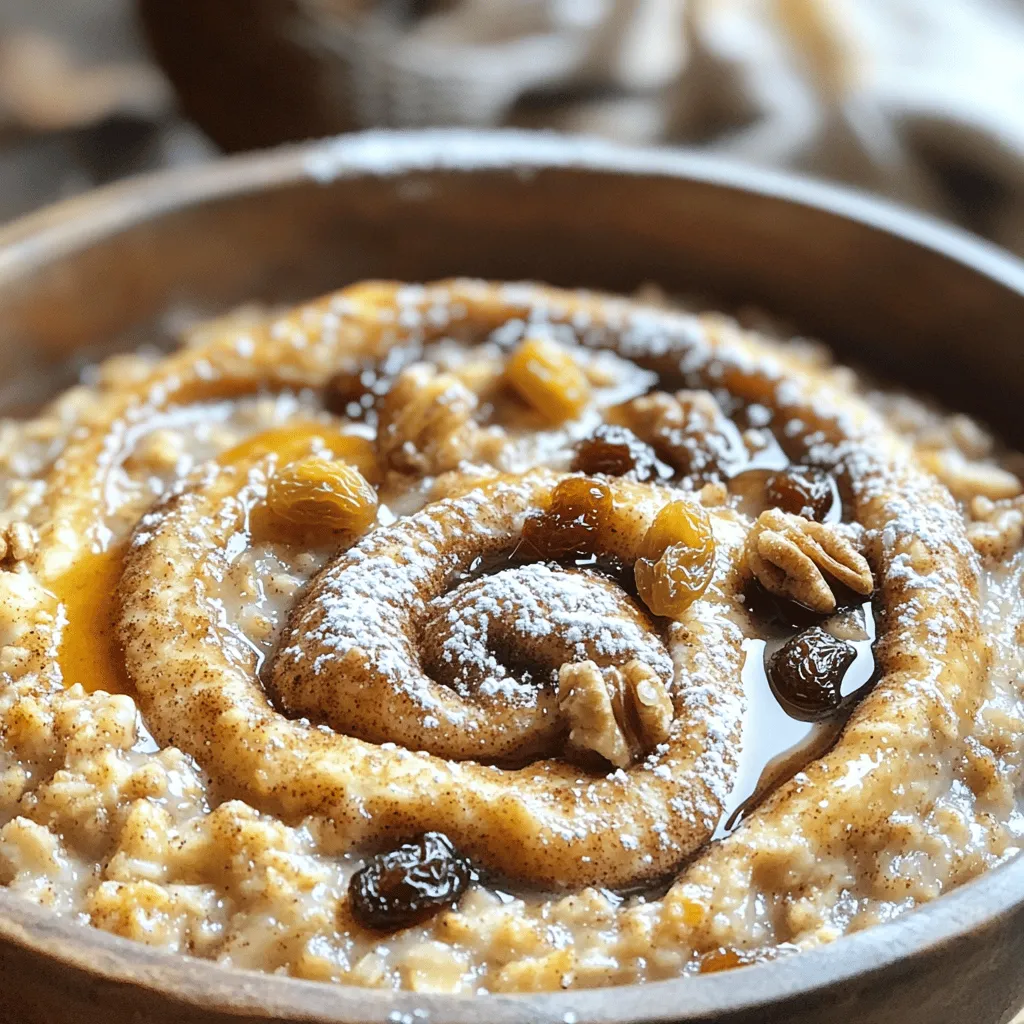
Looking for a warm and filling breakfast? My Cinnamon Roll Baked Oatmeal is just the thing! This simple recipe combines

Older posts
Newer posts
← Previous Page1 … Page35 Page36 Page37 … Page84 Next →

dsad

© 2026 Lisa Dishes • Built with GeneratePress

Our Policies

  • Copyright Policy
  • Cookie Policy
  • GDPR Policy
  • Privacy Policy
  • Disclaimer
  • Terms Of Use

More Information

  • Home
  • About
  • Contact
  • Appetizers
  • Dessert
  • Dinner
  • Drinks
©2026, Lisa Dishes About Back To Top