Air Fryer Parmesan Zucchini Chips Crisp and Tasty Snack
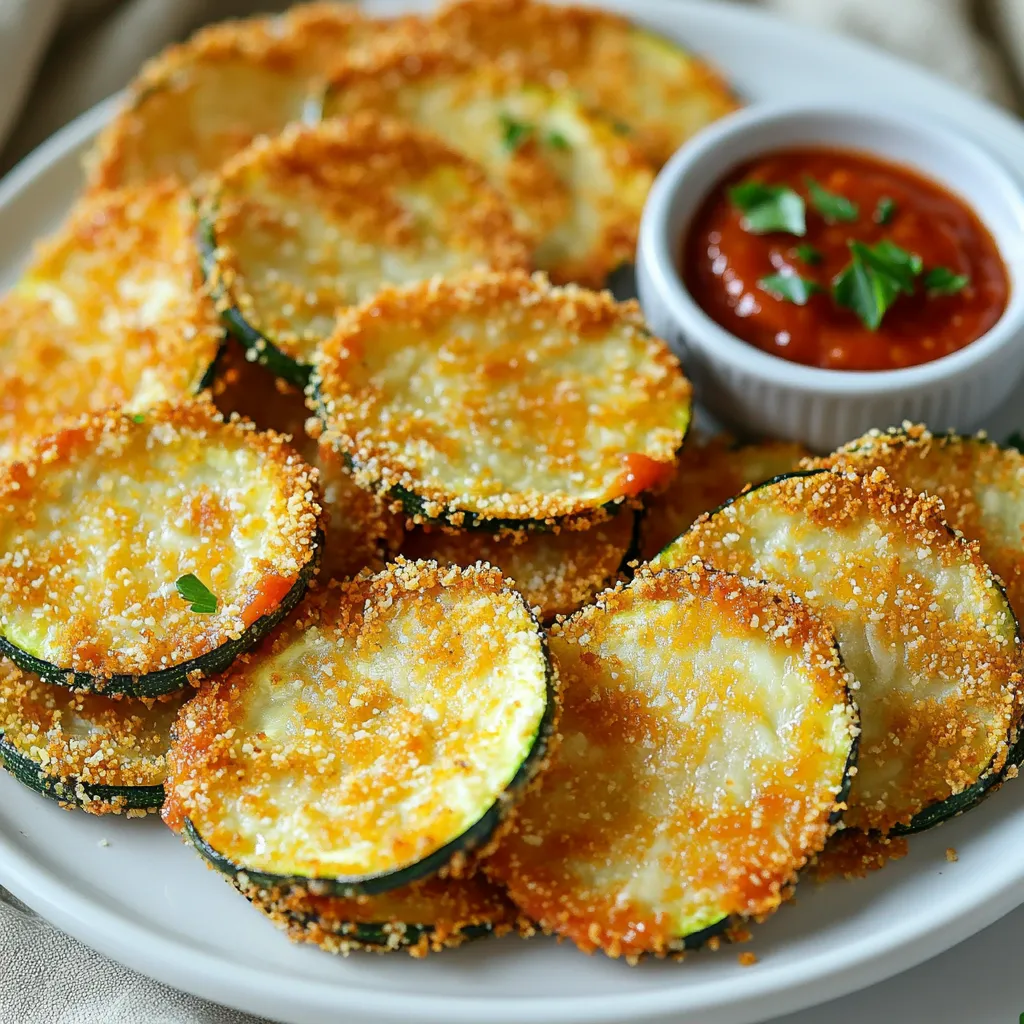
If you crave a crunchy snack that’s both healthy and easy to make, these Air Fryer Parmesan Zucchini Chips are
If you crave a crunchy snack that’s both healthy and easy to make, these Air Fryer Parmesan Zucchini Chips are
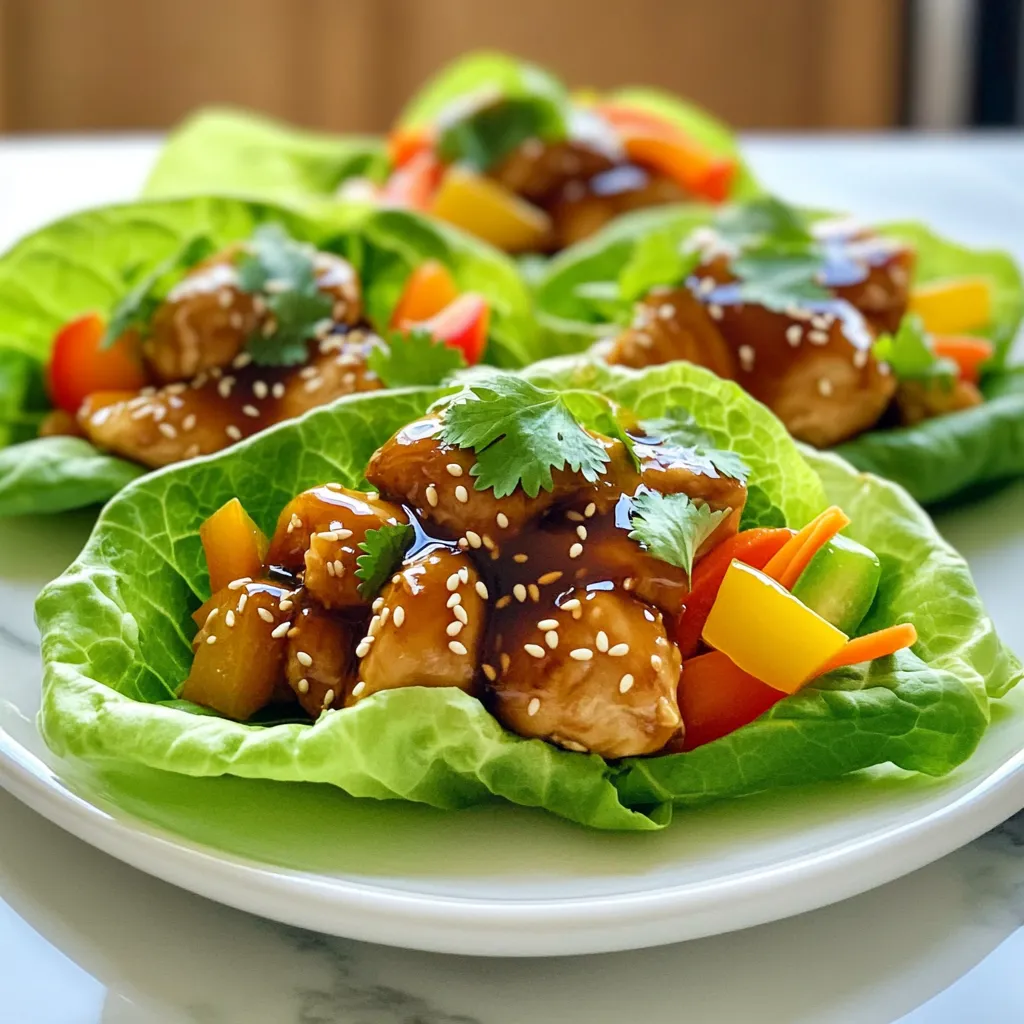
Looking for a quick and tasty meal? These Teriyaki Chicken Lettuce Wraps take just 15 minutes to make! Imagine tender

If you’re ready to spice up your breakfast or snack time, you’ve come to the right place! Savory Cheddar Jalapeño
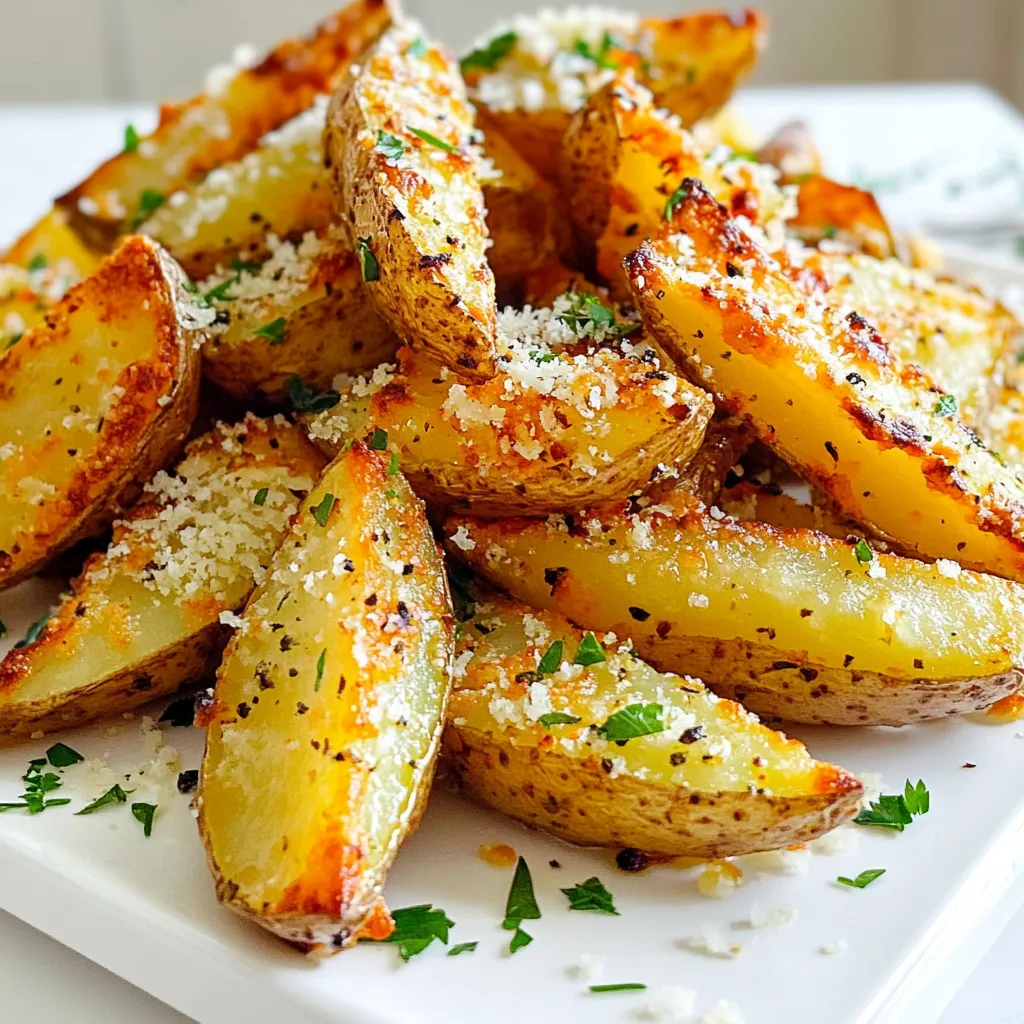
If you’re craving a tasty, crispy snack, try my Garlic Parmesan Potato Wedges made in the air fryer. With just
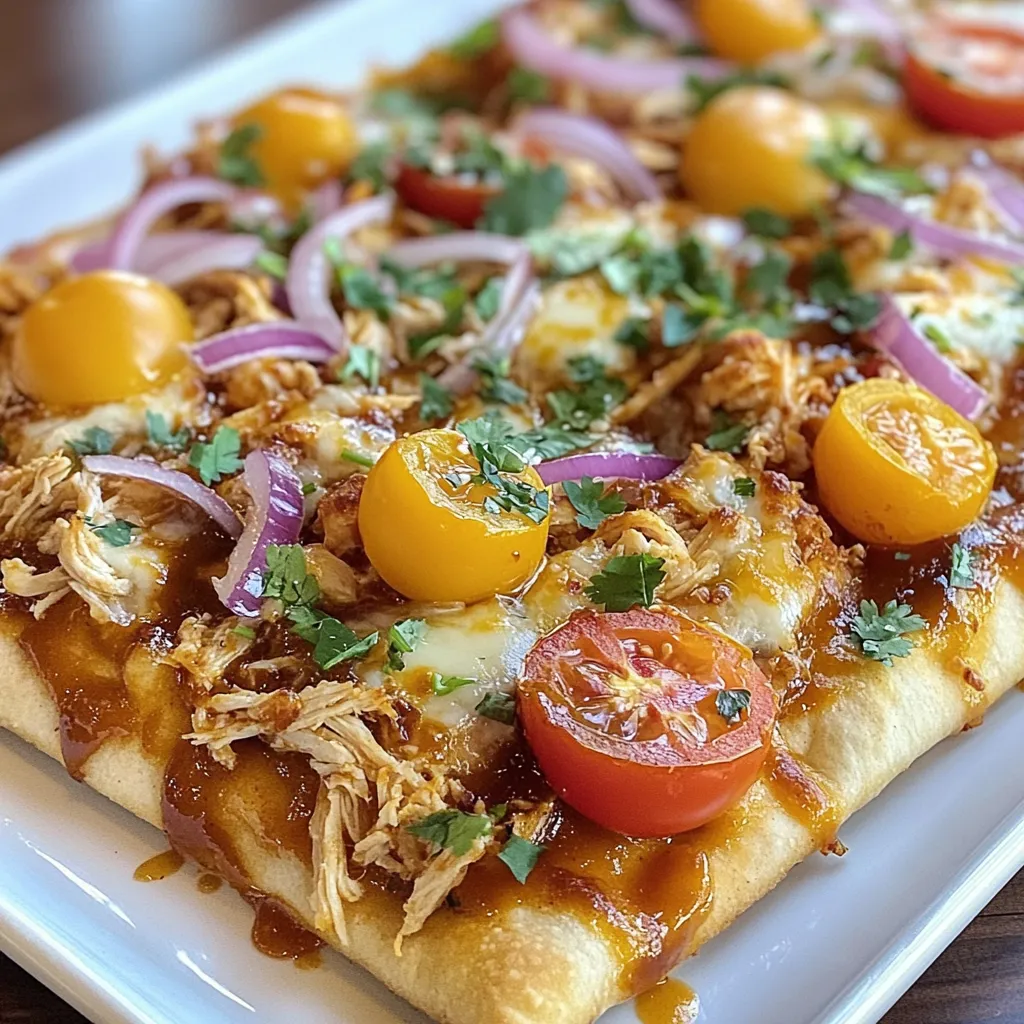
Are you ready to whip up a delicious BBQ Chicken Flatbread? In this quick and easy recipe, I’ll show you

Want a meal that bursts with flavor and is super fresh? My Thai Basil Beef Lettuce Cups are perfect! Packed

Craving a tasty, easy snack? Try my Air Fryer Buffalo Chicken Taquitos! These taquitos pack a flavorful punch and are
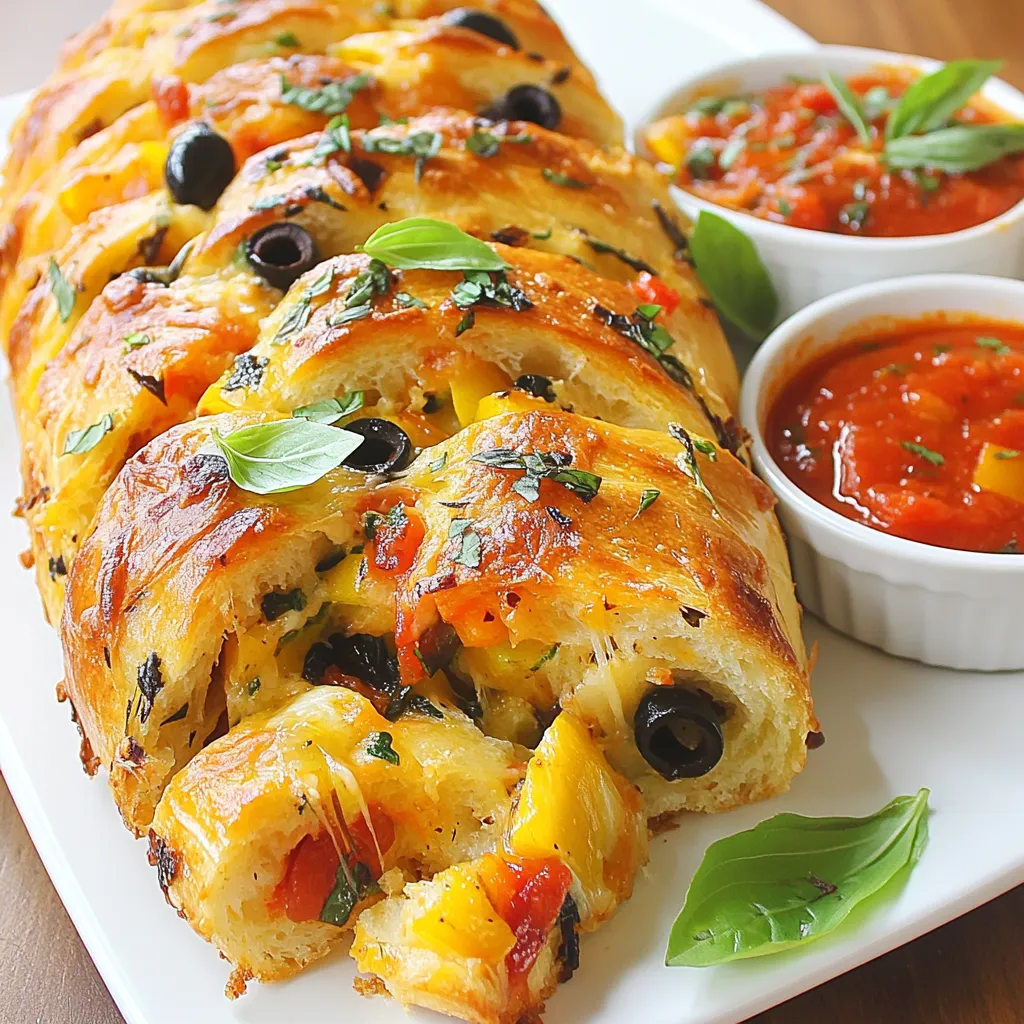
Are you ready to dive into a deliciously simple dish? Garbage Bread Delight takes the fuss out of cooking while
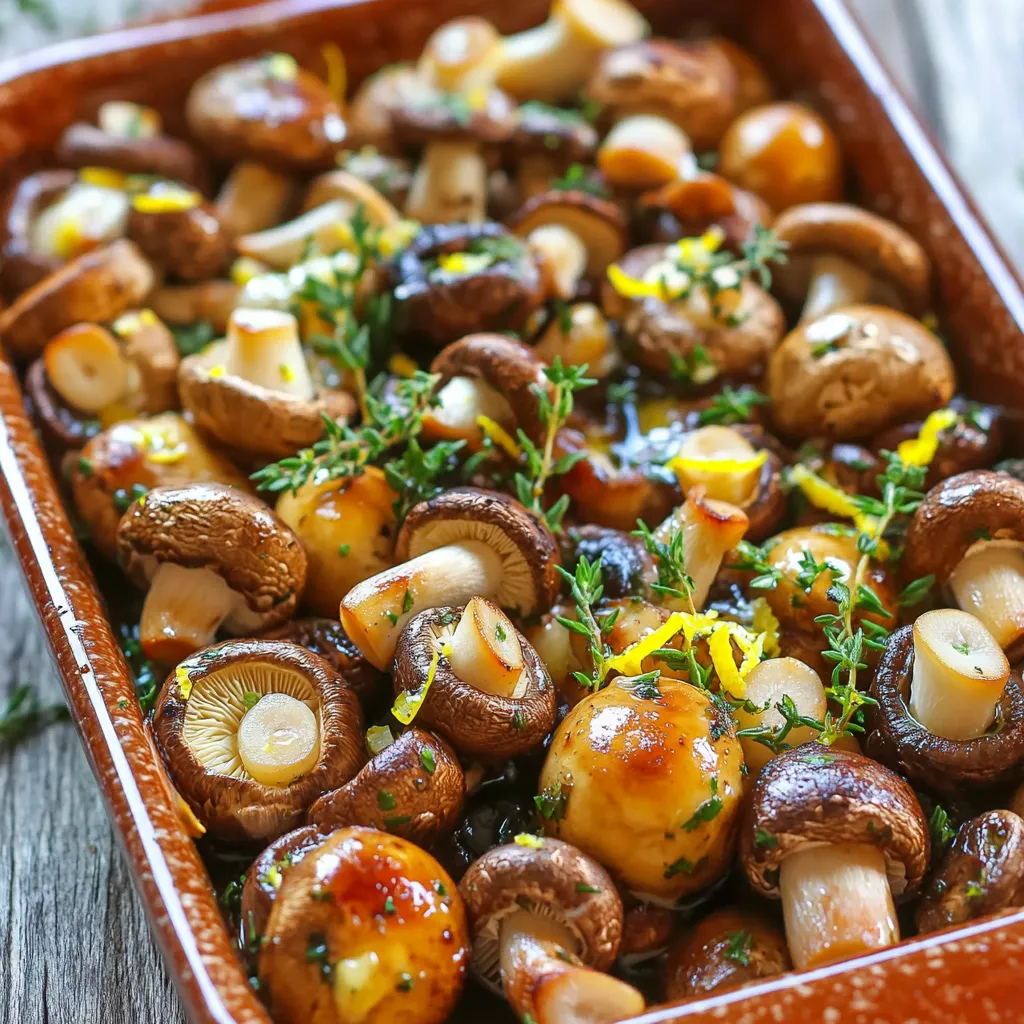
If you’re searching for a tasty side dish, Garlic Butter Roasted Mushrooms are a must-try. These mushrooms burst with flavor
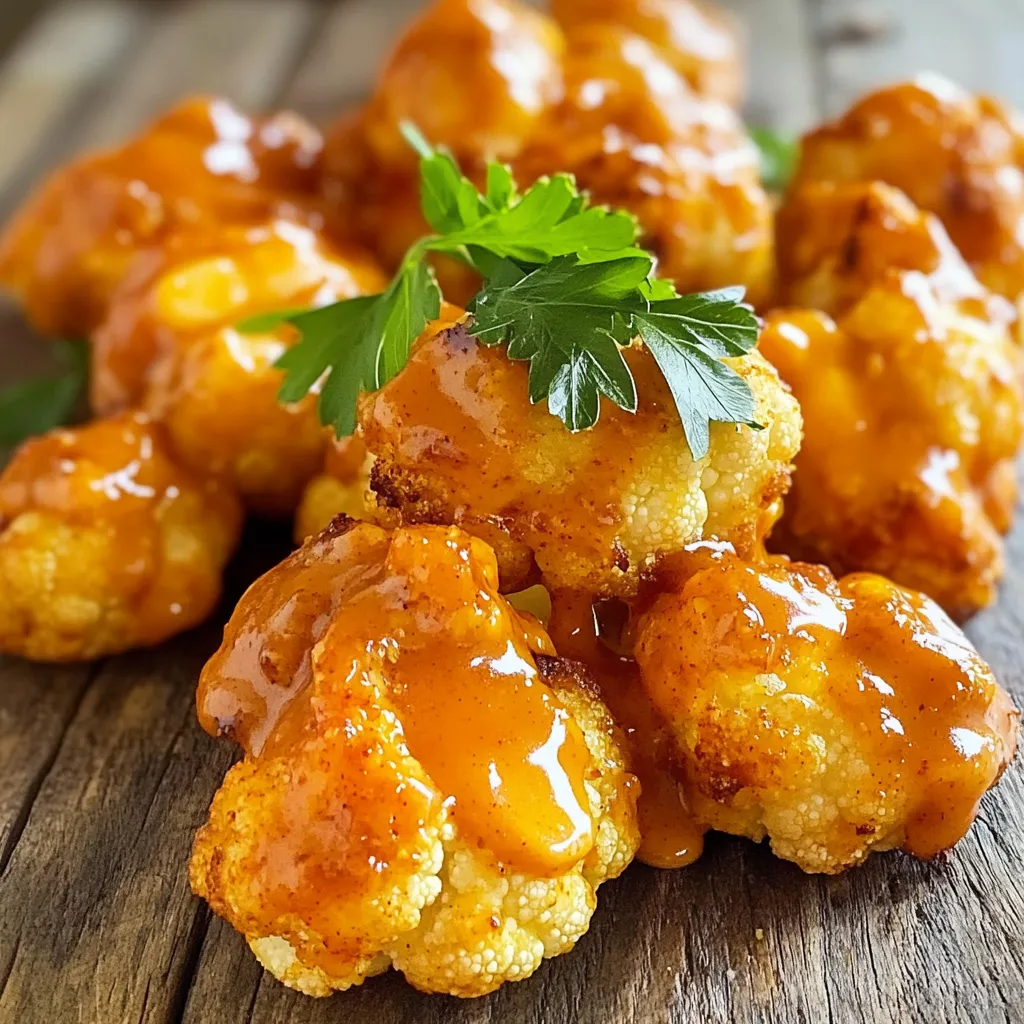
Looking for a quick and tasty snack? Air Fryer Buffalo Cauliflower checks all the boxes! It’s simple to make, packed
