Skip to content
DisclaimerTerms Of UseGDPR PolicyCookie Policy

Lisa Dishes

  • Home
  • Drinks
  • Appetizers
  • Dinner
  • Dessert
  • About
  • Contact
  • Privacy Policy
DisclaimerTerms Of UseGDPR PolicyCookie Policy

lisa

- 4 salmon fillets (skin on) - 3 tablespoons honey - 2 tablespoons soy sauce (low sodium) - 3 cloves garlic, minced - 1 tablespoon fresh ginger, minced - 1 tablespoon olive oil - 1 teaspoon sesame oil - Salt and pepper to taste - 2 green onions, finely sliced (for garnish) - Sesame seeds (for garnish) You can swap honey for maple syrup or agave nectar. Both will add sweetness. For soy sauce, use coconut aminos for a gluten-free option. If you need gluten-free soy sauce, look for brands that offer it. You can also use tamari, which is a good gluten-free option. How to prepare the salmon fillets Start by patting the salmon fillets dry with a paper towel. This step helps to get that crispy skin. Next, season both sides with salt and pepper. Be generous but not too much. This enhances the flavor without overpowering the honey garlic sauce. Making the honey garlic sauce In a small bowl, whisk together three tablespoons of honey, two tablespoons of low-sodium soy sauce, and three minced garlic cloves. Add one tablespoon of minced fresh ginger for a nice kick. This sauce will add depth and sweetness to your salmon. Set it aside while you cook the fish. Cooking the salmon skin-side down Heat a large skillet over medium-high heat and add one tablespoon of olive oil. Once the oil is hot, place the salmon fillets skin-side down in the skillet. Cook for about four to five minutes. You'll know it's ready when the skin is crispy and browned. Flipping and basting the salmon Carefully flip the salmon fillets to cook the other side. Now, pour the honey garlic sauce into the pan. Cook for an additional three to four minutes. Baste the salmon with the sauce as it cooks. This helps the flavor soak in and thickens the sauce slightly. Adding sesame oil After cooking, drizzle one teaspoon of sesame oil over the salmon. This adds a rich, nutty flavor. Cook for one more minute to ensure the fillets are well-coated in the sauce. Garnishing Remove the salmon from heat and let it rest for a minute. Plate it up and drizzle extra sauce on top. Garnish with finely sliced green onions and sesame seeds for a touch of freshness and crunch. Look at that! Your crispy honey garlic salmon is ready to impress. For the full recipe, don’t forget to check the link! To get that perfect crispy salmon, start by drying the fillets. Use a paper towel to pat them dry. This step helps the skin crisp up nicely in the skillet. Next, heat your skillet to medium-high. A hot skillet is key. If the oil sizzles when you add the salmon, you are ready. You can boost the flavor of your salmon with extra spices or herbs. Try adding chili flakes for heat or fresh herbs like thyme or rosemary for depth. Infusing flavors before cooking can also make a big difference. Letting the salmon soak in the honey garlic sauce for a bit adds a nice kick. For sides, consider steamed veggies or fluffy rice. These pair well with the sweet and savory flavors of the salmon. When plating, arrange the salmon nicely on a clean plate. Drizzle some extra sauce over it for a beautiful touch. Top with sliced green onions and sesame seeds for a pop of color. This makes your dish look as great as it tastes. {{image_2}} You can prepare salmon in different ways. Grilling gives it a smoky taste. Pan-searing creates a crispy skin and juicy inside. Both methods work well for this dish. You can also use various cuts of salmon. Fillets are popular, but you can try steaks or even whole fish. Each cut has a unique texture and flavor, adding fun to your meal. You can spice up the sauce too. For a spicy honey garlic option, add red pepper flakes or sriracha. This adds heat and a nice kick. For a citrus twist, mix in orange or lemon juice. This gives the sauce a fresh and bright flavor. You can also zest the fruit for extra zing. If you follow a keto diet, you can easily adapt this recipe. Use a sugar-free honey substitute to lower carbs. You can also swap soy sauce for coconut aminos. For a low-carb option, serve the salmon with lots of veggies. Try broccoli, zucchini, or cauliflower rice. These sides keep your meal light and tasty. For the full recipe, you can refer back to the earlier section. Enjoy your cooking adventure! To keep your crispy honey garlic salmon fresh, use airtight containers. Glass containers work best. They do not retain odors and keep the salmon safe. Store the salmon in the fridge. It stays fresh for 2 to 3 days. You can reheat salmon in the oven or microwave. The oven keeps it crispy. Set it to 350°F (175°C) and bake for 10 minutes. Cover it loosely with foil to prevent drying out. If using the microwave, heat in short bursts. Use a low power setting. This way, the salmon remains tender but may lose some crispiness. To freeze cooked salmon, first let it cool completely. Wrap it tightly in plastic wrap. Then place it in a freezer-safe bag. This helps prevent freezer burn. You can freeze it for up to 3 months. When ready to eat, thaw in the fridge overnight. Reheat in the oven for best results. This keeps the salmon crispy. Enjoy your delicious meal later! For the full recipe, check out the earlier section. It usually takes about 10 to 15 minutes to cook salmon fillets. Cooking time can vary based on thickness. For average fillets, I suggest cooking for 4-5 minutes on the skin side and 3-4 minutes after flipping. This method gives you a nice crispy skin and juicy fish. Yes, you can use frozen salmon for this dish. Just keep a few tips in mind. First, thaw the salmon in the fridge overnight for best results. If you are short on time, you can run cold water over the vacuum-sealed package. Cook the salmon for a minute longer to ensure it cooks through. Honey garlic salmon pairs well with many sides. Here are some great options: - Steamed broccoli - Garlic mashed potatoes - White rice or quinoa - A fresh salad with citrus dressing - Roasted asparagus These sides balance the rich flavors of the salmon and make for a complete meal. For more details, check the Full Recipe. In this blog post, we covered how to make honey garlic salmon. We discussed the key ingredients needed, from fresh salmon to flavorful sauces. I shared easy steps to cook the salmon perfectly and provided tips for serving and storing leftovers. You can experiment with different cooking methods and sauce variations to suit your taste. With these ideas, you can create a delicious meal each time. Enjoy your cooking and make the most of your salmon dishes!

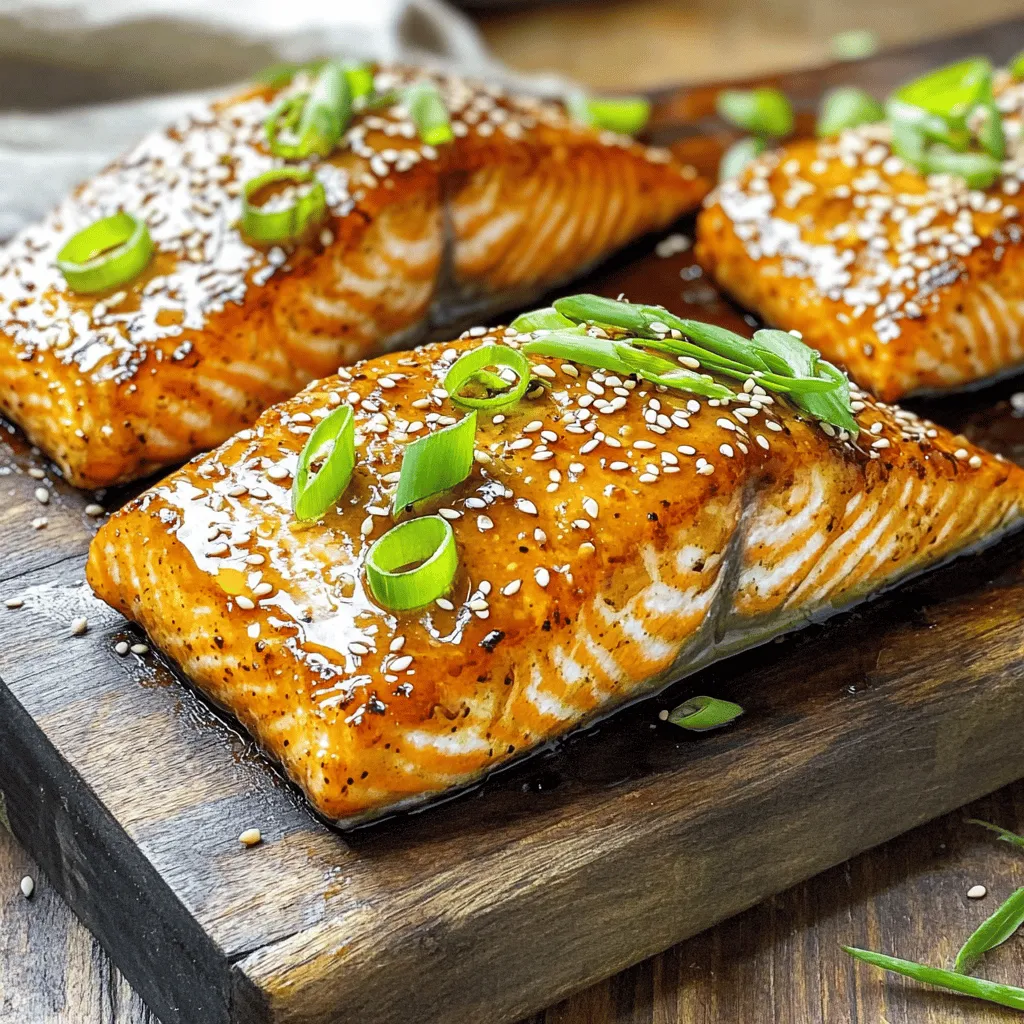
Crispy Honey Garlic Salmon in 30 Minutes Delight

Are you ready to savor a dish that bursts with flavor and crunch? My Crispy Honey Garlic Salmon can be

- 1 cup unsweetened cocoa powder - 1 cup granulated sugar - 1 cup brown sugar, packed - 1/2 cup unsalted butter, melted - 4 large eggs - 1 teaspoon vanilla extract - 1/2 cup all-purpose flour - 1/4 teaspoon salt - 2 cups fresh strawberries, hulled and sliced - 1 tablespoon lemon juice - 1 cup heavy cream - 2 tablespoons powdered sugar - Optional chocolate drizzle - Fresh mint leaves for garnish - Baking pan - Mixing bowls - Electric mixer (for whipping cream) The ingredients for this brownie strawberry shortcake are simple yet effective. The cocoa powder gives a rich taste. The mix of sugars adds sweetness. Butter provides richness, while eggs bind everything together. Vanilla brings warmth to the flavor. Flour and salt balance the mix. Fresh strawberries add a juicy and fruity bite. Lemon juice brightens the strawberries’ flavor. Heavy cream becomes a fluffy topping when whipped. Powdered sugar sweetens the cream perfectly. You can add a chocolate drizzle for extra flair. For equipment, a baking pan helps shape the brownies. Mixing bowls are essential for combining ingredients. An electric mixer makes whipping cream easy and quick. You can find all these ingredients and tools at your local store. This recipe is well-rounded. You get rich brownies, sweet strawberries, and creamy whipped cream. Enjoy the balance of flavors and textures in every bite. I love how simple it is to make this treat delicious and beautiful. You can find the full recipe above. 1. Preheat oven and prepare baking pan: Set your oven to 350°F (175°C). Grease a 9x9-inch baking pan. Line it with parchment paper, leaving some overhang. This helps with easy removal later. 2. Mixing dry ingredients: In a big bowl, whisk together 1 cup cocoa powder, 1 cup granulated sugar, 1 cup brown sugar, 1/2 cup flour, and 1/4 teaspoon salt. Make sure everything blends well. 3. Incorporating wet ingredients: Add 1/2 cup melted butter to the dry mix. Stir until smooth. Next, add 4 large eggs, one at a time. Then, mix in 1 teaspoon vanilla extract until well combined. 1. Pouring and spreading the batter: Pour your brownie batter into the prepared pan. Use a spatula to spread it out evenly. 2. Baking time and checking for doneness: Bake for 25-30 minutes. To check if they are done, insert a toothpick in the center. It should come out with a few moist crumbs. 3. Cooling brownies before assembly: Once baked, let the brownies cool completely in the pan. Place them on a wire rack. After they cool, lift them out using the parchment paper and cut them into squares. 1. Macerating the strawberries with lemon juice: In a bowl, mix 2 cups hulled and sliced strawberries with 1 tablespoon lemon juice. Let them sit for about 15 minutes. This softens them and brings out their sweetness. 2. Preparing the whipped cream: In another bowl, whip 1 cup heavy cream and 2 tablespoons powdered sugar together. Beat until soft peaks form. This creates a light and fluffy topping. 3. Tips for achieving perfect whipped cream: To get the best whipped cream, use cold cream and a chilled bowl. This helps it whip faster and hold its shape better. Now, you have all the steps to create this luscious Brownie Strawberry Shortcake delight! For the full recipe, check [Full Recipe]. To make your brownies just right, avoid over-mixing your batter. When you mix too much, the brownies can become tough. Mix until the flour disappears, and then stop. This keeps the brownies soft and chewy. Next, aim for the ideal brownie texture. You want them fudgy, not cakey. Check them in the oven around 25 minutes. When a toothpick comes out with a few moist crumbs, they are done. Let them cool completely before cutting to help maintain their shape. When you assemble your dessert, think about layering. Start with a brownie square, then add strawberries and whipped cream. Repeat the layers for a tall treat. This creates a beautiful, tasty dessert. For a nice plate presentation, use a drizzle of chocolate sauce. Place a mint leaf on top for color. This adds a fresh touch, making your dessert look as good as it tastes. You can use alternative sweeteners in your whipped cream. Try honey or maple syrup for a different flavor. This can make your cream lighter and still sweet. To boost the flavor, add extracts. A drop of almond or orange extract can elevate your whipped cream. This small change can make a big difference in taste. For the full recipe, check out the complete guide to Brownie Strawberry Shortcake. {{image_2}} You can switch up the fruit toppings for this dessert. Instead of strawberries, try raspberries or blueberries. They add a nice tartness. You can also mix in nuts or chocolate chips into the brownie batter. Walnuts or pecans give a nice crunch. Chocolate chips add more chocolate flavor. Both options make the brownies even more exciting. If you want vegan options, you can replace eggs with applesauce or flaxseed. Use plant-based butter and coconut cream for the whipped topping. For gluten-free brownies, swap all-purpose flour with almond flour or a gluten-free blend. This way, everyone can enjoy this dessert. You can serve this treat in fun ways. Individual dessert cups are great for parties. Layer the brownies, whipped cream, and fruit in clear cups. This looks pretty and makes it easy to serve. Another idea is to layer all the ingredients in a trifle dish. This big dessert looks impressive and is perfect for sharing. To keep your dessert layers fresh, store them in a cool, dry place. Use an airtight container to prevent moisture from ruining the brownies or whipped cream. If you have leftover strawberries, keep them in the fridge. You can also layer the components in a container to save space. For reheating brownies, place them in the microwave for 10-15 seconds. This will make them soft and warm. In the refrigerator, your Brownie Strawberry Shortcake will last about 3 days. If you want to keep it longer, you can freeze it. Wrap the brownies tightly in plastic wrap and then in foil. This method helps to avoid freezer burn. They can last up to 2 months in the freezer. For macerated strawberries, store them in a sealed container in the fridge. They should stay fresh for up to 2 days. To keep whipped cream light and fluffy, store it in a separate container. You can also add a pinch of cornstarch to help it hold its shape longer. Avoid mixing it again right before serving to keep the texture perfect. For the full recipe, check the details above. You can use vegan egg alternatives like applesauce or flaxseed. Each option works well. For applesauce, use 1/4 cup for each egg. Flaxseed needs mixing. Combine 1 tablespoon of ground flaxseed with 2.5 tablespoons of water. Let it sit for 5 minutes to thicken. Yes, you can use frozen strawberries. Thaw them first and drain excess liquid. This will keep your dessert from becoming too watery. Frozen strawberries can still taste sweet and delicious. The best way is the toothpick test. Insert a toothpick into the center of the brownies. If it comes out with a few moist crumbs, they are ready. If it’s wet with batter, they need more time. Making whipped cream is simple and fun. Start with cold heavy cream in a bowl. Use an electric mixer on medium speed. Whip until soft peaks form. Add 2 tablespoons of powdered sugar for sweetness. Continue until you reach your desired consistency. You now have all the tools to create a delicious brownie strawberry shortcake. From mixing the ingredients to perfecting your whipped cream, each step counts. Remember the tips for achieving the best texture and flavor. Don’t hesitate to try variations to make it your own. Whether for a special event or just a treat, this dessert will impress. Enjoy sharing your tasty creation with friends and family. Happy baking!

Brownie Strawberry Shortcake Delightful Dessert Recipe

Are you ready for a dessert that will wow your friends and family? This Brownie Strawberry Shortcake is a sweet

- 1 pound ground beef - 1 packet taco seasoning - 1 cup shredded cheddar cheese - 1 cup ranch dressing - 1 cup crushed tortilla chips - 1/2 cup diced tomatoes - 1/2 cup diced red onion - 1 avocado, diced - 1/4 cup chopped fresh cilantro - 1 tablespoon olive oil - 1 package small flour tortillas (10-12 count) Ground beef forms the heart of this dish. It cooks quickly and absorbs flavors well. Taco seasoning gives the beef its bold taste. Each bite bursts with spices that excite your palate. Shredded cheddar cheese adds creamy richness. It melts beautifully, making every bite cheesy and satisfying. Ranch dressing provides a cool, tangy contrast. It balances the spice from the taco seasoning. Fresh vegetables like tomatoes and avocado add color and texture. They enhance both flavor and nutrition. Want to change it up? Use ground turkey or chicken instead of beef. Both options are leaner and still full of flavor. If you prefer a vegetarian dish, swap the meat for black beans or lentils. You can also try different cheeses, like pepper jack for added heat. Instead of ranch dressing, opt for Greek yogurt for a healthier twist. Start with a large skillet. Add one tablespoon of olive oil and heat it on medium. Next, add one pound of ground beef. Cook the meat for about five to seven minutes. Stir it often until it turns brown. After that, drain any extra fat. Now, sprinkle in one packet of taco seasoning. Pour in a quarter cup of water. Stir well and let it simmer for five minutes. This will thicken the mixture and boost the flavor. While the beef is cooking, preheat your oven to 375°F (190°C). Take your small flour tortillas and cut them into circles. You can use a cookie cutter or the rim of a glass. Lay the circles flat on a lined baking sheet. Make sure they do not overlap. This will help them cook evenly. Once your beef mixture is ready, spoon a small amount onto each tortilla circle. Make sure not to overfill them. Next, sprinkle shredded cheddar cheese on top of the beef. Add a bit of crushed tortilla chips for extra crunch. Now, bake them in the oven for eight to ten minutes. Watch as the tortillas get crispy and the cheese melts. While they bake, mix diced tomatoes, red onion, avocado, and cilantro in a bowl. Add half of your ranch dressing to this mix. After the taco bites come out of the oven, drizzle the remaining ranch dressing on top. Serve them warm with the fresh mixture. Enjoy your Taco Ranch Bites! For the complete recipe, check out the Full Recipe. To get crispy tortillas, cut small circles from the tortillas. Use a cookie cutter or a glass. Place them on a baking sheet lined with parchment paper. Bake at 375°F (190°C) for 8-10 minutes. The heat makes them crunchy. You can also brush them lightly with olive oil before baking. This adds flavor and helps them crisp up. Store any leftover Taco Ranch Bites in an airtight container. Keep them in the fridge for up to three days. To reheat, place them in the oven at 350°F (175°C) for about 5-7 minutes. This keeps the tortillas crispy. You can also use a microwave, but they might get chewy. For best taste, enjoy them fresh right after baking. Serve Taco Ranch Bites warm for the best flavor. Add a side of extra ranch dressing for dipping. You can also serve them with guacamole or salsa. These bites are great for parties or game day snacks. They are fun and easy to share with friends and family. For a colorful touch, sprinkle some diced veggies on top before serving. {{image_2}} You can easily make Taco Ranch Bites vegetarian. Instead of ground beef, use black beans or lentils. Both options give a great texture. Add some sautéed bell peppers for extra flavor. You can also use plant-based cheese to keep it dairy-free. This way, everyone can enjoy the bites. If you like heat, add diced jalapeños or hot sauce. Mix them into the beef or sprinkle on top. You can also use pepper jack cheese instead of cheddar. This will give your bites a spicy kick. Try adding a sprinkle of cayenne pepper to the beef for more warmth. To make Taco Ranch Bites gluten-free, use corn tortillas. They work well and stay crispy. For a low-carb option, try lettuce wraps instead. You can also swap out ranch dressing for a yogurt-based dip. This change lowers calories and fat. Always check labels to ensure all ingredients fit your needs. Taco Ranch Bites are tasty but also filling. Each serving has about 350 calories. You get around 20 grams of protein, 25 grams of fat, and 20 grams of carbs. This balance makes them a good snack or light meal. You can make Taco Ranch Bites even healthier. Choose lean ground turkey instead of beef. Use Greek yogurt instead of ranch dressing for a lighter option. You can swap regular cheese for low-fat cheese too. These swaps help cut calories and fat while keeping flavor. Each ingredient in Taco Ranch Bites has benefits. Ground beef provides protein for muscle health. Avocado adds healthy fats and fiber. Tomatoes are packed with vitamins C and K. Lastly, cilantro has antioxidants that may support good health. These ingredients work together to create a yummy and nutritious snack. You can serve Taco Ranch Bites with many sides. I love pairing them with fresh salsa. Guacamole is another great choice. A simple side salad also works well. Consider serving some extra ranch dressing for dipping. This adds a creamy touch that many enjoy. Yes, you can make Taco Ranch Bites ahead. Cook the beef and prepare the toppings in advance. Store them separately in the fridge. When ready to serve, assemble the bites and bake them. They stay tasty and fun, even after waiting a bit. You can change the flavors easily. Try adding different cheese types, like pepper jack. For heat, mix in jalapeños or hot sauce. You can also switch the meat for chicken or turkey. Adding black beans can boost the texture and taste. Get creative and have fun with it! In this blog post, we explored the key ingredients and step-by-step instructions for making tasty Taco Ranch Bites. We discussed tips for crispy tortillas and how to store and reheat them. You can also try several variations, including vegetarian options or spicy additions. Taco Ranch Bites are fun and easy. You can make them fit any diet or taste. Enjoy experimenting and sharing these delightful bites with friends and family!

Taco Ranch Bites Flavorful and Easy Snack Recipe

Looking for a fun snack that packs a punch? Let me introduce you to Taco Ranch Bites! This easy recipe

To make S'mores Monkey Bread, you need simple ingredients. Each one adds a special touch to this fun dessert. Here’s what you will need: - 2 cans (16 oz each) refrigerated biscuit dough - 1 cup mini marshmallows - 1 cup semi-sweet chocolate chips - 1/2 cup graham cracker crumbs - 1/2 cup unsalted butter, melted - 3/4 cup brown sugar - 1 teaspoon vanilla extract - Pinch of salt This list covers everything you need for a tasty treat. The biscuit dough gives a fluffy base, while the chocolate and marshmallows bring the classic s'mores flavor. The graham cracker crumbs offer a nice crunch. When you mix these ingredients, you create a dessert that everyone will love. For the full recipe and instructions, check out the [Full Recipe]. - Preheat the oven to 350°F (175°C) and grease your bundt pan. - Open the biscuit dough cans and cut each biscuit into quarters. - In a large bowl, mix the quartered biscuit pieces with melted butter and vanilla extract. - In another bowl, combine graham cracker crumbs, brown sugar, and a pinch of salt. - Take a handful of the butter-coated biscuit pieces, and roll them in the graham cracker mixture. - Layer the coated dough pieces in the bundt pan, adding mini marshmallows and chocolate chips between layers. - Once all the biscuit pieces are in the pan, sprinkle any leftover graham cracker mixture over the top. Add a few more marshmallows and chocolate chips for a nice finish. - Bake for 35-40 minutes or until golden brown. Check for doneness by inserting a toothpick; it should come out clean. - Let the baked monkey bread cool for about 10 minutes. Invert it onto a platter and serve warm. For extra delight, drizzle melted chocolate and mini marshmallows on top. This S'mores Monkey Bread is a fun, easy dessert that brings joy to any gathering. For the full recipe, refer to the earlier section. Enjoy the gooey, sweet goodness! To make the best S'mores Monkey Bread, focus on texture. You want it soft and fluffy inside, with a golden crust. To achieve this, don’t skip the proper baking time. Bake it for 35-40 minutes. Check it at the 35-minute mark. A toothpick should come out clean. Using quality ingredients is key for flavor. Choose fresh mini marshmallows and good chocolate chips. The better the ingredients, the better your dessert will taste. Get creative when serving S'mores Monkey Bread. Serve it warm, straight from the pan. Use skewers or forks for easy sharing. Drizzle extra melted chocolate on top for fun. You can also add a small bowl of melted chocolate for dipping. A scoop of vanilla ice cream makes a great side too. Enjoy the fun of s'mores in a new way! For the full recipe, check the details above. {{image_2}} You can easily switch up the chocolate or candy in S'mores Monkey Bread. Try using milk chocolate or even dark chocolate for a richer taste. If you love peanut butter, add peanut butter cups instead of chocolate chips. For alternative coatings, consider using crushed cookies or different flavored crackers. You could use chocolate graham crackers or even Oreos to give a fun twist. Each swap will change the flavor and make it unique. Adding spices can elevate your dessert. A pinch of cinnamon or nutmeg adds warmth and depth. You can also add a few drops of peppermint or almond extract for a fresh taste. These tiny changes can create big flavor shifts. Mix-ins are another way to personalize your monkey bread. Try adding chopped nuts like walnuts or pecans for crunch. You could even add fruit, like diced strawberries or banana slices, for a fruity touch. Each mix-in brings new flavors and textures, making your dessert even more exciting. To store leftover S'mores Monkey Bread, first let it cool completely. Place it in an airtight container. You can also wrap it tightly in plastic wrap. This keeps it fresh for up to three days in the fridge. If you want to store it longer, you can freeze it. Just place it in a freezer-safe container or bag. It can last for about two months in the freezer. Yes, you can freeze S'mores Monkey Bread. Make sure it is fully cooled before freezing. Wrap it well to prevent freezer burn. When you are ready to eat it, simply thaw it in the fridge overnight. To reheat your S'mores Monkey Bread, preheat your oven to 350°F (175°C). Place the bread in a baking dish. Cover it with foil to keep it moist. Heat for about 15-20 minutes or until warm. You can also microwave individual pieces for about 20-30 seconds. This helps keep the marshmallows soft and warm. Enjoy your dessert as if it was fresh out of the oven! Can I use homemade biscuit dough instead of refrigerated? Yes, you can use homemade biscuit dough. Just make sure it is soft and easy to cut. The texture may change a bit, but the taste will still be great! What if I don't have a bundt pan? If you don’t have a bundt pan, use a regular cake pan. Just adjust the baking time. Keep an eye on it as it bakes. How can I make this recipe gluten-free? To make it gluten-free, use gluten-free biscuit dough. Check labels on marshmallows and chocolate chips to ensure they are gluten-free too. How long does S'mores Monkey Bread last? S'mores Monkey Bread lasts about 2 to 3 days when stored in an airtight container. Keep it at room temperature. Can I prepare it ahead of time? Yes, you can prepare it a day ahead. Just assemble the monkey bread and cover it tightly. Bake it the next day for fresh, warm goodness. In this article, we explored the fun and tasty S'mores Monkey Bread, covering the ingredients, steps, and best tips. You learned how to mix chilled biscuit dough with chocolate, marshmallows, and graham crackers for a delightful treat. Remember to play with flavors and ingredients for your own twist. Storing leftovers is easy, and reheating keeps it fresh. This dessert is perfect for any gathering. Enjoy every bite and share it with friends. Your kitchen adventures will surely impress!

S’mores Monkey Bread Deliciously Easy Dessert Recipe

Are you ready to try a dessert that combines the classic flavors of s’mores with the fun of monkey bread?

- 1 lb chicken breast, diced - 1 medium onion, sliced - 1 bell pepper (any color), sliced - 2 cloves garlic, minced - 1 can (14 oz) diced tomatoes (with juices) - 4 cups chicken broth - 1 tablespoon fajita seasoning (store-bought or homemade) - 1 can (15 oz) black beans, drained and rinsed - 1 cup corn (fresh, frozen, or canned) - 2 tablespoons olive oil - Salt and pepper to taste - Fresh cilantro, chopped (for garnishing) - Sliced avocado and lime wedges (for serving) Gathering these ingredients is key for a great soup. Start with the chicken breast. It gives your soup its rich flavor and protein. Use fresh chicken for the best taste. The onion and bell pepper add a nice sweetness and crunch. Slice them thinly to cook evenly. Garlic gives a bold taste. Mince it finely for even distribution. The canned diced tomatoes provide a juicy base. Their acidity balances the soup. Chicken broth is essential. It adds depth and body to the dish. Fajita seasoning is what makes this soup unique. You can buy it or make your own. Black beans add fiber and a creamy texture. They also boost the soup's heartiness. Corn, whether fresh or canned, adds a pop of sweetness. Finally, olive oil helps in sautéing the chicken and veggies. Don’t forget salt and pepper. They enhance all the flavors. For garnish, fresh cilantro, avocado, and lime wedges add freshness and zest. For the full recipe, check the complete guide! Cooking this Easy Chicken Fajita Soup is simple and fun. Let’s break it down step-by-step. 1. Heat olive oil in a large pot. Start by adding the olive oil to your pot. Use medium heat. This helps prepare the base for your soup. 2. Sauté chicken breast for 5 minutes. Add the diced chicken breast next. Cook it for about five minutes. You want the chicken to turn white and no longer be pink. 3. Add onion and bell pepper, cooking until softened. Toss in the sliced onion and bell pepper. Cook them for about five minutes until they start to soften. This adds great flavor! 4. Stir in garlic and cook for an additional minute. Now, add the minced garlic. Cook it for one more minute. The smell will be amazing! 5. Combine diced tomatoes, chicken broth, and seasonings. Next, add the can of diced tomatoes, chicken broth, and fajita seasoning. Stir well to mix everything. 6. Bring to boil, then simmer for 15-20 minutes. Turn up the heat until the soup boils. Then, lower the heat and let it simmer for 15 to 20 minutes. This blending of flavors is key! 7. Adjust seasoning with salt and pepper to taste. After simmering, taste your soup. Add salt and pepper as needed. This is where you can make it perfect for you! 8. Serve garnished and enjoy! Finally, ladle the soup into bowls. Top it with chopped cilantro, avocado slices, and a squeeze of lime. Enjoy your delicious meal! For the full details on making this tasty soup, check out the Full Recipe. - Use fresh ingredients for vibrant flavors. Fresh veggies make a big difference. - Adjust seasoning according to personal preference. Taste as you go for the best result. - Let the soup simmer longer for deeper flavor integration. This makes all the flavors blend well. - Best served hot with avocado and lime wedges. The fresh toppings add great taste. - Pair it with tortilla chips for extra crunch. Chips give a nice texture to the soup. - Offer toppings like sour cream or shredded cheese for customization. Everyone can make it their own. This soup is not just easy; it’s also packed with flavor. Check out the Full Recipe for all the details. Enjoy your cooking! {{image_2}} You can change up the protein in this soup. Swap chicken for beef or shrimp for a fresh twist. Each option brings a new taste. If you want a plant-based option, try adding beans or lentils. They add protein and texture. You can also play with the beans you use. Black beans work well, but you can try pinto or kidney beans for a different flavor. If you want more color, experiment with different peppers. Use green, yellow, or even spicy peppers for a kick. Each pepper adds its own unique taste to the soup. If you like heat, you can easily adjust the spice level. Increase the fajita seasoning for a bolder flavor. Want it even spicier? Add fresh jalapeños or a splash of hot sauce. This adds a zesty kick and makes the soup exciting. Feel free to taste as you go. This way, you can find the right level of spice for your taste buds. Enjoy mixing and matching flavors to make this soup your own. And if you want the full recipe, check out the [Full Recipe]. After you enjoy your easy chicken fajita soup, store any leftovers right. - Place them in an airtight container. - Keep them in the fridge for up to 3 days. - For longer storage, freeze the soup for up to 3 months. - Make sure to thaw it before you reheat. When it's time to enjoy your soup again, reheating is simple. - You can reheat it on the stove over medium heat. - If it looks thick, add some broth to loosen it up. - For a quick option, use the microwave. - Heat in short intervals, stirring in between for even warmth. This method keeps your soup tasty and fresh. - Can I make this soup in a slow cooker? Yes, you can! Just brown the chicken in a pan first. Then, add everything to your slow cooker. Cook on low for 6-8 hours or on high for 3-4 hours. This makes the flavors blend well. - Is it possible to prepare this recipe ahead of time? Absolutely! You can make the soup a day ahead. Store it in the fridge. The next day, just reheat it on the stove. The flavors will get even better overnight. - How can I make this recipe healthier? To make it healthier, use skinless chicken breast. You can also add more veggies like spinach or zucchini. This adds fiber and nutrients without many calories. - What is the best way to serve this soup? Serve the soup hot in bowls. Top it with fresh cilantro, avocado slices, and a squeeze of lime. You can also add tortilla chips for a crunchy side. - Can I use canned chicken instead of fresh? Yes, you can use canned chicken. Just drain it and add it in during the last few minutes of cooking. It’s a great time-saver. - What’s the best way to modify the recipe for a vegetarian option? For a vegetarian soup, skip the chicken. Use vegetable broth instead of chicken broth. Add extra beans or chickpeas for protein. - How do I add more vegetables to my soup recipe? You can add vegetables like carrots, celery, or even kale. Just chop them small and add them in with the onions and bell peppers. This boosts nutrition and flavor. In this blog post, we covered how to make easy chicken fajita soup. You learned about the essential ingredients and step-by-step cooking method. I shared tips for perfecting your soup, suggested fun variations, and provided storage info. With these insights, you can enjoy a flavorful meal tailored to your taste. Remember, cooking is about fun and creativity. Enjoy making this soup and share it with friends and family!

Easy Chicken Fajita Soup Flavor-packed and Quick Meal

Looking for a flavorful meal that’s quick and easy? This Easy Chicken Fajita Soup packs a punch with delicious flavors

- 4 boneless, skinless chicken breasts - 1 cup fresh basil leaves, packed - 1/2 cup grated Parmesan cheese - 1 cup breadcrumbs (preferably Italian seasoned) - 1 large egg - 1/2 cup all-purpose flour - 3 cloves garlic, minced - 1 teaspoon lemon zest - Salt and pepper to taste - Olive oil, for frying - Fresh basil leaves, for garnish To make Italian Basil Chicken Cutlets, gather these ingredients. Start with four boneless, skinless chicken breasts. The chicken gives a juicy base for the dish. Next, grab a cup of fresh basil leaves. This herb adds bright flavor and aroma. You will also need half a cup of grated Parmesan cheese. It brings a savory depth to your cutlets. For the crispy coating, use one cup of breadcrumbs. I suggest Italian seasoned breadcrumbs for extra flavor. You will also need one large egg to help bind the coating. Don’t forget a half cup of all-purpose flour to coat the chicken first. Minced garlic is a must, so use three cloves. Garlic enhances the taste of the basil. We’ll add a teaspoon of lemon zest for a fresh kick. Season with salt and pepper to bring out all the flavors. Finally, have olive oil ready for frying. It gives the chicken a crispy finish. Fresh basil leaves make a beautiful garnish. They add color and flavor to the final dish. You can find the full recipe to guide you through the cooking process. How to combine the basil mixture Start by gathering your fresh basil leaves. In a food processor, add the basil, minced garlic, lemon zest, and grated Parmesan cheese. Pulse everything together until it becomes a smooth paste. Taste the mixture and add salt and pepper as needed. This mix will give your chicken a burst of Italian flavor. Flattening the chicken cutlets Take each chicken breast and place it between two pieces of plastic wrap or parchment paper. Using a meat mallet or a rolling pin, gently pound the chicken until it is about 1/2 inch thick. This step helps the chicken cook evenly, making sure it stays juicy. Setting up a breading station Next, prepare a breading station. You need three shallow bowls. Fill one with flour and season it with salt and pepper. In the second bowl, crack and beat one large egg. In the third bowl, add the breadcrumbs. I recommend using Italian seasoned breadcrumbs for extra flavor. Dredging the chicken Now it’s time to coat the chicken. First, take a flattened chicken breast and dip it into the flour. Shake off any excess flour. Next, dip it into the beaten egg, making sure it is fully coated. Finally, roll it in the breadcrumbs, pressing gently to ensure it sticks well. Repeat this for all the chicken cutlets. Frying techniques for best results Heat a generous amount of olive oil in a large skillet over medium-high heat. Once the oil is hot, carefully add the coated chicken cutlets. Fry each side for about 4-5 minutes, or until they are golden brown and cooked through. Avoid overcrowding the pan; fry in batches if needed. This helps them crisp up nicely. Adding the basil mixture When the chicken is done frying, spread a layer of the basil mixture on top of each cutlet. This step is key as the heat from the chicken will melt the mixture slightly, creating a flavorful crust. Enjoy the blend of fresh basil and cheese as it enhances each bite! For the full recipe, click here. - Best oil choices for frying I recommend using olive oil. It has a great flavor and a high smoke point. Canola oil is also a good choice if you want a neutral taste. Both oils work well for frying chicken cutlets. - Ensuring even cooking To cook evenly, pound the chicken to 1/2 inch thick. This helps the cutlets cook at the same rate. Also, don’t overcrowd the pan. Fry in batches if needed. This keeps the oil hot and helps get that golden crust. - Tips for coating the chicken perfectly Set up your breading station with flour, egg, and breadcrumbs. Make sure to season the flour with salt and pepper. Dip the chicken in flour first, then egg, and finally breadcrumbs. This three-step process gives a nice, crispy coating. - Complementary side dishes Italian Basil Chicken Cutlets pair well with a fresh salad or roasted vegetables. You can also serve it with pasta tossed in olive oil and garlic for a full meal. - Best sauces to pair A light marinara or a lemon butter sauce enhances the flavors. If you enjoy something creamy, a basil pesto sauce works great too. These options add extra flavor to your cutlets. - Presentation ideas for meal aesthetics For a beautiful plate, arrange the cutlets on a large platter. Garnish with fresh basil leaves. You can also drizzle some balsamic glaze over the top for color and flavor. This makes your meal look as good as it tastes. {{image_2}} You can easily customize this recipe to fit your needs. Here are some options: - Gluten-free options: Use gluten-free breadcrumbs and flour. Almond flour works well too. - Dairy-free modifications: Substitute nutritional yeast for Parmesan. It gives a cheesy flavor without dairy. - Vegan substitutions: Replace chicken with tofu or tempeh. Use a flax egg instead of a regular egg for coating. You can serve Italian Basil Chicken Cutlets in various ways. Here are some ideas: - Baked vs. fried variations: For a healthier option, bake the cutlets at 400°F for 20 minutes. This keeps them crispy without frying. - Serving in salads or wraps: Slice the cutlets and toss them in a salad or wrap them in a tortilla. Add fresh veggies for crunch. - Reimagining as a pasta dish: Serve the chicken on a bed of pasta. Drizzle with olive oil and sprinkle with extra basil for flavor. These variations give you room to play and make the dish your own! For the full recipe, check out the details above. To keep your Italian Basil Chicken Cutlets fresh, follow these tips: - Refrigerating: Place leftovers in an airtight container. This helps keep them moist. Store in the fridge for up to three days. - Freezing: For longer storage, wrap each cutlet in plastic wrap. Place them in a freezer bag. They can last up to three months in the freezer. - Reheating: To reheat, place the cutlets in a skillet over low heat. Add a splash of water or broth to keep them moist. Cover with a lid. This helps to avoid dryness and keeps the flavor intact. Understanding how long your cutlets last is key. - Fridge Life: In the fridge, your cutlets stay fresh for about three days. - Spoilage Signs: Watch for changes in color and smell. If they look dull or smell off, toss them. Always trust your senses when it comes to food safety. These tips help you enjoy your delicious Italian Basil Chicken Cutlets even after the first meal! How long to cook chicken cutlets? Cook chicken cutlets for about 4-5 minutes on each side. The goal is to achieve a golden brown crust. Make sure the chicken reaches an internal temperature of 165°F. This keeps it juicy and safe to eat. Can I make this dish ahead of time? Yes, you can prepare the chicken cutlets ahead of time. After frying, let them cool completely. Store them in the fridge for up to two days. When ready, reheat them in a hot skillet for a few minutes. What can I serve with Italian Basil Chicken Cutlets? These cutlets pair well with many sides. Consider serving them with pasta, salad, or garlic bread. You might also enjoy them with roasted vegetables or a light couscous salad. Is it safe to freeze cooked chicken? Yes, it is safe to freeze cooked chicken. Place the cutlets in an airtight container or freezer bag. They will last for up to three months in the freezer. Just thaw them in the fridge before reheating. Can I use dried basil instead of fresh? You can use dried basil, but fresh basil gives more flavor. If using dried, use about one-third of the amount. Dried herbs are more concentrated, so a little goes a long way. What's the best way to ensure chicken is cooked through? Use a meat thermometer to check the chicken's internal temperature. It should reach 165°F. If you don't have a thermometer, cut into the thickest part of the chicken. The meat should be white, not pink, and juices should run clear. This guide walks you through making delicious Italian Basil Chicken Cutlets. You learned about key ingredients, preparation steps, and cooking techniques. I shared helpful tips, serving ideas, and variations to suit your taste. Remember, choosing the right oil and ensuring even cooking makes a big difference. Storing and reheating leftovers will keep your meal fresh. With these steps, you can create a dish everyone will love. Enjoy your cooking journey and explore your kitchen with confidence!

Italian Basil Chicken Cutlets Flavorful and Easy Recipe

Are you ready to elevate your dinner game? My Italian Basil Chicken Cutlets are not only flavorful, but they are

- 1 cup lump crab meat, picked over for shells - 1/2 cup breadcrumbs (preferably panko) - 1/4 cup mayonnaise - 1 tablespoon Dijon mustard - 1 teaspoon Worcestershire sauce - 1 teaspoon Old Bay seasoning - 1 green onion, finely chopped - 1 tablespoon fresh parsley, chopped - Salt and pepper to taste - 8 egg roll wrappers - Vegetable oil for frying These main ingredients give your crab cake egg rolls their best flavor and texture. The lump crab meat is the star. It should be fresh and free of shells. The panko breadcrumbs add a nice crunch. Mayonnaise keeps the filling moist and rich. I like to add Dijon mustard and Worcestershire sauce for extra depth. Old Bay seasoning brings a classic taste that pairs well with crab. Green onions and parsley add freshness. Don’t forget to season with salt and pepper to enhance all the flavors. - Sweet chili sauce for dipping - Fresh herbs and spices While the main ingredients shine, optional ones can elevate your dish. Sweet chili sauce makes a great dip and adds a hint of sweetness. You can also use fresh herbs like cilantro or dill for added brightness. Spices such as garlic powder or paprika can bring a unique twist to your egg rolls. Feel free to get creative and make this dish your own! You can find the Full Recipe for a detailed guide on how to put it all together. Start by gathering all the main ingredients. You will need: - 1 cup lump crab meat, picked over for shells - 1/2 cup breadcrumbs (preferably panko) - 1/4 cup mayonnaise - 1 tablespoon Dijon mustard - 1 teaspoon Worcestershire sauce - 1 teaspoon Old Bay seasoning - 1 green onion, finely chopped - 1 tablespoon fresh parsley, chopped - Salt and pepper to taste In a large bowl, combine the crab meat, breadcrumbs, mayonnaise, mustard, Worcestershire sauce, Old Bay seasoning, green onion, parsley, and a pinch of salt and pepper. Mix gently. Be careful not to break up the crab too much. You want to keep those big chunks intact. This adds to the texture and taste. Now, let’s fold the egg rolls. Place one egg roll wrapper on a clean surface. Make sure a corner is pointed toward you. Scoop about 2 tablespoons of the crab mixture into the center of the wrapper. Fold the bottom corner over the filling. Then, fold the sides in. Roll tightly to seal. Use a little water along the edges to help seal the wrapper. This keeps everything inside during cooking. Repeat this with all the wrappers and filling. Next, it’s time to fry. In a large skillet or deep fryer, heat about 2 inches of vegetable oil. Aim for a temperature of 350°F (175°C). You can use a thermometer for accuracy. Carefully add the egg rolls to the hot oil. Do this in batches to avoid overcrowding. Fry for about 3-4 minutes. You want them golden brown and crispy on all sides. Turn them if needed. Once done, use tongs to remove them from the oil. Place them on a paper towel-lined plate to drain excess oil. Now, your crab cake egg rolls are ready to serve! Don't forget to check the Full Recipe for any additional tips! To make crab cake egg rolls great, avoid sogginess. Here are some tips: - Use dry ingredients: Make sure your breadcrumbs are dry, especially if you use fresh ones. Panko works best for a crispy texture. - Don’t overload: Fill each egg roll with just enough crab mixture. If you put in too much, they can burst and leak during frying. - Seal well: Use a little water to seal the edges of the wrapper. This helps keep the filling inside while frying. Ensuring even cooking is key. Follow these steps: - Heat oil correctly: Use a thermometer to check the oil's temperature. It should be around 350°F (175°C) for perfect frying. - Fry in batches: Don’t crowd the pan. This helps the egg rolls cook evenly and get crispy all around. Dipping sauces can elevate your crab cake egg rolls. Here are a few ideas: - Sweet chili sauce: This pairs well with the crab's flavor and adds a nice kick. - Tartar sauce: A classic choice that adds creaminess and tang. For garnishing ideas, consider: - Fresh herbs: Sprinkle chopped parsley or cilantro on top for a vibrant touch. - Lemon wedges: Serve with wedges for a zesty squeeze that brightens the dish. For the full recipe, refer to the Full Recipe section above. Enjoy your cooking! {{image_2}} You can easily swap the crab meat for other proteins. Shrimp or lobster make tasty alternatives. For a vegetarian twist, use chopped mushrooms or artichokes. You can also add beans or lentils for a hearty option. Spices can change the whole dish. If you like heat, add some cayenne pepper or chili flakes. For a fresh taste, try dill or cilantro. Mix and match spices to fit your mood. You can bake or fry your egg rolls. Baking is healthier and simpler. Preheat your oven to 400°F (200°C). Place the rolls on a baking sheet. Brush them lightly with oil and bake for about 20 minutes. Flip them halfway through for a nice golden color. Frying gives a crispy texture. Heat vegetable oil to 350°F (175°C). Fry in small batches to keep them crisp. Each roll takes about 3-4 minutes to turn golden brown. If you have an air fryer, you can use it too! Preheat to 375°F (190°C). Place the egg rolls in a single layer. Cook for 10-12 minutes, flipping halfway through. They will be crispy and delicious! Many cultures add their own twist to crab cake egg rolls. In Asian cuisine, you might find them with soy sauce or spicy mayo. Latin versions often feature jalapeños and lime. Popular adaptations include adding cheese or herbs. Some people love to dip them in sriracha or garlic sauce. Feel free to explore and create your own version! For the full recipe, check out the recipe section. To keep your crab cake egg rolls fresh, store them in an airtight container. This helps to lock in flavors and moisture. Place a paper towel in the container to absorb any excess moisture. This step prevents sogginess. You can keep them in the fridge for up to three days. After that, their quality may decline. When you’re ready to enjoy leftovers, reheat them safely. The best way is to use an oven. Preheat your oven to 350°F (175°C). Place the egg rolls on a baking sheet. Bake for about 10-15 minutes. This method keeps them crispy. You can also use an air fryer. Set it to 350°F (175°C) and cook for about 5-7 minutes. This also helps maintain that crunch. Avoid using a microwave, as it may leave them soggy. For the complete recipe, check out the Full Recipe section. Yes, you can make crab cake egg rolls ahead of time. This helps save time when guests arrive. To prep, follow these steps: - Prepare the filling: Mix the crab meat and other ingredients as in the recipe. - Wrap the egg rolls: Assemble them but don’t fry yet. Keep them in the fridge. - Storing: Place the wrapped rolls on a plate. Cover with plastic wrap. This keeps them fresh for a few hours. - Freezing: If you want to store them longer, freeze the egg rolls. Lay them flat on a baking sheet, freeze until firm, then transfer to a freezer bag. They can last for about a month. When you’re ready to cook, fry them straight from frozen. Just add a minute or two to the cooking time. Crab cake egg rolls pair well with many sides and drinks. Here are some tasty options: - Dipping sauces: Serve with sweet chili sauce, spicy mayo, or tartar sauce. - Salads: A simple green salad or coleslaw adds freshness. - Sides: Try potato wedges, fries, or pickled vegetables. - Drinks: Light beers, white wine, or sparkling water complement the flavors well. Mix and match these options for a fun spread. You can find the full recipe in the Full Recipe section. There, you’ll see all the steps to make these tasty crab cake egg rolls. Enjoy cooking! In this post, we explored how to make crab cake egg rolls, starting with key ingredients like crab meat, breadcrumbs, and mayonnaise. We discussed how to prepare the crab mixture and assemble the egg rolls neatly. Cooking tips helped ensure crispiness, while variations opened up new ideas. Don't forget to store leftovers properly and reheat them well to keep them tasty. Now, you’re ready to create a fun dish that’s sure to impress. Enjoy experimenting with flavors and sharing this delicious treat with others. Happy cooking!

Crab Cake Egg Rolls Tasty and Simple Appetizer

Craving a quick and tasty appetizer? Look no further than these crab cake egg rolls! They’re packed with lump crab

Here are the ingredients you need for a healthy avocado shrimp salad. Each item plays a key role in creating a fresh and tasty dish. - 1 lb (450 g) shrimp, peeled and deveined - 2 ripe avocados, diced - 1 cup cherry tomatoes, halved - 1 cucumber, diced - 1/4 red onion, finely chopped - 1/4 cup fresh cilantro, chopped - Juice of 2 limes - 3 tablespoons olive oil - Salt and pepper to taste - 1 teaspoon garlic powder - 1 teaspoon chili powder (optional) These simple ingredients bring bright colors and flavors to your salad. The shrimp adds a nice protein boost. The avocados give it a creamy texture. You can easily find all these items at your local market. This salad is not only quick to make but also packed with nutrients. You can find the full recipe in the next section. To make this tasty salad, start by combining fresh ingredients in a big bowl. Add diced avocados, halved cherry tomatoes, diced cucumber, and finely chopped red onion. Mix gently to keep the avocado intact. Next, in a small bowl, whisk the dressing ingredients together. You will need the juice of two limes, olive oil, garlic powder, chili powder (if you want a kick), salt, and pepper. This dressing brings all the flavors together. Now, heat a skillet over medium heat and add a splash of olive oil. Let the oil warm for a minute. Season the shrimp with a pinch of salt and pepper. When the skillet is ready, add the shrimp. Cook them for 2-3 minutes on each side until they turn pink and opaque. This step is quick, so keep an eye on them. Once cooked, remove the shrimp from the heat and let them cool for a moment. Combine the cooked shrimp with the salad ingredients in the large bowl. Pour the dressing over everything. Now, gently fold the ingredients together. This will help coat each piece with the dressing. Finally, top the salad with chopped cilantro for a fresh finish. Give it one last gentle mix. You can find the full recipe to help you through each step. Enjoy your fresh and flavorful Healthy Avocado Shrimp Salad! To make your healthy avocado shrimp salad shine, choose ripe avocados. A ripe avocado feels slightly soft when you press it gently. This gives your salad a creamy texture and rich flavor. Cook the shrimp just until they turn pink. If you cook them too long, they become tough and chewy. Perfectly cooked shrimp should be tender and juicy. Adjust the lime juice in the dressing for the right tang. If you like it zesty, add more lime juice. For a milder taste, use less. You can also try add-ins to boost flavor. Chopped jalapeños add heat, while diced mango brings sweetness. Both options can make your salad unique. Serve the salad in a large bowl or on individual plates to impress. Adding lime wedges on the side gives a pop of color and flavor. Garnish with extra cilantro for a vibrant finish. You can even sprinkle some chili flakes for a touch of spice. A beautiful presentation makes every bite more enjoyable. {{image_2}} You can switch shrimp for other seafood. Try crab or scallops for a new twist. These options add different flavors and textures. If you want plant-based proteins, use chickpeas or lentils. They add protein and fiber, making your salad filling and healthy. To make your salad heartier, add grains like quinoa or farro. They boost nutrition and make the dish more satisfying. You can also mix in different vegetables or fruits. For example, bell peppers add crunch, while mango offers sweetness. Both options enhance flavor and color. A unique homemade dressing can elevate your salad. Try mixing yogurt with lime juice and herbs for a creamy touch. Alternatively, blend avocado with olive oil for a smooth, rich dressing. Experimenting with different herbs and spices can also change the taste. Cilantro, dill, or even cumin can add exciting flavor notes. Explore these variations to find your favorite combination, and check the Full Recipe for more details! To keep leftovers fresh, store your Healthy Avocado Shrimp Salad in an airtight container. This helps prevent the salad from browning. You can refrigerate it for up to two days. After that, the avocados may turn mushy and lose their taste. If you want to save it longer, freeze the shrimp separate from the salad. Shrimp can freeze well for up to three months. Just make sure they are in a freezer-safe bag. When ready to eat, thaw the shrimp in the fridge overnight. To reheat, warm the shrimp in a skillet over low heat. Avoid using high heat to keep the shrimp tender. Do not microwave the salad, as it can ruin the texture of the fresh ingredients. Enjoy your meal fresh for the best taste! For the full recipe, check out Healthy Avocado Shrimp Salad. What are the health benefits of shrimp and avocado? Shrimp is low in calories and high in protein. It also has omega-3 fatty acids, which are good for your heart. Avocado is high in healthy fats and fiber. It helps keep you full and supports digestion. Together, they make a perfect duo for a healthy meal. Can I prepare this salad in advance? Yes, you can prepare the salad a few hours ahead. Just keep the shrimp and dressing separate until you are ready to serve. This keeps the salad fresh and prevents sogginess. Is it safe to eat shrimp that has been frozen? Yes, frozen shrimp is safe to eat. Freezing helps keep shrimp fresh and kills bacteria. Just ensure it is cooked properly after thawing. What sides pair well with this salad? This salad goes well with brown rice or quinoa. You could also serve it with a light soup or some whole-grain bread. These sides add extra nutrition and make the meal more filling. How can I make this recipe gluten-free? This recipe is naturally gluten-free. Just make sure any added ingredients, like sauces or dressings, are certified gluten-free. Always check labels to stay safe. For the full recipe, visit Healthy Avocado Shrimp Salad. This blog detailed how to make a vibrant avocado shrimp salad. You learned about the fresh ingredients you need, step-by-step cooking methods, and tips for the best results. Don't forget the fun variations you can try to keep it exciting. Store leftovers safely for later enjoyment. As you prepare your salad, remember to use ripe ingredients for the best taste. Enjoy each bite, knowing you're making a healthy choice!

Healthy Avocado Shrimp Salad Fresh and Flavorful Dish

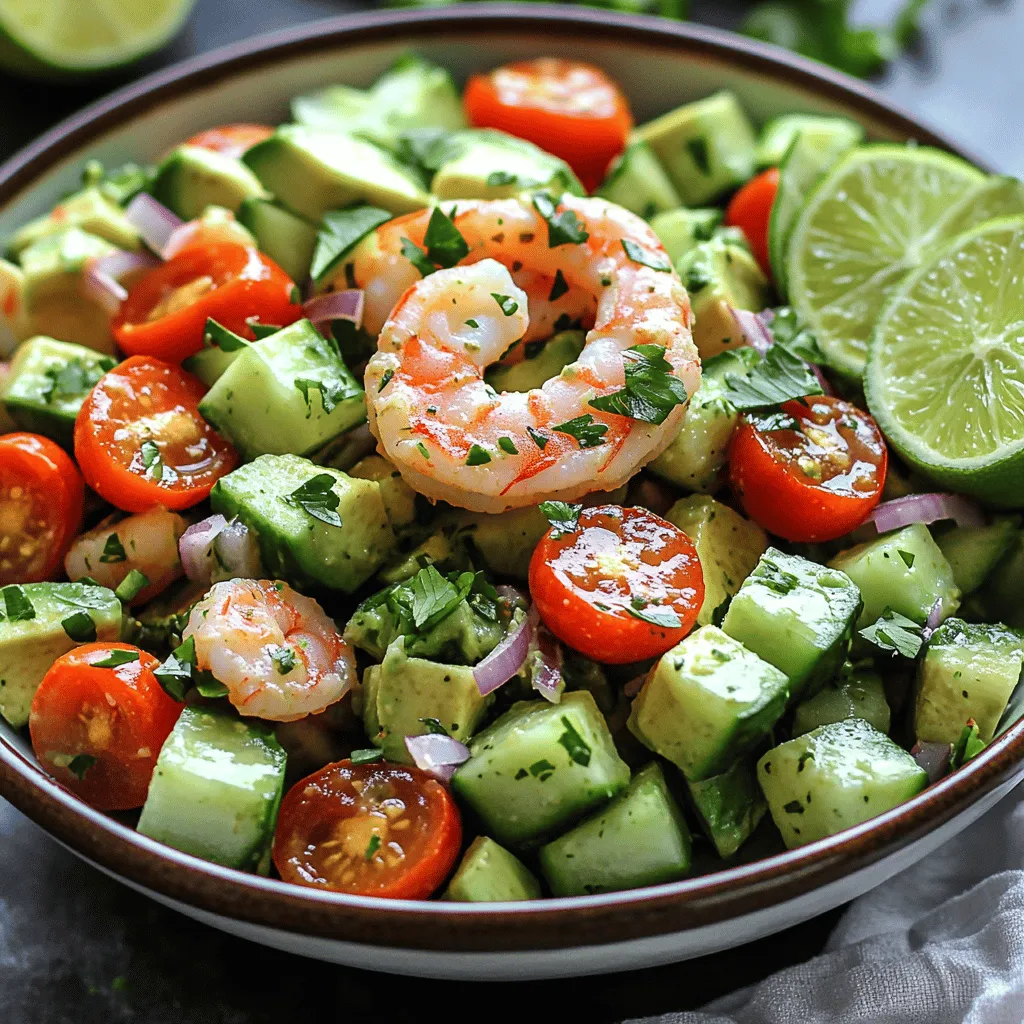
Are you ready to make a dish that’s both healthy and tasty? This Healthy Avocado Shrimp Salad is fresh, vibrant,

- 2 cups cooked chicken, shredded - 1 cup shredded cheddar cheese - 1 cup corn tortillas - 1 cup enchilada sauce (red or green) The core of any good enchilada is the filling. I use shredded chicken because it’s easy and tasty. You can cook chicken yourself or grab a rotisserie chicken for speed. The cheese adds creaminess and flavor. I prefer cheddar, but you can choose your favorite. Corn tortillas hold everything together and give a nice texture. - 1 cup black beans, drained and rinsed - 1/2 cup red bell pepper, finely diced - 1/2 cup onion, finely chopped - 1 teaspoon ground cumin - 1 teaspoon garlic powder - 1 teaspoon chili powder - 1/2 teaspoon salt - 1/4 teaspoon black pepper Want to switch things up? Add black beans for protein and fiber. Diced bell peppers and onions add color and crunch. Spices like cumin and chili powder kick up the flavor. You can mix and match based on what you have at home. - Fresh cilantro, chopped - Sour cream - Avocado slices Garnishes make your dish pop! Fresh cilantro adds a burst of freshness. A dollop of sour cream cools the heat and adds creaminess. Slices of avocado bring a rich, buttery flavor. These toppings make your dish look and taste amazing. For the full recipe, check out [Full Recipe]. 1. Preheat your oven to 375°F (190°C). This step gets the oven ready for baking. 2. In a large bowl, mix the shredded chicken, half of the cheese, black beans, red bell pepper, and onion. Add cumin, garlic powder, chili powder, salt, and black pepper. Stir well to combine all the flavors. 1. Spread a thin layer of enchilada sauce on the bottom of your baking dish. This keeps the tortillas from sticking. 2. Take a corn tortilla. Fill it with about 1/4 cup of the chicken mixture. Roll it tightly and place it seam-side down in the baking dish. Repeat this with the rest of the tortillas and filling. 3. Once all the tortillas are in the dish, pour the remaining enchilada sauce over the top. Make sure each tortilla is well coated. 4. Sprinkle the rest of the shredded cheese over the enchiladas. This will melt into a delicious layer. 1. Bake in the preheated oven for 20-25 minutes. The cheese should melt and bubble nicely. 2. When done, let the enchiladas cool for a few minutes. This makes them easier to serve. 3. Garnish with fresh cilantro before serving. Pair with sour cream for added creaminess. For the full recipe, refer to the earlier section. Enjoy the tasty flavors of your easy chicken enchiladas! - Using rotisserie chicken: Grab a rotisserie chicken from the store. It saves time and effort. Just shred it, and you're ready to go. This tip makes the process quick and easy. - Preparing ahead of time: You can mix the filling a day before. Keep it in the fridge. This way, you can assemble and bake the enchiladas in no time. - Oven vs. stovetop methods: Baking enchiladas gives them a nice, bubbly top. Stovetop cooking is faster but won’t give you the same crispy edges. I prefer the oven for that golden cheese finish. - How to achieve the perfect melt: Use a mix of cheeses. Cheddar melts well. Monterey Jack adds creaminess. For the best melt, cover the dish with foil for the first half of baking. Then, remove it to let the cheese brown. - Additional spices or sauces: Add more spices like smoked paprika or cayenne for extra flavor. You can also mix in some fresh herbs. A splash of lime juice brightens up the filling. - Making them spicier or milder: If you like heat, add jalapeños to the filling. For a milder dish, skip the spicy peppers and use a mild enchilada sauce. This way, you can customize your meal to suit your taste. {{image_2}} You can change the protein in your enchiladas to suit your taste. Ground turkey or beef works well as alternatives to chicken. They add a new flavor while keeping the dish hearty. If you want a vegetarian option, try using black beans or tofu. Both are packed with protein and make a great filling. Just mix them with spices for extra flavor. The sauce is key to great enchiladas. You can choose between red and green enchilada sauce. Red sauce is rich and tangy, while green sauce is bright and zesty. For a fun twist, try making your own sauce. Just blend tomatillos, garlic, and cilantro for a fresh taste. You can also add spices to customize the sauce to your liking. To make your meal complete, consider some tasty sides. Serve your enchiladas with cilantro-lime rice or black bean salad. These pair perfectly and enhance your meal. You can also offer a fresh salad on the side. This adds crunch and balances the richness of the enchiladas. For an extra treat, serve chips and salsa as well. For the Full Recipe, check out the instructions above. To store leftover enchiladas, let them cool completely. Then, place them in an airtight container. This keeps them fresh and tasty. You can also cover the dish tightly with plastic wrap. When reheating, preheat your oven to 350°F (175°C). Bake for about 15 minutes. This warms them up without drying them out. You can freeze enchiladas before or after baking. If you freeze them before baking, wrap each one tightly in foil. Place them in a freezer-safe bag. This method keeps them fresh for up to three months. To bake, just add 10-15 minutes to your cooking time. If you freeze them after baking, let them cool first. Thaw in the fridge overnight before reheating. Heat them in the oven at 350°F (175°C) for about 20 minutes. In the fridge, enchiladas last about 3-4 days. In the freezer, they can last up to three months. Always check for signs of spoilage. If you see mold or a funny smell, toss them out. Eating spoiled food can make you sick. Easy Chicken Enchiladas take about 40 minutes to make. This includes 15 minutes to prep and 25 minutes to bake. You can enjoy a tasty meal in no time! Yes, you can prepare these enchiladas ahead of time. Just assemble them and cover the dish. Store it in the fridge for up to 24 hours. When you're ready to eat, bake them straight from the fridge. If you want to freeze them, wrap the enchiladas well. They can last for about three months in the freezer. Thaw them overnight in the fridge before baking. I recommend using shredded cheddar cheese for a rich, sharp flavor. Monterey Jack is also great for a milder taste. You can even mix both cheeses for a yummy combo. This adds a nice, gooey texture to your enchiladas. Absolutely! You can use gluten-free corn tortillas for your enchiladas. Make sure to check the labels when buying enchilada sauce. Many sauces are gluten-free, but some may contain wheat. Always choose sauces that fit your diet needs. Enjoy your enchiladas without worry! Easy chicken enchiladas are fun to make and tasty to eat. You learned about key ingredients like shredded chicken and cheese options. We covered important steps, including preparation and baking. Tips helped save time and improve flavor. Variations let you customize your dish, while storage info ensures freshness. Remember, you can easily make these enchiladas your own. Enjoy experimenting with flavors and ingredients. Your perfect meal awaits!

Easy Chicken Enchiladas Flavorful and Quick Dinner Idea

Are you craving a tasty meal that won’t take all night to make? Easy Chicken Enchiladas are your answer! Packed

- 2 cups elbow macaroni - 4 cups shredded sharp cheddar cheese - 1 cup grated Parmesan cheese - 3 cups whole milk - 1/4 cup unsalted butter - 1/4 cup all-purpose flour - 1 tablespoon Dijon mustard - 1 teaspoon garlic powder - 1 teaspoon onion powder - 1/2 teaspoon paprika - Salt and black pepper to taste - 1/2 cup breadcrumbs (for topping) - 2 tablespoons melted butter (for topping) Gathering fresh ingredients is key for great baked macaroni and cheese. Start with elbow macaroni. This pasta shape holds sauce well. Next, grab sharp cheddar cheese and Parmesan cheese. They add rich flavor and creaminess. Whole milk makes your cheese sauce smooth and thick. Unsalted butter and all-purpose flour help create a roux, which thickens the sauce. For flavor, use Dijon mustard, garlic powder, onion powder, and paprika. Salt and black pepper help balance the taste. Don't forget the breadcrumbs! They give a crispy topping. Add melted butter to the breadcrumbs for extra crunch. When you have these ingredients ready, you can make the best baked mac and cheese. Check out the Full Recipe for detailed steps! - Preheat the oven to 350°F (175°C). - Cook elbow macaroni until al dente. - Drain macaroni and set aside. - Create the roux with butter and flour. - Gradually mix in whole milk, stirring to avoid lumps. - Add spices and cheeses for flavor and creaminess. - Combine macaroni with cheese sauce and transfer to a baking dish. - Prepare breadcrumbs for topping. - Bake until golden brown and bubbly. Making baked macaroni and cheese is simple and fun. When you follow these steps, you will get a creamy and cheesy dish. You can find the full recipe above to guide you. As you cook, enjoy the smells and sounds of the kitchen. Each step builds on the last, creating a meal that the whole family will love. - Use a mix of cheeses for varied flavors. - Add cream cheese to the cheese sauce. To make your baked macaroni and cheese even creamier, mix different cheeses. A blend of sharp cheddar, Gruyère, and a bit of mozzarella gives a rich flavor and a smooth texture. Cream cheese can also boost creaminess. Just whisk it into your cheese sauce until it melts. This small step makes a big difference in taste and texture. - Experiment with additional spices like cayenne pepper or nutmeg. - Incorporate cooked bacon or sautéed onions for extra depth. To enhance flavor, try adding spices. A pinch of cayenne pepper adds heat, while nutmeg gives a warm, nutty taste. You can also mix in cooked bacon or sautéed onions. These add savory depth that makes your dish stand out. It’s a fun way to make your recipe your own. - Avoid overcooking macaroni to maintain texture. - Let the dish sit before serving for optimized consistency. For the best texture, don’t overcook the macaroni. Aim for al dente, so it stays firm when baked. After baking, let your dish sit for a few minutes before serving. This helps the cheese sauce thicken a bit, making it easier to scoop and serve. These simple tips can elevate your baked macaroni and cheese to a new level. {{image_2}} You can change the cheese for fun flavors. Swap cheddar for Gruyère or Gouda. Both give your dish a nice twist. If you want heat, mix in pepper jack cheese. This adds a spicy kick that makes it exciting. Think about adding more to your mac and cheese. You can add vegetables like spinach or broccoli. These add color and nutrients. For more protein, include shredded chicken or crab. This makes it a full meal that will satisfy everyone. If you need a faster meal, try a stovetop version. This method cooks the pasta and sauce together. It saves time and still tastes great. You can also make a vegan version. Use plant-based cheeses and milk for a tasty option that everyone can enjoy. You can store leftover baked macaroni and cheese in an airtight container. Make sure to refrigerate it within two hours. It will stay fresh for up to three days. Allow the dish to cool first. This helps keep the texture nice and creamy. If you want to keep it longer, freezing is a great option. Freeze baked mac and cheese in portions. This makes reheating easy. When you are ready to eat it, thaw it in the fridge overnight. Thawing helps maintain the dish's quality. To reheat, use the oven for the best taste. Set the oven to 350°F. Bake it until hot all the way through, about 20 minutes. If you are short on time, use the microwave. Just cover it to keep the moisture in. This will help the mac and cheese stay delicious. To get that rich, creamy texture, I suggest using a mix of cheeses. Sharp cheddar gives great flavor, but you can also add cream cheese to the sauce. This extra step makes your mac and cheese extra smooth and delicious. The cream cheese melts in and binds everything together. It’s a secret weapons of mine for creating that perfect cheesy goodness. Yes, you can prepare the dish ahead of time. Just make the whole recipe and then refrigerate it before baking. When you’re ready to enjoy, simply pop it in the oven. This lets you save time on busy days. You can have a comforting meal ready in no time. There are so many fun ways to change up mac and cheese! You can add crispy bacon for a smoky flavor. If you like a bit of heat, throw in some jalapeños. Mixing different cheese blends also adds excitement. Try using Gouda or pepper jack for a twist. Each variation brings a unique taste that keeps things interesting. Baked mac and cheese can last up to 3 days in the fridge. Just make sure to store it in an airtight container. Allow it to cool down before placing it in the fridge to keep the texture nice. This way, you can enjoy leftovers without losing any of that creamy goodness. Baked macaroni and cheese is a crowd-pleaser that’s easy to make. You've learned about its key ingredients, step-by-step preparation, and various fun twists. Remember, you can adjust the recipe to your taste. Add extras like vegetables or different cheeses for a unique flavor. Store leftovers wisely for delicious meals later. Enjoy your cooking, and make this dish a staple in your kitchen! Trust me, you won't regret it!

Baked Macaroni and Cheese Comforting Family Favorite

Baked macaroni and cheese is a dish that warms the heart and fills the belly. It’s a comforting family favorite

Older posts
Newer posts
← Previous Page1 … Page43 Page44 Page45 … Page55 Next →

dsad

© 2025 Lisa Dishes • Built with GeneratePress

Our Policies

  • Copyright Policy
  • Cookie Policy
  • GDPR Policy
  • Privacy Policy
  • Disclaimer
  • Terms Of Use

More Information

  • Home
  • About
  • Contact
  • Appetizers
  • Dessert
  • Dinner
  • Drinks
©2025, Lisa Dishes About Back To Top