Skip to content
DisclaimerTerms Of UseGDPR PolicyCookie Policy

Lisa Dishes

  • Home
  • Drinks
  • Appetizers
  • Dinner
  • Dessert
  • About
  • Contact
  • Privacy Policy
DisclaimerTerms Of UseGDPR PolicyCookie Policy

lisa

- 2 boneless, skinless chicken breasts - 2 tablespoons Cajun seasoning - 1 cup heavy cream - 8 oz fettuccine or penne pasta - 1 cup cherry tomatoes, halved - 1 cup bell peppers, thinly sliced (red, yellow, or green) - 1 small onion, finely chopped - 2 cloves garlic, minced - 1 tablespoon olive oil - Grated Parmesan cheese for garnish - Fresh parsley, chopped for garnish To make Creamy Cajun Chicken Pasta, gather these ingredients. The chicken gives the dish its heartiness. Cajun seasoning adds a spicy kick. Heavy cream creates the rich sauce that ties everything together. Pasta is the base that brings it all to life. Now, let's talk about the vegetables. Cherry tomatoes add a sweet burst of flavor. Bell peppers bring bright colors and crunch. Onions and garlic build the flavor base for the dish. Each veggie plays a key role. Don’t forget the garnishes! Olive oil brings richness. Grated Parmesan cheese adds a salty touch. Fresh parsley gives a pop of color and freshness. For the full recipe, check out the link for precise measurements and steps! To start, fill a large pot with water and add a generous amount of salt. Bring the water to a boil. Once it’s boiling, add 8 oz of fettuccine or penne pasta. Cook the pasta according to the package instructions until it reaches al dente. This means it should be firm when you bite into it. Drain the pasta in a colander, but save about 1/2 cup of the pasta water. This water will help adjust your sauce later. While the pasta cooks, grab your two boneless, skinless chicken breasts. Sprinkle Cajun seasoning all over the chicken, making sure to cover both sides well. Once seasoned, heat 1 tablespoon of olive oil in a large skillet over medium heat. Add the chicken breasts to the skillet. Cook them for about 6-7 minutes on each side. You want the chicken to reach an internal temperature of 165°F (75°C). After cooking, take the chicken out and let it rest. Once it cools, slice it into strips. In the same skillet, add a finely chopped onion. Sauté it for about 3-4 minutes or until it becomes translucent. Next, add 2 cloves of minced garlic and 1 cup of thinly sliced bell peppers. Cook these for another 2-3 minutes until the peppers soften. Now, pour in 1 cup of chicken broth and bring it to a simmer. After that, stir in 1 cup of heavy cream. Let this mix cook for 2-3 minutes until it thickens slightly. If it becomes too thick, add a bit of the reserved pasta water to adjust the consistency. Now you’re ready to combine everything. Add the cooked pasta and 1 cup of halved cherry tomatoes into the sauce. Toss everything together to ensure the pasta is well coated in the creamy sauce. Season your dish with salt and pepper to taste. For the full recipe, refer to the earlier section. Enjoy this flavorful dinner delight! To get the right sauce thickness, start with the heavy cream. If it gets too thick, add a bit of the pasta water. This water helps keep the sauce creamy and smooth. For flavor balance, taste as you cook. Adjust salt and pepper slowly. Too much salt can overpower the dish, so add it bit by bit. Resting the chicken is key. Once cooked, let it sit for about five minutes. This helps keep it juicy. When slicing, cut against the grain. This keeps the chicken tender and easier to chew. Aim for even strips to make serving simple. Avoid overcooking the pasta. If it’s too soft, it will not hold the sauce well. Cook it just until al dente. The chicken also needs careful cooking. Overcooked chicken can become dry and tough. Lastly, do not ignore seasoning. Adjust as you go and taste often for the best results. For a detailed guide on making this dish, check the Full Recipe. {{image_2}} For a tasty vegetarian version, swap the chicken for plant-based proteins. You can use tofu, tempeh, or seitan. Each option brings a unique flavor. First, marinate your choice in Cajun seasoning to infuse that bold taste. Then, sauté it just like the chicken. This keeps the dish flavorful. Want more heat? You can easily amp up the spice levels. Add extra Cajun seasoning or a dash of hot sauce while cooking. You can also toss in some red pepper flakes for an extra kick. Just be careful; you can always add more, but you can’t take it out! If you need alternatives, there are plenty of options. For the cream, you can use half-and-half or a plant-based cream. This will give a lighter touch but still keep it creamy. As for pasta, if you want whole grain or gluten-free, those work great too. Just adjust the cooking time based on the type you choose. For the Full Recipe, refer back for all details. To keep your Creamy Cajun Chicken Pasta fresh, store it in an airtight container. Make sure it cools down before sealing. Place it in the fridge. It can stay good for up to three days. Avoid leaving it out for more than two hours. This helps prevent bacteria growth. When reheating, use a skillet for the best results. Add a splash of chicken broth or cream to keep it creamy. Heat on low and stir often. You can also use the microwave. Just cover the bowl and heat in short bursts. Stir between each time to avoid hot spots. If you want to freeze this dish, do so before adding the pasta. Cook the chicken and sauce, then let them cool. Place them in a freezer-safe bag or container. Remove as much air as you can. The sauce can last up to three months in the freezer. When ready to eat, thaw it overnight in the fridge. Reheat it on the stove and then add freshly cooked pasta. You can pair this dish with a fresh garden salad. A simple side salad adds crunch and balance. Try a Caesar salad for a rich taste. Garlic bread complements the creamy sauce well. You might enjoy roasted vegetables for an extra flavor boost. Yes, you can make it ahead. Cook the pasta and chicken, then store them separately. Keep the sauce in an airtight container. When ready to eat, reheat the sauce and combine everything. This method keeps the pasta and chicken fresh. To make it dairy-free, swap heavy cream with coconut milk or almond milk. Use dairy-free cheese for garnish. This keeps the creamy texture while removing dairy. Adjust seasoning to suit your taste. Enjoy a rich flavor without the dairy! This blog covered all you need for a tasty Creamy Cajun Chicken Pasta. We discussed key ingredients, simple steps, and helpful tips. You learned how to cook pasta perfectly and season chicken just right. Don't forget about easy variations and how to store leftovers. Remember, cooking is fun! Experiment with flavors and make this dish your own. Enjoy each delicious bite, and share it with friends and family.

Creamy Cajun Chicken Pasta Flavorful Dinner Delight

Are you ready to impress at dinnertime? My Creamy Cajun Chicken Pasta is a flavorful delight you won’t want to

To make a vibrant salsa verde, you will need the following fresh ingredients: - 10 tomatillos, husked and quartered - 1 small onion, quartered - 2 cloves garlic, peeled - 1-2 jalapeños, seeds removed - 1/2 cup fresh cilantro - 1 tablespoon lime juice - 1 teaspoon salt - 1/2 teaspoon ground cumin - 1 tablespoon olive oil Choosing the right ingredients is key to great salsa verde. Here are some helpful tips: - How to choose ripe tomatillos: Look for firm tomatillos with bright green skin. Avoid any that feel soft or have dark spots. The husk should be dry and papery. - Freshness indicators for cilantro: Choose cilantro with bright green leaves. Avoid wilted or yellowing leaves. A fresh smell is also a good sign. - Selecting the right jalapeños for spice levels: For milder salsa, pick smaller jalapeños. Larger ones tend to be hotter. Check for smooth skin and a firm texture. First, preheat your oven to 400°F (200°C). This temperature helps to roast the vegetables nicely. While the oven heats, line a baking sheet with parchment paper. This makes clean-up easy. Next, you'll want to prepare the ingredients. Take 10 tomatillos, remove their husks, and quarter them. Cut 1 small onion into quarters, and peel 2 cloves of garlic. If you like heat, take 1-2 jalapeños and remove the seeds. Now, place the tomatillos, onion, garlic, and jalapeños on the baking sheet. Drizzle with 1 tablespoon of olive oil. Toss everything well to coat. This oil helps add flavor and aids in roasting. Roast the veggies in the preheated oven for about 15-20 minutes. You want them to char and soften. Keep an eye on them. The tomatillos should change color and look a bit wrinkled. You can poke them with a fork to check if they are soft. Once they cool a bit, it's time to blend. In a blender or food processor, add the roasted tomatillos, onion, garlic, and jalapeños. Then, add 1/2 cup of fresh cilantro leaves, 1 tablespoon of lime juice, 1 teaspoon of salt, and 1/2 teaspoon of ground cumin. Blend everything until smooth. If you like some chunkiness, pulse it a few times. Taste your salsa verde and adjust the seasoning if needed. If it needs more salt or lime, now is the time to fix it. After blending, transfer the salsa verde to a bowl. Let it sit for at least 30 minutes. This waiting time helps the flavors blend. Enjoy your fresh and zesty salsa verde with chips or on your favorite tacos! For the full recipe, check out the details above. To create the best salsa verde, focus on balance. You want to mix the tartness of tomatillos with the bright notes of lime and cilantro. Start by roasting your tomatillos and jalapeños to boost flavor. Roasting adds depth. It helps to caramelize the natural sugars in your ingredients. When blending, time is key. Blend until smooth for a creamy texture. If you prefer chunks, pulse the blender a few times. This gives your salsa a nice rustic feel. Don’t rush; let the salsa sit for at least 30 minutes. This wait allows flavors to meld and develop. Salsa verde pairs well with many dishes. Use it as a dip for tortilla chips or drizzle it over tacos. It also shines as a topping for grilled chicken or fish. Want to impress guests? Serve it in vibrant bowls, garnished with extra cilantro and lime wedges. For gatherings, create a salsa verde bar. Offer various chips and veggies for dipping. This makes it fun for guests to mix and match flavors. Avoid over-roasting your ingredients. If you roast too long, the flavor can become bitter. Keep a close eye on your tomatillos and jalapeños. They should soften and char lightly, not burn. Another mistake is getting the seasoning wrong. Taste your salsa before serving. Adjust the salt, lime, or cumin to suit your taste. A little tweak can make all the difference. Remember, you can always add more, but you can't take it out! {{image_2}} To make your salsa verde even better, try adding different herbs or spices. Fresh oregano or thyme can bring a new twist. You could also add a pinch of smoked paprika for depth. Mixing in fruits like mango or pineapple adds a sweet touch. This makes your salsa unique and fun! Adjusting the spice level is easy. If you want it milder, use fewer jalapeños. Remove seeds and membranes for less heat. For a spicier kick, add serrano peppers or a splash of hot sauce. Each chili has a different heat level, so choose wisely based on your taste. Different regions of Mexico have their own salsa verde styles. In Guerrero, they may add roasted pumpkin seeds for nuttiness. In Oaxaca, you might find tomatillos mixed with avocado for creaminess. These unique ingredients can change the flavor profile. Explore these variations to bring a taste of Mexico to your home! To keep your homemade salsa verde fresh, use airtight containers. Glass jars work great. They seal well and do not stain. You can also use plastic containers, but make sure they close tightly. For short-term storage, place your salsa verde in the fridge. It stays fresh for about a week. If you want to keep it longer, freeze it. Transfer your salsa to freezer bags, removing as much air as possible. This helps prevent freezer burn. Homemade salsa verde lasts up to one week in the fridge. In the freezer, it can last for three months. Always check for signs of spoilage. If you see mold or a strange smell, toss it. A change in color also means it's time to say goodbye. Do not let any leftover salsa verde go to waste! You can use it in many dishes. Mix it into scrambled eggs for a tasty breakfast. Add it to tacos, burritos, or grilled chicken for an extra kick. You can even drizzle it over roasted vegetables. Get creative! Use it as a dip for chips or veggies. It also makes a great topping for quesadillas or nachos. The possibilities are endless! Check out the Full Recipe for more inspiration. Salsa verde is a fresh green sauce made mainly from tomatillos. It has a bright, tangy flavor. You can enjoy it with chips, tacos, or grilled meats. Key ingredients include tomatillos, onion, garlic, and cilantro. This sauce is vibrant and adds a zesty kick to many dishes. Yes, you can use green tomatoes. They will taste different from tomatillos. Green tomatoes offer a slightly sweeter flavor. However, they do not have the same tartness. If you want the classic taste, stick with tomatillos. If you’re curious, try both to see which you like best. The spice level of homemade salsa verde depends on the jalapeños used. Removing the seeds and membranes will make it milder. You can add more jalapeños for heat. If it’s too spicy, add more tomatillos or avocado to balance it out. Always taste as you go to find the right level for you. Salsa verde pairs well with many dishes. It's great with tortilla chips, tacos, and grilled chicken. You can also drizzle it over enchiladas or mix it into rice. It adds freshness to roasted vegetables too. Feel free to experiment with your favorite foods! Yes, you can make salsa verde ahead of time. It tastes even better after sitting for a few hours. Store it in an airtight container in the fridge. It will stay fresh for up to a week. For longer storage, you can freeze it. Just thaw it before serving. Enjoy your zesty salsa verde anytime! Homemade salsa verde combines fresh tomatillos, onions, and spices for a tasty dip. I shared tips on selecting the best ingredients and step-by-step preparation methods. You learned how to balance flavors and avoid common mistakes. Remember, making it your own is key. Experiment with herbs and adjust spice levels to suit your taste. Store your salsa properly for long-lasting freshness. Now you can impress your friends and family with your delicious salsa verde at any gathering. Enjoy creating your unique version!

Homemade Salsa Verde Flavorful and Fresh Recipe

Are you ready to elevate your salsa game? Homemade salsa verde is fresh, vibrant, and packed with flavor. With a

To make lemon garlic roasted asparagus, you need a few simple items: - 1 pound fresh asparagus, trimmed - 3 tablespoons olive oil - 2 cloves garlic, minced - Zest of 1 lemon - Juice of 1 lemon - 1 teaspoon salt - 1/2 teaspoon black pepper - 1/4 teaspoon red pepper flakes (optional) - 2 tablespoons grated Parmesan cheese (optional) You can add more flavor to this dish. Consider mixing in: - Lemon zest or juice for extra citrus punch - Fresh herbs like thyme or parsley for a fresh taste - Toasted nuts for crunch These additions can elevate the dish and make it your own. If you don't have an ingredient, don't worry. Here are some swaps: - Use avocado oil instead of olive oil for a different flavor - Try garlic powder if you lack fresh garlic - You can swap lemon with lime for a different citrus taste These options keep the dish fun and flexible. For the full recipe, check out the details above! Start by washing your asparagus. Look for fresh stalks that are firm and bright green. Trim the tough ends off with a sharp knife. About one to two inches should do. This helps the asparagus cook evenly and taste better. In a large bowl, mix the olive oil, minced garlic, lemon zest, and lemon juice. Add in the salt, black pepper, and red pepper flakes if you like heat. Whisk this mixture until it blends well. This coating gives the asparagus a bright, zesty flavor. Preheat your oven to 400°F (200°C). Toss the trimmed asparagus in the lemon-garlic mixture. Make sure each piece is well coated. Spread them out on a baking sheet lined with parchment paper. Roast for 15 to 20 minutes, until they are tender but still crisp. If you like cheese, sprinkle Parmesan on top in the last five minutes. This adds a nice golden finish. When done, remove the asparagus and serve it hot. Drizzle with extra lemon juice for more flavor. For the full recipe, check out the section above. Roasting asparagus takes just the right time. Aim for 15 to 20 minutes at 400°F. Check after 15 minutes. You want the asparagus tender yet crisp. If too soft, you may have roasted it too long. The tips can brown slightly, adding great flavor. Lemon and garlic shine in this dish. Use fresh garlic for the best taste. Lemon zest adds brightness. Feel free to adjust the salt and pepper to your liking. Red pepper flakes give a nice kick. If you like cheese, add Parmesan during the last five minutes. A few key tools make this dish easy. You need a mixing bowl to combine ingredients. A whisk helps blend the lemon-garlic sauce well. A baking sheet lined with parchment paper makes cleanup simple. Finally, tongs help you toss the asparagus evenly. For the full recipe, check the details above. {{image_2}} You can mix in other veggies with your asparagus. Try adding baby carrots or bell peppers. Cut them into similar sizes for even cooking. Broccoli florets also work well. This adds more color and nutrients to your dish. The lemon-garlic flavor pairs nicely with these vegetables. Just make sure to adjust cooking times if needed. Feel free to play with the seasonings! Instead of lemon, use lime for a fresh twist. You can also try balsamic vinegar for a sweet touch. Add herbs like thyme or rosemary for more depth. If you want spice, include cayenne pepper or smoked paprika. These changes keep the dish exciting and tasty. This recipe is easy to adjust for different diets. For vegan options, skip the Parmesan cheese. You can also replace olive oil with avocado oil for a mild flavor. If you need gluten-free, rest easy; this dish is naturally gluten-free. These small tweaks let everyone enjoy the dish without worry. Check out the Full Recipe for more ideas on customization. After enjoying your lemon garlic roasted asparagus, let it cool. Place leftovers in an airtight container. Store in the fridge for up to three days. Keeping the asparagus in the right container helps retain its taste and texture. To reheat, preheat your oven to 350°F (175°C). Spread the asparagus on a baking sheet. Heat for about 10 minutes or until warmed through. This method helps keep the asparagus crisp. You can also use a microwave. Heat in short bursts, checking often to avoid sogginess. If you want to freeze asparagus, do it right after cooking. Place cooled asparagus in a freezer-safe bag. Remove excess air and seal tightly. It can last for up to three months in the freezer. When you’re ready to eat, thaw it in the fridge overnight before reheating. This keeps it tasty and fresh. For detailed steps, check the Full Recipe. Yes, you can use frozen asparagus. But fresh asparagus tastes better. Frozen asparagus often has a softer texture. If you choose frozen, thaw it first. Drain any excess water before roasting. This helps the asparagus roast evenly. Asparagus is done when it is tender yet crisp. You should see slight browning at the tips. A good test is to pierce it with a fork. If it goes in easily, it's ready. Typically, roasting takes about 15-20 minutes at 400°F. Lemon Garlic Roasted Asparagus pairs well with many dishes. Here are a few tasty options: - Grilled chicken or fish - Quinoa or rice pilaf - A fresh green salad - Roasted potatoes or sweet potatoes These sides balance the flavors well and create a lovely meal. For the full recipe, check the main section. This article covered the key ingredients, steps, and tips for making Lemon Garlic Roasted Asparagus. You can enhance flavors and swap ingredients based on your taste. I shared easy methods for cooking, storing, and reheating your dish. The variations let you customize the recipe for any diet. Remember, fresh asparagus shines in this dish. Use my tips for the best taste. Enjoy cooking and savor each bite!

Lemon Garlic Roasted Asparagus Savory and Fresh Dish

Ready to elevate your veggies? This Lemon Garlic Roasted Asparagus is fresh, zesty, and oh-so-savory. In this blog, I’ll walk

To make this vibrant salad, gather these ingredients: - 8 oz rice noodles - 1 cup shredded carrots - 1 red bell pepper, julienned - 1 cucumber, thinly sliced - 1 cup bean sprouts - 1/4 cup fresh cilantro, chopped - 1/4 cup green onions, sliced - 1/4 cup crushed peanuts (for garnish) - 1/4 cup sesame oil For the dressing, you will need: - 3 tablespoons soy sauce - 2 tablespoons lime juice - 1 tablespoon brown sugar - 1 tablespoon fish sauce (optional for added depth) - 1 teaspoon chili paste or sriracha (adjust to taste) Here’s a simple guide for portioning: - Rice noodles: 8 oz is about half a standard package. - Carrots: Use 1 cup, which is roughly 2 medium carrots. - Red bell pepper: A single pepper gives you enough for this dish. - Cucumber: One medium cucumber works well. - Bean sprouts: 1 cup is a good measure, about a handful. - Fresh cilantro and green onions: Each should be about 1/4 cup when chopped. - Crushed peanuts: Use 1/4 cup for a crunchy topping. - Sesame oil: 1/4 cup adds a nice richness to the salad. You can boost the flavor with these optional ingredients: - Add grilled chicken for protein. - Toss in some sliced radishes for a peppery kick. - Include mango for a sweet twist. - Try extra herbs like mint or basil for freshness. - Use lime zest to amplify the lime flavor. This salad is flexible. Feel free to switch things up based on what you have on hand. For the full recipe, check the [Full Recipe]. First, get a pot and fill it with water. Bring the water to a boil. Add the rice noodles to the pot. Cook them according to the package instructions, which usually takes about 4-6 minutes. You want them al dente, not too soft. Once done, drain the noodles. Rinse them with cold water to stop the cooking process. This keeps them from getting mushy. Now, let’s make the dressing. Grab a small bowl. In it, whisk together the soy sauce, lime juice, brown sugar, and fish sauce if you choose to use it. Add the chili paste or sriracha for some heat. Mix it well until the sugar is dissolved. Taste the dressing and adjust the spice level to your liking. This dressing ties all the flavors together, making the salad pop. In a large mixing bowl, combine the cooked noodles, shredded carrots, red bell pepper, cucumber, bean sprouts, cilantro, and green onions. Pour the dressing over this mixture. Toss everything gently to coat the noodles and veggies well. This step is key for even flavor distribution. Lastly, drizzle the sesame oil over the salad and toss again. Let it marinate for about 10-15 minutes. This time allows all the flavors to meld. Serve the salad chilled or at room temperature. Don't forget to top it with crushed peanuts for some extra crunch! For the full recipe, check out the earlier section. To keep your rice noodles from sticking together, rinse them after cooking. Use cold water to wash off the starch. This helps separate each noodle. You can also toss them with a little oil. A light coat of sesame oil works great here. Just make sure to use a small amount so it does not become greasy. For the best crunch, use fresh vegetables. Cut them just before you mix the salad. This keeps them crisp. Store them in ice water for a short time if you need to prep ahead. The water will help them stay fresh and crunchy. When you are ready, drain them well before adding to your salad. Spice is a key part of this salad. To adjust the heat, start with a small amount of chili paste. You can always add more later. Taste as you go to find your perfect level. If you prefer no spice, skip the chili sauce entirely. Instead, add a bit more lime juice for flavor. For the full recipe, check out the [Full Recipe]. {{image_2}} You can add protein to make your Spicy Thai Noodle Salad heartier. Chicken, tofu, or shrimp work well. For chicken, grill or sauté it in a little oil. Dice it into bite-size pieces and mix it in. For tofu, press it to remove water, then cube it. Sauté until golden or use it raw. Shrimp can be boiled or sautéed until pink. Each choice brings a unique taste and texture. Feel free to change the vegetables or herbs based on your taste. You can use bell peppers in different colors, zucchini, or snap peas. Fresh herbs like mint or basil can add a nice twist. The crunch from veggies keeps the salad fresh. Experiment to find your favorite mix! If you want a gluten-free meal, choose rice noodles or zucchini noodles. Rice noodles are easy to find and packed with flavor. Zucchini noodles, or “zoodles,” offer a low-carb option. Just spiralize the zucchini and toss it in with the salad. Both options keep the dish light and tasty. For the complete recipe, check the [Full Recipe]. To keep your Spicy Thai Noodle Salad fresh, place it in an airtight container. This helps retain flavor and texture. If you have leftovers, try to store them within two hours of making the salad. Always cool the salad to room temperature before sealing it. This way, you avoid condensation inside the container, which can make your salad soggy. You can enjoy this salad cold or at room temperature, so reheating is not usually needed. If you prefer warm noodles, gently heat them in a pan over low heat. Add a splash of water or sesame oil to help them warm evenly. Be careful not to overheat, as this can make the noodles mushy. Toss in some fresh veggies after warming for a crunchy bite. The salad lasts about 3 days in the fridge. Keep an eye on the veggies, as they can wilt quickly. If you want to freeze the salad, I recommend freezing only the noodles. The other fresh ingredients don’t freeze well. Store the noodles in a freezer-safe bag for up to a month. Thaw them in the fridge before mixing with fresh veggies and dressing again. For the full recipe, refer to the main article. Spicy Thai Noodle Salad comes from Thailand. It shows the mix of flavors in Thai cooking. This dish blends fresh veggies with rice noodles. The bold flavors come from herbs and spices. It is a popular choice for street food. Many people enjoy it for its bright taste and crunch. Yes, you can make this salad ahead of time. It tastes even better after the flavors mix. Just store it in the fridge in an airtight container. I recommend adding peanuts just before serving. This keeps them crunchy. The salad can last for about three days when stored properly. You can serve Spicy Thai Noodle Salad on its own or with other dishes. It pairs well with grilled chicken or shrimp. You can also add it to a larger meal with rice or stir-fry. For a fun twist, serve it in lettuce wraps. This keeps the meal light and fresh. Want more ideas? Check the Full Recipe for inspiration! Spicy Thai Noodle Salad is a flavorful dish that brings zest to your table. We covered key ingredients, portioning tips, and optional flavors to enhance your meal. You learned step-by-step instructions for cooking and mixing ingredients with a tasty dressing. I shared tips to keep your noodles from sticking and how to keep veggies crunchy. You can customize the dish with different proteins or veggies. Lastly, proper storage ensures freshness. Remember, this salad is easy to make and satisfying. Enjoy your culinary adventure!

Spicy Thai Noodle Salad Flavorful and Refreshing Dish

Looking for a dish that’s bursting with flavor and freshness? This Spicy Thai Noodle Salad hits the spot! Packed with

To make this tasty chocolate chip banana bread, you need key ingredients that blend well. Here’s what you'll need: - 3 ripe bananas, mashed - 1/2 cup melted coconut oil (or unsalted butter) - 1/2 cup brown sugar - 1/4 cup granulated sugar - 2 large eggs, beaten - 1 teaspoon vanilla extract - 1 teaspoon baking soda - 1/2 teaspoon salt - 1 1/2 cups all-purpose flour - 1 cup semi-sweet chocolate chips - 1/2 cup walnuts or pecans, chopped (optional) These ingredients work together to create a moist and delicious bread. The bananas add sweetness, while the chocolate chips give you that rich, gooey texture. You can play around with different flavors. Here are some ideas: - Swap coconut oil for unsalted butter for a richer taste. - Use dark chocolate chips for a deeper chocolate flavor. - Add spices like cinnamon or nutmeg for a warm touch. - If you want nuts, try almonds or hazelnuts instead of walnuts. These options let you customize the bread to fit your taste. You can get creative and make it your own! Ripe bananas are key to great banana bread. Here’s how to pick them: - Look for bananas with brown spots on the peel. - The more spots, the sweeter the banana. - Avoid bananas that are too green or too brown. If you need ripe bananas fast, place them in a paper bag. This traps ethylene gas and speeds up ripening. You can use this trick to ensure your bananas are perfect for baking. First, gather all your ingredients. You will need: - 3 ripe bananas, mashed - 1/2 cup melted coconut oil (or unsalted butter) - 1/2 cup brown sugar - 1/4 cup granulated sugar - 2 large eggs, beaten - 1 teaspoon vanilla extract - 1 teaspoon baking soda - 1/2 teaspoon salt - 1 1/2 cups all-purpose flour - 1 cup semi-sweet chocolate chips - 1/2 cup walnuts or pecans, chopped (optional) Next, preheat your oven to 350°F (175°C). Grease a 9x5-inch loaf pan. You can also line it with parchment paper for easy removal later. This step makes serving easier. In a large bowl, mix the mashed bananas and melted coconut oil. Stir until they blend well. Then add the brown and granulated sugars. Mix until the mixture is smooth. Beat in the eggs and vanilla extract. Make sure they are fully incorporated. Sprinkle the baking soda and salt over this mix. Stir gently to combine. Now, add the flour gradually. Mix just until it all comes together. Avoid overmixing. This keeps the bread light and fluffy. Finally, fold in the chocolate chips and nuts if you chose to add them. Ensure they are evenly mixed. Pour the batter into your prepared pan. Smooth the top with a spatula. Bake in the preheated oven for 55-65 minutes. Check for doneness by inserting a toothpick into the center. It should come out clean or with a few moist crumbs. Once done, remove the banana bread from the oven. Let it cool in the pan for about 10 minutes. After that, transfer it to a wire rack. Let it cool completely before slicing. Enjoy your homemade chocolate chip banana bread! If you want the full recipe, check out the [Full Recipe]. To get the best texture in your chocolate chip banana bread, use ripe bananas. Ripe bananas have more natural sugar and moisture. Mash them well for a smooth mix. When mixing, blend just until the flour disappears. Overmixing can make your bread dense. Add chocolate chips gently to keep them from sinking. One common mistake is using cold ingredients. Always use room temperature eggs. Cold eggs can shock the batter. Also, check your baking soda for freshness. Old baking soda can lead to flat bread. Lastly, avoid opening the oven door too early. This can cause your bread to collapse. If you want to skip chocolate chips, try other flavors. You can add nuts for crunch. Walnuts or pecans work great. Spices like cinnamon can add warmth. For a fruity twist, mix in blueberries or diced apples. You can even add a splash of orange juice or zest for brightness. Each choice will change the taste while keeping it delicious. {{image_2}} You can switch up the flavors in your chocolate chip banana bread. Try adding peanut butter for a nutty taste. You can also mix in dried fruits like cranberries or raisins for a sweet twist. For a hint of spice, add a teaspoon of cinnamon or nutmeg. If you love nuts, toss in some chopped walnuts or pecans. Each choice gives a new feel to the classic recipe. If you need a gluten-free option, replace all-purpose flour with a gluten-free blend. Look for one that works well for baking. For a vegan version, swap eggs with flaxseed meal. Mix one tablespoon of flaxseed with three tablespoons of water and let it sit until it gets thick. Use plant-based butter or coconut oil instead of regular butter. These changes will keep your bread moist and tasty. Serve your chocolate chip banana bread in fun ways. Try toasting slices and spreading almond butter on top. This adds a nice crunch and flavor. You can also serve it warm with a scoop of ice cream for a dessert treat. Drizzling honey or maple syrup can take it to the next level. For breakfast, enjoy it with yogurt and fresh fruit. Each way to serve makes it special. For all the details, check the Full Recipe. To keep your chocolate chip banana bread fresh, store it in an airtight container. This helps maintain moisture and flavor. You can place parchment paper between slices to avoid sticking. If you live in a warm area, store it in the fridge. This keeps it safe from mold. However, cold storage may dry it out slightly. You can freeze banana bread for later enjoyment. Wrap it tightly in plastic wrap and then in aluminum foil. This prevents freezer burn. For best results, slice the bread first. This way, you can thaw only what you need. When ready to eat, remove it from the freezer and let it thaw at room temperature. You can also reheat slices in the microwave for about 15-20 seconds. Banana bread stays fresh for about 3-4 days at room temperature. In the fridge, it lasts up to a week. If frozen, it can last for up to three months. Use a loaf pan or a glass container for storage. Glass is airtight and helps keep the bread moist. For the best taste, enjoy it within the first week! Yes, you can! If you skip the chocolate chips, you can still make a tasty banana bread. You might want to add nuts, like walnuts or pecans, for crunch. Dried fruits, like raisins or cranberries, also work well. This gives your bread a nice texture and flavor. You can also spice it up with cinnamon or nutmeg for extra warmth. To ripen bananas fast, place them in a brown paper bag. The bag traps ethylene gas, speeding up the ripening. You can add an apple or another ripe banana to help the process. If you need them super fast, you can bake them! Simply place unpeeled bananas on a baking sheet and bake at 300°F (150°C) for about 15-20 minutes. Watch them turn black. Let them cool before using them in your recipe. To keep your banana bread fresh, store it at room temperature in an airtight container. A zip-top bag works well too. If you want it to last longer, wrap it tightly in plastic wrap and freeze it. When you want a slice, take it out and let it thaw. You can also warm it up in the oven for a few minutes. This brings back that fresh-baked taste! You now know how to make Chocolate Chip Banana Bread. We explored the key ingredients and steps. You learned how to mix for the best results and how to bake it perfectly. We shared tips for texture and flavor options, plus storage tips to keep it fresh. Try adding your own twists to make it unique. Baking can be fun and simple. Enjoy each slice of your delicious creation!

Chocolate Chip Banana Bread Easy and Delicious Recipe

Welcome to the sweetest part of your day! In this post, I’ll share my easy and delicious Chocolate Chip Banana

To make this dish, you need some key ingredients that bring flavor and texture. Here’s what you’ll need: - 1.5 lbs boneless, skinless chicken thighs, cut into bite-sized pieces - 1 cup plain Greek yogurt - 2 tablespoons garam masala - 1 tablespoon ground cumin - 1 tablespoon turmeric - 1 tablespoon paprika - 1 teaspoon salt (adjust to taste) - 1/2 teaspoon black pepper - 2 tablespoons vegetable oil - 1 medium onion, finely chopped - 4 cloves garlic, minced - 1 inch ginger, grated - 1 can (14 oz) crushed tomatoes - 1 cup coconut milk - Fresh cilantro for garnish Each ingredient adds a layer of flavor. The chicken provides protein, while the yogurt helps tenderize it. The spices create that warm, rich taste we love in chicken tikka masala. You can also customize your chicken tikka masala. Here are some optional ingredients to consider: - Bell peppers or peas for added veggies - A squeeze of lemon juice for brightness - Chili powder for extra heat - Cashews for a crunchy topping Feel free to mix in these options based on your taste. They can make the dish even more exciting! To serve your chicken tikka masala well, consider these sides and garnishes: - Basmati rice to soak up the sauce - Naan bread for dipping - A simple cucumber salad for freshness - Extra cilantro for a pop of color These sides complement the dish and make your meal feel complete. Enjoy your cooking adventure with this savory Instant Pot Chicken Tikka Masala recipe! For the detailed cooking steps, check the Full Recipe. To start, grab a large bowl. In it, mix the chicken pieces with Greek yogurt, garam masala, cumin, turmeric, paprika, salt, and pepper. Make sure each piece is well-coated. This marinade gives the chicken great flavor and tenderness. Cover the bowl and let it sit for at least 30 minutes. If you have time, marinate it overnight in the fridge. This will make a big difference in taste. Now, set your Instant Pot to Sauté mode. Add the vegetable oil and let it heat up. Once hot, toss in the chopped onion. Sauté for about 3-5 minutes until it turns soft and translucent. Next, add the minced garlic and grated ginger. Cook for an additional minute until you smell that wonderful aroma. Now, it’s time for the marinated chicken. Add it to the pot along with all the marinade. Stir everything together with the onions. Pour in the crushed tomatoes and coconut milk. Mix well. Close the lid and seal the vent. Set the Instant Pot to Pressure Cook on high for 10 minutes. After it cooks, let the pressure release naturally for 5 minutes. Then, carefully do a quick release. When you open the lid, give the chicken tikka masala a good stir. Taste it and adjust the salt or spices if you want. If you like a thicker sauce, let it simmer on Sauté mode for another 5-10 minutes. Serve the tikka masala hot. Garnish with fresh cilantro. It goes great over basmati rice or with warm naan bread. For the full recipe, check back to get every delightful detail just right. Enjoy! To make the best chicken tikka masala, the marinade is key. Use fresh ingredients for the best flavor. Here are my tips: - Marinate Longer: Let the chicken sit in the marinade for at least 30 minutes. For a deeper taste, marinate overnight. - Use Greek Yogurt: It adds creaminess and helps tenderize the meat. - Adjust Spices: Feel free to adjust the spices. If you like heat, add more garam masala or cumin. Many cooks make simple mistakes that can change the dish. Here are some common pitfalls: - Rushing the Marinade: Don’t skip marinating time. It makes a big difference in flavor. - Overcrowding: Avoid overloading the Instant Pot. Cook in batches if needed. - Not Sealing the Lid: Make sure the lid is sealed before cooking. Otherwise, it won’t build pressure. You can boost the taste of your chicken tikka masala with a few simple tricks: - Fresh Herbs: Always use fresh cilantro for garnish. It brightens up the dish. - Add Lemon Juice: A squeeze of lemon juice before serving gives a fresh zing. - Experiment with Coconut Milk: Try different brands or even full-fat coconut milk for a creamier sauce. By following these tips, you will elevate your Instant Pot chicken tikka masala. For the full recipe, refer to the section above. Enjoy your cooking! {{image_2}} You can make this dish vegetarian by using cauliflower or chickpeas. These options soak up the rich flavors well. For a vegan twist, replace Greek yogurt with coconut yogurt. Use almond milk instead of coconut milk for a lighter sauce. This keeps the taste great while being plant-based. If you like heat, add more chili powder or cayenne pepper. Start with a pinch and taste as you go. For a milder version, skip the hot spices altogether. You can also balance out heat with a bit of sugar or honey. Adjusting spices lets you create the perfect dish for your taste buds. Try using shrimp or firm tofu instead of chicken. Shrimp cooks quickly and absorbs flavors nicely. Tofu will need to be pressed and cubed first. You can also use beef or lamb, but adjust the cooking time. This flexibility lets you enjoy chicken tikka masala with your favorite protein. For the full recipe, check out the link. To store leftovers, let the chicken tikka masala cool down first. Once cool, place it in an airtight container. This keeps it fresh for up to three days in the fridge. Make sure to label the container with the date. This helps you track how long it has been stored. When you are ready to enjoy leftovers, reheating is key. You can use the microwave or stovetop. If using the microwave, heat in short bursts. Stir in between to ensure even heating. On the stovetop, use low heat and stir often. Add a splash of water or coconut milk to keep it creamy. To freeze the chicken tikka masala, use a freezer-safe container. Portion it out for easy meals later. It can stay good for up to three months. When you are ready to eat, defrost in the fridge overnight. Then, reheat as described above. This keeps the flavors intact and the dish delicious. For the full recipe, check the detailed instructions. Yes, you can use frozen chicken. Just add a few extra minutes to the cooking time. Ensure the chicken is in smaller pieces for even cooking. The Instant Pot will still work well with frozen chicken. It saves time and is safe. If you need a substitute, try heavy cream or plain yogurt. Almond milk or soy milk also works, but they alter the taste. Choose a substitute based on your taste and dietary needs. Each option gives a different flavor and texture. To make Chicken Tikka Masala without an Instant Pot, use a large pot or skillet. Start by marinating the chicken as before. Sauté onions, garlic, and ginger in oil. Add the marinated chicken, crushed tomatoes, and coconut milk. Simmer on low heat for 30-40 minutes. Stir often until the chicken is cooked through. I love serving Chicken Tikka Masala over basmati rice. It soaks up the sauce well. You can also serve it with warm naan bread. Top it with fresh cilantro for a burst of flavor. Pair it with a side salad or yogurt for extra freshness. Enjoy it with friends for a cozy meal! This blog post covered how to make Chicken Tikka Masala in your Instant Pot. We discussed the key ingredients, cooking steps, and tips for the best results. You learned how to customize your dish and avoid common mistakes. We also shared ideas for storage and reheating. With this guide, you can create a delicious meal that fits your taste. Experiment and enjoy every bite of your Chicken Tikka Masala!

Savory Instant Pot Chicken Tikka Masala Recipe

Looking for a quick and tasty dinner? My Savory Instant Pot Chicken Tikka Masala is here to save the day!

Cinnamon sugar churros are simple to make and need just a few key ingredients. Here’s what you will need: - 1 cup water - 1/2 cup unsalted butter - 1 tablespoon sugar - 1/4 teaspoon salt - 1 cup all-purpose flour - 2 large eggs - 1 teaspoon vanilla extract - Vegetable oil (for frying) - 1/2 cup sugar (for coating) - 1 tablespoon ground cinnamon These ingredients work together to create a rich and tasty treat. The water and butter form a smooth dough. The sugar adds sweetness, while the salt enhances the flavor. All-purpose flour gives the churros their perfect texture. The eggs help bind the dough and add richness. Vanilla extract adds a nice flavor. The vegetable oil is for frying, giving the churros their crispy outside. Finally, the cinnamon sugar coating gives that classic churro taste. For the full recipe, you can refer to the recipe section above. Now that you have the ingredients ready, let's move on to making these delicious treats! First, grab a medium saucepan. Combine 1 cup of water, 1/2 cup of unsalted butter, 1 tablespoon of sugar, and 1/4 teaspoon of salt. Turn the heat to medium. Stir as the butter melts. Once it boils, remove from heat. Now, add 1 cup of all-purpose flour to the mixture. Stir until it forms a ball. Let it cool for about 5 minutes. Next, add 2 large eggs one at a time. Mix well each time before adding the next egg. This helps make the dough smooth. Then, blend in 1 teaspoon of vanilla extract. This adds a nice flavor to your churros. Now, heat vegetable oil in a deep pan or fryer. Aim for 375°F (190°C). This is the perfect temperature for frying. Take your churro dough and transfer it to a piping bag with a star-shaped nozzle. Pipe 4 to 6-inch strips of dough into the hot oil, cutting them off with scissors. Fry until golden brown, about 2-3 minutes on each side. Once done, remove the churros and drain them on paper towels. While they are still warm, coat them in a mix of 1/2 cup sugar and 1 tablespoon ground cinnamon. This will give your churros that classic sweet and spicy flavor. Enjoy your delicious creation! For the complete process, check out the Full Recipe. To make great churros, start by boiling the mixture correctly. Boil the water, butter, sugar, and salt until the butter melts. This step helps to create a smooth dough. Next, ensure your oil is at the right temperature, around 375°F (190°C). If the oil is too cold, your churros will soak up oil and become greasy. If it's too hot, they may burn before cooking through. Use a thermometer for accuracy. Coating churros in cinnamon sugar is simple and fun. Mix sugar and cinnamon in a shallow dish. While the churros are still warm, roll them in the mixture. This gives them a sweet, crunchy exterior. For a creative presentation, arrange the churros in a tall glass or a basket. You can sprinkle extra cinnamon sugar on top for flair. Serve with a warm chocolate dipping sauce for a treat that everyone will love. Want more ideas? Check out the Full Recipe for extra tips! {{image_2}} You can make your churros even more special. Try drizzling melted chocolate or caramel on top. This adds a rich, sweet layer that makes each bite more exciting. You can also play with spices. A hint of nutmeg or a dash of cayenne pepper can give your churros a unique twist. These flavors blend well with the warm cinnamon sugar coating. Churros taste great with different sauces. A creamy chocolate sauce is always a hit. It pairs well with the cinnamon sugar. If you want something fresh and different, try a spicy fruit salsa. The sweetness of the fruit with a bit of heat creates an exciting contrast. Both options elevate your churro experience. For the full recipe, check out the detailed instructions above. To store leftover churros, let them cool first. Place them in an airtight container. You can keep them at room temperature for one day. For longer storage, put them in the fridge. Churros can last up to three days in the fridge. When reheating, the goal is to keep them crispy. Preheat your oven to 350°F (175°C). Place the churros on a baking sheet. Heat them for about 5-10 minutes. This keeps them from getting soggy. Avoid using the microwave, as it makes them soft and chewy. You can freeze churro dough or cooked churros. To freeze dough, wrap it tightly in plastic wrap. Place it in a freezer bag and remove as much air as possible. Dough can be frozen for up to three months. For cooked churros, let them cool. Then, place them in a single layer on a baking sheet. Freeze them for about one hour. Once frozen, transfer them to a freezer bag. They can last up to three months in the freezer. To thaw, move the churros to the fridge overnight. For reheating, use the oven at 350°F (175°C) for 10-15 minutes. This method keeps them crispy and delicious. Enjoy your churros as if they were just made! How long do churros stay fresh? Churros taste best when fresh. They stay good for about one day at room temperature. If you keep them in a sealed bag, they can last up to two days. However, they may lose some crunch. Can I bake churros instead of frying? Yes, you can bake churros! Preheat your oven to 400°F (200°C). Pipe the dough onto a baking sheet lined with parchment paper. Bake for 20-25 minutes until golden. They won’t be as crispy as fried ones, but they will still be tasty. What's the best way to keep churros crispy? To keep churros crispy, store them in an open container. Avoid sealing them in a bag. Reheat them in an oven at 350°F (175°C) for a few minutes to restore the crunch. Can I use whole wheat flour for churros? You can use whole wheat flour for churros, but the texture will change. The churros may be denser and less airy. Use a mix of all-purpose and whole wheat for a better balance. What size piping nozzle is best for churros? A star-shaped piping nozzle works best for churros. A 1/2-inch or 1-inch opening gives the right shape. This creates the classic ridged look and helps them cook evenly. Where did churros originate? Churros likely originated in Spain. They are a popular treat in many Spanish-speaking countries. They are often enjoyed for breakfast or as a snack. Are churros served in different ways globally? Yes! In Mexico, churros are often served with chocolate sauce. In Spain, they might be dipped in thick hot chocolate. Every country adds its twist, making churros a truly global treat. Making churros involves simple ingredients and easy steps. We boiled water, butter, sugar, and salt. Then we mixed in the flour and eggs to create dough. Frying them at the right temperature gives churros their crispiness. With tips on serving and storage, you can enjoy churros fresh or later. Don't forget to try different flavors and dips. Churros are fun treats, and you can make them your own. Now, gather your ingredients and start frying your delicious churros. Enjoy every bite!

Cinnamon Sugar Churros Irresistible and Easy Recipe

Cinnamon sugar churros are a treat that combines crispy exteriors with soft, warm centers. If you’ve ever wanted to make

To make these no-bake cheesecake bites, you need a few simple ingredients. They are easy to find and fun to use. Here’s what you need: - 1 cup cream cheese, softened - 1/2 cup Greek yogurt - 1/3 cup powdered sugar - 1 teaspoon vanilla extract - 1/2 cup crushed graham crackers - 1/4 cup unsweetened cocoa powder (for chocolate version) - 1/4 cup mini chocolate chips (optional) - Fresh berries for topping These ingredients blend together to create a creamy and delicious treat. Cream cheese gives a rich flavor. Greek yogurt adds a nice tang, making each bite light. The powdered sugar sweetens the mix just right. You can choose to make a chocolate version by adding cocoa powder. If you love chocolate, don’t skip the mini chocolate chips! Fresh berries on top add color and freshness. This recipe is perfect for any occasion. You can whip it up in just 15 minutes. Then, let it chill in the fridge for two hours. For the full recipe, check out the instructions below! Start by taking a medium mixing bowl. Combine 1 cup of softened cream cheese and 1/2 cup of Greek yogurt. Use an electric mixer to blend them together until smooth. This will make your base creamy and rich. Next, add in 1/3 cup of powdered sugar and 1 teaspoon of vanilla extract. Mix again until everything is silky and well combined. If you want a chocolate twist, add 1/4 cup of unsweetened cocoa powder. Mix it in until the color changes and everything is evenly blended. This chocolate version is rich and delicious, perfect for chocolate lovers. Once your mixture is ready, it's time to shape the bites. Take a small amount of the mixture and roll it into a ball about 1 inch wide. Use your hands or a small cookie scoop for even size. Place each ball on a parchment-lined baking sheet. After forming all the bites, refrigerate them for at least 2 hours. This helps them set and makes them easier to eat. Before serving, top with fresh berries for a colorful finish. For the full recipe, check out the detailed instructions above. To get the best texture for your no-bake cheesecake bites, start with softened cream cheese. Softened cream cheese blends easily. It ensures a smooth and creamy mix. If your cream cheese is cold, it will be lumpy. Let it sit out for about 30 minutes before use. Mixing techniques matter too. Use an electric mixer at medium speed. This will help to fully combine the cream cheese and yogurt. Mix until the mixture looks silky and smooth. Avoid over-mixing, as this can incorporate too much air. Garnishing your cheesecake bites can make them pop. Fresh berries add a lovely touch. Try strawberries, blueberries, or raspberries. They add color and flavor. Place one berry on top of each bite for a fresh look. Serving on decorative platters can make a big impact. Use a colorful plate or a rustic wooden board. Arrange the bites in a circle or a line. This creates a fun and inviting display. To keep your leftover bites fresh, store them in the fridge. Use an airtight container. They will stay good for up to five days. Always place a piece of parchment paper between layers to avoid sticking. If you want to keep them longer, freezing is a great option. Just place them in a single layer on a baking sheet. Freeze until solid, then transfer to a freezer-safe bag. They can last for up to three months. When ready to eat, thaw in the fridge overnight. Enjoy your no-bake cheesecake bites anytime! {{image_2}} You can make your no-bake cheesecake bites even more exciting. Try adding different flavors. - Chocolate cheesecake bites: Simply add 1/4 cup of unsweetened cocoa powder to your mix. This gives a rich, chocolatey taste. You can also fold in mini chocolate chips for extra fun. - Fruit-flavored options: Add fruit to the cream cheese base. You can use fresh strawberries or lemon zest. Both give a fresh twist. For strawberry bites, blend in some pureed strawberries. For lemon, add lemon juice and zest for a zesty kick. You can also make these bites fit your diet. Here are some easy swaps: - Gluten-free alternatives for graham crackers: Use gluten-free cookies or almond flour instead of regular graham crackers. This keeps the bites tasty and safe for those with gluten allergies. - Low-sugar versions: Replace powdered sugar with a sweetener like stevia or erythritol. This way, you can enjoy the bites without too much sugar. Get creative with your cheesecake bites. Adding fun extras can change everything. - Incorporating nuts or dried fruit: Mix in chopped nuts like walnuts or pecans. Dried fruits like cranberries or raisins can also add a nice texture and flavor. - Experimenting with different toppings: Try different toppings like shredded coconut or crushed cookies. Each topping adds a unique twist to your bites. These variations let you enjoy no-bake cheesecake bites in many ways. You can check out the Full Recipe for all the details you need. Store your no-bake cheesecake bites in an airtight container. This keeps them fresh and tasty. They will last in the fridge for about five days. Enjoy them cold for the best flavor. To freeze the cheesecake bites, place them in a single layer on a baking sheet. After they freeze solid, transfer them to a freezer-safe bag or container. They can stay frozen for about three months. When you're ready to enjoy them, thaw the bites in the fridge overnight. Freezing may change the texture slightly, making them a bit softer. However, the flavor will still be just as delicious. For the best taste, serve them chilled. To make your cheesecake bites creamy, start with softened cream cheese. This helps blend it well. Use an electric mixer to mix the cream cheese and Greek yogurt. Mix until the texture is smooth. Gradually add powdered sugar and vanilla extract. This will keep the mixture silky. If you want a chocolate version, mix in cocoa powder well. Make sure there are no lumps for the best texture. Yes, you can make these bites ahead of time. I recommend preparing them the day before your event. They need at least 2 hours in the fridge to set. This way, they will be ready when you need them. Just keep them stored in an airtight container. This helps keep them fresh and tasty. Serve your cheesecake bites chilled for the best taste. Arrange them on a pretty platter. You can add fresh berries on top for a nice touch. A dusting of powdered sugar adds a special look. Pair them with a cup of tea or coffee. This makes for a delightful dessert experience. Absolutely! You can easily change the flavors of your cheesecake bites. For a fruit flavor, add pureed strawberries or lemon zest. You can also try using flavored yogurt. If you like chocolate, just add more cocoa powder. For a nutty taste, mix in some crushed nuts. The fun of these bites is that you can be creative! Check the Full Recipe for more ways to enjoy these treats. You now have a clear guide to making delicious cheesecake bites. Start by mixing cream cheese and Greek yogurt, add your favorite toppings, and chill your creations. Experiment with flavors and dietary needs to find what suits you best. Remember to store leftovers properly for future enjoyment. These bites are easy to customize and fun to share. With these tips and tricks, you can impress friends and family with your tasty treats. Enjoy making these cheesecake bites your way!

No-Bake Cheesecake Bites Simple and Tasty Treat

If you love sweet treats that are easy to make, you’re in the right place! These no-bake cheesecake bites are

To make a truly delightful veggie pizza, here are the key ingredients you need: - 1 ½ cups all-purpose flour - 1 teaspoon instant yeast - ½ teaspoon salt - ½ teaspoon sugar - ½ cup warm water (110°F/43°C) - 1 tablespoon olive oil - ½ cup pizza sauce - 1 cup shredded mozzarella cheese - ½ cup bell peppers (red, yellow, green), diced - ½ cup cherry tomatoes, halved - ¼ cup red onion, thinly sliced - 1 cup spinach leaves - 1 teaspoon dried oregano - 1 teaspoon garlic powder - Salt and pepper to taste These ingredients work together to create a perfect base, rich flavors, and fresh veggies. You can make your pizza unique by adding these optional ingredients: - Mushrooms, sliced - Zucchini, thinly sliced - Olives, sliced - Artichoke hearts, quartered - Fresh basil or arugula for garnish These extras allow you to play with flavors and textures. Feel free to mix and match based on your taste. When making a veggie pizza, it is good to know its nutritional value: - Calories per serving: Approximately 220 - Protein: 10 grams - Carbohydrates: 30 grams - Fat: 8 grams - Fiber: 3 grams This pizza can be a healthy choice, especially when you load it with fresh veggies. You can enjoy a delicious meal without guilt. For the full recipe, check the details above. To make your dough, gather these ingredients: - 1 ½ cups all-purpose flour - 1 teaspoon instant yeast - ½ teaspoon salt - ½ teaspoon sugar - ½ cup warm water (110°F/43°C) - 1 tablespoon olive oil In a mixing bowl, mix the flour, yeast, salt, and sugar. Slowly add the warm water and olive oil. Stir until a dough forms. Then, knead the dough on a floured surface for 5 to 7 minutes. The dough should feel smooth and elastic. After kneading, place the dough in a lightly oiled bowl. Cover it with a kitchen towel. Let it rise in a warm spot for about 1 hour. The dough should double in size. This step is key for a fluffy crust. Once the dough has risen, preheat your oven to 475°F (245°C). If you have a pizza stone, place it in the oven while it heats. Punch down the dough to remove air bubbles. Roll it out on a floured surface into a 12-inch circle. You can also shape it on a parchment-lined baking sheet. Next, spread the pizza sauce evenly over the dough. Leave a small border at the edges. Then, sprinkle shredded mozzarella cheese on top. Now it's time to add the veggies: - ½ cup bell peppers, diced - ½ cup cherry tomatoes, halved - ¼ cup red onion, thinly sliced - 1 cup spinach leaves Top it all with dried oregano, garlic powder, salt, and pepper for flavor. Transfer the pizza to the preheated oven or onto the hot pizza stone. Bake for 12 to 15 minutes. The crust should turn golden and the cheese bubbly. Let the pizza cool for a few minutes before slicing. Enjoy your tasty veggie pizza! For a full recipe, check here: [Full Recipe]. To make great dough, start with fresh ingredients. Use warm water, about 110°F, to help the yeast grow. Mix the flour, yeast, salt, and sugar in a bowl. Gradually add the warm water and olive oil. Knead the dough for 5-7 minutes on a floured surface. This step makes the dough smooth and elastic. After kneading, let it rise in a warm spot for one hour. This helps the dough double in size. A crispy crust brings joy to every bite. Preheat your oven to 475°F. If you have a pizza stone, place it in the oven while it heats. Rolling the dough thin also helps; aim for about ¼ inch thick. Use parchment paper for easy transfer if you don’t have a pizza stone. Bake the pizza for 12-15 minutes, until the crust is golden. This high heat creates a nice crunch. To make your pizza extra tasty, use quality ingredients. Start with a flavorful pizza sauce. You can add herbs like oregano or basil for a fresh taste. Garlic powder gives a nice kick. Don’t be shy with cheese; more cheese means more flavor! Layer your veggies evenly to ensure each slice has a variety of tastes. Sprinkle a bit of salt and pepper before baking to enhance all the flavors. For more tips and the full recipe, check the earlier sections. {{image_2}} You can mix and match veggies for your pizza. Some great options include: - Mushrooms - Zucchini - Artichokes - Olives - Broccoli Feel free to experiment! Each veggie adds its own flavor and texture. For a spicy kick, try jalapeños or banana peppers. If you want a sweeter taste, add roasted red peppers. The key is to balance flavors and colors. While pizza sauce is classic, you can use other sauces too. Here are some tasty options: - Pesto - Alfredo - BBQ sauce - Olive oil and garlic Each sauce brings a new twist. Pesto adds a fresh taste, while BBQ sauce gives a smoky flavor. Try different sauces to find your favorite. You can make your veggie pizza lighter without losing flavor. Here are some tips: - Use less cheese or a lower-fat option. - Add more veggies to replace cheese. - Use a cauliflower crust instead of traditional dough. - Skip heavy sauces and stick to tomato or olive oil. These changes can help you enjoy pizza while keeping it healthy. You get all the flavor without the extra calories. When you want to enjoy veggie pizza but don’t feel like cooking, try these top places. They offer some of the best veggie pizzas around. 1. The Green Slice They serve a fresh and colorful veggie pizza. The crust is thin and crispy. You’ll enjoy their homemade sauce and fresh toppings. 2. Veggie Haven This spot focuses on healthy options. Their veggie pizza is packed with seasonal vegetables. It’s a great choice for health-conscious eaters. 3. Pizza Garden Known for their garden-fresh toppings, they have many veggie options. You can customize your pizza with your favorite veggies. The atmosphere is fun and family-friendly. 1. Domino's They have a robust veggie pizza menu. You can choose multiple toppings, like mushrooms and green peppers. Their online ordering makes it easy. 2. Papa John's Their veggie pizza is loaded with fresh ingredients. You can add extra cheese or keep it light. The garlic sauce is a must-try for dipping. 3. Pizza Hut They offer a variety of veggie pizzas. The stuffed crust option is popular. It’s a treat if you want something cheesy and filling. - The Green Slice has a 4.8/5 rating. Customers love the fresh taste and friendly staff. - Veggie Haven scores a 4.5/5. People rave about the variety of toppings and healthy choices. - Pizza Garden holds a 4.7/5 rating. Diners appreciate the unique flavors and cozy vibe. These restaurants make great veggie pizzas. You can find something for every taste. If you're curious about making your own, check out the Full Recipe to get started! To store leftover veggie pizza, wrap it well in plastic wrap or foil. You can also place it in an airtight container. This keeps the pizza fresh for about 3-4 days in the fridge. If you want to keep it longer, freeze the slices. Just remember to separate them with parchment paper. This prevents them from sticking together. When ready to eat, reheat in the oven for the best taste and texture. Yes, you can make the dough ahead of time. After kneading, let it rise for about an hour. Then, punch it down and wrap it tightly in plastic. Store it in the fridge for up to 24 hours. If you want to save it longer, freeze the dough instead. Just thaw it overnight in the fridge before using. This gives you fresh dough without the last-minute rush. To make a gluten-free version, use gluten-free flour instead of all-purpose flour. Look for a blend designed for pizza dough. You also need to adjust the liquid, as gluten-free flours absorb moisture differently. Add a little more warm water if needed. Follow the same steps for the dough and toppings. You’ll enjoy a tasty pizza that everyone can eat! Check out the Full Recipe for all the details. We covered the key parts of making a great veggie pizza. First, we found essential and optional ingredients to create your perfect pie. Next, we walked through easy steps to prepare the dough, let it rise, and bake it to golden perfection. Then, we shared tips to get the ideal crust and flavor. Finally, we explored different toppings, sauces, and even where to grab a slice nearby. Making veggie pizza at home is fun and tasty. Now, it's your turn to try these recipes and make each meal special.

Delicious Veggie Pizza Easy Recipe for Everyone

Are you ready to savor a slice of pure veggie delight? With this easy recipe, I’ll show you how to

- 2 medium sweet potatoes, diced - 1 can (15 oz) black beans, drained and rinsed - 1 can (14 oz) diced tomatoes (with juices) - 1 cup vegetable broth - 1 medium onion, diced - Fresh cilantro or parsley for garnish - 2 tablespoons olive oil - 1 tablespoon chili powder - 1 teaspoon cumin - 1/2 teaspoon cayenne pepper Sweet Potato Black Bean Chili relies on simple yet bold flavors. The sweet potatoes provide a creamy base, while black beans add protein and texture. Diced tomatoes give the chili a juicy tang. The vegetable broth enhances the soup's depth. Use vegetable broth for a rich flavor without meat. Diced onion brings sweetness and aroma to the dish. The spices are key to this recipe. Olive oil helps to sauté the onions and spices, building a solid flavor base. Chili powder and cumin bring warmth and earthiness. Adjust the cayenne pepper to control the heat. These ingredients work together to create a comforting bowl of chili. For the full recipe, check the details in the cooking instructions. Start by heating olive oil in a large pot over medium heat. It should shimmer but not smoke. Then, add the diced onion. Sauté the onion for about five minutes until it becomes translucent. This step helps build a solid flavor base for your chili. Next, stir in the minced garlic, red bell pepper, and green bell pepper. Cook the mixture for about three to four minutes. You want the peppers to soften and release their sweet aroma into the pot. This adds a rich layer of flavor. Now, it’s time to spice things up. Add chili powder, cumin, smoked paprika, cayenne pepper, salt, and pepper. Stir well to coat the vegetables with the spices. Let it cook for about one minute. This helps the spices bloom and enhances their flavors. Mix in the diced sweet potatoes next. Ensure they’re thoroughly combined with the spices and vegetables. Then, pour in the black beans, diced tomatoes with their juices, and vegetable broth. Stir everything together until evenly mixed. This creates a hearty, comforting base for your chili. Bring the mixture to a gentle boil. Once boiling, reduce the heat to low, cover the pot, and let it simmer. Cook for about 25 to 30 minutes, or until the sweet potatoes are tender. Stir occasionally to prevent sticking. This slow cooking allows the flavors to meld beautifully. After simmering, taste the chili and adjust the seasoning as necessary. You can add more salt, pepper, or spices to your liking. Ladle the chili into bowls, garnish with fresh cilantro or parsley, and add any optional toppings like avocado slices or lime wedges. Enjoy your flavorful comfort bowl! For the full recipe, check the detailed instructions provided. To make your chili just right, cut sweet potatoes evenly. This helps them cook at the same time. Stir the chili occasionally while it simmers. This keeps it from sticking to the pot. Let your chili sit for a few hours or even overnight. This allows the flavors to meld beautifully. Taste the chili after it cooks. If you want more spice, add it little by little to find your perfect heat. Serve your chili in bright, colorful bowls. This adds fun to your meal. Top it with fresh herbs like parsley or avocado slices. These colorful toppings make your dish look even more inviting. {{image_2}} You can make this chili even better by adding protein. Cooked lentils are a great choice. They mix well and add a nice texture. If you prefer meat, ground turkey or beef works too. Just brown it before adding the other ingredients. This adds a savory depth to your chili. Spice can change everything in your chili! Adjust the cayenne pepper to match your heat level. If you love spice, add more. You can also try different chili powders, like chipotle. This will give your dish a smoky flavor. Play with spices until you find your perfect mix. Don't be afraid to get creative with veggies! Zucchini or corn can add fun textures. They also boost nutrition. You can swap black beans for other beans, like kidney or pinto beans. Each bean gives a unique taste and feel. Try these changes to make the dish your own. For the complete experience, check out the Full Recipe to explore all the delicious details! To keep your Sweet Potato Black Bean Chili fresh, store any leftovers in airtight containers. This helps lock in flavors and prevent spoilage. You can safely keep the chili in the fridge for up to 5 days. If you want to save some for later, freezing is a great option. Freeze the chili in individual portions for easy meals. It can be stored for up to 3 months. Just remember to label each container with the date. When you're ready to enjoy your chili again, reheat it on the stove over medium heat. Stir occasionally until it is heated through. If the chili seems too thick, add a splash of vegetable broth to loosen it up. Enjoy your comforting bowl of chili! Yes, this chili can be made in advance; it often tastes better the next day. The flavors blend well overnight. You can store it in the fridge and reheat when needed. Yes, all ingredients are naturally gluten-free. You can enjoy it without worry. It fits well in gluten-free diets. Add more cayenne pepper or diced jalapeños during cooking. Start with a little and taste as you go. This way, you can find the heat level you enjoy. Great options include cornbread, rice, or tortilla chips. Each adds a nice crunch or softness. You can dip or scoop, making it fun to eat. Yes, butternut squash or regular potatoes can be used as alternatives. Both will change the taste slightly but still keep it delicious. Popular choices include avocado, cheese, sour cream, or fresh lime juice. These toppings add creaminess and zest. Customize your bowl to your liking! This blog post covered how to make a delicious Sweet Potato Black Bean Chili. You learned about the key ingredients, spices, and step-by-step instructions to prepare it perfectly. With tips on enhancing flavor and variations to change things up, this chili can suit anyone's taste. Enjoy making this chili for your next meal. It's healthy, filling, and easy to store. Get creative with toppings and enjoy your tasty dish!

Sweet Potato Black Bean Chili Flavorful Comfort Bowl

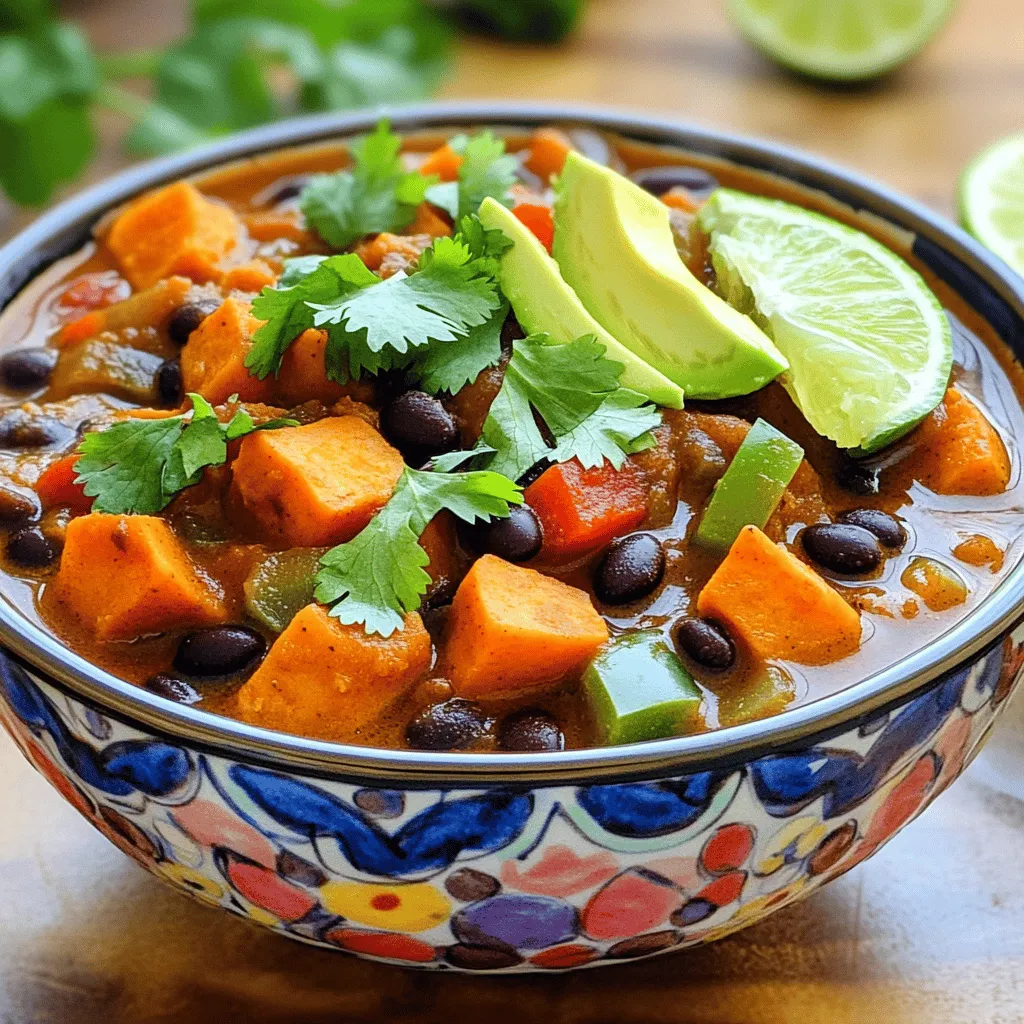
Warm up your chilly evenings with a bowl of Sweet Potato Black Bean Chili! This dish blends creamy sweet potatoes,

Older posts
Newer posts
← Previous Page1 … Page37 Page38 Page39 … Page56 Next →

dsad

© 2025 Lisa Dishes • Built with GeneratePress

Our Policies

  • Copyright Policy
  • Cookie Policy
  • GDPR Policy
  • Privacy Policy
  • Disclaimer
  • Terms Of Use

More Information

  • Home
  • About
  • Contact
  • Appetizers
  • Dessert
  • Dinner
  • Drinks
©2025, Lisa Dishes About Back To Top