Skip to content
DisclaimerTerms Of UseGDPR PolicyCookie Policy

Lisa Dishes

  • Home
  • Drinks
  • Appetizers
  • Dinner
  • Dessert
  • About
  • Contact
  • Privacy Policy
DisclaimerTerms Of UseGDPR PolicyCookie Policy

lisa

- 1 block (14 oz) firm tofu, pressed and cubed - 1/3 cup sweet chili sauce - 1 red bell pepper, sliced - 1 yellow bell pepper, sliced - 1 cup snap peas - 1 medium carrot, julienned - 3 green onions, chopped - 3 cloves garlic, minced - 1-inch piece ginger, grated I love using firm tofu for this stir fry. It holds its shape well and absorbs flavors nicely. Sweet chili sauce adds a perfect blend of sweetness and heat. Fresh vegetables bring color and crunch. - 2 tablespoons vegetable oil - 2 tablespoons cornstarch - 2 tablespoons soy sauce - 1 tablespoon sesame oil Using vegetable oil is great for high heat cooking. Cornstarch gives the tofu a crispy coat. Soy sauce deepens the flavor, while sesame oil adds a nutty touch. - Sesame seeds - Chopped green onions - Fresh herbs Garnishes can elevate your dish. Sesame seeds add a nice crunch. Chopped green onions provide freshness and color, while fresh herbs brighten the flavor. For the full recipe, check out the Sweet Chili Tofu Stir Fry. Start by pressing the tofu. This removes extra moisture. Use paper towels to soak up the water. Place the tofu on a plate and add a weight on top. Let it sit for about 15 minutes. After pressing, cut the tofu into cubes. Toss these cubes in cornstarch. This helps create a nice crust when cooked. Heat 1 tablespoon of vegetable oil in a large skillet over medium-high heat. Once the oil is hot, add the tofu cubes. Cook them for about 8-10 minutes. You want them to turn golden brown and crispy on all sides. This adds flavor and texture. Once they are perfect, remove the tofu from the skillet and set it aside. In the same skillet, add the remaining tablespoon of oil. Now, it’s time to add your fresh vegetables! Toss in sliced bell peppers, snap peas, and julienned carrot. Stir-fry these veggies for about 3-4 minutes. You want them to be tender but still crisp. This keeps the colors bright and the crunch alive. Next, add minced garlic and grated ginger to the skillet. Stir them in for about a minute. You want to bring out their flavors. After that, return the cooked tofu to the skillet. Pour in the sweet chili sauce and soy sauce. Toss everything together. Cook for another 2-3 minutes until everything is heated through. This mixes all the flavors nicely. Now, drizzle sesame oil over the stir fry. Mix it well for added flavor. Remove the skillet from heat. For a beautiful finish, garnish your stir fry with chopped green onions and a sprinkle of sesame seeds. This makes your dish look as good as it tastes. For the full recipe, check the earlier section. Tofu can be tricky to cook. To get it crispy, start by pressing it. This removes extra water. Once pressed, cut the tofu into cubes. Toss these cubes in cornstarch. This helps create a nice crunch. If you want to skip cornstarch, try using arrowroot powder. It can give a similar crispiness. You can also use breadcrumbs for a different texture. To boost the flavor, add some spices. Garlic powder and onion powder work well. You can also use a bit of smoked paprika for depth. If you don't have sweet chili sauce, mix honey with soy sauce. You can also blend sriracha with a bit of sugar for a spicy twist. The oil you use matters. Vegetable oil is great, but you can also try peanut oil. It has a nice flavor and high smoke point. Using a wok is best for stir-frying. It heats up quickly and cooks evenly. If you don’t have one, a large skillet works too. Just make sure it has high sides to prevent spills. For the full recipe, check the main section! {{image_2}} You can make this dish even heartier. Try adding tempeh or seitan for a boost. Both options provide great texture and flavor. Tempeh has a nutty taste. Seitan mimics meat well. You can also use beans like chickpeas or black beans. They add protein and fiber. Simply toss them in during the last few minutes of cooking. This keeps them warm without losing their shape. Seasonal veggies can change this stir fry's taste. In spring, consider asparagus or snap peas. During summer, add zucchini or bell peppers. Fall brings great choices like butternut squash. In winter, you can use broccoli or Brussels sprouts. Feel free to adjust based on what you have. You can even make a veggie-only meal. Just skip the tofu and double the vegetables. This keeps it light yet filling. If you need gluten-free options, use tamari instead of soy sauce. Tamari tastes similar and works well. For low-carb alternatives, you can skip rice or quinoa. Instead, use cauliflower rice for a lighter base. It's a great way to enjoy this dish without the carbs. These adjustments make the stir fry fit your diet while still being tasty. For the full recipe, visit the Sweet Chili Tofu Stir Fry section above. To store Sweet Chili Tofu Stir Fry, let it cool first. Place it in an airtight container. This keeps the meal fresh and tasty. You can store it in the fridge for about 3 to 5 days. Always check for any strange smells or colors before eating leftovers. You can freeze the stir fry if you have extra. Just put it in a freezer-safe container. Make sure to leave some space for the food to expand. It can last for about 2 to 3 months in the freezer. When you're ready to eat, thaw it in the fridge overnight. Reheat it in a pan over medium heat for the best results. This keeps the flavors strong and the texture nice. Batch cooking is a great way to save time. You can make a large batch of the stir fry ahead of time. Divide it into individual portions. This makes it easy to grab a meal when you're busy. Use containers that are safe for the microwave. This way, you can heat up your meal quickly. Always label your containers with the date. This helps you remember when you made it. If you want a vegan protein, try tempeh or seitan. Both options work well. Tempeh has a nutty flavor and a firm texture. It absorbs sauces well. Seitan is chewy and mimics meat. You can also use chickpeas or edamame for a different twist. Both add protein and fiber to your dish. Yes, you can use frozen vegetables! They save time and are often just as nutritious. When using frozen veggies, cook them a bit longer. This ensures they heat through and become tender. Add them to the skillet after the tofu. Stir-fry them for about 5-6 minutes. Check for that bright color and a tender-crisp bite. To add heat, try fresh chili peppers. Slice them thin and add them with the garlic. You can also use chili flakes for more spice. Mix them in with the sauces for even heat. If you like a kick, consider a splash of sriracha. Adjust the spice level to suit your taste! This blog post explored making a tasty tofu stir-fry. We covered essential ingredients, like firm tofu and fresh veggies, and cooking techniques for crispy results. Tips for flavor and dietary adjustments helped personalize your dish. Remember, proper storage keeps leftovers fresh. With these steps, you can enjoy a quick meal any day. Dive in, experiment, and make it your own! You’ll impress everyone with your tasty creations.

Sweet Chili Tofu Stir Fry Flavorful and Easy Meal

Looking for a quick and tasty meal? My Sweet Chili Tofu Stir Fry is the answer! With firm tofu, fresh

- 1 cup grated zucchini - 1 cup fresh blueberries - 1/2 cup granulated sugar - 1/4 cup brown sugar, packed - 1/3 cup vegetable oil - 1 large egg - 1 teaspoon vanilla extract - 1 cup all-purpose flour - 1 teaspoon baking powder - 1/2 teaspoon baking soda - 1/2 teaspoon ground cinnamon - 1/4 teaspoon salt - Chopped nuts or seeds - Chocolate chips When you gather these ingredients, you set the stage for a delightful muffin. Grated zucchini adds moisture, while blueberries bring sweetness. Using both white and brown sugar creates a nice balance of flavor. The vegetable oil keeps the muffins soft. Don't forget the egg and vanilla extract; they help bind everything together. In the dry section, the flour gives structure, while baking powder and soda help them rise. Ground cinnamon adds warmth, and salt enhances all the flavors. You can also play with optional add-ins. Nuts add crunch, and chocolate chips bring decadence. For the full recipe, check out the complete guide on making Zucchini Blueberry Muffins. 1. Preheat the oven to 350°F (175°C). This helps the muffins bake evenly. 2. Prepare the muffin tin by greasing it or lining it with paper muffin cups. This prevents sticking. 1. In a large bowl, combine the grated zucchini, granulated sugar, brown sugar, vegetable oil, egg, and vanilla extract. Mix well until everything is blended. 2. In a separate bowl, mix the all-purpose flour, baking powder, baking soda, ground cinnamon, and salt together. This keeps the dry ingredients evenly mixed. 1. Gradually add the dry mixture to the wet mixture. Stir gently until it is just combined. Do not overmix, or the muffins may be tough. 2. Fold in the blueberries carefully. This way, they stay whole and colorful in the muffins. 3. Spoon the batter into the prepared muffin tin, filling each cup about 2/3 full. This allows room for the muffins to rise. 4. Bake in the preheated oven for 18-20 minutes. Check for doneness by inserting a toothpick into the center. If it comes out clean, they are ready! 5. Once baked, remove the muffins from the oven. Let them cool in the tin for about 5 minutes. Then, transfer them to a wire rack to cool completely. These steps lead you to scrumptious zucchini blueberry muffins. Check out the Full Recipe for more details! To avoid overmixing, mix just until the flour disappears. Overmixing makes muffins tough. Stir gently when adding dry ingredients. This way, your muffins stay light and fluffy. When incorporating blueberries, fold them in carefully. You want even distribution without crushing them. If you’re using frozen blueberries, thaw and drain them first. This prevents extra moisture from making your batter soggy. Using fresh zucchini is key. Grate it right before use for the best flavor and moisture. If your zucchini is watery, squeeze out some juice before adding it. This keeps the texture perfect. To add moisture, consider adding a little yogurt or applesauce. Both enhance moisture without changing the taste. This makes your muffins even more delightful. For presentation, serve your muffins warm. A light dusting of powdered sugar makes them look fancy. Add a few fresh blueberries on top for color. Pair these muffins with a cup of coffee or tea. The flavors complement each other well. Enjoying these muffins fresh out of the oven is pure bliss. For more details, check the Full Recipe. {{image_2}} You can make your zucchini blueberry muffins even healthier. Start by using whole wheat flour instead of all-purpose flour. Whole wheat flour adds fiber and nutrients. This simple swap makes the muffins heartier and more filling. You can also reduce the sugar content. Try cutting the granulated sugar by half. This change keeps the muffins tasty while lowering calories. You can also use natural sweeteners like honey or maple syrup. These options add flavor with less refined sugar. Adding spices can bring new life to your muffins. Sprinkle in some nutmeg or ginger for warmth and depth. These spices complement the blueberries and zucchini well. They make each bite more interesting and flavorful. You can also incorporate citrus zest. Lemon or orange zest adds a bright note. Just a teaspoon can brighten the muffins and enhance the fruit flavors. This small change can elevate your muffin game. Using seasonal fruits can keep your muffins fresh and exciting. Swap blueberries for strawberries or raspberries in the summer. These fruits work well and keep the recipe light and fruity. You can adjust the nut types too. If you prefer walnuts or pecans, feel free to add them. Just chop them up and fold them into the batter. Nuts add crunch and healthy fats, making your muffins even better. For a complete recipe, check the Full Recipe link. Store your zucchini blueberry muffins at room temperature for up to three days. Just keep them in an airtight container. If you want them to last longer, put them in the fridge. This can keep the muffins fresh for about a week. However, they might become a bit dry in the fridge. So, I prefer the room temperature method. To freeze your muffins, let them cool completely first. Wrap each muffin in plastic wrap. Then, place them in a freezer bag or a tight container. Make sure to remove as much air as possible. You can freeze them for up to three months. When ready to eat, just take one out and let it thaw at room temperature. You can also warm it up in the oven or microwave for a cozy treat. These muffins can last up to three days at room temperature. If stored in the fridge, they can stay fresh for about a week. In the freezer, they can last for three months. Always check for any signs of spoilage before enjoying them. The freshness of your zucchini and blueberries can affect the shelf life too. Enjoy these tasty muffins as soon as you can for the best flavor. For the full recipe, check the section above. Can I use frozen blueberries? Yes, you can use frozen blueberries. Make sure to thaw them first. This helps keep the batter from turning blue. You can also use them straight from the freezer. Just add a minute to the baking time. How do I know when the muffins are done? You can check if the muffins are done by inserting a toothpick. If it comes out clean, your muffins are ready. They should also look golden brown on top. If they are still wet, bake them a bit longer. What if I don’t have zucchini? If you don’t have zucchini, you can use grated carrots. They add a similar moisture and sweetness. You can also try applesauce for a different taste and texture. Benefits of zucchini and blueberries Zucchini is low in calories and high in vitamins. It has fiber which helps digestion. Blueberries are full of antioxidants and vitamins too. They support heart health and boost your immune system. Together, they make a healthy choice for snacks or breakfast. How to adjust for dietary restrictions To make these muffins gluten-free, use almond or coconut flour. You can also swap sugars with honey or maple syrup. For vegan muffins, replace the egg with a flax egg. Mix one tablespoon of flaxseed meal with three tablespoons of water. Let it sit until it thickens. These muffins combine fresh zucchini and blueberries for a tasty treat. We covered key ingredients, mixing techniques, and baking tips. Remember to avoid overmixing for the best texture. Enjoy your muffins warm with coffee or tea. Feel free to experiment with flavors or healthier options. These easy muffins are perfect for any occasion. Store them properly to keep them fresh. Enjoy baking and sharing your delicious creations!

Zucchini Blueberry Muffins Tasty and Simple Delight

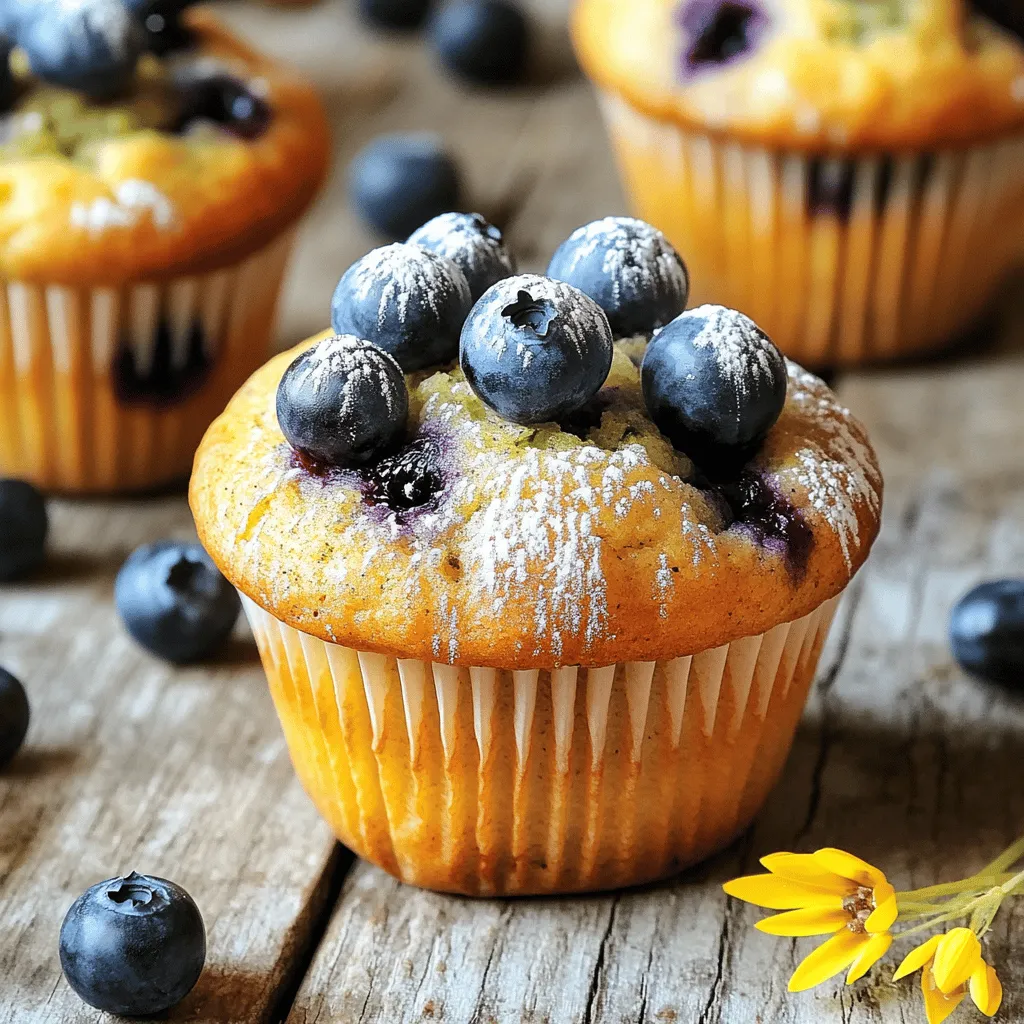
Looking for a tasty twist on muffins? Try my Zucchini Blueberry Muffins! This easy recipe combines fresh blueberries and flavorful

For the best Peach Pecan Crisp, use fresh, ripe peaches. Here’s what you need: - 4 cups ripe peaches, sliced (about 6 medium peaches) - 1 tablespoon lemon juice The lemon juice adds a nice tartness to balance the sweetness. Choose peaches that are slightly firm and fragrant for the best flavor. Next, gather these common pantry items: - 1/4 cup granulated sugar - 1 teaspoon vanilla extract - 1 teaspoon ground cinnamon - 1 cup rolled oats - 1/2 cup all-purpose flour - 1/2 cup packed brown sugar - 1/2 cup unsalted butter, melted - Pinch of salt These staples bring out the full flavor of the crisp. The oats and flour create a perfect topping. Want to enhance your Peach Pecan Crisp? Consider these toppings: - Vanilla ice cream - Whipped cream - A sprinkle of cinnamon These extras add a touch of warmth and sweetness. You can also serve it with a drizzle of caramel for a special treat. For the full recipe, be sure to check out the detailed instructions! To start, wash and slice your ripe peaches. You need about six medium peaches, which gives you four cups. In a large bowl, combine the sliced peaches with 1/4 cup of granulated sugar. This helps the peaches release their sweet juices. Add one tablespoon of lemon juice, one teaspoon of vanilla extract, and one teaspoon of ground cinnamon. Gently toss the mixture with your hands or a spoon until the peaches are coated. Then, pour this fruity mixture into a greased 9x13 inch baking dish. Now, let’s make the topping. In another bowl, mix together 1 cup of rolled oats, 1/2 cup of all-purpose flour, and 1/2 cup of packed brown sugar. Add 1/2 cup of chopped pecans for a nice crunch. Pour in 1/2 cup of melted unsalted butter and a pinch of salt. Stir everything until it looks like coarse crumbs. This will be the perfect topping for your peach filling. Preheat your oven to 350°F (175°C). Once your oven is ready, sprinkle the oat mixture evenly on top of the peach filling. Bake for 30-35 minutes, or until the topping turns golden brown and the peaches bubble. Keep an eye on it to avoid over-baking. After you take it out of the oven, let it cool for a few minutes. This helps the flavors settle. Serve warm, and don’t forget to check the Full Recipe for more details! Choose ripe peaches for the best flavor. They should feel soft but not mushy. Look for a sweet scent when you pick them. Wash the peaches well to remove any dirt. Slice them thinly for even cooking. If your peaches are not ripe, let them sit on the counter for a few days. This will help them soften and sweeten. To get that perfect crispy topping, mix your ingredients well. Blend the oats, flour, and nuts into a coarse crumb. You want the butter to coat everything evenly. This will help it crisp up nicely in the oven. Don’t skip the pinch of salt; it enhances the flavor. Bake until golden brown and bubbling to ensure a crunchy bite. Serve your Peach Pecan Crisp warm for the best taste. A scoop of vanilla ice cream makes it even better. You can also add a dollop of whipped cream on top. For a fun twist, try drizzling honey or maple syrup over it. This adds extra sweetness and flavor. Enjoy this delightful dessert with friends and family for a perfect finish to any meal. For the complete recipe, check the Full Recipe section. {{image_2}} You can switch up the peaches for other fruits. Try using ripe nectarines or juicy plums. Both fruits have a sweet flavor that works well. You can also use berries like blueberries or raspberries. They add a nice tartness that balances the sweetness. To make this dish gluten-free, swap the all-purpose flour. Use almond flour or oat flour instead. Both options will still give you a great texture. Just ensure that your oats are certified gluten-free. This way, everyone can enjoy the crisp! Pecans add a wonderful crunch, but you can use other nuts. Try walnuts or almonds if you prefer. You can also leave out the nuts for a nut-free option. The crisp will still be delicious and satisfying without them. After enjoying your Peach Pecan Crisp, let it cool down. Place any leftovers in an airtight container. This keeps it fresh for up to three days in the fridge. Make sure to cover it well to avoid drying out the topping. If you want to keep it longer, consider freezing. To reheat your Peach Pecan Crisp, preheat your oven to 350°F (175°C). Place the crisp in an oven-safe dish. Cover it with foil to keep it moist. Heat for about 15-20 minutes. If you prefer a microwave, warm a single serving for about 30-45 seconds. Enjoy it warm for the best taste! You can freeze Peach Pecan Crisp for up to three months. Before freezing, let it cool completely. Wrap it tightly with plastic wrap, then aluminum foil. This helps prevent freezer burn. When you’re ready to enjoy it, thaw it in the fridge overnight. Reheat it as mentioned above. Now, you can savor this delightful treat anytime! For the full recipe, check the earlier section. Yes, you can use canned peaches. Just drain them well before use. Canned peaches may be softer, so adjust baking time. Fresh peaches provide a firmer texture and brighter flavor. I suggest using fresh when they are in season for the best taste. To make Peach Pecan Crisp vegan, swap the butter for a plant-based alternative. You can use coconut oil, vegan butter, or applesauce. Ensure the sugar is vegan, as some sugars are processed with bone char. This way, you keep all the great flavors without animal products. I love serving Peach Pecan Crisp warm. Add a scoop of vanilla ice cream or a dollop of whipped cream on top. You can also sprinkle some extra pecans for crunch. Serve it in individual bowls for a fun touch. Peach Pecan Crisp stays fresh for about 3 to 5 days in the fridge. Make sure to cover it well to avoid drying out. The topping may lose some crunch over time, but the flavors will still be delicious. Absolutely, you can double the recipe! Just use a larger baking dish to fit all the ingredients. Keep an eye on the baking time, as it may take longer. Check for that golden topping and bubbling peaches to know when it's done. For the full recipe, refer back to the earlier section! In this blog post, we explored how to make a delicious Peach Pecan Crisp. We covered fresh ingredients, pantry staples, and optional toppings. You learned step-by-step instructions for preparing the peach filling, creating the crisp topping, and baking it perfectly. We shared tips for the best peaches, achieving the ideal texture, and serving suggestions. Remember, you can customize this recipe with different fruits and dietary needs. Follow the storage tips for leftovers to enjoy later. Now, get ready to impress everyone with your tasty dessert. You can truly make this recipe your own.

Peach Pecan Crisp Delightful and Easy Recipe

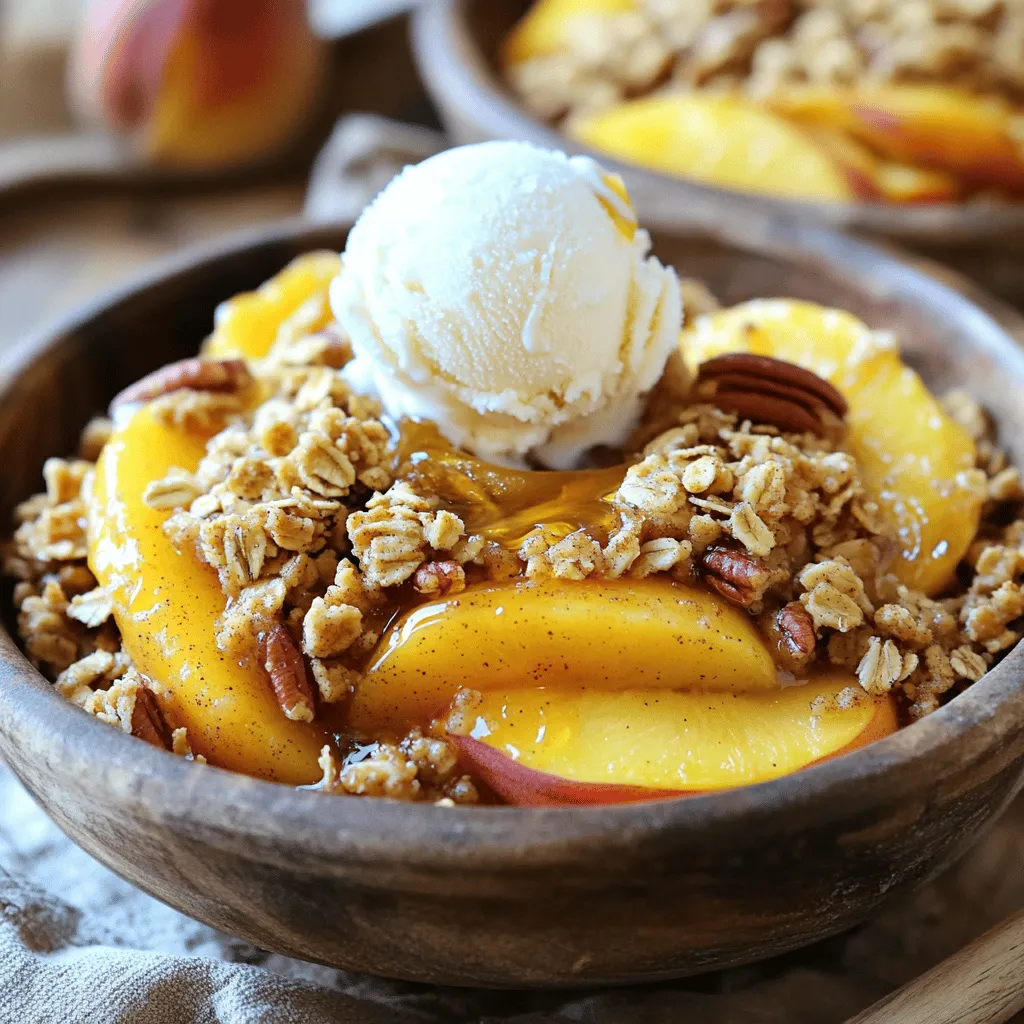
If you crave a sweet and crunchy dessert, you’ll love this Peach Pecan Crisp! This easy recipe combines juicy peaches

Cucumber mango salsa brings bright flavors and a refreshing crunch. Here’s what you need: - Ripe mango, diced - Cucumber, peeled and diced - Red bell pepper, finely chopped - Small red onion, finely chopped - Jalapeño, minced (optional for spice) - Fresh cilantro, chopped - Lime juice - Olive oil - Salt and pepper Each ingredient plays a role in creating a balanced taste. The mango adds sweetness, while the cucumber gives a crisp bite. The red bell pepper brings color and extra flavor. The red onion adds a slight sharpness, and the jalapeño can heat things up if you like spice. Fresh cilantro adds an herbaceous note, and lime juice brightens everything. Olive oil ties it all together, adding richness. Use fresh ingredients for the best results. The quality of your produce impacts the final dish. If possible, choose organic options. Always wash your fruits and veggies well before use. For the full recipe, you can check the details, but remember, the key to this salsa is freshness! First, let’s get our mango and cucumber ready. For the mango, slice it in half, remove the pit, and scoop out the flesh. Then, dice it into small cubes. Next, peel the cucumber and dice it the same way. This gives a nice crunch. Now, let's chop the red bell pepper and onion. Cut the bell pepper in half, remove the seeds, and finely chop it. For the onion, peel it, and then chop it into small pieces. This adds a nice depth to our salsa. If you like a bit of spice, you can prepare the jalapeño. First, cut it in half and remove the seeds. Then, mince it into tiny pieces. Be careful! You can wear gloves if your hands are sensitive to heat. In a large mixing bowl, combine the diced mango, cucumber, chopped red bell pepper, and onion. If you’re using jalapeño, add that too. Then, sprinkle in the chopped cilantro. This herb gives a fresh taste. Next, we need to make the dressing. In a small bowl, mix the lime juice, olive oil, salt, and pepper. Whisk it until everything blends well. Pour this dressing over the salsa mixture. Gently toss everything together. Make sure all the pieces get coated in the dressing. Now it’s time to blend the flavors. Toss the salsa gently again, so all ingredients mix well. This step helps the flavors combine beautifully. Cover the bowl with plastic wrap and refrigerate it for at least 30 minutes. This waiting time allows the flavors to meld. The longer it sits, the better it tastes. Enjoy your fresh and zesty Cucumber Mango Salsa! For the full recipe, check the details above. To make cucumber mango salsa shine, you need to adjust its flavors. Lime juice brings bright acidity. Start with the juice of one lime, then taste. You can add more if needed. Lime keeps the salsa fresh and zesty. For a spicy kick, consider adding jalapeño. If you like heat, use a whole pepper. If you prefer mild, use half. Chop it finely and mix it in. This spice adds depth to the dish without overwhelming it. Crispness is key in this salsa. Choose a fresh cucumber and peel it. Dice it into small cubes for the perfect bite. The cucumber should snap when you bite it. This crunch balances the soft mango. Keep the ingredients fresh by chopping them just before mixing. If you let them sit too long, they can lose their vibrancy. Freshness keeps the colors bright and the flavors lively. Serving matters as much as taste. Use a colorful bowl to hold your salsa. A bright dish enhances its appeal. Garnish with cilantro leaves and add lime wedges. This adds a nice look and extra flavor. For serving, tortilla chips are a classic choice. You can also use this salsa as a topping for grilled fish. It brings a burst of flavor and color to any meal. For the full recipe, check out the details above. {{image_2}} You can switch up ingredients in cucumber mango salsa for fun. Try adding avocado for a creamy touch. It pairs well with the sweet mango and crunchy cucumber. You can also use different herbs. Fresh mint gives a refreshing flavor. This change brightens the salsa and adds a new twist. Want more heat? Try using different peppers. You can add serrano or habanero peppers for a spicy kick. Each pepper adds its unique flavor. You can also experiment with spices like cumin or smoked paprika. These spices give depth to the salsa and make it even more exciting. Cucumber mango salsa is very versatile. You can serve it with various dishes. It goes great with grilled chicken or fish. You can also use it as a topping for tacos or burritos. Enjoy it with tortilla chips for a tasty dip. It brings freshness to any meal, making it a fun addition. For the full recipe, check out the Crisp & Zesty Cucumber Mango Salsa 🥭🥒 above! To keep your cucumber mango salsa fresh, refrigerate any leftovers right away. Store the salsa in an airtight container. This helps lock in flavor and keeps it crisp. I recommend using glass containers for the best results. They do not absorb odors and are easy to clean. In the fridge, your salsa will last about three to five days. If you want to keep it longer, consider freezing it. Freeze the salsa in small portions. This way, you can take out just what you need. When thawed, the salsa may lose some crunch, but it remains tasty. Check for signs that your salsa has gone bad. Look for changes in color or an off smell. If the salsa is watery or has mold, it's time to toss it. To prevent spoilage, make sure to keep it airtight in the fridge. Always use clean utensils when serving to avoid contamination. To add heat, use jalapeño or other peppers. You can also add hot sauce for extra kick. Start small, then taste and adjust. This way, you control the spice level. I like to remove the seeds for less heat, but keep some if you want it spicy. You can even mix in some red pepper flakes. Yes, you can make this salsa ahead of time. It tastes great after chilling for 30 minutes. If you want to prep it earlier, store it in the fridge for up to 24 hours. Just remember to add the lime juice right before serving. This keeps the colors bright and fresh. You can serve cucumber mango salsa in many ways. It tastes great with tortilla chips as a dip. Use it on tacos or grilled chicken for added flavor. I love to top fish tacos with this salsa. You can also enjoy it on a fresh salad or as a side for grilled meats. Cucumber and mango bring many health benefits. Cucumbers are low in calories and high in water, keeping you hydrated. They also have vitamins K and C. Mangoes are rich in vitamins A and C, which boost your immune system. Together, they make a tasty and healthy snack. This salsa is both refreshing and nutritious. Enjoy it guilt-free! For the full recipe, check out the Crisp & Zesty Cucumber Mango Salsa. This blog post provides a clear guide to making cucumber mango salsa. You learned about key ingredients, how to prepare and mix them, and tips to enhance flavor. I also shared variations to keep it fresh and exciting. Remember, using fresh ingredients makes a big difference. The right storage ensures your salsa stays tasty longer. Enjoy experimenting with flavors and serving styles. This dish is a refreshing addition to any meal, perfect for sharing with friends or enjoying on your own.

Cucumber Mango Salsa Fresh and Flavorful Delight

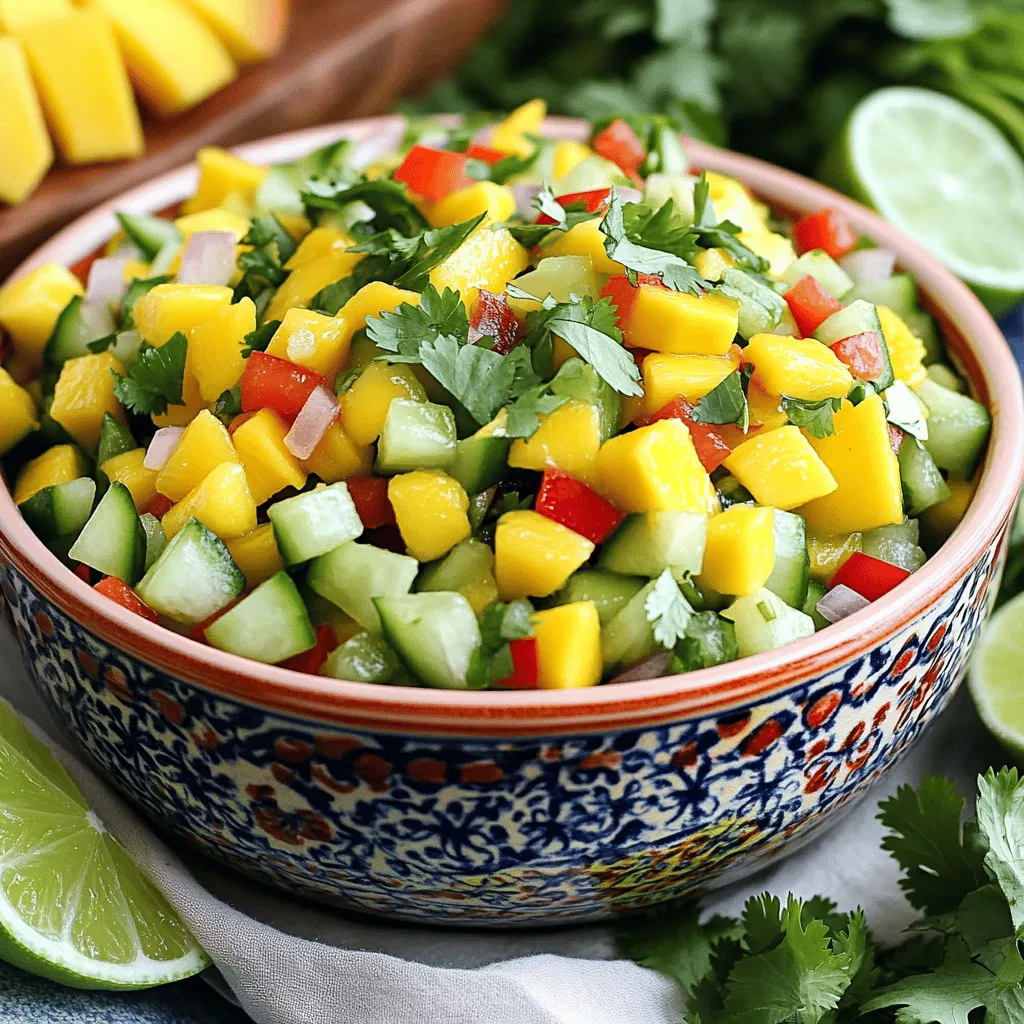
Are you ready to brighten up your next meal? Cucumber Mango Salsa is fresh, colorful, and bursting with flavor. With

To make Baked Zucchini Parmesan Casserole, gather these ingredients: - 4 medium zucchinis, sliced thinly - 2 cups marinara sauce - 1 cup ricotta cheese - 1 cup grated Parmesan cheese - 1 cup shredded mozzarella cheese - 2 cloves garlic, minced - 1 teaspoon dried basil - 1 teaspoon dried oregano - Salt and pepper to taste - 1 tablespoon olive oil - 1 cup breadcrumbs - Fresh basil leaves for garnish You can adjust these ingredients based on your taste. If you like, use low-fat ricotta cheese. For a richer flavor, try using fresh mozzarella. If you do not have marinara sauce, any tomato-based sauce works well. You can also swap zucchinis for eggplant or yellow squash. To keep your zucchinis fresh, store them in the fridge. Keep them unwashed in a paper bag. They stay crisp for about a week. Always choose firm zucchinis with smooth skin. Avoid soft or wrinkled ones. For the best flavor, use fresh herbs. Fresh basil enhances the dish’s aroma and look. Enjoy this recipe for a delicious meal that packs a punch! Check the Full Recipe for more details. First, gather your ingredients. You will need zucchinis, marinara sauce, ricotta, Parmesan, mozzarella, garlic, herbs, and breadcrumbs. Start by preheating your oven to 375°F (190°C). Next, slice the zucchinis thinly. Sprinkle them with salt and let them sit for about 15 minutes. This helps remove extra water. Afterward, pat them dry with paper towels. While the zucchinis sit, chop the garlic. Heat olive oil in a skillet over medium heat. Add the garlic and cook it for about 1 minute until it smells great. Add the zucchinis to the skillet. Cook them for 5-7 minutes until they are a bit soft but still firm. Turn off the heat and set them aside. In a separate bowl, mix the ricotta cheese, half of the Parmesan cheese, dried basil, dried oregano, and a pinch of salt and pepper. This mixture adds creaminess and flavor to the dish. Now it’s time to build the layers in the dish. Start with a 9x13 inch baking dish. Spread a thin layer of marinara sauce on the bottom. This keeps the casserole moist. Layer half of the sautéed zucchini evenly over the sauce. Then, take half of the ricotta mixture and spread it over the zucchini. Add another layer of marinara sauce on top. Repeat this process. Add the remaining zucchini, followed by the rest of the ricotta mixture, and more marinara sauce. For the final layer, sprinkle the shredded mozzarella cheese over the top. Add the rest of the Parmesan cheese and breadcrumbs for a nice crunch. Cover the baking dish with aluminum foil. Bake it in the preheated oven for 25 minutes. After that, remove the foil and bake for another 15 minutes. You want the top to be golden and bubbly. Once it’s done, let the casserole cool for about 10 minutes before serving. Enjoy this tasty baked zucchini Parmesan casserole with fresh basil on top! For the full recipe, check the earlier section. To make your baked zucchini parmesan casserole shine, start with fresh zucchini. Select firm zucchinis with smooth skin. These have the best flavor and texture. Always slice them thinly to ensure even cooking. I recommend salting the zucchini before cooking. This step pulls out extra moisture and intensifies the flavor. Use high-quality marinara sauce for a rich taste. You can also add red pepper flakes for a bit of heat. One common mistake is not removing enough moisture from the zucchini. If you skip salting, your casserole may turn soggy. Another mistake is overcooking the zucchini. You want it tender but not mushy. Also, be careful with layering. If you don’t layer properly, flavors won’t mix well. Lastly, don’t forget to cover the casserole with foil while baking. This helps keep the dish moist during the first bake. For serving, let the casserole cool for about ten minutes. This cooling time helps it hold its shape. Garnish with fresh basil leaves to add color and a fresh taste. I like to serve it alongside a simple green salad or crusty bread. This pairs well with the rich flavors of the casserole. For a fun touch, use a nice serving dish to highlight the layers. It makes your meal feel extra special. You can find the full recipe and more ideas to enjoy this dish! {{image_2}} If you want to make this dish gluten-free, swap the breadcrumbs with gluten-free ones. You can use crushed gluten-free crackers as well. They will still give you that nice crunch on top. Make sure to check your marinara sauce for hidden gluten. Many brands offer gluten-free options. You can boost nutrition by adding more veggies. Try bell peppers, mushrooms, or spinach. These add great flavor and color. Just sauté them with the zucchini for the best results. You can also layer in sliced tomatoes or eggplant for extra variety. Cheese is key in this casserole, but you have choices! If you want a lighter option, use part-skim ricotta and mozzarella. For a stronger flavor, try using goat cheese or feta. You can also mix in some cheddar if you like a sharper taste. Each cheese brings its own flair to the dish. Check the Full Recipe for the original cheese mix. Store any leftover Baked Zucchini Parmesan Casserole in an airtight container. I recommend using glass or plastic containers. Make sure to let it cool down first. This keeps it fresh for up to three days in the fridge. If you want to keep it longer, freezing is a great option. To reheat, place the casserole in the oven at 350°F (175°C). Cover it with foil to prevent drying out. Heat for about 20 minutes or until warm. You can also use a microwave. Heat it in short bursts, checking often to avoid overheating. You can freeze the casserole before or after baking. If freezing before baking, wrap it tightly with plastic wrap and then foil. It will stay fresh for three months. When ready to bake, thaw it overnight in the fridge. Then, bake as directed in the Full Recipe. If freezing after baking, let it cool completely first. To make this dish vegan, replace dairy cheese with vegan options. Use vegan ricotta and mozzarella. Nutritional yeast can add a cheesy flavor too. For the Parmesan, try using a store-bought vegan substitute or make your own with nuts and nutritional yeast. Also, check the marinara sauce for animal products. Many brands offer vegan sauces. Yes, you can prepare the casserole ahead. Assemble it up to the baking step. Cover it well and refrigerate for up to 24 hours. When ready to bake, remove it from the fridge. Let it sit at room temperature for about 30 minutes before baking. This helps it cook evenly. This casserole pairs well with many sides. A simple green salad adds freshness. Crusty bread is great for scooping up the casserole. Roasted vegetables can also complement the flavors. For a heartier meal, serve it with pasta or rice. Enjoy experimenting with your favorite sides! For the complete recipe, check out the Full Recipe. In this post, we explored the key ingredients, step-by-step instructions, and helpful tips for making Baked Zucchini Parmesan Casserole. I shared suggestions to vary the dish and provided storage advice. This casserole is simple, tasty, and perfect for any meal. You can adjust it to fit your taste, dietary needs, and freshness for leftovers. Now, you have all the tools to create a delicious dish that your family will love. Enjoy cooking and sharing this delightful casserole!

Baked Zucchini Parmesan Casserole Flavorful Delight

Are you ready to enjoy a tasty dish that’s both easy to make and healthy? Baked Zucchini Parmesan Casserole is

For the peach cheesecake smoothie, you need: - 2 ripe peaches, pitted and chopped - 1 cup Greek yogurt - 1/2 cup cream cheese, softened - 1/2 cup milk (dairy or non-dairy) - 2 tablespoons honey or maple syrup (adjust to taste) These main ingredients create a creamy and fruity base. Ripe peaches add natural sweetness and flavor. Greek yogurt gives a rich texture and protein. Cream cheese adds that cheesecake taste, while milk helps blend everything smoothly. The sweeteners round it all out. You can enhance your smoothie with these extras: - 1 teaspoon vanilla extract - 1/4 teaspoon ground cinnamon - 1 cup ice cubes Adding vanilla extract brings warmth and depth. Ground cinnamon adds a hint of spice that pairs well with peaches. Ice cubes give your smoothie a frosty texture, making it refreshing. You can mix and match these options based on your taste. For the complete recipe, check the Full Recipe section. - Peel and chop the peaches. - Gather all ingredients. First, start with the peaches. If you like, peel them for a smoother texture. Next, chop the peaches into small pieces. This helps them blend better. Set the chopped peaches aside. Now, gather the rest of your ingredients. You will need Greek yogurt, cream cheese, milk, honey or maple syrup, vanilla extract, ground cinnamon, and ice cubes. Having everything ready makes the next steps easy. - Combine ingredients in blender. - Blend until smooth. Place all your ingredients in a blender. Add the chopped peaches, Greek yogurt, cream cheese, and milk. Then, include the honey or maple syrup. Don’t forget the vanilla extract and ground cinnamon! Blend the mixture on high speed. You want it to be smooth and creamy. If needed, stop and scrape down the sides. This ensures everything blends well. - Adjust consistency and sweetness. - Serve in chilled glasses. Next, add the ice cubes to the blender. Blend again until thick and frosty. If your smoothie is too thick, add a splash of milk to reach your perfect consistency. Taste your smoothie and adjust the sweetness if needed. Add more honey or syrup, then blend briefly. Now, pour your smoothie into chilled glasses. For extra flair, top with whipped cream and a slice of fresh peach. Enjoy your Peach Cheesecake Smoothie! For a detailed guide, check out the Full Recipe. You can make this smoothie your own! Here are some fun ways to switch it up: - Experiment with different sweeteners: Try agave syrup or stevia for a unique twist. - Add other fruits for variation: Toss in berries or bananas for added flavor and nutrients. Blending can make or break your smoothie. Keep these tips in mind: - Use frozen peaches for a thicker texture: Frozen fruit adds creaminess without needing ice. - Scrape down sides for even blending: This ensures every bit mixes well for a smooth finish. Make your smoothie even more delightful with these serving ideas: - Garnish ideas: Top with whipped cream and a slice of peach for a pretty look. - Best time to enjoy your smoothie: Sip it as a refreshing breakfast or snack on a hot day. Check out the Full Recipe for all the tasty details and get blending! {{image_2}} You can easily make a dairy-free peach cheesecake smoothie. Just swap Greek yogurt for non-dairy yogurt. Use almond, coconut, or oat milk instead of regular milk. This change keeps the taste creamy while being kind to your tummy. To make your smoothie extra filling, add a scoop of protein powder. You can also stir in some nut butter, like almond or peanut. Both options add a nutty flavor and make this smoothie a perfect post-workout snack. Want to sneak in more nutrients? Toss in a handful of spinach or kale. These greens blend well and add vitamins without changing the sweet peach flavor. You get a health boost and still enjoy a tasty treat. For the full recipe, check out the details above. You can keep your peach cheesecake smoothie in the fridge for up to 24 hours. Store it in an airtight container to avoid any odors from other foods. The longer it sits, the more it may separate. Just give it a good shake or stir before enjoying it again. Yes, you can freeze leftovers! Pour the smoothie into ice cube trays or freezer-safe bags. It can last for up to three months. When you're ready to enjoy it again, just blend the frozen cubes with a splash of milk for a quick treat. To keep your smoothie tasting great, follow these tips: - Use fresh peaches: The riper, the better for flavor. - Store immediately: Put it in the fridge right after making. - Avoid adding toppings: Keep any toppings separate until serving. - Re-blend if needed: If it separates, blend it again for a smooth texture. These steps will help you enjoy that delicious peach cheesecake taste every time! This recipe makes two servings. Each smoothie is rich and filling. You can share it or enjoy it all yourself. If you need more, just double the ingredients. Yes, you can use frozen peaches. They blend well and give a nice texture. Frozen peaches also make the smoothie colder and thicker. If using frozen peaches, you might need less ice. Just adjust based on your taste. A Peach Cheesecake Smoothie offers many health benefits. - Peaches are low in calories and high in vitamins A and C. They boost skin health and support your immune system. - Greek yogurt is packed with protein. It helps build and repair muscles, plus it aids digestion. - Cream cheese adds flavor but also contains calcium, which is good for bones. - Honey or maple syrup provides natural sweetness and antioxidants. - Cinnamon can help lower blood sugar and has anti-inflammatory properties. This smoothie is a tasty way to enjoy healthy ingredients. It can be part of a balanced diet and is a great snack or breakfast option. For the full recipe, check out the details provided earlier. This article covered a tasty Peach Cheesecake Smoothie that you can easily make. We explored the main ingredients like ripe peaches, Greek yogurt, and sweeteners. You learned the step-by-step process to create it and also picked up tips for custom flavors. I shared variations for different diets and how to store your smoothie. Now, go ahead and try making this smoothie. It will be a fresh treat that you’ll enjoy!

Peach Cheesecake Smoothie Tasty and Healthy Delight

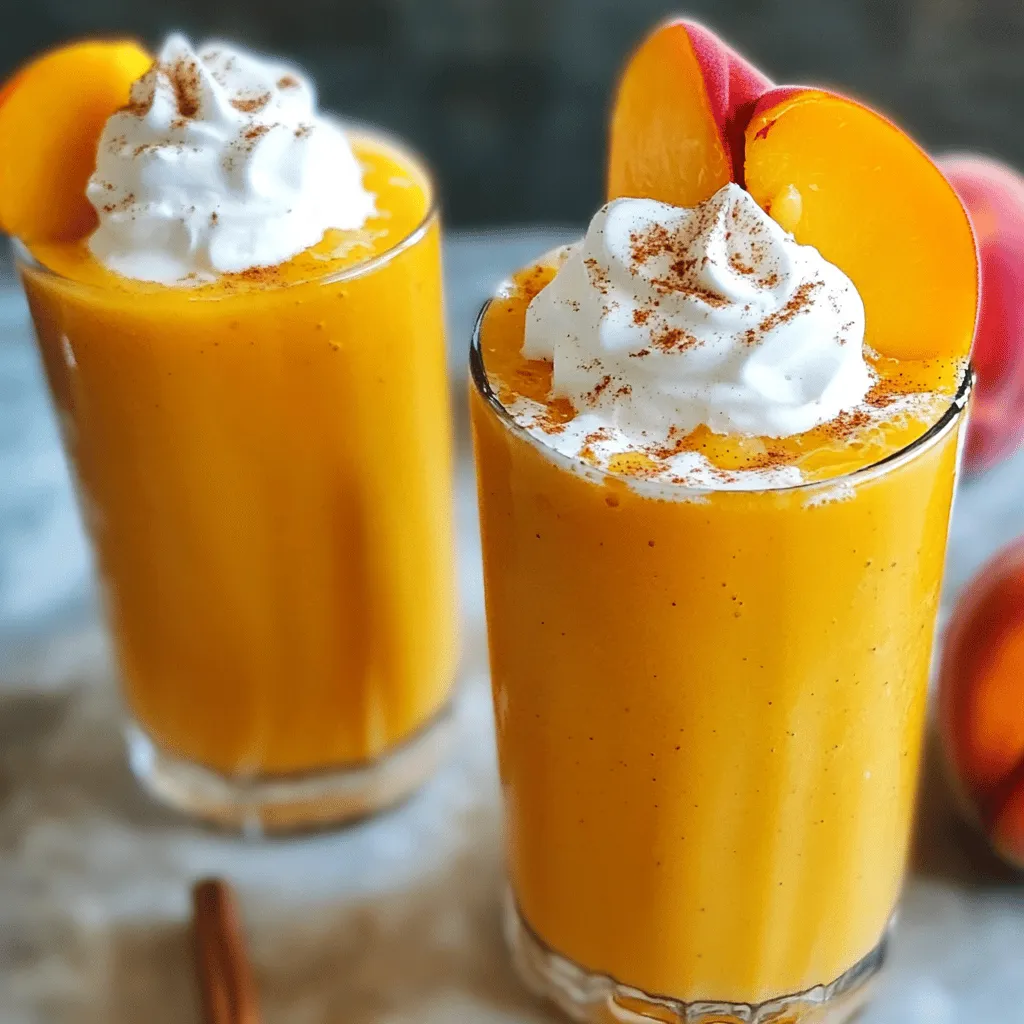
Are you craving a delicious treat that’s also good for you? The Peach Cheesecake Smoothie is your answer! This creamy

For this delicious Zucchini Carrot Bread, gather the following ingredients: - 2 cups grated zucchini (about 2 medium zucchinis) - 1 cup grated carrots (about 2 medium carrots) - 1 ½ cups all-purpose flour - 1 teaspoon baking soda - 1 teaspoon baking powder - ½ teaspoon salt - 1 teaspoon ground cinnamon - ½ teaspoon ground nutmeg - ¾ cup granulated sugar - ½ cup brown sugar, packed - 3 large eggs - ½ cup vegetable oil - 1 teaspoon vanilla extract - ½ cup chopped walnuts or pecans (optional) - ½ cup raisins or dried cranberries (optional) Grate the zucchini and carrots using a box grater. Make sure to drain the zucchini and carrots. This step is key to avoid sogginess. You can also add optional ingredients. Walnuts or pecans give a nice crunch. Raisins or dried cranberries add sweetness. Feel free to mix and match based on your taste! This loaf serves about 10 people. Each slice has roughly 230 calories. It contains: - 5g protein - 11g fat - 30g carbs Zucchini and carrots are packed with vitamins. They provide Vitamin A, Vitamin C, and potassium. These nutrients boost your immune system and support vision. Plus, zucchini has a lot of water, which keeps you hydrated. Carrots are great for healthy skin and eyes. This bread is not just tasty; it’s good for you too! First, let's prepare the zucchini and carrots. Grate 2 medium zucchinis and 2 medium carrots using a box grater or food processor. After grating, place them in a clean kitchen towel. Squeeze the towel to remove excess moisture. This step is key to keeping your bread from being soggy. Next, in a large bowl, mix the dry ingredients. Combine 1 ½ cups of all-purpose flour, 1 teaspoon of baking soda, 1 teaspoon of baking powder, ½ teaspoon of salt, 1 teaspoon of ground cinnamon, and ½ teaspoon of ground nutmeg. Whisk these together until well blended. In another bowl, mix the wet ingredients. Whisk together ¾ cup of granulated sugar, ½ cup of packed brown sugar, 3 large eggs, ½ cup of vegetable oil, and 1 teaspoon of vanilla extract until smooth. Now, slowly add the wet mixture to the dry mixture. Stir gently until just combined. Avoid overmixing, as this can make the bread tough. Pour the batter into your greased loaf pan. Smooth the top with a spatula. Bake in a preheated oven at 350°F for 50-60 minutes. To check for doneness, insert a toothpick into the center of the bread. If it comes out clean or with a few moist crumbs, your bread is ready. Once baked, let the bread cool in the pan for about 10 minutes. Then, transfer it to a wire rack to cool completely. Enjoy the wonderful smell as it fills your kitchen! Draining excess moisture from the zucchini and carrots is key. If you skip this step, your bread may turn out soggy. Here’s how to do it right: After grating, place the veggies in a clean towel and twist to squeeze out the liquid. This will help keep your bread light and fluffy. Measuring flour accurately is also important. Use the spoon-and-level method for best results. Spoon flour into a dry measuring cup, then level it off with a knife. Avoid packing the flour, as this can lead to too much flour in your mix. To boost flavor, add spices like cinnamon or nutmeg. A teaspoon of vanilla extract can also make a big difference. If you enjoy crunch, toss in some chopped walnuts or pecans. Fresh ingredients, like ripe zucchini and vibrant carrots, enhance taste and nutrition. Always pick the best, as it shows in your final bread. For those wanting something sweet, consider adding raisins or dried cranberries. They add a lovely burst of flavor and texture. This little extra touch can make your zucchini carrot bread stand out. Check out the Full Recipe for more detailed steps! {{image_2}} You can boost the flavor of your zucchini carrot bread in fun ways. Adding spices like ginger or cloves gives it a warm kick. A splash of almond extract can make it sweet and nutty. If you want to mix in some fruit, try adding crushed pineapple. It adds moisture and a hint of sweetness. You can even throw in some chocolate chips for a rich twist. Think about what flavors you love and get creative! If you're looking for gluten-free options, swap the all-purpose flour for almond or coconut flour. You can also use a gluten-free flour blend. For a vegan twist, replace the eggs with flax eggs. Just mix one tablespoon of ground flaxseed with three tablespoons of water and let it sit for a few minutes. To cut down on sugar, use applesauce or mashed bananas instead. These swaps will keep your bread tasty while fitting your diet. Check out the Full Recipe for more details! To keep your zucchini carrot bread fresh, wrap it tightly in plastic wrap. This keeps moisture in and air out. You can also place it in an airtight container. For long-term storage, slice the bread and freeze it. Use freezer bags and remove as much air as possible. This way, you can enjoy slices later without losing flavor. At room temperature, the bread lasts about three days. If you keep it in the fridge, it can last up to a week. Always check for signs of spoilage. Look for mold or an off smell. If the bread feels dry or crumbly, it might not be good anymore. Enjoy your zesty zucchini carrot bread while it's fresh! Yes, you can use frozen zucchini and carrots. Just make sure to thaw them first. Drain any extra water after thawing. This step is key, as excess moisture can make the bread too wet. If you skip this, your zucchini carrot bread might end up soggy. The flavor stays great, so don’t worry about that! To make the bread denser, use less flour or add a bit of extra zucchini. You can also try adding more sugar. For a fluffier texture, add an extra egg or use cake flour instead of all-purpose flour. Be careful not to overmix; this can make the bread tough. Mix just until combined for the best result. Yes, you can double the recipe easily. Just use twice the amount of each ingredient. Make sure to use a larger loaf pan or two pans. Bake time might change, so check both loaves with a toothpick. If you use two pans, they may bake faster. Follow the Full Recipe for the best results! In this post, we covered how to make a delicious bread using zucchini and carrots. You learned the best ingredients and methods to prepare them. We discussed the nutrition benefits and provided step-by-step baking instructions. I also shared tips for flavor and storage, along with variations to suit your taste. Remember, fresh ingredients lead to great flavor. Follow the guidance to avoid common mistakes, and you'll achieve a wonderful loaf every time. Enjoy your baking journey!

Zucchini Carrot Bread Simple and Flavorful Recipe

Welcome to my delightful journey of baking Zucchini Carrot Bread! This simple and flavorful recipe packs wholesome veggies into a

To make Cucumber Basil Lemonade, you need: - 1 large cucumber, peeled and diced - 1 cup fresh basil leaves, loosely packed - 1 cup freshly squeezed lemon juice (about 4-5 lemons) - 3/4 cup honey or agave syrup (adjust to taste) - 4 cups cold water - Ice cubes - Lemon slices and basil sprigs for garnish - Cucumber: Cucumber is low in calories. It helps keep you hydrated. It also has vitamins that support your skin. - Basil: Basil adds flavor and has antioxidants. It may help reduce stress and improve digestion. - Lemon Juice: Lemon juice is rich in vitamin C. It boosts your immune system and aids digestion. - Honey or Agave Syrup: These sweeteners are natural. They can provide a quick energy boost without refined sugar. - Water: Staying hydrated is key for health. Water helps maintain body temperature and keeps your skin clear. - Cucumber: Choose cucumbers that feel firm. Look for a bright green color with no soft spots. - Basil: Smell the basil before buying it. Fresh basil has a strong, sweet aroma. Look for bright green leaves without browning. - Lemons: Pick lemons that are heavy for their size. They should feel firm and have a bright yellow color. - Honey or Agave Syrup: Opt for organic options if possible. Check the label to avoid added sugars. - Water: Use filtered water for the best taste and health benefits. This recipe is simple and full of fresh flavors. For the full recipe, check out the complete instructions provided. To start, grab your blender. Add the peeled and diced cucumber, along with the fresh basil leaves. Pour in 1 cup of cold water. Blend this mix until it turns smooth and creamy. This step brings out the fresh flavors of cucumber and basil. You will love the fresh smell that fills your kitchen! Next, we need to strain the cucumber-basil mixture. Use a fine mesh sieve over a large pitcher. Pour the blended mix into the sieve and let it drip. This process removes the solids, leaving you with a smooth liquid. Press with a spoon to get every drop out. This helps us create a refreshing drink without any bits. Now it’s time to add the fun stuff! Pour in the freshly squeezed lemon juice, which gives the drink its bright flavor. Next, add the honey or agave syrup. Stir well to make sure everything mixes smoothly. Then, pour in the remaining 3 cups of cold water. Mix it all together again until it’s well combined. Taste it! You can adjust the sweetness to your liking. This is where you can make it just right for you. For the full recipe, check the earlier section. Now, chill the lemonade for at least 30 minutes. This allows all the flavors to blend nicely. When you're ready to serve, pour it over ice. Garnish with lemon slices and basil sprigs for a lovely touch. Enjoy your cool and tasty drink! You can control the sweetness of your cucumber basil lemonade easily. Start with the honey or agave syrup. Add 3/4 cup as the recipe states. After mixing, taste the lemonade. If it’s not sweet enough, add more syrup slowly. Stir well after each addition. Keep tasting until it suits your preference. Chilling your lemonade is key to great flavor. Let it sit in the fridge for at least 30 minutes. This rest time allows the cucumber and basil flavors to blend well. You can chill it longer if you want a stronger taste. The longer it sits, the more refreshing it becomes. Serve your cucumber basil lemonade over ice for a cool drink. Garnish with lemon slices and basil sprigs for a pretty touch. This drink is great for summer parties or picnics. You can also make it in a large pitcher for easy serving. For extra fun, try serving it in mason jars for a rustic feel. Don’t forget to offer straws for a fun touch! {{image_2}} Add a fresh twist by mixing mint into your cucumber basil lemonade. Start by adding a handful of fresh mint leaves to the blender with the cucumber and basil. Blend as usual and strain. Mint adds a cool flavor that pairs well with the lemon and basil. You can garnish with extra mint leaves for a pretty touch. For a bubbly version, use sparkling water instead of still water. After blending and straining your cucumber and basil, mix in the lemon juice and sweetener. Then, add the sparkling water just before serving. This drink will have a fun fizz that makes it even more refreshing on hot days. Serve it in tall glasses with ice for a great look. If you prefer a sugar-free drink, replace honey or agave with a sugar substitute. Stevia or erythritol work well. Just start with a small amount, taste, and adjust. You can also use fresh fruit, like mashed berries, to sweeten your drink naturally. This keeps your cucumber basil lemonade light and healthy while still being delicious. For the full recipe, check out the instructions above. Enjoy your drink! To store leftover Cucumber Basil Lemonade, pour it into a clean pitcher. Make sure to cover it tightly with a lid or plastic wrap. This helps to keep the flavors fresh. Place your pitcher in the fridge. Cucumber Basil Lemonade stays fresh for about 3 days in the fridge. After this, the taste may change. If you notice any off smells or flavors, it’s best to throw it away. You can freeze Cucumber Basil Lemonade for longer storage. Pour it into ice cube trays and freeze. Once frozen, transfer the cubes to a freezer bag. This method makes it easy to enjoy later. Just add the cubes to a glass of water or use them in smoothies. Yes, you can use bottled lemon juice. However, fresh lemon juice tastes better. Fresh lemons add a bright, zesty flavor. Bottled juice often lacks that freshness. If you want the best taste, squeeze fresh lemons. Cucumber Basil Lemonade is quite healthy. It has low calories and is hydrating. Cucumbers are full of water and vitamins. Basil adds antioxidants, and lemons provide vitamin C. The sweetness from honey or agave is natural. This drink is a refreshing choice for hot days. Making this recipe vegan is easy. Just swap honey for agave syrup or maple syrup. Both options are plant-based and sweet. The taste will still be great. Follow the [Full Recipe] for steps to make your lemonade. This guide shows how to make refreshing Cucumber Basil Lemonade. We covered key ingredients, their health benefits, and tips for choosing fresh ones. The step-by-step instructions ensure your drink turns out great. I shared tips on adjusting sweetness and serving ideas. You can explore fun variations, like adding mint or making it sparkling. Remember to store leftovers correctly for the best taste. With these tips, you can enjoy a tasty, healthy drink anytime. Enjoy your Cucumber Basil Lemonade adventures!

Cucumber Basil Lemonade Refreshing Summer Drink

Looking for the perfect drink to beat the summer heat? Cucumber Basil Lemonade is your answer! This refreshing mix of

- 4 medium zucchini, cut into spears - 4 tablespoons olive oil - 4 cloves garlic, minced - 1 teaspoon dried oregano - 1 teaspoon paprika - Salt and pepper to taste - Fresh parsley, chopped (for garnish) When selecting zucchini, look for firm, smooth skin. Choose bright green zucchini without blemishes. Smaller zucchinis are often sweeter and more tender. Check for a heavy feel; this means they are fresh. If you can, smell them. Fresh zucchini has a clean, earthy scent. Avoid any that feel soft or look wrinkled. If you don’t have olive oil, you can use avocado oil or melted coconut oil. Both work well and add unique flavors. Canola oil is another choice; it’s neutral and won’t change the taste. For a richer taste, consider using butter. Just remember to keep an eye on the heat, as butter can burn easily. First, gather all your ingredients. You need fresh zucchini, garlic, olive oil, and spices. This will make your cooking process smooth and quick. Wash the zucchini well and cut them into spears. This shape helps them roast evenly. Preheat your oven to 425°F (220°C) so it’s ready when you are. 1. In a large bowl, mix the olive oil, minced garlic, oregano, paprika, salt, and pepper. 2. Whisk the mixture until it blends well. This helps the flavors to combine. 3. Add the zucchini spears to the bowl. Toss them until they are fully coated. 4. Line a baking sheet with parchment paper. This keeps the zucchini from sticking. 5. Spread the zucchini spears in a single layer on the sheet. This step is key for even roasting. 6. Roast the zucchini in the oven for 15-20 minutes. Turn them halfway through to cook evenly. 7. When finished, remove them from the oven. Let them cool for a minute before serving. 8. Garnish with fresh parsley for a nice touch. To get the best flavor, do not overcrowd the baking sheet. If the spears are too close, they will steam instead of roast. You can also try different spices to change the flavor. A little lemon juice can brighten the taste. For the full recipe, check the earlier section. Enjoy your delicious garlic roasted zucchini spears! To make the garlic shine, use fresh garlic. Fresh garlic gives a bolder taste than dried. You can also roast the garlic before mixing it with the oil. Roasted garlic adds a sweet and rich flavor. If you want more zest, try adding lemon juice or zest. Both will brighten the dish and balance the garlic. To avoid soggy zucchini, keep the spears dry. Pat them with a towel after washing. The less moisture there is, the better they roast. Also, space out the spears on the baking sheet. This helps hot air circulate around each piece. If they are too close, they will steam instead of roast. Most home ovens work well at 425°F (220°C). If you have a convection oven, reduce the temperature by about 25°F (14°C). This helps cook the zucchini evenly and quickly. For electric ovens, the time is about 15-20 minutes. If you use a gas oven, check the spears a bit earlier. They might cook faster. Always look for a golden-brown color to know they are done. {{image_2}} You can add cheese to your garlic roasted zucchini for extra flavor. Parmesan gives a nice salty taste. Just sprinkle grated Parmesan on top before roasting. Feta cheese, crumbled on the finished dish, adds creaminess. Both will melt slightly and create a great texture. If you like heat, try adding chili flakes or cayenne pepper. A pinch of these spices can make the dish exciting. You can also use hot sauce in the garlic-oil mix. This adds a zesty kick and balances the zucchini's mild flavor. For a Mediterranean flair, mix in olives and cherry tomatoes. Chop the olives and halve the tomatoes. Toss them with the zucchini before roasting. This adds color and makes the dish more vibrant. The olives provide saltiness while the tomatoes bring sweetness. Explore the Full Recipe for more tips and details on how to create this dish! To keep your garlic roasted zucchini spears fresh, let them cool first. Place them in an airtight container. Store the container in the fridge. Proper storage helps maintain flavor and texture. Use the leftovers within three days for the best taste. Reheating your zucchini spears can be easy and fun. You can use an oven or a skillet. If using the oven, preheat it to 350°F (175°C). Place the zucchini on a baking sheet and heat for about 10 minutes. If you prefer a skillet, add a splash of olive oil over medium heat. Cook for 3-5 minutes, turning occasionally. This method keeps them tasty and warm. Freezing garlic roasted zucchini spears is simple. First, let them cool completely. Then, lay them flat on a baking sheet and freeze for about an hour. Once frozen, transfer them to a freezer bag or container. Squeeze out as much air as possible before sealing. You can freeze them for up to three months. When ready to eat, reheat them from frozen or thaw in the fridge overnight. You’ll still enjoy the flavors from the Full Recipe! To boost flavor, add more garlic or spices. You can try cayenne pepper for heat. Lemon juice adds brightness. Fresh herbs like basil or thyme also enhance taste. Mix different spices to find your perfect blend. Don't be afraid to experiment! Adjust salt and pepper to suit your taste. Yes, you can use other veggies! Carrots, bell peppers, or asparagus work great. Cut them in similar sizes to ensure even cooking. Each vegetable brings its own flavor. Feel free to mix them for a colorful dish. Just adjust cooking times as needed for each type. Garlic roasted zucchini spears pair well with many main dishes. Try them with grilled chicken or fish for a healthy meal. They also complement pasta or quinoa dishes nicely. Serve with a fresh salad for balance. You can even use them in wraps or sandwiches! For the full recipe, check out the Garlic Roasted Zucchini Spears above. This post covered how to make garlic roasted zucchini spears. We explored fresh ingredient selection, cooking steps, and tips to boost flavor. You learned how to avoid sogginess and adapt the recipe with variations like cheese or spices. Storing tips ensure your dish retains flavor longer. Remember, simple ingredients can create tasty meals. Enjoy experimenting in your kitchen!

Garlic Roasted Zucchini Spears Flavorful Side Dish

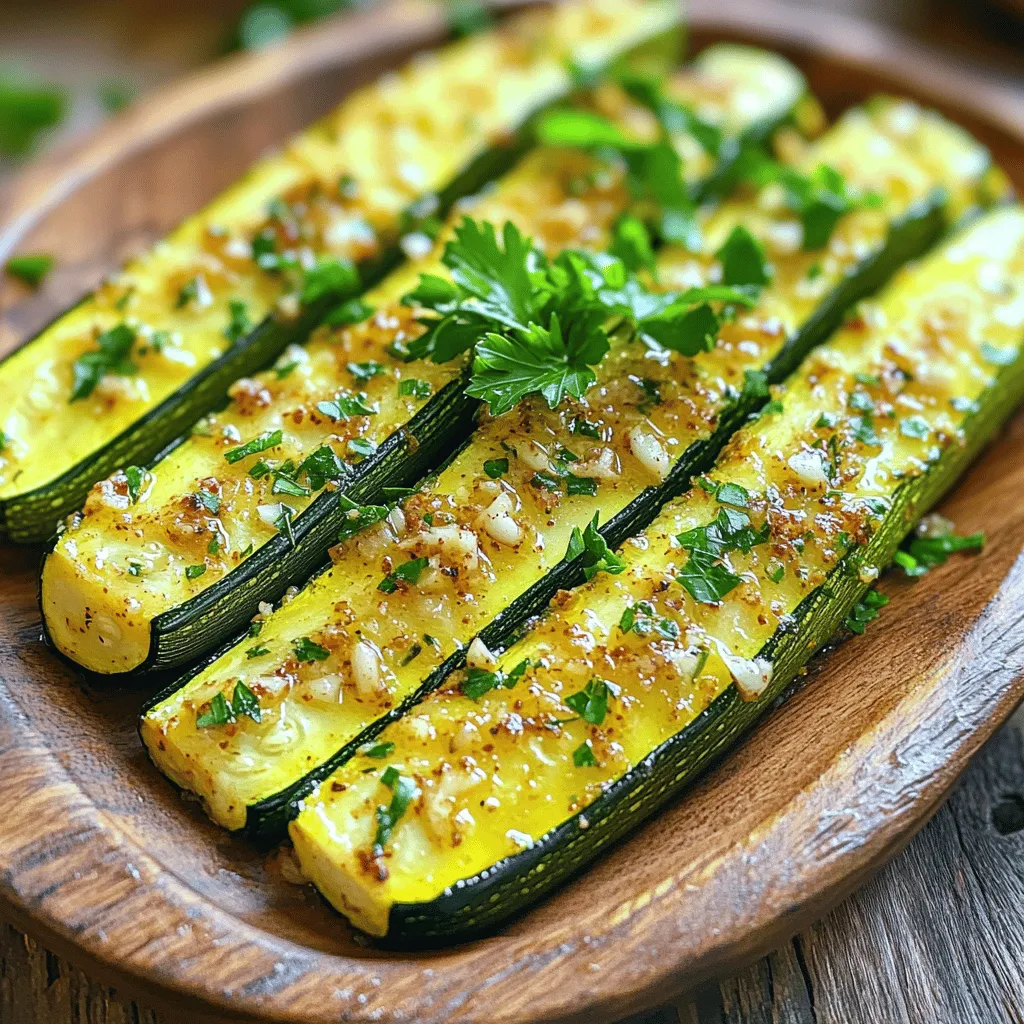
Looking for a simple yet tasty side dish? Try my Garlic Roasted Zucchini Spears! This dish highlights fresh zucchini’s great

- Dry Ingredients - 2 cups all-purpose flour - 1 cup granulated sugar - 2 teaspoons baking powder - 1/2 teaspoon baking soda - 1/4 teaspoon salt - Wet Ingredients - 1/2 cup unsalted butter, softened - 3 large eggs - 1 cup Greek yogurt - 1 teaspoon vanilla extract - 2 cups ripe peaches, diced (about 2-3 medium peaches) - Streusel Topping - 1/2 cup brown sugar - 1/3 cup all-purpose flour - 1/4 cup rolled oats - 1/4 cup unsalted butter, melted - 1 teaspoon cinnamon I love using fresh, ripe peaches for this recipe. They add a sweet, juicy flavor. The combination of soft cake and crunchy streusel makes every bite a joy. You can use other fruits if you want a twist. Apples or berries work well too. For the streusel topping, the oats give it a nice texture. The brown sugar adds a rich taste. This topping is easy to mix. Just combine the ingredients in a bowl until crumbly. It's a fun and simple way to add crunch to your cake. If you want the full recipe, check the details above. The ingredients listed here will help you create a delicious Peach Streusel Coffee Cake. Enjoy the process of baking and the joy it brings! Preheating the Oven Start by preheating your oven to 350°F (175°C). This step is key. A hot oven helps the cake rise well. If the oven is not hot enough, your cake may not bake properly. Greasing the Baking Pan Next, grease a 9x13 inch baking pan. You can also use parchment paper for easy removal. Greasing the pan helps the cake come out smoothly. Creaming Butter and Sugar In a large mixing bowl, cream together the softened butter and granulated sugar. Beat them until the mix is light and fluffy. This process takes about 3-4 minutes. Proper creaming adds air, making the cake soft. Incorporating Eggs and Yogurt Now, beat in the eggs one at a time. Make sure each egg is well blended before adding the next. Then, mix in the Greek yogurt and vanilla extract until the batter is smooth. The yogurt adds moisture and richness. Adding Dry Ingredients In another bowl, whisk together the flour, baking powder, baking soda, and salt. Gradually add this dry mix to the wet batter. Use a spatula to fold gently until just combined. Avoid overmixing, as it can make the cake tough. Incorporating Peaches and Preparing Streusel Gently fold in the diced peaches. Be careful not to break them apart too much. In a separate bowl, mix the brown sugar, flour, rolled oats, melted butter, and cinnamon for the streusel. Combine until it is crumbly. The streusel adds a sweet crunch. Follow these steps for a delicious Peach Streusel Coffee Cake. For the full recipe, refer to the earlier section. Ensuring Even Baking To bake your Peach Streusel Coffee Cake evenly, spread the batter smoothly in the pan. Make sure your oven is set to the right temperature before you start. Use an oven thermometer to check the heat. This helps avoid hot spots that can burn your cake. Rotate the pan halfway through baking for a better rise. Checking for Doneness To know if your cake is done, use a toothpick. Insert it in the center of the cake. If it comes out clean, the cake is ready. If it has batter on it, bake a few more minutes. Keep an eye on your cake as it bakes to avoid overcooking. Serving and Garnishing Serve your Peach Streusel Coffee Cake on a nice platter. Dust it with powdered sugar for a sweet touch. You can also add fresh peach slices on top for color. A sprig of mint adds freshness and looks great too. Pairing with Beverages This cake pairs well with coffee or tea. A light herbal tea highlights the peach flavors. You could also serve it with lemonade for a refreshing balance. Enjoy it at breakfast, brunch, or as a snack. Check out the Full Recipe for more details. {{image_2}} Alternative Fruits You can swap peaches for other fruits. Try ripe berries, like blueberries or raspberries. Cherries also work well. Apples bring a nice crunch, too. Each fruit adds its own flavor twist. Just remember to adjust the sugar if the fruit is sweeter or tart. Different Nut Toppings For added texture, use nuts in the streusel. Walnuts or pecans enhance the flavor. Almonds provide a nice crunch, too. Chop them finely and mix them into the streusel. You can also sprinkle them on top for extra crunch. Gluten-Free Options If you need a gluten-free cake, swap the flour for a gluten-free blend. Look for a blend that works in baking. This helps keep the cake moist and fluffy. You can also use almond flour for a different taste. Vegan Substitutes To make this coffee cake vegan, replace the eggs with flax eggs. Mix one tablespoon of ground flaxseed with three tablespoons of water. Let it sit until it thickens. Use a plant-based yogurt instead of Greek yogurt. This way, everyone can enjoy this delicious treat. For the complete recipe, check out the Full Recipe section. Room Temperature You can keep Peach Streusel Coffee Cake at room temperature for up to three days. Place it in an airtight container. This helps keep the cake moist. Avoid direct sunlight or heat. Refrigeration Tips If you want to store it longer, place it in the fridge. The cake stays fresh for about a week when refrigerated. Cover it well with plastic wrap or foil to prevent drying out. Freezing the Cake You can freeze Peach Streusel Coffee Cake for up to three months. First, let the cake cool completely. Then, wrap it tightly in plastic wrap. After that, place it in a freezer-safe bag or container. Label it with the date and type of cake. Thawing and Reheating To thaw, move the cake to the fridge overnight. If you want it warm, preheat your oven to 350°F (175°C). Heat the cake for about 10-15 minutes. This way, it tastes fresh baked again. For the full recipe, check the earlier section. Can I use canned peaches? Yes, you can use canned peaches. Make sure to drain them well. Fresh peaches add great flavor, but canned ones work in a pinch. Cut them into small pieces to mix well into the batter. How do I know if the cake is done? To check if the cake is done, insert a toothpick in the center. If it comes out clean, the cake is ready. If it has batter on it, bake a few more minutes. Can I make this coffee cake ahead of time? Yes, you can make this coffee cake ahead of time. Bake it, let it cool, and store it in an airtight container. It stays fresh for a few days. You can also freeze it for longer storage. What can I serve with Peach Streusel Coffee Cake? This coffee cake pairs well with coffee or tea. You can also serve it with fresh whipped cream or a scoop of vanilla ice cream. If you want, add a side of fresh fruit for extra flavor. This blog post detailed how to make a delicious Peach Streusel Coffee Cake. We covered the ingredients, step-by-step instructions, and tips for better baking. You learned about flavor swaps and storage options to keep your cake fresh. Remember, baking is an art. Experiment and have fun with your flavors. Enjoy sharing this treat with friends or family, and savor every bite!

Peach Streusel Coffee Cake Flavorful and Easy Recipe

If you’re craving a sweet and comforting treat, this Peach Streusel Coffee Cake recipe is just for you! It’s simple

Older posts
Newer posts
← Previous Page1 … Page16 Page17 Page18 … Page55 Next →

dsad

© 2025 Lisa Dishes • Built with GeneratePress

Our Policies

  • Copyright Policy
  • Cookie Policy
  • GDPR Policy
  • Privacy Policy
  • Disclaimer
  • Terms Of Use

More Information

  • Home
  • About
  • Contact
  • Appetizers
  • Dessert
  • Dinner
  • Drinks
©2025, Lisa Dishes About Back To Top