Skip to content
DisclaimerTerms Of UseGDPR PolicyCookie Policy

Lisa Dishes

  • Home
  • Drinks
  • Appetizers
  • Dinner
  • Dessert
  • About
  • Contact
  • Privacy Policy
DisclaimerTerms Of UseGDPR PolicyCookie Policy

lisa

- 1 lb ground turkey or chicken - 1 medium onion, diced - 2 cloves garlic, minced - 1 bell pepper, diced - 1 can (15 oz) black beans, rinsed and drained - 1 can (15 oz) corn, drained - 1 cup uncooked rice - 2 cups chicken or vegetable broth - 1 packet taco seasoning (or homemade blend) - 1 can (14 oz) diced tomatoes with green chilies - 1 cup shredded cheese (cheddar or Mexican blend) - Fresh cilantro for garnish - Optional toppings such as sour cream and avocado When I make this dish, I always start with the main ingredients. I like to use ground turkey or chicken because they cook quickly and taste great. You can also add more flavor with fresh onions and garlic. Diced bell peppers add a nice crunch and color. Next, I add black beans and corn. They give good texture and a hint of sweetness. Using rice is essential for a hearty meal. It absorbs all the flavors from the broth and seasoning. Speaking of broth, I prefer chicken broth for a richer taste, but vegetable broth works well too. The taco seasoning adds that zesty kick. Finally, I toss in diced tomatoes with green chilies. They give a nice tang and a bit of heat. For the topping, I always use shredded cheese. It melts beautifully and makes the dish creamy. Fresh cilantro adds a burst of freshness. If you want to make it special, serve with sour cream or avocado. This dish is fun to make and even more fun to eat! Check out the Full Recipe for all the steps. Start by heating a tablespoon of olive oil in a large skillet over medium heat. Once hot, add the diced onion and bell pepper. Sauté them until they soften, which takes about 5 minutes. This step brings out the flavors in the veggies. Next, add the minced garlic to the skillet. Cook it for about one minute, stirring often to avoid burning. Now it's time to add the protein. Push the veggies to one side of the skillet. Add 1 pound of ground turkey or chicken. Cook it until it's browned, breaking it apart with a spatula. This should take about 6 to 8 minutes. Once the meat is browned, sprinkle in the taco seasoning. Cook for another 1 to 2 minutes until it smells great. Add the fun ingredients next! Pour in one can of diced tomatoes with green chilies, one can of black beans (rinsed and drained), one can of corn (drained), and one cup of uncooked rice. Mix everything well to combine. Now, pour in 2 cups of chicken or vegetable broth. Bring the mixture to a boil. Once boiling, reduce the heat to a simmer. Cover the skillet and let it cook for 20 to 25 minutes. The rice should be cooked and soak up the liquid. Once your skillet is cooked, remove it from heat. Stir in half of the shredded cheese. This will make it creamy and cheesy. Then, sprinkle the remaining cheese on top. Cover the skillet again for about 2 to 3 minutes. The cheese will melt nicely. Finally, fluff the rice with a fork, season with salt and pepper to taste, and add fresh cilantro for a pop of color. For more details, check the Full Recipe. Using a non-stick skillet makes cooking and cleanup simple. It keeps your food from sticking and helps you get a perfect sear on your meat. You can also control spice levels. If you like heat, add jalapeños or spicy taco seasoning. For a milder taste, stick with regular seasoning. Serving your One Pot Taco Skillet straight from the skillet gives it a warm, rustic feel. It looks great on the table. To make it even better, offer toppings on the side. Think sour cream, avocado, or extra cheese. This way, everyone can make their dish just how they like it. Cooking times may change based on the type of rice. White rice cooks faster than brown rice. If you use brown rice, add extra liquid and extend the cooking time by about 10 minutes. Always check for doneness. If the rice seems dry, add more broth. This keeps everything nice and moist. {{image_2}} You can easily change the meat in this dish. Use ground beef or a plant-based protein like lentils. Both options work well and taste great. If you want a healthier meal, swap rice for quinoa. Quinoa cooks fast and adds extra protein. Want more nutrition? Add diced veggies like zucchini or corn. They make the dish colorful and tasty. You can also try different types of cheese. Pepper jack or feta can give new flavors to your skillet. Make your taco skillet spicy by adding jalapeños or chili peppers. This adds heat and excitement. For a southwestern twist, include corn salsa and black olives. These ingredients add depth and fun to the dish. For the full recipe, check the main recipe section. After enjoying your One Pot Taco Skillet, let the dish cool. Once cooled, transfer it to an airtight container. This will keep your meal fresh. Store it in the refrigerator for up to 3-4 days. This way, you can savor the flavors later in the week. If you want to save some for later, divide the skillet into portions. Use freezer-safe containers for easy meals down the road. You can freeze it for up to 2-3 months. This method helps maintain the best quality. When you're ready to enjoy your leftovers, reheat them on the stovetop. Add a splash of broth to keep the dish moist. If you're in a hurry, you can also microwave individual portions. This gives you a quick meal with the same great taste. For more details, check out the Full Recipe. To add heat, use hot taco seasoning. You can also add fresh jalapeños. Slice them thinly and mix them in during cooking. This will give your dish a nice kick. Adjust the amount based on your heat level preference. Yes, you can use brown rice. However, this will change the cooking time. Brown rice takes longer to cook, so you need to increase the liquid too. Check the package for specific cooking times and adjust the broth amount as needed. You have many tasty options! Serve with crunchy tortilla chips for dipping. A side salad adds freshness and balance. Mexican-style corn complements the dish well too. You can also offer toppings like sour cream, avocado, or extra cheese for fun. For the Full Recipe, check out the main section above. This blog post covered how to make a delicious One Pot Taco Skillet. You learned about the key ingredients, cooking steps, and tips to make it perfect. Remember, you can customize this dish with different proteins or spices. Don’t forget to store leftovers properly for quick meals later. Enjoy creating your own tasty variations, and have fun serving it with your favorite toppings. This dish is simple, yet full of flavor and options for everyone! Happy cooking!

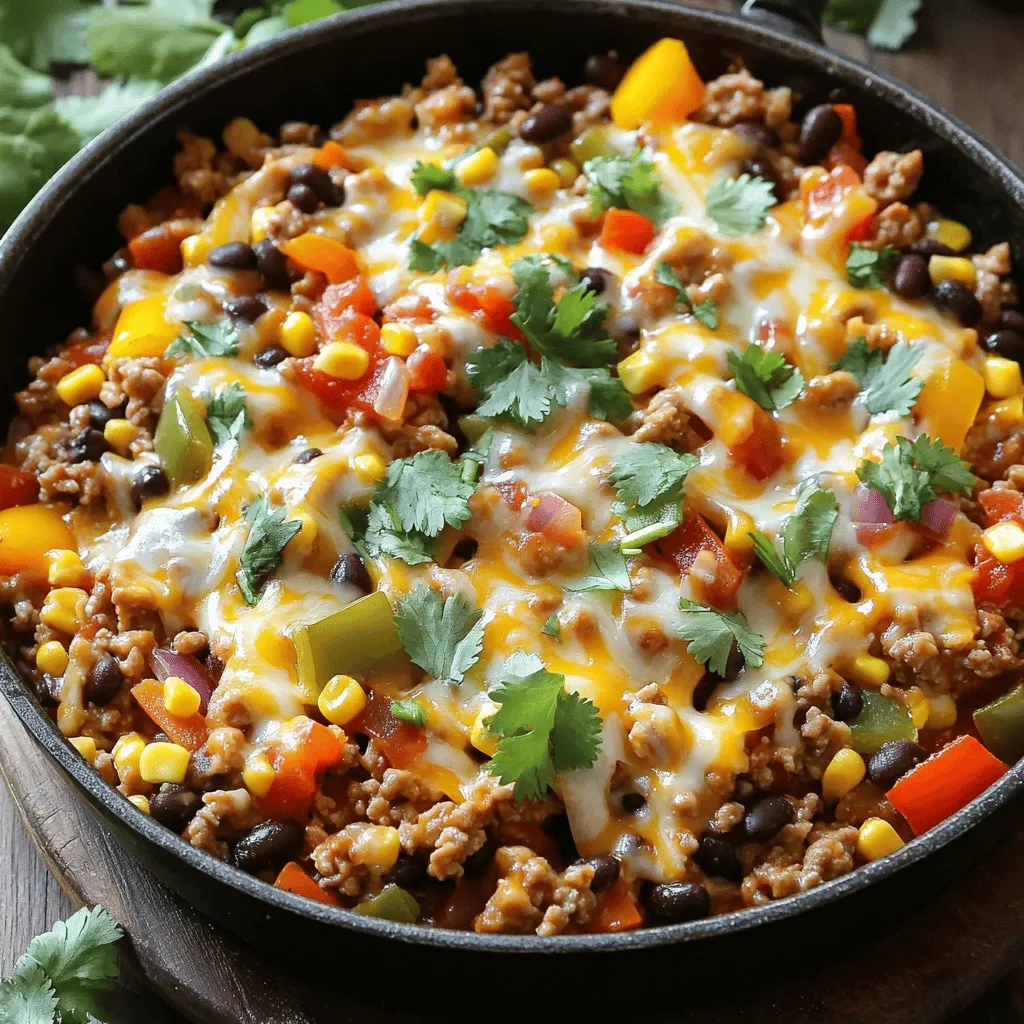
One Pot Taco Skillet Easy and Flavorful Dinner Dish

Are you tired of dinner prep chaos? I’ve got you covered with my One Pot Taco Skillet. This easy and

You can make healthy blueberry oatmeal cookies with simple ingredients. This recipe takes only 22 minutes from start to finish. With just 10 minutes of prep, you’ll enjoy soft and chewy cookies that burst with flavor. Here’s what you need to gather: - 1 cup rolled oats - 1 cup almond flour - 1/2 teaspoon baking powder - 1/2 teaspoon baking soda - 1/4 teaspoon salt - 1/4 cup coconut oil, melted - 1/4 cup honey or maple syrup - 1 teaspoon vanilla extract - 1/2 cup fresh blueberries (or frozen, if unavailable) - 1/4 cup chopped nuts (walnuts or pecans) - optional You can change the flavor or texture with a few tweaks: - Use oat flour instead of almond flour for a nut-free option. - Swap honey for agave syrup if you prefer a vegan choice. - Add a teaspoon of cinnamon for warmth. - Toss in some dark chocolate chips for a sweet surprise! These ingredients make your cookies not just tasty but also healthy. Enjoy making these blueberry delights! Start by gathering all your ingredients. You need rolled oats, almond flour, baking powder, baking soda, salt, coconut oil, honey or maple syrup, vanilla extract, fresh blueberries, and nuts if you want. Make sure your oven is off, and preheat it to 350°F (175°C). Line a baking sheet with parchment paper. This step helps the cookies not stick. In a large bowl, mix together your rolled oats, almond flour, baking powder, baking soda, and salt. Make sure to blend them well. This step sets a strong base for your cookies. A good mix ensures even baking and flavor in every bite. In another bowl, whisk the melted coconut oil, honey or maple syrup, and vanilla extract. Stir until everything is smooth. Pour this mixture into the dry ingredients and mix carefully. You want it combined but not overmixed. Gently fold in the blueberries and nuts, if you use them. Use a tablespoon to scoop the dough onto your baking sheet. Space them about 2 inches apart. Flatten each cookie just a bit. They won’t spread much while baking. Bake for 10-12 minutes or until they turn lightly golden. After that, let them cool for 5 minutes on the baking sheet. Then, transfer them to a wire rack to cool completely. You can find the full recipe linked above. To get the best texture in your cookies, use rolled oats. They give a chewy bite that is delightful. Do not overmix the dough when you combine the wet and dry ingredients. Overmixing makes cookies tough. Instead, mix until just combined. This method keeps them soft. Flatten the cookies slightly before baking. They won’t spread much, so this step helps them bake evenly. One common mistake is not measuring the flour correctly. Use the spoon-and-level method for accuracy. Another mistake is using cold ingredients. Always bring your coconut oil and eggs to room temperature. This allows for better mixing. Lastly, keep an eye on baking time. Every oven is different, so check your cookies early. You want them golden, not burnt. These cookies are great on their own, but you can add a twist. Serve them warm with a glass of almond milk. You can also pair them with yogurt for a healthy snack. Try adding a sprinkle of cinnamon or a drizzle of honey on top for extra flavor. For a fun treat, place a few cookies in a bowl and top them with fresh blueberries. This makes a lovely presentation! Find the full recipe for these delicious cookies [here](#). {{image_2}} You can easily make these cookies gluten-free. Instead of almond flour, use gluten-free oat flour. This keeps the texture light and fluffy. You can also try using coconut flour. Just remember, coconut flour absorbs more moisture. You may need to adjust the liquid in the recipe to keep it moist. To make these cookies vegan, swap honey for maple syrup. This simple change keeps the sweetness while making it plant-based. You can also use applesauce instead of coconut oil. This adds moisture and sweetness without any animal products. Just use 1/4 cup of unsweetened applesauce in place of the oil. Adding spices can elevate the flavor of your cookies. Try mixing in cinnamon or nutmeg for a warm taste. A pinch of ginger gives a nice kick too. You can also add a dash of vanilla extract for a deeper flavor. These small changes can transform the cookies into a unique treat. For the complete recipe, check out the Full Recipe section. To keep your healthy blueberry cookies fresh, place them in an airtight container. Make sure they cool completely before you store them. This helps prevent sogginess. Store the cookies at room temperature for up to five days. If you want to enjoy them longer, consider freezing them. Freezing is a great way to save your cookies for later. First, let the cookies cool down fully. Then, arrange them in a single layer on a baking sheet. Place the baking sheet in the freezer for about two hours. This step helps the cookies freeze without sticking. Once frozen, transfer them to a freezer bag or container. They can last up to three months in the freezer. To keep your cookies fresh and tasty, follow these tips: - Use parchment paper between layers if stacking cookies. - Keep cookies away from heat and moisture. - For chewy cookies, add a slice of bread to the container. - For a fun twist, try adding a little citrus zest to enhance flavor. By following these tips, your healthy blueberry oatmeal cookies will always be a delightful treat! For the full recipe, check the previous sections. Yes, you can use frozen blueberries. They work well in this recipe. Just remember to gently fold them into the dough while still frozen. This helps keep the dough from turning blue. Frozen blueberries may release more juice, giving the cookies a nice color and taste. To make cookies chewy, add a little extra honey or maple syrup. You can also use more oats. For crispy cookies, bake them a bit longer. Keep an eye on them. If you like, you can flatten the dough more before baking. This helps them spread. Blueberries are very healthy. They are full of vitamins and antioxidants. These help our bodies fight off sickness. Blueberries may also boost brain health. Eating them can improve memory and mood. They are low in calories, making them a smart choice for snacks. This blog covered how to make healthy blueberry cookies, from essential ingredients to serving tips. We discussed step-by-step instructions and variations to fit your needs. Remember to store your cookies well to keep them fresh. If you want to try something new, consider the gluten-free or vegan options. With these ideas, you'll make delicious cookies that everyone loves. Enjoy baking and sharing your tasty treats!

Healthy Blueberry Oatmeal Cookies Easy and Tasty Treat

Are you ready for a delicious treat that’s also good for you? In this post, I’ll share my easy and

- 2 medium sweet potatoes, peeled and diced - 1 can (15 oz) black beans, drained and rinsed - 1 can (15 oz) kidney beans, drained and rinsed - 1 can (14.5 oz) diced tomatoes (with juice) - 1 medium onion, chopped - 3 cloves garlic, minced - 1 red bell pepper, diced - 1 jalapeño pepper, minced (optional for heat) - 2 cups vegetable broth - 1 tablespoon chili powder - 1 teaspoon cumin - 1 teaspoon smoked paprika - Salt and pepper to taste - 2 tablespoons olive oil - Fresh cilantro, for garnish (optional) - Avocado slices, for serving (optional) Each ingredient plays a key role in flavor and nutrition. Sweet potatoes add natural sweetness and fiber. They provide vitamins A and C, which support your immune system. Black beans and kidney beans bring protein and iron, important for energy and muscle health. Diced tomatoes add juiciness and help balance flavors while offering antioxidants. For those with allergies, you can substitute the beans with lentils or chickpeas. You can also use zucchini instead of sweet potatoes if you prefer. For a nut-free option, ensure your vegetable broth is free from nuts. In this chili, each ingredient contributes to a hearty, filling dish. You get protein, fiber, and essential vitamins. It’s a great choice for a healthy meal that warms you up inside. To dive deeper into the cooking process, check the Full Recipe. 1. Start by heating 2 tablespoons of olive oil in a large pot over medium heat. 2. Add 1 medium chopped onion and sauté it for 3-4 minutes. This helps the onion soften and release its flavor. 3. Next, add 3 cloves of minced garlic, 1 diced red bell pepper, and 1 minced jalapeño pepper if you want some heat. Cook these for another 2-3 minutes until the peppers become tender. 4. Now, stir in 2 medium diced sweet potatoes along with 1 tablespoon of chili powder, 1 teaspoon of cumin, and 1 teaspoon of smoked paprika. Add salt and pepper to taste. Cook for another 3-4 minutes to let the spices toast and coat the vegetables. 5. Pour in 1 can of diced tomatoes (with juice), 1 can of drained black beans, and 1 can of drained kidney beans. Add 2 cups of vegetable broth and mix everything well. 6. Bring the chili to a boil. Then reduce the heat to low. Cover the pot and let it simmer for about 25-30 minutes, or until the sweet potatoes are tender. 7. Taste the chili. Adjust the seasoning by adding more salt, pepper, or spices as needed. If you want a thicker chili, mash some sweet potatoes against the pot's side and stir. 8. Serve the chili hot. Top it with fresh cilantro and avocado slices if you like. - To adjust the consistency, you can add more vegetable broth to make it thinner or mash some sweet potatoes to make it thicker. - For best seasoning, always taste your dish as you cook. This way, you can balance the flavors just right. - Prep time is about 15 minutes, and total cook time is 45 minutes. - For meal prep efficiency, chop your veggies ahead of time. This way, you can quickly throw everything together when you're ready to cook. Try this Vegan Sweet Potato Chili recipe for a hearty meal! You can find the Full Recipe for more details. Adjusting spice levels To make your chili just right, taste it as you cook. If you like heat, add more jalapeño or chili powder. For a milder flavor, skip the jalapeño or cut back on spices. You can also add a bit of sugar to balance out the heat. Making it ahead of time Chili often tastes better the next day. It lets the flavors blend well. Make your chili a day ahead and store it in the fridge. Reheat it on the stovetop or in the microwave. If it thickens too much, stir in a bit of vegetable broth. Best accompaniments for Vegan Sweet Potato Chili Serve your chili with fresh bread or cornbread. A dollop of vegan sour cream adds creaminess. You can also top it with avocado slices and fresh cilantro. A side salad pairs well for a refreshing touch. Ideal serving size This recipe serves about 4-6 people. For a filling meal, plan for 1.5 to 2 cups per person. If you have leftovers, they keep well, and you can enjoy them later. Nutritional analysis of the recipe This chili is packed with fiber and protein. Sweet potatoes are rich in vitamins A and C. Beans provide protein and keep you full longer. Together, they make a balanced meal that’s great for your health. Benefits of sweet potatoes and beans in the diet Sweet potatoes are low in calories and high in nutrients. They help support eye health and boost your immune system. Beans are heart-healthy and can lower cholesterol. Together, they make this chili not just tasty but healthy, too. For more details, check out the Full Recipe. {{image_2}} You can easily change up the vegetables. Try adding zucchini, carrots, or corn. These add color and flavor. For protein, chickpeas or lentils work well too. They boost nutrition and make the chili heartier. Spices can change the game. Add a pinch of cayenne for heat or smoked paprika for depth. You could also try a dash of oregano or thyme for a fresh taste. Toppings make chili fun. Try sour cream, shredded cheese, or fresh lime juice. They add a nice zing. If you want to save time, use a slow cooker. Just follow the same steps, but cook on low for 6-8 hours. For a quick meal, the Instant Pot is a great choice. Cook the chili on high pressure for about 10 minutes, then let it naturally release. This keeps all the flavors intact. For the full recipe, check out the detailed steps above. To store leftovers safely, let the chili cool first. Then, place it in an airtight container. This keeps moisture in and bacteria out. I recommend using glass containers. They are safe for both fridge and freezer. You can also use freezer bags. Just remember to remove as much air as possible. You can reheat chili in the microwave or on the stovetop. Microwaving is quick but can sometimes change the texture. Stir the chili halfway through to heat it evenly. Stovetop reheating is better for maintaining flavor. Heat it on low and stir often. This keeps the chili creamy and delicious. Vegan sweet potato chili lasts about 4-5 days in the fridge. Always check for signs of spoilage. If you see mold or an off smell, throw it out. When stored in the freezer, it can last up to 3 months. To keep it fresh, write the date on the container. This helps you track how long it has been stored. How to make Vegan Sweet Potato Chili spicy? You can add heat by including jalapeño peppers. Just dice them and mix them in. You can also use cayenne pepper or chili flakes to boost the spice. Adjust to your taste! Can I make this chili ahead of time? Yes, this chili stores well. Make it a day before serving. The flavors will deepen and blend overnight. Just store it in the fridge in a sealed container. Is Vegan Sweet Potato Chili gluten-free? Yes, this chili is naturally gluten-free. All the ingredients used, like sweet potatoes and beans, do not contain gluten. Always check labels to be safe. Can this recipe be doubled? Absolutely! Doubling the recipe is easy. Just use twice the ingredients and a larger pot. This makes it perfect for meal prep or feeding a crowd. What to serve with Vegan Sweet Potato Chili for a complete meal? You can serve this chili with rice, cornbread, or a fresh salad. Avocado slices on top add creaminess and flavor. Fresh cilantro also brightens up the dish! Can I make this recipe oil-free? Yes, you can skip the olive oil. Use vegetable broth or water to sauté the onions and garlic. This keeps it light and still tasty! How to adapt the recipe for a low-carb diet? To make this low-carb, reduce the sweet potatoes. You can add more beans or use cauliflower instead. This keeps the chili filling without too many carbs. This blog post covered all you need to know about Vegan Sweet Potato Chili. We looked at key ingredients, cooking steps, and tips for a perfect dish. You learned how to adjust flavors and even tried different cooking methods. In the end, this chili is not just tasty; it’s good for you. Enjoy making it, sharing it, and reaping the health benefits. With all these options, you can make it just right for you and your friends. Happy cooking!

Vegan Sweet Potato Chili Flavorful and Hearty Dish

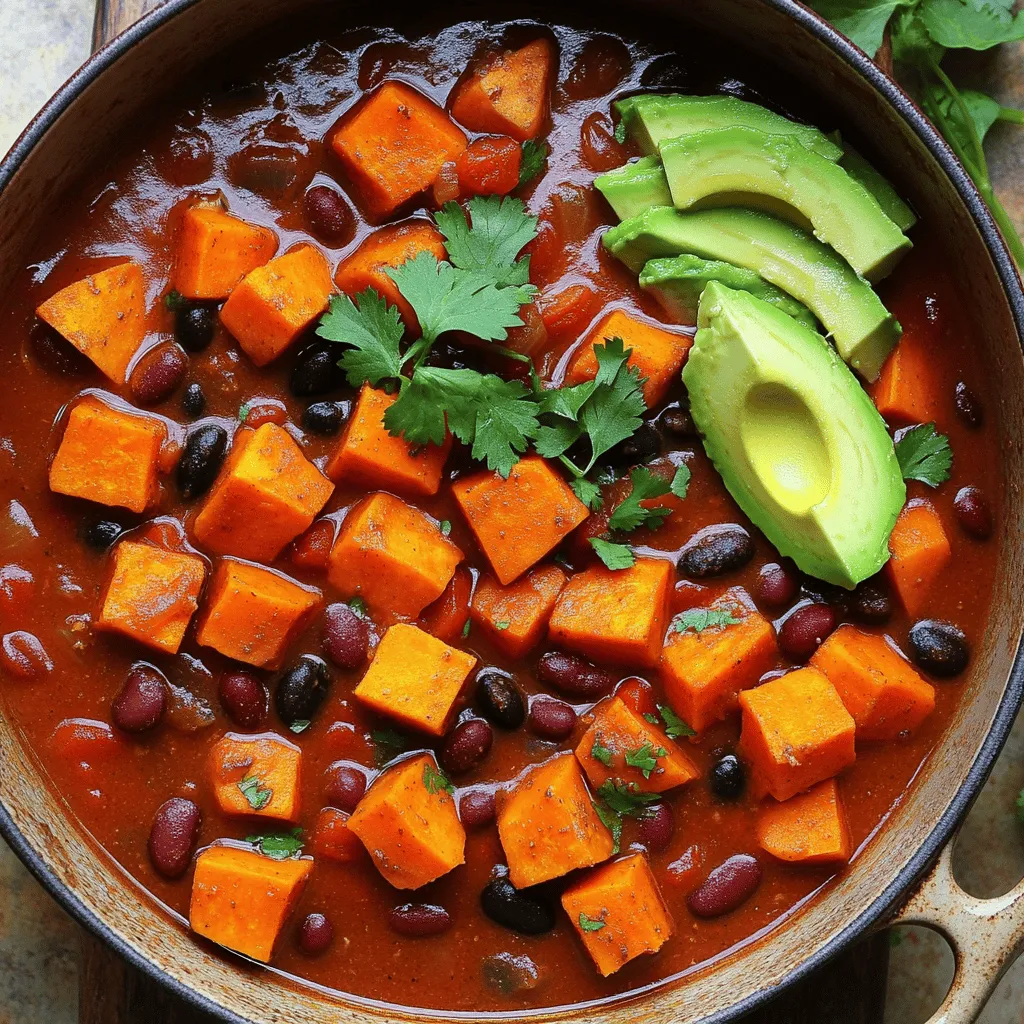
If you’re searching for a warm, hearty dish, look no further than Vegan Sweet Potato Chili. This recipe is not

To make tasty Cauliflower Buffalo Wings, you need a few key items: - 1 medium cauliflower head, cut into bite-sized florets - 1 cup all-purpose flour - 1 cup almond milk (or any plant-based milk) - 1 teaspoon garlic powder - 1 teaspoon onion powder - 1 teaspoon paprika - 1/2 teaspoon cayenne pepper (adjust for spice level) - 1/2 teaspoon salt - 1/2 teaspoon black pepper - 1 cup buffalo sauce (store-bought or homemade) - 2 tablespoons unsalted butter or vegan butter, melted - Fresh parsley, chopped (for garnish) - Celery sticks (for serving) - Ranch or blue cheese dressing (for serving) You can add fun flavors to your wings. Here are some ideas: - Use smoked paprika for a deeper taste. - Swap almond milk for coconut milk for a creamier texture. - Add nutritional yeast for a cheesy flavor. Dipping sauces make these wings even better. Try these: - Classic ranch dressing pairs well with the spice. - Blue cheese dressing adds a rich taste. - A zesty yogurt sauce cools down the heat. These ingredients create a crunchy, spicy snack. You can find the full recipe in the article to guide you through each step. Enjoy! First, grab a medium cauliflower head. Cut it into bite-sized florets. Make sure they are all roughly the same size. This helps them cook evenly. Rinse the florets under cold water. Drain them well and set them aside. In a large bowl, combine the flour, garlic powder, onion powder, paprika, cayenne pepper, salt, and black pepper. Mix these dry ingredients well with a whisk. Next, slowly pour in the almond milk. Whisk until you have a smooth batter. The batter should be thick enough to coat the florets. If it seems too runny, add a little more flour. Preheat your oven to 450°F (232°C). Line a baking sheet with parchment paper. Now, dip each floret into the batter. Make sure each piece gets a good coating. Place the coated florets on the baking sheet. Leave some space between them. Bake for 20 minutes or until golden brown and crispy. While they bake, mix the buffalo sauce and melted butter in a bowl. After 20 minutes, take the cauliflower out. Toss the crispy wings in the buffalo sauce mixture until coated. Return them to the oven for 10-15 more minutes. They should be crispy and the sauce thickened. Serve them hot, garnished with fresh parsley, and enjoy with celery sticks and your favorite dressing. For the full recipe, check out the details provided earlier! To make your cauliflower buffalo wings crispy, use a thick batter. A thick coat helps create that crunch we all love. Make sure to leave space between each floret on the baking sheet. This ensures hot air can circulate around them. If you want extra crispiness, bake them a little longer. Just keep an eye on them to avoid burning. Buffalo wings are known for their heat. If you prefer milder wings, reduce the cayenne pepper. For a spicy kick, add more buffalo sauce after baking. Taste the sauce before you dip the cauliflower. This way, you can find the right heat for your palate. Remember, you can always add more spice, but it's hard to take it away! Baking is the easiest and healthiest way to cook these wings. It keeps them crispy without much oil. If you want to fry, heat oil in a pan and cook until golden brown. Air frying is another great option. It gives a nice crunch with less oil. Whichever method you choose, just ensure the wings are evenly cooked. Follow the full recipe to explore these cooking methods! {{image_2}} You can switch up the flavor of your cauliflower buffalo wings by trying different sauces. Instead of classic buffalo sauce, you might enjoy a sweet chili sauce for a milder taste. For a smoky twist, try a chipotle sauce. Honey mustard also adds a unique zing. You can mix sauces too! Combine buffalo and honey for sweet and spicy wings. If you need gluten-free options, use almond flour or chickpea flour instead of all-purpose flour. Both work well and still give you a nice crispy texture. Make sure your buffalo sauce is gluten-free too. Many brands offer gluten-free choices, so check the label. You can add more flavor to your batter with extra seasonings. Try adding cumin for a warm taste or nutritional yeast for a cheesy flavor. A pinch of oregano or thyme can also enhance the dish. Experiment with spices you love. Each change gives a new twist to your cauliflower buffalo wings. For a full recipe, check out the ingredients and instructions in the main section! To store your Cauliflower Buffalo Wings, let them cool completely. Place them in an airtight container. You can keep them in the fridge for up to 3 days. For longer storage, freeze the wings. Use a freezer-safe bag or container. They can last up to 3 months in the freezer. Make sure to label the bags with the date. This step helps you use them before they go bad. When you’re ready to enjoy your wings again, preheat your oven to 400°F (204°C). Place the wings on a baking sheet lined with parchment paper. Heat for about 10-15 minutes. This method keeps the wings crispy. You can also reheat them in an air fryer. Set the air fryer to 350°F (177°C) for about 5-7 minutes. Just check on them to avoid burning. To keep your Cauliflower Buffalo Wings fresh, store them in the fridge right after cooling. Avoid leaving them out for too long. Reheat only what you plan to eat. If you have leftover sauce, store it separately. This keeps everything tasting great. Enjoy your delicious cauliflower wings at their best! For the detailed recipe, check the Full Recipe section. Yes, you can prepare them ahead of time. Make the batter and coat the cauliflower. Store the coated florets in the fridge. Bake them when you’re ready to serve. They will still be tasty! Serve them hot and crispy. I like to add fresh parsley on top for color. Pair them with celery sticks for crunch. Don’t forget your favorite ranch or blue cheese dressing for dipping! Yes, you can freeze leftovers. Once they cool down, place them in an airtight container. When you want to eat them, reheat them in the oven for extra crispiness. This keeps them tasty! Making homemade buffalo sauce is easy! Combine 1 cup of hot sauce with 2 tablespoons of melted butter. Mix well until smooth. You can adjust spice by adding more hot sauce if you like it spicy. This sauce adds a great kick! You can find the full recipe in the article for even more details. In this post, we covered how to make delicious Cauliflower Buffalo Wings. We explored the key ingredients, step-by-step instructions, and useful tips for perfect texture. We discussed flavor options and storage methods to keep your wings fresh. Enjoy these tasty wings for your next party or snack. You'll impress everyone with your cooking skills. Try different dips and seasonings to find your favorite combo!

Cauliflower Buffalo Wings Deliciously Crispy Delight

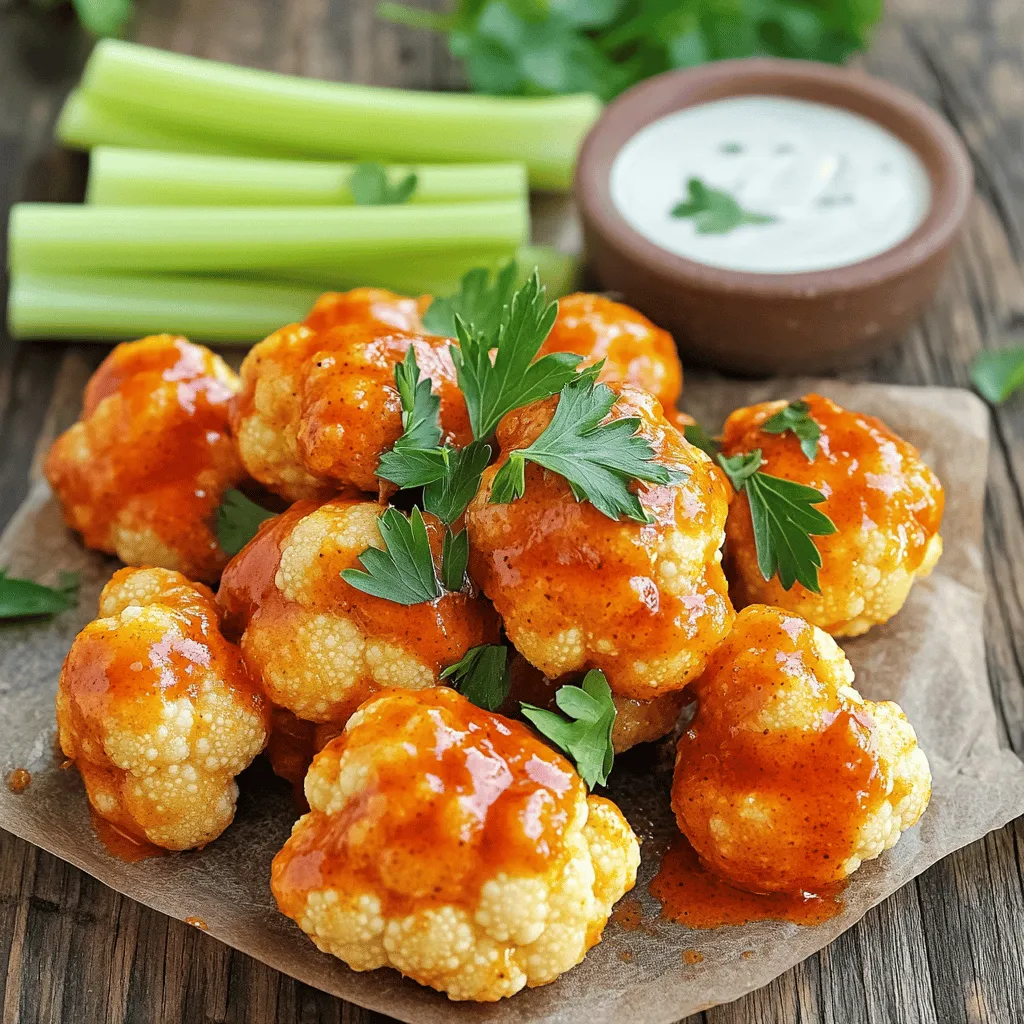
Are you ready to spice up your snack game with a healthy twist? These Cauliflower Buffalo Wings are bursting with

To make a great Classic French Toast, you need a few key ingredients: - 4 slices of thick bread (preferably brioche or challah) - 2 large eggs - 1 cup milk (any type) - 1 teaspoon vanilla extract - 1 teaspoon ground cinnamon - 1 tablespoon sugar (optional) - 1 tablespoon butter (for frying) The bread is the star here. Brioche and challah are soft, buttery, and soak up the egg mixture well. The egg and milk mixture gives the toast its rich flavor. Vanilla and cinnamon add warmth, while sugar sweetens it up. Now, let’s talk about toppings. They can really make your French toast pop. - Maple syrup varieties: You can use classic maple syrup or try flavored ones like vanilla or cinnamon. - Fresh fruit options: Berries like strawberries, blueberries, or raspberries add freshness. Bananas also work great. - Additional toppings: Powdered sugar gives a nice touch. Whipped cream adds creaminess and fun. These simple toppings add flavor and make your dish look beautiful. Enjoy your Classic French Toast with your favorite toppings from the Full Recipe! To make the perfect batter, start with a large bowl. Add two eggs and one cup of milk. Whisk them together well to combine. Use a steady motion to create air bubbles. This frothiness helps the French toast rise. Add one teaspoon of vanilla extract, one teaspoon of ground cinnamon, and sugar if you like it sweet. Whisk again until the mixture looks smooth and airy. Preheat your skillet or griddle over medium heat. Melt one tablespoon of butter in the pan. Make sure it coats the bottom evenly to prevent sticking. Once the butter is hot, dip each bread slice into the egg mixture. Let it soak for just a few seconds on each side. You want it wet but not falling apart. Place the soaked bread in the skillet. Cook for 2-3 minutes on each side until it turns a lovely golden brown. Keep an eye on it to avoid burning. To serve, place the French toast on a nice plate. Drizzle warm maple syrup over the top. Add fresh berries like strawberries, blueberries, or raspberries for color. A sprig of mint can make it look fancy. Pair this with a hot cup of coffee or a glass of fresh juice. Enjoy! To get the best texture, soak the bread for about 10 seconds on each side. You want it wet but not falling apart. Use a medium heat on your skillet. If it’s too hot, the outside burns before the inside cooks. If it’s too low, the toast gets soggy. One big mistake is over-soaking the bread. If you leave it too long, it turns mushy. Another mistake is using the wrong heat setting. Too high will burn the toast, while too low will dry it out. Keep an eye on the toast as it cooks. Flip it when it’s golden brown. For a detailed recipe, check the Full Recipe for Classic French Toast. {{image_2}} You can make French toast exciting with fun flavors. Try these: - Cinnamon French Toast: Add more cinnamon for a warm taste. Just mix a bit more into the egg mixture. It brings a sweet and cozy feeling to each bite. - Chocolate Chip French Toast: After dipping the bread, sprinkle chocolate chips on top before cooking. The chips will melt slightly, giving you a decadent treat. Everyone loves chocolate! - Savory French Toast Options: For a twist, skip the sugar and vanilla. Instead, mix in herbs like thyme or rosemary. Top with cheese and avocado for a savory delight. You might want to change some ingredients for health reasons or taste. Here are a few swaps: - Dairy-Free Alternatives for Milk: You can use almond, soy, or oat milk instead of regular milk. These options work well and keep the French toast creamy. - Gluten-Free Bread Choices: If you need gluten-free bread, look for brands that are soft and thick. They will hold up better when soaked in the egg mixture. These variations and swaps can help you find the perfect French toast recipe that fits your taste and needs. For the full recipe, be sure to follow the steps to create your own delicious French toast. To store leftover French toast, place it in the fridge. Use an airtight container to keep it fresh. You can also freeze French toast. Wrap each slice in plastic wrap, then place them in a freezer bag. This way, they won't stick together. When you're ready to eat your French toast, reheating is simple. The best method is using a toaster or a skillet. For a toaster, pop the slices in until warm. If you use a skillet, heat it on low. Add a bit of butter to keep the toast moist. Cook for a couple of minutes on each side. This helps keep the texture nice and fluffy. Enjoy your delicious French toast again! For the full recipe, check out the Heavenly Classic French Toast section. I recommend using thick bread for the best texture. Brioche and challah are top choices. They soak up the egg mixture well and cook to a nice golden brown. Both types have a rich flavor that makes French toast special. If you want a different twist, try sourdough or Texas toast. They can add a nice crunch, too. Yes, you can make French toast ahead! Prepare the batter and soak the bread slices. Then, store them in the fridge for up to one day. Just cook them when you're ready to serve. You can also freeze cooked French toast. Place slices in a single layer on a baking sheet, then freeze. Once frozen, put them in a bag. To reheat, just pop them in the toaster or oven. You can definitely make egg-free French toast! Use mashed banana or unsweetened applesauce as a substitute. Another great option is using silken tofu, blended until smooth. For a simple mix, combine one tablespoon of ground flaxseed with three tablespoons of water. Let it sit for a few minutes until it thickens. This will help bind the ingredients together, just like eggs do. This blog post covered key ingredients and steps to make great French toast. We explored bread choices and how to prepare the perfect egg mixture. You learned about cooking tips for golden results and creative topping ideas. By following these simple steps, you can enjoy a delicious breakfast. Remember to experiment with flavors and variations. Perfecting French toast is easier than you think. Enjoy your cooking and share your tasty results with friends!

Classic French Toast Delight with Simple Toppings

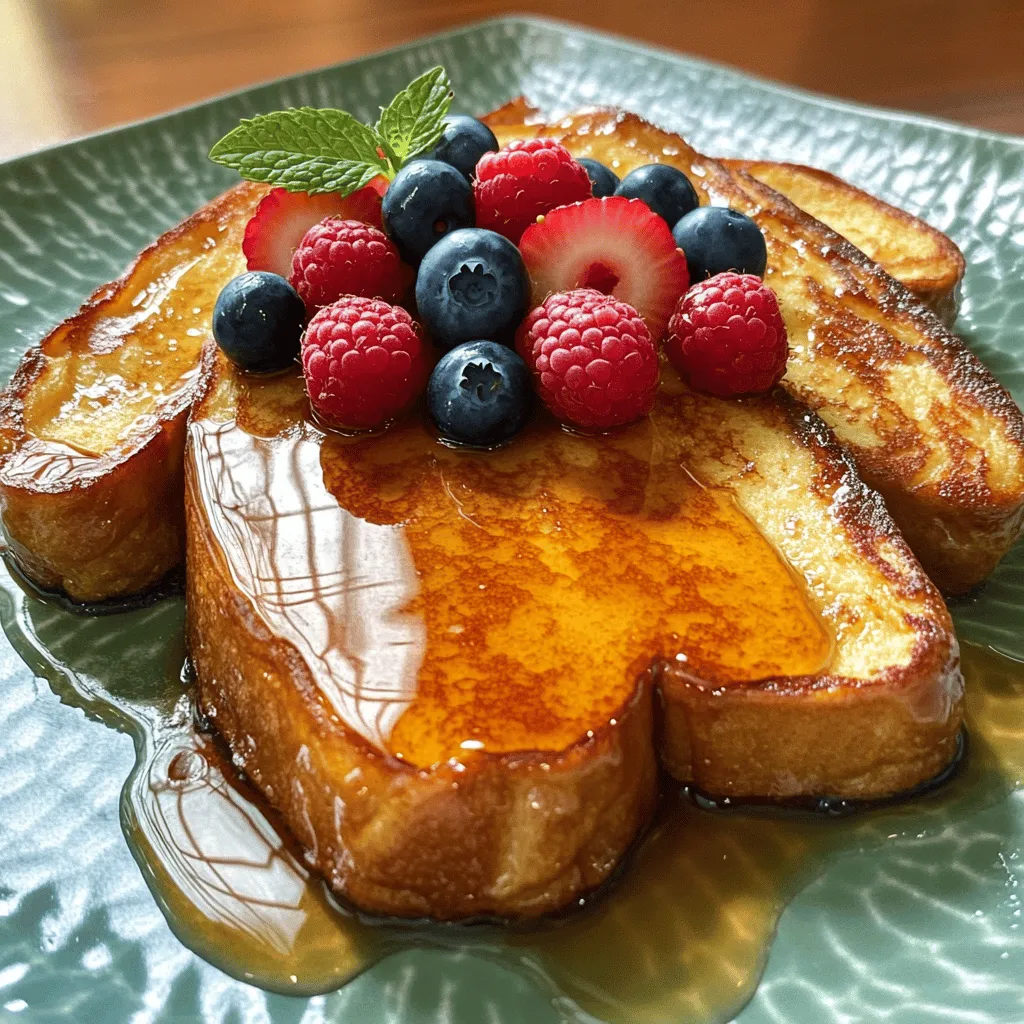
Welcome to the world of Classic French Toast Delight! If you’re craving a warm, comforting breakfast that’s simple yet satisfying,

- 8 oz rotini or penne pasta - 1 lb grilled chicken breast, diced - 1 cup romaine lettuce, chopped - ½ cup cherry tomatoes, halved - ½ cup Caesar dressing - ¼ cup grated Parmesan cheese - 2 tablespoons olive oil - 1 clove garlic, minced - Salt and pepper to taste - ½ cup croutons for topping - Fresh parsley, chopped (for garnish) Gathering the right ingredients is key to making a great Chicken Caesar Pasta Salad. Start with the pasta. I love using rotini or penne because they hold the dressing well. You need about 8 ounces. Next, you'll want some protein. I recommend 1 pound of grilled chicken breast, diced into bite-sized pieces. It adds flavor and makes the salad hearty. Next, for freshness, chop up 1 cup of romaine lettuce. This crunchy green balances the rich dressing. Don’t forget the cherry tomatoes; ½ cup of these, halved, adds a juicy pop. Now, let's talk about the dressing and toppings. Grab ½ cup of Caesar dressing for a creamy touch. You also need ¼ cup of grated Parmesan cheese for a salty kick. A bit of olive oil, about 2 tablespoons, helps blend everything. Lastly, to enhance flavor, include 1 clove of minced garlic for depth. Add salt and pepper to taste. For crunch, use ½ cup of croutons on top. Finish with some fresh parsley, chopped, for color and freshness. This Chicken Caesar Pasta Salad is not just tasty; it’s a feast for the eyes, too! For the full recipe, check out the detailed instructions. - Boil salted water in a large pot. - Cook rotini or penne until al dente, about 8 to 10 minutes. - Drain the pasta and rinse it under cold water to stop cooking. - Season chicken breast with olive oil, garlic, salt, and pepper. - Grill or sauté the chicken until fully cooked, about 6 to 8 minutes per side. - Let the chicken rest, then dice it into bite-sized pieces. - In a large bowl, mix the cooled pasta with chicken, chopped romaine, and halved cherry tomatoes. - Pour in the Caesar dressing and sprinkle with grated Parmesan cheese. - Taste the salad and season with extra salt and pepper as needed. - Toss everything together to ensure an even coat of dressing. - Refrigerate the salad for at least 30 minutes to let flavors blend. - Just before serving, top with croutons and garnish with fresh parsley. For more detailed instructions, check the Full Recipe. - How to prevent pasta from becoming mushy Cook the pasta until it is al dente. This means it should be firm but cooked through. Drain and rinse it under cold water right after cooking. This stops the cooking process and keeps the pasta from getting too soft. - Choosing the right type of pasta I like using rotini or penne for this dish. These shapes hold the sauce well. They also add a nice texture to your salad. You can try others, but stick with short pasta for best results. - Adding extra ingredients for flavor To make your Chicken Caesar Pasta Salad even better, add crispy bacon or creamy avocado. Bacon gives a nice crunch. Avocado adds creaminess and richness. Both will elevate the taste and texture. - Using homemade Caesar dressing vs. store-bought Homemade Caesar dressing tastes fresh and vibrant. It is easy to make with simple ingredients. Store-bought dressing can save time, but it may lack the depth of flavor. If you have time, I recommend making your own for the best salad experience. - Best accompaniments for a Chicken Caesar Pasta Salad Serve your salad with crusty bread or garlic toast. This will soak up extra dressing. A light fruit salad or vegetable sticks make a great side too. They balance the meal and add freshness. - Ideas for packaging for picnics or meal prep For picnics, pack the salad in a sealed container. Keep the dressing separate until serving. This keeps the pasta crisp. If you prep for the week, divide the salad into smaller containers. This makes it easy to grab and go. For the full recipe, check the detailed instructions I provided earlier. {{image_2}} You can switch out the grilled chicken for shrimp or tofu. Shrimp adds a sweet and briny flavor. Just sauté them until they turn pink and tender. Tofu brings a nice texture and soaks up flavors. For a vegan option, use grilled tofu instead of chicken. It’s a great way to enjoy this dish without meat. Feel free to explore different dressings. You can try ranch or Greek yogurt dressing for a twist. Each dressing brings a unique taste to the salad. If you want to make your own Caesar dressing, it’s simple. Just mix mayonnaise, lemon juice, garlic, Worcestershire sauce, and Parmesan cheese. This adds a fresh touch to your Chicken Caesar Pasta Salad. Try various pasta shapes for fun. Rotini and penne are great, but you can use farfalle or fusilli. Each shape holds the dressing differently, making every bite special. If you need a gluten-free option, look for gluten-free pasta. It tastes just as good and keeps the meal light and fresh. To store your Chicken Caesar Pasta Salad, place it in an airtight container. This keeps the salad fresh and tasty. Make sure to cool the salad before sealing it. Properly stored, it lasts in the fridge for 3 to 5 days. You can freeze Chicken Caesar Pasta Salad, but I recommend separating the ingredients. Freezing the salad as a whole can make the pasta mushy. Instead, freeze the chicken and dressing together. Keep the pasta, lettuce, and tomatoes in the fridge. They stay crisp this way. You can enjoy leftovers cold or at room temperature. If you want to serve it warm, heat the chicken gently in a pan. Add fresh lettuce and dressing right before serving. For a fun twist, mix leftovers into a wrap or a quesadilla. This adds variety to your meals. What can I add to Chicken Caesar Pasta Salad? You can add many fun ingredients. Try crispy bacon, grilled shrimp, or even avocado. Fresh herbs like basil or dill also boost flavor. You can mix in bell peppers or olives for extra crunch. Get creative and make it your own! Can I make this salad ahead of time? Yes, you can! Make it a few hours before serving. Just keep it in the fridge. This allows the flavors to blend. It’s perfect for meal prep or potlucks. Is Chicken Caesar Pasta Salad healthy? This salad can be healthy. It includes lean protein from chicken and fresh veggies. The dressing adds flavor, but you can use less for a lighter option. Balance it with whole grain pasta for more fiber. How do I make the best homemade Caesar dressing? To make a great Caesar dressing, combine garlic, lemon juice, and anchovy paste. Mix in mayonnaise and grated Parmesan cheese. Add olive oil slowly while whisking. Taste and adjust with salt and pepper. This dressing is creamy and full of flavor! What are the best toppings for Chicken Caesar Pasta Salad? Top your salad with croutons for crunch. Freshly grated Parmesan cheese adds a nice touch. You can also sprinkle chopped parsley for color. Some people love adding a squeeze of lemon juice on top. What to do if the salad is too dry? If your salad is dry, add more dressing. A little olive oil can help too. Toss everything well to coat it evenly. You want every bite to be flavorful! How to fix an overly salty salad? If your salad is too salty, add more pasta or lettuce. You can also add a splash of lemon juice to balance it. Mixing in extra veggies can help reduce the saltiness too. This Chicken Caesar Pasta Salad is a great dish for any meal. You learned how to cook the pasta, prepare the chicken, and combine all the fresh ingredients. I shared tips for variations and storage to keep it tasty for days. Remember, you can customize it however you want, with different proteins or dressings. Enjoy this easy and delicious recipe! You'll impress everyone at your next meal.

Chicken Caesar Pasta Salad Flavorful and Fresh Meal

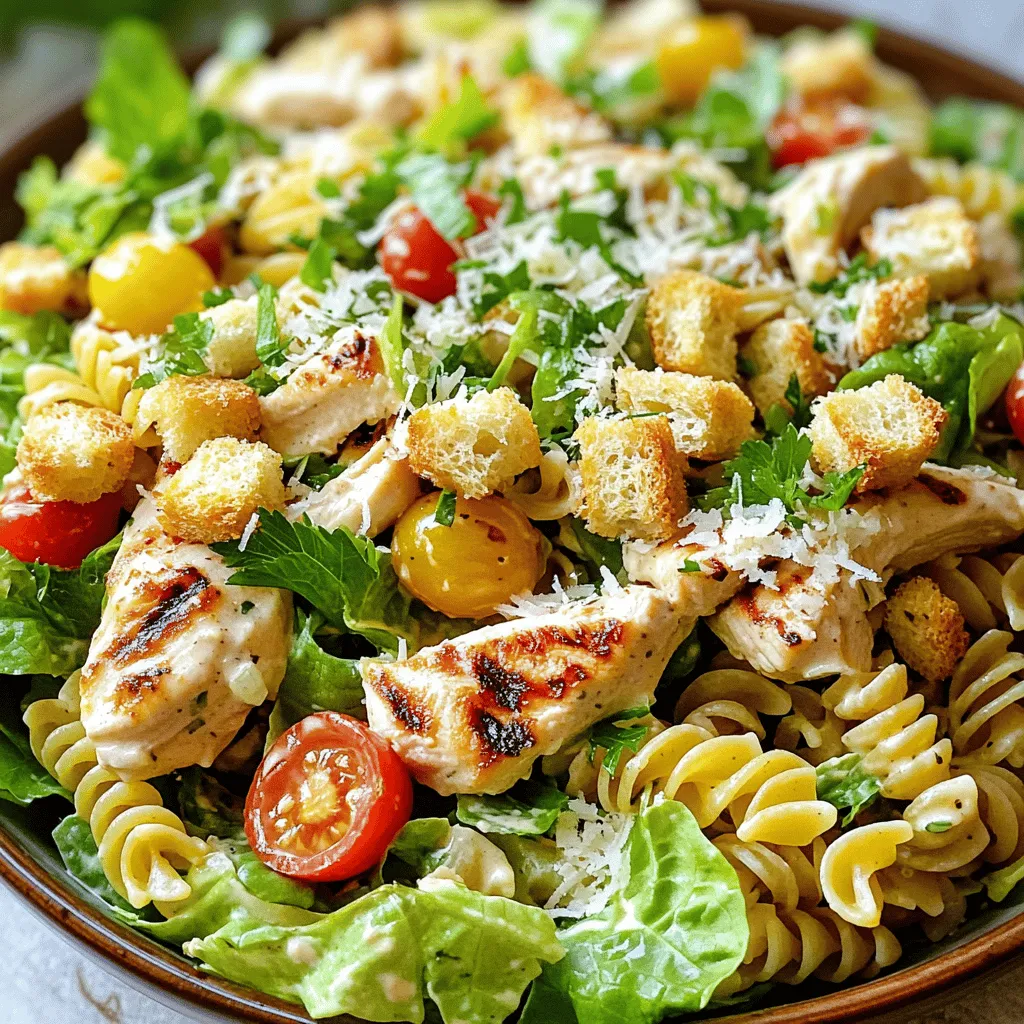
Looking for a fresh meal that’s both easy to make and full of flavor? Chicken Caesar Pasta Salad is your

- 1 pound Brussels sprouts, trimmed and halved - 3 tablespoons olive oil - 2 tablespoons honey - 1 tablespoon balsamic vinegar - 1 teaspoon crushed red pepper flakes - 1/2 teaspoon garlic powder - Salt and pepper to taste - 1/4 cup chopped pecans - 1/4 cup dried cranberries In this recipe, we focus on fresh Brussels sprouts. Choose firm sprouts that feel heavy. Trim the ends and cut them in half. This helps them cook evenly. I use olive oil for a rich flavor. Honey adds sweetness, while balsamic vinegar brings a tangy note. The combination makes each bite tasty. For seasonings, crushed red pepper flakes give a gentle heat. Garlic powder adds depth. Always adjust salt and pepper to your taste. You can add chopped pecans for crunch and dried cranberries for sweetness. These add-ins make the dish more fun and colorful. This recipe is truly special. You can try it for a quick weeknight meal or a big dinner party. It’s easy to follow, and you’ll impress everyone. Check out the full recipe for all the steps to create this savory dish. - Preheat your oven to 425°F (220°C). - In a large bowl, combine the halved Brussels sprouts with olive oil, honey, balsamic vinegar, crushed red pepper flakes, garlic powder, salt, and pepper. Toss well until the Brussels sprouts are evenly coated. - Arrange the coated Brussels sprouts in a single layer on a baking sheet. - Roast them for 20-25 minutes, stirring halfway through. You want them golden brown and crispy on the edges. - If you like, include pecans and cranberries for the last 5 minutes of roasting. This adds a nice crunch and sweetness. - Once done, cool slightly before serving. Enjoy your savory and simple dish! For the full recipe, check out the details above. To get the best Brussels sprouts, you need to coat them well. Use enough oil and seasoning. This helps them cook evenly. I suggest roasting them at 425°F (220°C). This high heat gives you crispy edges and soft insides. Roast for about 20 to 25 minutes. Stir them halfway through for even cooking. For a great presentation, serve your sprouts on a large platter. Drizzle with any leftover honey. Add extra pecans and cranberries to make it colorful. These Brussels sprouts pair well with chicken, fish, or beef. They also make a tasty side for a big salad. One big mistake is not preheating your oven. Always preheat before roasting to get the best texture. Another mistake is overcrowding the baking sheet. If the sprouts are too close, they steam instead of roast. Give them space to get crispy and brown. {{image_2}} You can easily change the taste of your roasted Brussels sprouts. One great option is lemon garlic roasted Brussels sprouts. Just add lemon juice and minced garlic to the mix before roasting. This brings a fresh and zesty flavor. Another tasty option is to sprinkle Parmesan cheese and herbs on top. After roasting, add grated Parmesan and your favorite herbs. This gives a rich and savory twist that pairs well with the sprouts. You can cook Brussels sprouts in different ways. An air fryer is a fast and easy method. It cooks the sprouts quickly while keeping them crispy. Simply toss them in oil and seasonings, then cook at a high temperature. Grilling Brussels sprouts is also a fun choice. The grill adds a smoky flavor that is hard to beat. Just skewer the halved sprouts or use a grill basket. Brush them with oil and grill until tender and slightly charred. If you follow a vegan diet, you can easily adapt this recipe. Use maple syrup instead of honey. This keeps the sweetness without using animal products. For gluten-free diets, check your balsamic vinegar. Most are gluten-free, but always read labels. You can also make low-carb Brussels sprouts. Simply skip any sweeteners or use a low-carb substitute. Focus on seasoning with herbs and spices for flavor. Explore these variations to find your perfect Brussels sprouts recipe! For the full recipe, check out the Sweet & Spicy Oven Roasted Brussels Sprouts section. After enjoying your sweet and spicy oven roasted Brussels sprouts, you may want to save some for later. To store your leftovers, let them cool down first. Place them in an airtight container. This keeps them fresh and tasty. You can refrigerate them for up to four days. If you want to enjoy them beyond that, consider freezing. When it’s time to enjoy your Brussels sprouts again, you have two options: the oven or the microwave. The oven gives the best results. Preheat it to 350°F (175°C). Spread the sprouts on a baking sheet. Heat for about 10-15 minutes until they’re warm and crisp. If you use the microwave, place them in a microwave-safe dish. Cover with a microwave-safe lid or wrap. Heat in short bursts of 30 seconds. This way, you keep them moist without losing texture. If you want to freeze your Brussels sprouts, it's best to do it before cooking. Clean and trim them, then blanch in boiling water for two minutes. Quickly cool them in ice water. Drain and pack in freezer bags. Squeeze out as much air as possible before sealing. They can last up to six months in the freezer. If you freeze them after roasting, let them cool first. Place them in airtight containers or freezer bags. When you’re ready to eat, thaw them in the fridge overnight. Then, reheat as mentioned above. Enjoy your tasty Brussels sprouts anytime! For the full recipe, check out the Sweet & Spicy Oven Roasted Brussels Sprouts recipe. Roast Brussels sprouts for 20 to 25 minutes. Start by preheating your oven to 425°F (220°C). Place them on a baking sheet in a single layer. Stir them halfway through cooking. This helps them roast evenly. Look for a golden brown color and crispy edges. If they aren’t brown enough, keep roasting for a few more minutes. You can use frozen Brussels sprouts, but fresh ones taste better. Fresh sprouts have a firmer texture and more flavor. Frozen sprouts may be softer after cooking. If you use frozen, thaw them first and pat them dry. This will help remove excess moisture and keep them from becoming mushy. Roasted Brussels sprouts pair well with many dishes. Try serving them with grilled chicken or fish. They also go great with steak or pork. For a vegetarian meal, serve them alongside quinoa or a grain salad. You can also add them to a warm pasta dish for extra flavor and nutrition. To get crispy Brussels sprouts, follow some simple tips. First, make sure they are fully coated with oil. This helps them crisp up in the oven. Spread them out on the baking sheet without overlapping. This allows hot air to circulate. If you want extra crunch, use high heat and roast them longer. Stirring halfway through also helps them brown evenly. Roasting Brussels sprouts can be easy and fun. We covered the main ingredients, from sprouts to olive oil and honey. You learned how to prepare, roast, and add extras for flavor. I shared tips for the best cooking methods, common mistakes to avoid, and ideas for serving. Try out my variations to enjoy new flavors. Storing and reheating these tasty veggies is simple too. Enjoy your delicious Brussels sprouts and impress everyone at your table!

Oven Roasted Brussels Sprouts Savory and Simple Dish

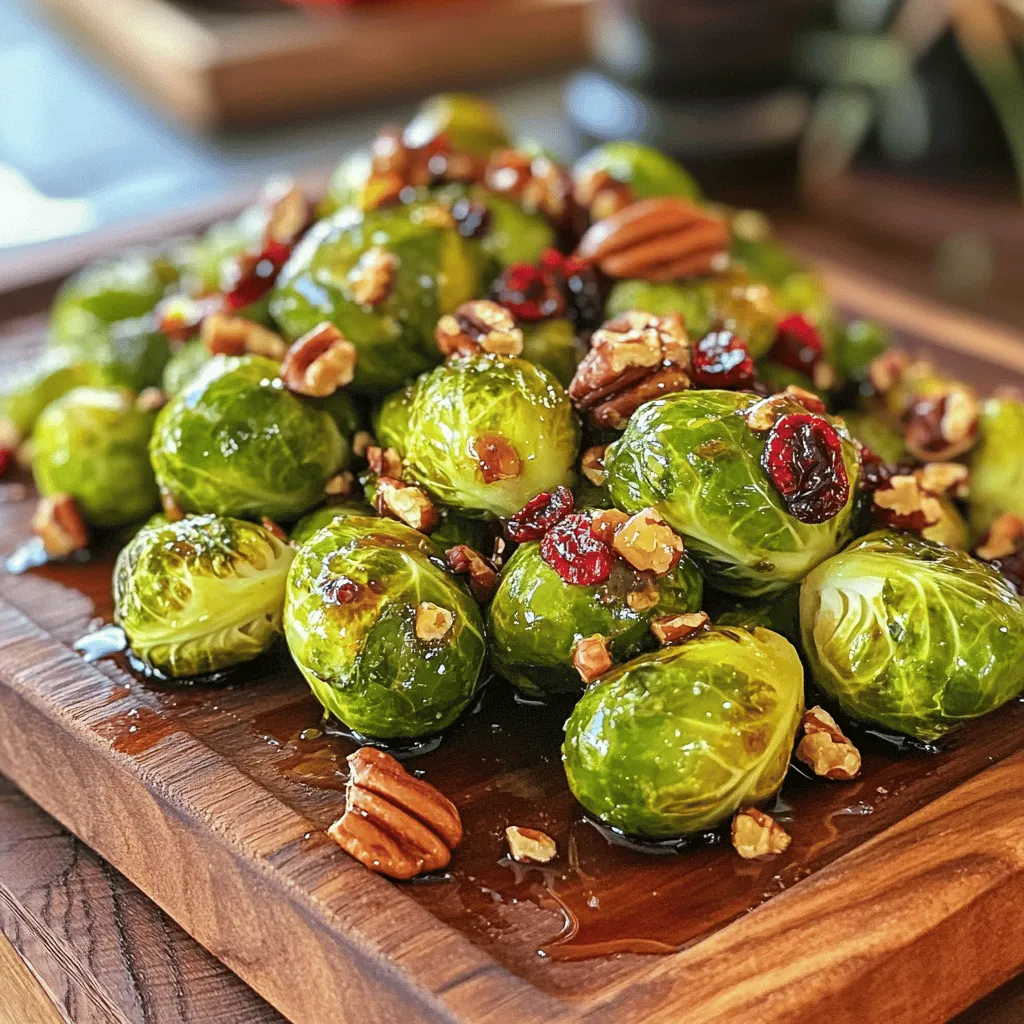
Craving a tasty and simple side dish? Oven Roasted Brussels Sprouts are here to impress! Packed with flavor from honey,

To make the best jalapeño popper dip, you need these simple ingredients: - 8 oz cream cheese, softened - 1 cup sharp cheddar cheese, shredded - 1/2 cup mozzarella cheese, shredded - 1/4 cup sour cream - 1/4 cup mayonnaise - 2-3 fresh jalapeños, seeded and finely chopped - 2 cloves garlic, minced - 1 teaspoon onion powder - 1/2 teaspoon smoked paprika - Salt and pepper to taste - 1/4 cup green onions, chopped (for garnish) - Tortilla chips or sliced vegetables (for serving) These ingredients come together to create a creamy dip bursting with flavor. You can adjust the number of jalapeños to suit your taste. If you like it spicy, add more jalapeños. If you prefer it milder, use just one or two. Trust me, this dip is perfect for any gathering, and everyone will love it! For the full recipe, check out the complete guide. - Preheat your oven to 350°F (175°C). - In a mixing bowl, combine cream cheese, sour cream, and mayonnaise until smooth. Getting this dip ready is super simple. First, you need to preheat your oven. This helps the dip bake evenly. Next, take a mixing bowl and combine your cream cheese, sour cream, and mayonnaise. Mix these well until you have a smooth base. This step is key because it creates a creamy texture for your dip. - Add cheddar and mozzarella cheeses, garlic, onion powder, smoked paprika, and jalapeños. Mix well. Now, it’s time to add flavor. Toss in your sharp cheddar and mozzarella cheeses. These cheeses give the dip its rich taste and gooey texture. Next, add minced garlic, onion powder, smoked paprika, and chopped jalapeños. This mix brings the heat and depth of flavor. Make sure to mix everything well, so the flavors blend nicely. - Transfer to a baking dish and bake for 25-30 minutes. Allow to cool slightly, garnish, and serve with tortilla chips. Once mixed, transfer your dip to a baking dish. Spread it out evenly to ensure it bakes well. Place it in the oven and bake for 25-30 minutes. You want it to be bubbly and slightly golden on top. After baking, let it cool for a few minutes. This helps prevent burns when you dig in. Finally, garnish with chopped green onions for a fresh touch. Serve with tortilla chips or sliced veggies for a tasty treat. If you're curious about the full recipe, check the details above! - Ensure cream cheese is softened for easier mixing. - Adjust jalapeño quantity to control the spice level. Softening the cream cheese helps it blend smoothly. I recommend taking it out of the fridge for about 30 minutes before mixing. For spice lovers, use more jalapeños. If you prefer mild flavors, stick to one or two. - Best served warm with tortilla chips or sliced vegetables. - Pair with a refreshing drink to complement the dip. When serving, warm the dip until bubbly. It tastes best straight from the oven. Tortilla chips make the perfect crunchy dipper. Fresh veggies like carrots and cucumbers also add a nice crunch. For drinks, try a light beer or sparkling water. - Overbaking can cause the dip to dry out. - Make sure to season adequately with salt and pepper. Watch the clock while baking! If you leave it too long, the dip can lose its creamy texture. After mixing, taste the dip. Add salt and pepper to bring out all the flavors. {{image_2}} - Substitute with pepper jack cheese for extra spice. This adds a nice kick. - Use a mix of goat cheese and cream cheese for a tangy flavor. This gives a rich taste. - Add cooked bacon for a smoky flavor. This elevates the dip to a new level. - Incorporate chopped tomatoes or corn for added texture. These ingredients bring freshness. - Use Greek yogurt instead of sour cream for a healthier option. It cuts calories but keeps creaminess. - Choose dairy-free cheese for a vegan version. This way, everyone can enjoy the dip. Explore the Full Recipe to see how these variations can transform your dish! Refrigerate your Jalapeño Popper Dip in an airtight container. It stays fresh for 3-5 days. This dip tastes great even after a day or two. Just make sure to seal it well to keep it moist. When you're ready to enjoy it again, reheat the dip in the oven. Set the oven to 350°F (175°C). Heat it for about 10-15 minutes, or until it's warm all the way through. This method helps keep the dip creamy and delicious. You can freeze the dip before baking it. Just prepare the mixture and place it in a safe freezer dish. When you want to cook it, thaw it in the fridge overnight. Then bake as per the Full Recipe instructions. This way, you can enjoy this tasty treat anytime! Yes, prepare it a day in advance and store it in the refrigerator. This dip tastes great even after a day. Just reheat it before serving. Yes, but fresh jalapeños provide better flavor and texture. Fresh peppers add a nice crunch. They also have a bright taste that canned ones lack. Tortilla chips, sliced vegetables, or crackers are excellent dippers. You can also try pita chips for a fun twist. Each choice brings a unique taste. It varies based on the number of jalapeños used; adjust accordingly for desired spice level. Start with two jalapeños for mild heat. If you like it hotter, add more! This blog post showed you how to make a tasty Jalapeño Popper Dip. We discussed key ingredients, step-by-step preparation, and baking tips. You learned how to customize the recipe and avoid common mistakes. Remember to store leftovers properly and reheat gently for the best flavor. With these tips, you can enjoy this dip at your next gathering. It’s sure to impress your friends and family. Now, gather your ingredients and start cooking! You’ll create a dish everyone will love.

Jalapeño Popper Dip Perfect for Any Gathering

Looking to impress your friends at your next gathering? Jalapeño Popper Dip is your secret weapon! This creamy, cheesy dip

To make healthy banana oat muffins, you need a few main ingredients. Here is what you will need: - 2 ripe bananas, mashed - 1/4 cup honey or maple syrup - 1/2 cup unsweetened applesauce - 1 teaspoon vanilla extract - 1 cup rolled oats - 1 cup whole wheat flour - 1 teaspoon baking powder - 1/2 teaspoon baking soda - 1/2 teaspoon salt - 1/2 teaspoon ground cinnamon These ingredients work together to create a rich, moist muffin. The ripe bananas bring natural sweetness, while the applesauce adds moisture without extra fats. Whole wheat flour and oats provide fiber and nutrients. You can add fun flavors to your muffins with a few extra ingredients. Here are some optional add-ins: - 1/2 cup chopped walnuts or pecans - 1/4 cup dark chocolate chips Chopped nuts give a nice crunch and healthy fats. Dark chocolate chips add a touch of sweetness. You can mix and match to find your favorite combo! These muffins are not just tasty; they are also good for you. Each muffin is low in sugar and high in fiber. Here’s a quick look at what you get: - Calories: About 120 per muffin - Protein: 3 grams - Fiber: 3 grams - Fat: 2.5 grams This means you can enjoy a yummy treat without the guilt. You can feel good about serving these muffins to your family. For the full recipe, check out the Healthy Banana Oat Muffins 🧁 section. To start, gather all your ingredients. You need ripe bananas, honey or maple syrup, applesauce, and vanilla extract. In a large bowl, mash the bananas until smooth. Add the honey or maple syrup, applesauce, and vanilla extract. Stir these together until they blend well. Next, in another bowl, whisk the rolled oats, whole wheat flour, baking powder, baking soda, salt, and ground cinnamon. This gives your muffins a nice rise and flavor. Slowly add the dry mix to the wet mix. Stir gently; don’t overmix. If you want extra crunch, fold in walnuts or chocolate chips at this stage. Now, preheat your oven to 350°F (175°C). Line your muffin tin with paper liners or lightly grease it. Scoop the batter into each muffin cup. Fill each cup about two-thirds full to allow room for rising. Bake the muffins for 15 to 20 minutes. Check for doneness by inserting a toothpick into the center. If it comes out clean, your muffins are ready. If not, give them a few more minutes. Once baked, remove the muffins from the oven. Let them cool in the tin for about 5 minutes. Then, transfer them to a wire rack to cool completely. These muffins taste great warm. You can dust them with powdered sugar or drizzle a little honey on top for extra sweetness. Pair them with tea or coffee for a delightful treat. Check out the Full Recipe for more details! To make your healthy banana oat muffins just right, focus on the batter. Mix the wet and dry ingredients gently. Overmixing can lead to tough muffins. Use ripe bananas for natural sweetness and moisture. This gives your muffins better flavor and texture. Watch your oven temperature. Baking muffins at the wrong heat can ruin them. Too hot can burn the tops while leaving the insides raw. Use an oven thermometer for accuracy. Also, make sure to fill the muffin cups wisely. Filling them about two-thirds full helps them rise well without spilling over. Add a pinch of nutmeg for warmth or swap honey for maple syrup for a deeper taste. You can also use different nuts or chocolate chips. These simple swaps can change the whole muffin experience. Try mixing in some shredded coconut or dried fruit for extra fun. For the complete recipe, refer to the Full Recipe section above. Enjoy your baking! {{image_2}} If you need gluten-free muffins, you can swap the whole wheat flour. Use almond flour or coconut flour instead. Both options work well and keep the muffins moist. You may need to adjust the liquid a bit for these flours. A good rule is to add a little more applesauce or honey to keep the batter from being too dry. You can mix in other fruits to change the flavor. Try adding blueberries, chopped apples, or even shredded carrots. Each fruit brings a new taste. For spices, add nutmeg or ginger for warmth. You can also add a bit more cinnamon for a spicier kick. These changes will keep your muffins exciting and fresh! To change the sweetness, you can use agave syrup or date syrup instead of honey. These swaps are equally tasty. If you want to reduce fat, replace some of the applesauce with pureed avocado. This will keep the muffins soft and add healthy fats. You can also cut out the nuts or chocolate chips to lower calories. To keep your Healthy Banana Oat Muffins fresh, store them in an airtight container. Place a paper towel in the container to absorb moisture. This helps prevent the muffins from getting soggy. You can keep them at room temperature for up to three days. If you want to store them longer, consider freezing them. Freezing your muffins is a great way to enjoy them later. First, let the muffins cool completely. Then, wrap each muffin in plastic wrap or aluminum foil. Place them in a freezer-safe bag or container. They can last up to three months in the freezer. When you're ready to eat one, just take it out and let it thaw at room temperature. To enjoy your muffins warm, you can reheat them in the microwave or oven. For the microwave, heat on medium power for about 15-20 seconds. If you prefer the oven, preheat it to 350°F (175°C) and warm the muffins for about 5-10 minutes. This will bring back their fresh-baked taste. To make Healthy Banana Oat Muffins vegan, swap honey for maple syrup. Use non-dairy milk in place of applesauce if you prefer. Ensure the chocolate chips are dairy-free. This keeps the muffins tasty and plant-based. Yes, you can use quick oats. They will make the muffins a bit softer. Rolled oats give a chewier texture. Both options taste great. Just remember that quick oats might change the muffin’s structure slightly. To ripen bananas fast, place them in a brown paper bag. This traps the ethylene gas they emit, speeding up ripening. You can also add an apple to the bag for even faster results. If you need them ready today, you can bake them at 300°F (150°C) for 15-20 minutes. This method softens the fruit quickly. You’ve learned how to make healthy banana oat muffins from scratch. We discussed key ingredients, step-by-step instructions, and useful tips. Don't forget the variations to suit your taste, and store them properly for later. These muffins are simple, tasty, and nutritious. You can enjoy them anytime. Use the tips to make your baking fun and easy. Happy baking!

Healthy Banana Oat Muffins Simple and Tasty Recipe

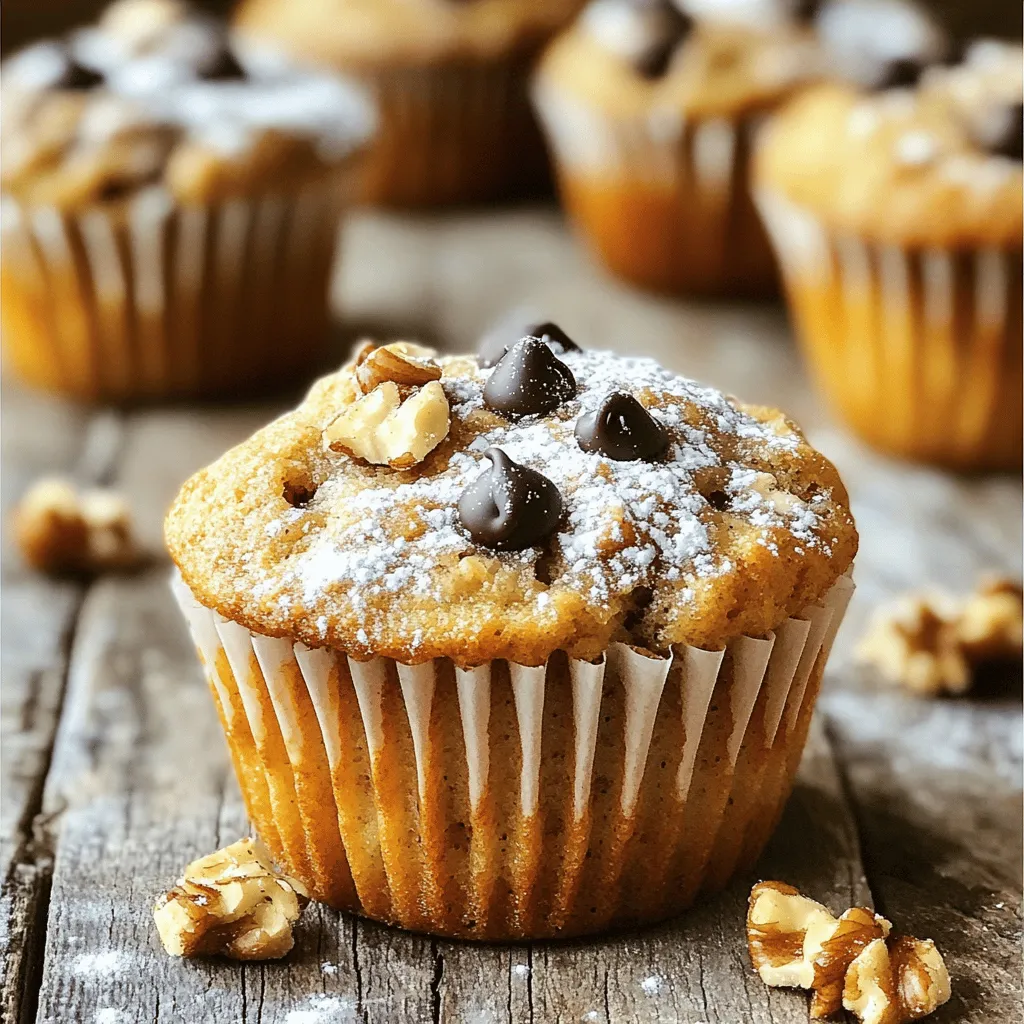
Are you ready to make a delicious and healthy treat? Your search for the perfect snack ends here! These Healthy

- Flatbreads (or naan) - Cooked chicken and BBQ sauce - Toppings like cheese and vegetables For this BBQ chicken flatbread, you need simple and tasty ingredients. Here’s what to gather: - 2 flatbreads or naan: These are your base. They should be soft yet sturdy. - 1 cup cooked chicken, shredded: You can use leftover chicken or rotisserie chicken. - 1 cup BBQ sauce: Choose your favorite, whether homemade or store-bought. - 1 cup mozzarella cheese, shredded: This will melt beautifully and add creaminess. - 1/2 cup red onion, thinly sliced: This adds a nice crunch and flavor. - 1/2 cup corn kernels: Use fresh, frozen, or canned for sweetness. - 1/4 cup fresh cilantro, chopped: This gives a fresh taste and bright color. - 1 tablespoon olive oil: Use this to brush the flatbreads. - Salt and pepper to taste: These will enhance the flavors. This list makes it easy to whip up your BBQ chicken flatbread. Each ingredient plays a role in taste and texture. Want to see how to make it? Check out the Full Recipe for all the steps! 1. Preheating the oven First, set your oven to 400°F (200°C). This helps get the flatbreads nice and crispy. 2. Mixing chicken with BBQ sauce In a bowl, take 1 cup of shredded chicken. Pour in 1 cup of BBQ sauce. Mix them well until the chicken is fully coated. 3. Preparing the flatbreads Grab 2 flatbreads or naan. Brush them lightly with 1 tablespoon of olive oil. Add a pinch of salt and pepper to taste. 1. Spreading the chicken mixture Evenly spread the BBQ chicken mixture on each flatbread. Leave a small border around the edges for a neat look. 2. Adding cheese and toppings Sprinkle 1 cup of shredded mozzarella cheese on top of the chicken. Then, add 1/2 cup of thinly sliced red onion and 1/2 cup of corn kernels evenly over the cheese. 1. Baking duration and temperature Place the flatbreads on a baking sheet lined with parchment paper. Bake for 12-15 minutes until the cheese is bubbly and golden brown. 2. Cooling and garnishing Once baked, take them out and let them cool for a couple of minutes. Before serving, garnish with 1/4 cup of chopped fresh cilantro for added flavor and color. To cook your BBQ chicken flatbread evenly, follow these tips: - Preheat your oven to 400°F (200°C) for the best results. - Use a baking sheet lined with parchment paper. This helps prevent sticking. - Brush your flatbreads lightly with olive oil. This adds flavor and helps them crisp up. - Bake for 12-15 minutes. Keep an eye on the cheese. It should be bubbly and golden. For a crispy flatbread, consider these steps: - Thinly roll or stretch the flatbreads. Thinner bread gets crispy faster. - Avoid stacking the toppings too high. This can weigh down the bread. - If you like extra crunch, bake the flatbreads without toppings for 5 minutes first. Presentation matters! Here are some ideas to serve your flatbread: - Use a wooden cutting board to create a rustic look. - Slice the flatbreads into wedges for easy sharing. - Drizzle extra BBQ sauce on top for added flavor and a nice visual. Pair your flatbread with these side dishes: - A fresh green salad adds a nice crunch. - Corn on the cob works well, too, with the BBQ theme. - Chips and guacamole can be a fun side for a casual meal. To take your BBQ chicken flatbread to the next level: - Experiment with different BBQ sauces. Try a spicy or smoky sauce for a twist. - Add jalapeños for heat. They pair well with the sweetness of the BBQ sauce. - Mix in other cheeses, like cheddar or gouda, for a richer flavor. Using these tips, you can make your BBQ chicken flatbread even more amazing. Check out the Full Recipe for more details. {{image_2}} You can easily change the protein in BBQ chicken flatbread. For vegetarians, use grilled veggies or black beans. These options add great flavor and texture. If you want to stick with meats, try pulled pork or shredded beef. Both bring a different taste to the dish. If you need gluten-free options, look for gluten-free flatbreads. Many stores sell them now. You can also use a cauliflower crust for a lighter choice. For cheese lovers who avoid dairy, there are many dairy-free cheese alternatives. Try almond or cashew-based cheeses. They melt well and taste great. Swapping ingredients can keep your BBQ chicken flatbread fresh and fun. Use seasonal vegetables like bell peppers, zucchini, or spinach. They add color and nutrition. You can also experiment with different BBQ sauces. A spicy chipotle sauce or a tangy mustard sauce can change the whole flavor. Don't be afraid to try new things! For the full recipe, check out the [Full Recipe]. To keep your BBQ chicken flatbread fresh, wrap it tightly in plastic wrap or foil. Place it in an airtight container. This helps seal in moisture and flavor. Store it in the fridge for up to three days. When you're ready to eat, reheat it in the oven at 350°F. This keeps the flatbread crispy and the cheese melty. Heat for about 10 minutes, or until it's warmed through. You can freeze your flatbreads for a quick meal later. Before freezing, let them cool completely. Wrap each flatbread in plastic wrap and then in aluminum foil to prevent freezer burn. Store them in the freezer for up to three months. When you want to enjoy them, take one out and let it thaw in the fridge overnight. Then, reheat it in the oven, as mentioned before. BBQ chicken flatbreads taste best when fresh. They last about three days in the fridge. Look for signs of spoilage, like an off smell or a change in texture. If the flatbread feels soggy or the toppings look dry, it’s time to toss it. Always trust your senses; if something seems off, don’t risk it. What can I substitute for flatbread? You can use naan, pita, or even tortillas. These options work well and can hold the toppings. Can I use raw chicken for this recipe? No, it is best to use cooked chicken. Cooking the chicken first keeps it safe and tender. How is BBQ chicken flatbread typically served? I serve it warm, cut into wedges. You can add extra BBQ sauce on top for flavor. What to do if the flatbread is soggy? If your flatbread is soggy, try baking it longer. You can also pre-bake the flatbread slightly before adding toppings. How can I make it spicier? Add sliced jalapeños or a dash of hot sauce to the BBQ chicken mix. This adds heat and flavor. For detailed guidance, check the [Full Recipe](#). BBQ chicken flatbreads make a tasty meal. We covered the main ingredients, from chicken to toppings. I shared easy steps for prep, assembly, and baking. Plus, I included tips for perfect results and fun variations. You can easily modify it for different diets or flavors. Store leftovers right to keep them fresh. With the right care, they taste great later. Enjoy your creating and flavors, and don't forget to share your unique twists!

BBQ Chicken Flatbread Tasty and Easy to Make

Craving something delicious and easy? BBQ Chicken Flatbread is the answer. You’ll love how simple it is to whip up

Older posts
Newer posts
← Previous Page1 … Page15 Page16 Page17 … Page55 Next →

dsad

© 2025 Lisa Dishes • Built with GeneratePress

Our Policies

  • Copyright Policy
  • Cookie Policy
  • GDPR Policy
  • Privacy Policy
  • Disclaimer
  • Terms Of Use

More Information

  • Home
  • About
  • Contact
  • Appetizers
  • Dessert
  • Dinner
  • Drinks
©2025, Lisa Dishes About Back To Top