
Egg Muffin Cups Easy and Tasty Breakfast Recipe
Looking for a quick and tasty breakfast? Egg muffin cups are your answer! This easy recipe packs protein, veggies, and
Looking for a quick and tasty breakfast? Egg muffin cups are your answer! This easy recipe packs protein, veggies, and
![To make Cheesy Corn Fritters, you need a few key items. Here’s what you will use: - 1 cup fresh or frozen corn kernels - 1 cup all-purpose flour - ½ cup shredded cheese (cheddar or mozzarella work great) - 1 large egg - ½ cup milk - 1 teaspoon baking powder - ½ teaspoon garlic powder - ½ teaspoon onion powder - Salt and pepper to taste - Oil for frying These ingredients create a delightful base for the fritters. The corn gives sweetness, while the cheese adds creaminess. Garnishes can turn a simple dish into something special. Here are some ideas: - 2 tablespoons chopped fresh parsley (for garnish) - A sprinkle of chili flakes for heat - A dollop of sour cream or yogurt - Fresh chives for extra color These extras can enhance the look and taste of your fritters. You can mix and match to find what you enjoy most. Choosing the right cheese can make a big difference. Here are some great options: - Cheddar: It melts well and has a sharp taste. - Mozzarella: It’s mild and adds a nice stretch. - Pepper Jack: If you like spice, this cheese is a fun choice. - Feta: For a tangy twist, crumbled feta works beautifully. These cheeses bring their unique flavors to the fritters. You can even mix different types for a richer taste. For the complete recipe, check out the [Full Recipe]. Start by gathering your dry ingredients. In a mixing bowl, combine: - 1 cup all-purpose flour - 1 teaspoon baking powder - ½ teaspoon garlic powder - ½ teaspoon onion powder - Salt and pepper to taste Mix them well to make sure they blend evenly. This mix creates the base for your fritters. In a separate bowl, whisk together: - 1 large egg - ½ cup milk This will be your wet mixture. Next, add in: - 1 cup fresh or frozen corn kernels - ½ cup shredded cheese Stir it all together until the corn and cheese are well mixed. Now, pour this mixture into the bowl with your dry ingredients. Be gentle as you mix. A few lumps are okay, so don't overdo it! Heat about ½ inch of oil in a frying pan over medium heat. To check if the oil is hot enough, drop a small amount of batter into it. If it sizzles, you’re good to go! Using a spoon or a small ice cream scoop, drop spoonfuls of the batter into the hot oil. Fry them for about 3-4 minutes until they turn golden brown. Flip the fritters and cook for another 3-4 minutes. Once both sides are crispy, remove them and drain on a paper towel. Serve warm, and if you like, add chopped parsley for that extra touch. Enjoy your cheesy corn fritters! For the full recipe, check out the recipe section above. For frying Cheesy Corn Fritters, I recommend using oils with high smoke points. Good options include canola oil, vegetable oil, or peanut oil. These oils heat well and do not burn easily. Heat your oil to about 350°F (175°C). You can test the oil by dropping a small bit of batter into it. If it sizzles and rises, your oil is ready! To get that crispy outside and soft inside, do not overmix your batter. A few lumps in the mix are okay. This keeps your fritters light and fluffy. Also, ensure your oil is hot enough before frying. Frying too slowly can lead to greasy fritters. Remove them when they are golden brown, about 3-4 minutes on each side. Taste your batter before frying. This lets you adjust the salt and spices. If you like heat, add a pinch of cayenne pepper or chili powder. Fresh herbs like parsley or cilantro can boost flavor too. Remember, you can always add more seasoning, but you can't take it out once it’s in! {{image_2}} You can make your cheesy corn fritters even better by adding spices or herbs. Try mixing in some paprika for a smoky kick. A pinch of cayenne pepper can add heat if you like spice. Fresh herbs, like chives or cilantro, give a fresh taste. Experimenting with these flavors keeps every batch exciting. If you have dietary needs, you can easily adjust the recipe. Use gluten-free flour if you need a gluten-free option. For a vegan version, replace the egg with a flax egg and use a non-dairy milk. You can also swap the cheese for a plant-based option. These changes let everyone enjoy tasty corn fritters. Corn fritters shine when served with the right dips and sides. A zesty lime crema pairs well and adds a nice tang. You can also serve them with salsa for a fresh burst of flavor. For a light meal, pair the fritters with a salad. These ideas make your snack even more enjoyable. For the full recipe, check out the details above. To keep your cheesy corn fritters fresh, store them in an airtight container. Let them cool to room temperature first. Place parchment paper between layers to prevent sticking. They should stay good for up to three days in the fridge. If you think you won't eat them soon, freezing is a great option. When you want to enjoy leftovers, the best way to reheat them is in a frying pan. Heat a bit of oil over medium heat. Place the fritters in the pan and cook for about 2-3 minutes on each side. This method helps to regain their crispiness. You can also use an oven. Preheat it to 350°F (175°C) and bake for about 10 minutes. Both methods keep the fritters tasty and crunchy. If you want to freeze the fritters, make sure they are fully cooled first. Place them in a single layer on a baking sheet. Freeze until solid, then transfer them to a freezer-safe bag. Remove as much air as possible before sealing. The fritters can last up to three months in the freezer. When you’re ready to eat them, just reheat directly from frozen. Enjoy your tasty snack anytime! For a complete guide on making these delicious bites, check out the Full Recipe. You can make Cheesy Corn Fritters ahead of time easily. Prepare the batter and store it in the fridge for up to 24 hours. This helps the flavors blend well. When you're ready to cook, just scoop and fry. If you want to freeze them, form the fritters and place them on a baking sheet. Once frozen, transfer them to a bag. Fry them straight from the freezer when you want a snack. Yes, you can bake Cheesy Corn Fritters. Preheat your oven to 400°F (200°C). Place the fritters on a baking sheet lined with parchment paper. Brush or spray them lightly with oil. Bake for about 15-20 minutes, flipping them halfway. This method makes them a bit healthier, but they won’t be as crispy as fried ones. Several dips enhance the flavor of Cheesy Corn Fritters. Here are a few tasty options: - Sour cream: Adds a creamy tang. - Avocado dip: Offers a fresh and smooth taste. - Spicy salsa: Gives a kick and extra flavor. - Ranch dressing: Adds a cool and herby touch. Experiment with these dips to find your favorite! For the full recipe, check out the earlier sections. Cheesy corn fritters are fun and tasty to make. You learned the main ingredients, cooking steps, and how to store leftovers. With some tips and variations, you can add your unique twist. Whether you fry them or try baking, these fritters offer great flavor. Enjoy them with dips or share them at gatherings. Experiment with spices and herbs for an even better taste. Now it's time to cook up a batch and savor every bite!](https://lisadishes.com/wp-content/uploads/2025/06/245dcdd9-8471-433e-82b9-1b8174aa4fd5.webp)
Craving a tasty snack that’s easy to make? You’ll love these Cheesy Corn Fritters. With just a handful of ingredients,
![To make crispy baked tofu, you need a few key items. Here’s the list: - 1 block (14 oz) firm tofu - 2 tablespoons cornstarch - 3 tablespoons soy sauce (or tamari for gluten-free) - 1 tablespoon sesame oil - 1 tablespoon rice vinegar - 1 teaspoon garlic powder - 1 teaspoon smoked paprika - Salt and pepper to taste These ingredients work together to create a savory, crispy snack or meal. You can add extra taste with these optional items: - 2 tablespoons sesame seeds - Green onions for garnish Sesame seeds give a nice crunch, and green onions add a fresh touch. If you have specific dietary needs, don’t worry! You can swap some ingredients: - Use tamari instead of soy sauce for gluten-free. - Replace sesame oil with olive oil if you prefer. - Use apple cider vinegar instead of rice vinegar for a different taste. - For a nut-free option, skip the sesame seeds. These swaps keep the dish tasty while meeting your dietary needs. You can find the [Full Recipe] for more detailed cooking steps. Start by preheating your oven to 400°F (200°C). This temperature gives the tofu a nice crisp. Next, take your block of firm tofu and drain it well. Press the tofu between paper towels to remove excess water. I like to place a heavy object on top for about 15 minutes. This step helps the tofu soak up flavors better later. Once the tofu is pressed, cut it into bite-sized cubes or rectangles. Choose a size you enjoy. Smaller pieces get crispier, while larger ones stay a bit softer. In a large bowl, mix the following ingredients: - 3 tablespoons soy sauce (or tamari for gluten-free) - 1 tablespoon sesame oil - 1 tablespoon rice vinegar - 1 teaspoon garlic powder - 1 teaspoon smoked paprika - Salt and pepper to taste Stir the marinade well until it combines. Add the tofu pieces to the bowl. Gently toss them so every piece gets coated. Let the tofu marinate for about 10 minutes. This allows the tofu to absorb all those tasty flavors. Next, sprinkle 2 tablespoons of cornstarch over the marinated tofu. Toss again until each piece is well-coated. The cornstarch helps create that lovely crunch when baked. Spread the tofu pieces evenly on a parchment-lined baking sheet. Make sure they are not touching. This space allows hot air to circulate and crisp up the tofu. Bake the tofu in your preheated oven for 25 to 30 minutes. Flip the pieces halfway through baking to ensure even crispiness. If you like, sprinkle sesame seeds over the tofu in the last 5 minutes. This adds extra crunch and flavor. Once they are golden brown and crispy, remove them from the oven. Let the tofu cool for a few minutes before serving. Garnish with chopped green onions for a fresh touch. Enjoy your crispy baked tofu! For the full recipe, check out the earlier section. To get crispy baked tofu, start with firm or extra-firm tofu. This type holds its shape well. After draining the tofu, press it firmly. I like using paper towels and a heavy pan. This step removes extra water. Less moisture means more crunch! Coating the tofu in cornstarch is key. It helps create a crispy crust when baking. Make sure to spread the tofu pieces out on the baking sheet. They should not touch. This allows hot air to circulate around each piece, making them crispy. One common mistake is skipping the pressing step. If you don’t press, your tofu will be soggy. Another mistake is not letting the tofu marinate long enough. Ten minutes can make a big difference in flavor. Also, avoid overcrowding the baking sheet. This leads to steaming instead of baking. Lastly, resist opening the oven door often. Each time you do, the heat escapes. Crispy baked tofu pairs well with many sides. Serve it over rice or quinoa for a filling dish. Add steamed broccoli or a fresh salad for greens. You can also toss it in a stir-fry with your favorite veggies. Drizzle some soy sauce or a spicy sauce on top for extra flavor. Check the full recipe for more ideas on how to enjoy this tasty dish! {{image_2}} You can change the taste of your crispy baked tofu by using different marinades. For an Asian twist, try adding ginger and hoisin sauce. If you want it spicy, mix in some sriracha or chili paste. You can even go Italian with olive oil, balsamic vinegar, and Italian herbs. Experiment with flavors to find the one you love most. Adding veggies to your tofu can make it even better. You can toss in bell peppers, broccoli, or carrots. These add color and nutrients. Nuts and seeds also work well. They bring in healthy fats and protein. Consider adding a handful of spinach for more vitamins without changing the taste much. Dipping sauces can take your tofu to the next level. A simple soy sauce mix with lime juice is refreshing. You can also try a peanut sauce for a creamy texture. For something sweet, use a honey and mustard blend. These sauces add variety and make each bite exciting. For the full recipe to make crispy baked tofu, check the earlier sections. To store leftover crispy baked tofu, let it cool to room temperature. Next, place it in an airtight container. You can keep it in the fridge for up to three days. This helps to keep it fresh and safe to eat. If you want to keep it longer, consider freezing. Reheating crispy baked tofu can be tricky. To keep it crispy, use the oven. Preheat the oven to 375°F (190°C). Spread the tofu on a baking sheet. Heat for about 10-15 minutes, flipping halfway. You can also use an air fryer for crispiness. Just set it to 350°F (175°C) for 5-7 minutes. If you want to freeze crispy baked tofu, it’s best to do this before reheating. After cooling, spread the tofu on a baking sheet. Freeze it for 1-2 hours until solid. Then, transfer the pieces to a freezer bag. Remove any air to prevent freezer burn. You can store it for up to three months. When ready to use, bake directly from frozen. The best tofu for baking is firm or extra-firm tofu. This type holds its shape well. Soft or silken tofu can break apart during cooking. Firm tofu gives you that perfect crispy texture. Yes, you can make this recipe gluten-free. Just use tamari instead of soy sauce. Tamari tastes similar but does not contain gluten. Always check labels to ensure all ingredients are gluten-free. You can skip the oil and still get crispy tofu! Use cornstarch to coat the tofu pieces. Bake them with enough space in between. This will help them crisp up without oil. You can store crispy baked tofu in the fridge for about 3 to 5 days. Keep it in an airtight container to maintain freshness. Reheat it in the oven for the best texture. Absolutely! You can use any spices you like. Try curry powder, chili powder, or Italian herbs. Get creative and mix flavors to find what you enjoy best. Check the Full Recipe for a great base to start! This post covered making crispy baked tofu. You learned key ingredients, steps, and tips. I shared how to prepare, marinate, and bake tofu for the best results. Remember to avoid common mistakes and try different flavor variations. Always store leftovers properly for later enjoyment. With these ideas, you can make delicious, healthy meals. Enjoy your cooking journey with crispy baked tofu!](https://lisadishes.com/wp-content/uploads/2025/06/02b6a79c-2393-46ae-85cf-283ed7619b20.webp)
Are you ready to enjoy a delicious and healthy meal? My easy and flavorful Crispy Baked Tofu recipe is perfect
![- 2 large sweet potatoes, cut into wedges - 3 tablespoons olive oil - 1 teaspoon smoked paprika - 1 teaspoon ground cinnamon - 1/2 teaspoon cayenne pepper (adjust to taste) - 1 teaspoon garlic powder - Salt and pepper to taste - 2 tablespoons honey or maple syrup - Fresh parsley, chopped (for garnish) Sweet potatoes are packed with vitamins. They have vitamin A, which is good for your eyes. They also have vitamin C, which helps your immune system. Plus, they are a good source of fiber. Each serving of these roasted sweet potato wedges has about 150 calories and 30 grams of carbs. When you eat sweet potatoes, you gain many health benefits. They help with digestion and keep your skin healthy. Sweet potatoes can also help control blood sugar. This makes them a smart choice for many diets. Using sweet potatoes instead of regular potatoes is a great way to add nutrition to your meals. I love using sweet potatoes in my cooking. They add color and flavor to any dish. For the full recipe, you can check out the details provided earlier. Enjoy making your delicious roasted sweet potato wedges! To start, preheat your oven to 425°F (220°C). This high heat helps create crispy edges. Line a baking sheet with parchment paper. This makes cleanup easy and prevents sticking. Next, grab your sweet potatoes. Use a sharp knife to cut them into wedges. Aim for pieces about 1 inch thick. This size helps them cook evenly and gives a nice texture. In a large mixing bowl, pour in 3 tablespoons of olive oil. Add 1 teaspoon of smoked paprika, 1 teaspoon of ground cinnamon, and 1/2 teaspoon of cayenne pepper. You can adjust the cayenne to control the heat. Include 1 teaspoon of garlic powder, along with salt and pepper to taste. Mix all these spices well until they form a thick paste. Now, add your sweet potato wedges to the bowl. Toss them gently in the spice mix. Make sure each wedge gets covered evenly. This step is key for great flavor. Spread the seasoned sweet potato wedges on the prepared baking sheet. Make sure they lay in a single layer. This spacing helps them roast evenly. Drizzle 2 tablespoons of honey or maple syrup over the top for a sweet glaze. Roast in the oven for 25-30 minutes. Turn the wedges halfway through cooking. This helps them brown nicely on all sides. You’ll know they are ready when they look golden brown and crispy. Let them cool for a few minutes after roasting. Garnish with chopped parsley for a fresh touch. Enjoy your roasted sweet potato wedges as a tasty treat! For the complete recipe, check out the Full Recipe. To make your sweet potato wedges crispy, follow these steps: - Cut evenly: Slice the sweet potatoes into uniform wedges. This helps them cook evenly. - Soak before cooking: Soak the wedges in water for 30 minutes. This removes excess starch, leading to a crispier result. - Use enough oil: Coat the wedges generously with olive oil. This promotes browning and crunch. - Don’t overcrowd the pan: Spread the wedges in a single layer on the baking sheet. This allows each wedge to roast properly. To avoid soggy sweet potatoes, check these tips: - Don’t skip the preheat: Always preheat your oven to 425°F (220°C) before roasting. This helps achieve that golden crust. - Turn halfway: Flip the wedges halfway through cooking. This ensures both sides get crispy. For extra flavor, try these spice variations: - Cumin: Adds a warm, earthy taste. - Chili powder: Gives a nice kick of heat. - Curry powder: Adds a unique twist and depth. For dipping sauces, consider these options: - Yogurt dip: Mix plain yogurt with herbs and lemon for a fresh taste. - Spicy mayo: Combine mayonnaise with hot sauce for a creamy, spicy dip. - Honey mustard: A sweet and tangy option that pairs well with sweet potatoes. Pair roasted sweet potato wedges with these sides or proteins: - Grilled chicken: The savory flavor of chicken complements the sweetness. - Black bean salad: A fresh, protein-packed side balances the meal. - Quinoa: This nutty grain adds texture and nutrients. For presentation, try these ideas: - Garnish with parsley: Sprinkle chopped parsley on top for a fresh look. - Serve in a basket: Use a cute basket lined with parchment paper for a rustic feel. - Add lime wedges: Serve with lime for a zesty touch. For the full recipe, refer to [Full Recipe]. {{image_2}} For fall and winter, add a touch of maple syrup. This brings a sweet and warm flavor. Pair it with spices like cumin or nutmeg for a cozy taste. You can also mix in roasted garlic for deeper flavors. In spring and summer, fresh herbs shine. Try adding rosemary or thyme for a bright twist. These herbs add a lovely aroma and freshness. If you need gluten-free options, sweet potatoes are naturally safe. You can use gluten-free spices and oils. For a vegan twist, swap honey for maple syrup. This keeps the dish sweet and plant-based. You can also use a tahini dressing for a creamy touch without dairy. Air frying is a great way to get crispy sweet potato wedges. Set your air fryer to 400°F (200°C). Cook for about 15-20 minutes, shaking the basket halfway through. This method uses less oil and cooks faster. You can also cook sweet potato wedges on the stovetop. Heat a pan with oil, then cook the wedges until golden brown. This method gives you control over the cooking time and crispiness. Feel free to explore these variations and adjustments. They can make your roasted sweet potato wedges even more enjoyable! For the complete recipe, check out the Full Recipe. After you enjoy your roasted sweet potato wedges, store any leftovers right away. For best results, place the wedges in an airtight container. This keeps them fresh and prevents them from drying out. You can store them in the fridge for up to three days. To reheat your sweet potato wedges, use an oven for the best crispiness. Preheat the oven to 400°F (200°C). Spread the wedges on a baking sheet and warm them for about 10-15 minutes. This method restores their crunch. If you need to use a microwave, place the wedges on a plate. Heat them in short bursts of 30 seconds. This will heat them through but may make them soggy. You can freeze cooked sweet potato wedges too. First, let them cool completely. Next, spread them in a single layer on a baking sheet. Freeze them for a couple of hours until firm. Then, transfer them to a freezer bag. They can last up to three months. When you're ready to eat, thaw them in the fridge overnight. Reheat them in the oven for the best results. Are sweet potatoes healthier than regular potatoes? Yes, sweet potatoes often have more fiber, vitamins, and nutrients than regular potatoes. They contain vitamin A, which helps your eyes and skin. Sweet potatoes also have a lower glycemic index. This means they raise blood sugar more slowly than regular potatoes. How do you know when sweet potatoes are cooked properly? You can tell sweet potatoes are done by checking their softness. When you poke them with a fork, they should feel tender. The edges will also be golden and crispy. Cooking times can vary, so check them after 25 minutes. Can you make roasted sweet potato wedges ahead of time? Yes, you can prepare the wedges and season them in advance. Just store the seasoned wedges in the fridge for up to a day. When ready to cook, roast them as normal. This saves time on busy days. What can I add to sweet potato wedges for extra flavor? You can try adding herbs like rosemary or thyme for a fresh taste. A sprinkle of cheese, like feta or Parmesan, can also add a nice touch. If you like heat, consider adding some chili flakes or smoked paprika. What can I use instead of olive oil? You can use any oil with a high smoke point. Good options are avocado oil or canola oil. These oils will still give the wedges a nice texture and flavor. Alternatives for honey or maple syrup in the recipe? If you want a different sweetener, try agave syrup or brown sugar. Both options will give your wedges a sweet glaze. You may adjust the amount to fit your taste. In this blog post, we explored how to make delicious roasted sweet potato wedges. We covered the key ingredients, their nutritional benefits, and a step-by-step guide to get the right texture. You learned tips for flavoring and pairing these wedges with meals. Remember, sweet potatoes are a great choice for a healthy diet. You can easily adjust the recipe to fit your tastes and diets, making it both fun and flexible. Now, grab those sweet potatoes and start roasting! Enjoy your cooking adventure!](https://lisadishes.com/wp-content/uploads/2025/06/53f4ab38-ad75-4fe8-aa74-ee0455a74884.webp)
Looking for a tasty snack or side dish? You’ve found it! These Roasted Sweet Potato Wedges are crisp, delicious, and
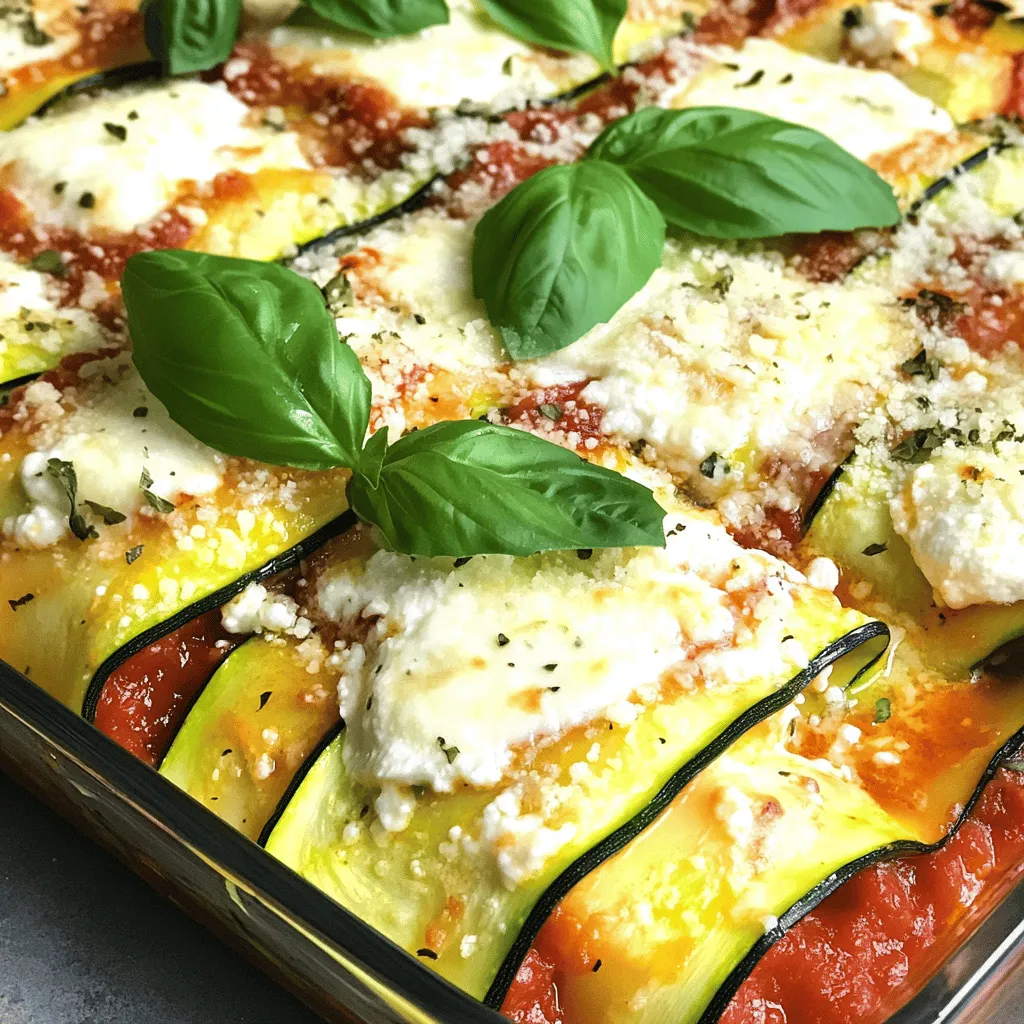
Looking for a tasty and healthy meal? Zucchini lasagna is your answer! This easy recipe swaps traditional noodles for fresh
![To make the best One-Pot Taco Soup, gather these key ingredients: - 1 lb ground turkey or beef - 1 medium onion, chopped - 2 cloves garlic, minced - 1 red bell pepper, diced - 1 can (15 oz) black beans, drained and rinsed - 1 can (15 oz) kidney beans, drained and rinsed - 1 can (15 oz) corn, drained - 1 can (28 oz) diced tomatoes with green chilies - 2 cups chicken or vegetable broth - 2 tablespoons taco seasoning - 1 teaspoon cumin - Salt and pepper to taste - 1 cup shredded cheddar cheese (optional) - Fresh cilantro for garnish - Sour cream, avocado, and tortilla chips for serving These ingredients create a rich and savory flavor. The beans and tomatoes add texture and depth. The ground meat brings protein and heartiness. You can elevate your soup with these fun toppings: - Shredded lettuce - Sliced jalapeños - Sliced green onions - Lime wedges These toppings add freshness and crunch. They help customize each bowl to your taste. If you want to switch things up, here are some easy swaps: - Use ground chicken or tofu for a lighter option. - Swap black beans for pinto beans or chickpeas. - Use homemade taco seasoning instead of store-bought. These substitutions let you tailor the dish to your liking. They also help make the recipe your own while saving time or ingredients. For the full recipe, check out the details above. First, gather all your ingredients. You need ground turkey or beef, onion, garlic, and red bell pepper. You will also need black beans, kidney beans, corn, and diced tomatoes. Remember to have broth, taco seasoning, cumin, salt, and pepper ready. If you want cheese, grab some shredded cheddar. Lastly, fresh cilantro, sour cream, avocado, and tortilla chips make great toppings. Start by heating a drizzle of olive oil in a large pot over medium heat. Add the chopped onion, garlic, and red bell pepper. Cook for about 5 minutes until the onion looks clear. Next, add the ground turkey or beef. Break it up with a spatula. Cook until it's browned, which takes about 7-10 minutes. Stir in the taco seasoning and cumin. Make sure the meat is well coated. Now, it’s time to add the beans, corn, diced tomatoes with their juices, and broth. Stir everything together. Bring this mix to a simmer. Lower the heat and let it cook for about 20 minutes. Stir it occasionally so nothing sticks to the bottom. This step helps the flavors blend well. Once the soup is ready, taste it. Add salt and pepper to your liking. If you want it cheesy, stir in the shredded cheddar until it melts. Serve the soup hot in bowls. Garnish with fresh cilantro. You can also add sour cream, avocado slices, and tortilla chips on the side for extra flavor. For the full recipe, check out [Full Recipe]. To boost the flavor of your One-Pot Taco Soup, try these simple tips: - Use fresh herbs like cilantro for a bright touch. - Add a splash of lime juice for a zesty kick. - Mix in a bit of chipotle in adobo for smokiness. - Top with crispy tortilla strips for crunch. Each of these ideas brings new life to the soup. You can make this taco soup without breaking the bank. Here are some cost-effective ways: - Choose ground turkey instead of beef for savings. - Use canned beans and frozen corn to cut costs. - Buy store-brand ingredients, which are often cheaper. - Look for sales on produce and stock up. This way, you can enjoy great flavor without overspending. Want to whip up this dish quickly? Here’s how: - Chop veggies in advance and store them in the fridge. - Use a food processor for quick dicing and chopping. - Cook the meat ahead of time and freeze it. - Make a big batch and freeze extra for later. These tricks help you save time while cooking delicious meals. For the complete instructions, check out the Full Recipe. {{image_2}} You can easily make a vegetarian taco soup. Swap the meat for more beans or lentils. Use vegetable broth instead of chicken broth. Add extra veggies like zucchini or mushrooms for more texture. This keeps the soup hearty and filling without meat. To make your soup spicy, add chopped jalapeños or a dash of hot sauce. You can also use spicy taco seasoning. If you prefer mild flavors, stick with regular seasoning and skip the hot peppers. Adjust to your taste for the best experience. This taco soup can be gluten-free with simple swaps. Use gluten-free taco seasoning and double-check your broth. Most canned beans and tomatoes are gluten-free, but read labels to be safe. Serve with gluten-free tortilla chips for the perfect crunch. For the full recipe, check the One-Pot Taco Soup Fiesta. After enjoying your One-Pot Taco Soup, let it cool. Store it in an airtight container. It will stay fresh in the fridge for up to four days. Be sure to label your container with the date. This helps you keep track of its freshness. When you're ready to enjoy leftovers, pour the soup into a pot. Heat it over medium heat until it warms through. Stir occasionally to prevent burning. You can also use the microwave. Place the soup in a microwave-safe bowl. Cover it loosely and heat for about 2-3 minutes. Stir and check if it’s hot enough. If you want to save some for later, freezing is a great option. Pour the cooled soup into freezer-safe containers. Leave some space at the top, as the soup will expand. It can last for up to three months in the freezer. When you’re ready to eat it, thaw it overnight in the fridge. Then, reheat as mentioned above. This makes for an easy meal on busy days. Enjoy your One-Pot Taco Soup anytime! For the complete recipe, check out the Full Recipe. Yes, you can! Feel free to swap ground turkey or beef for chicken or even pork. You can also use plant-based meat for a vegetarian option. Each meat adds a unique taste to the soup. Just ensure it is cooked well. To add heat, use spicy taco seasoning instead of regular. You can also add diced jalapeños or a splash of hot sauce. If you like smoky flavors, try adding chipotle peppers in adobo sauce. Adjust the spice to fit your taste! I love serving this soup with fresh toppings like cilantro, sour cream, and avocado. You can also add tortilla chips for crunch. A side of cornbread or a simple salad pairs well too. Each adds a nice touch to your meal. One-Pot Taco Soup lasts about 3 to 5 days in the fridge. Store it in an airtight container to keep it fresh. Just make sure to let it cool before putting it away. This way, you can enjoy it later! Absolutely! Doubling the recipe is easy. Just make sure you have a large enough pot. More soup means more fun. Plus, you can feed a bigger crowd or have leftovers for later. It’s a win-win! One-Pot Taco Soup is easy and fun to make. You learned about key ingredients, cooking steps, and tips to enhance flavor. You can also find ways to keep costs low or try different variations. Storing and reheating leftovers is simple too. I hope this guide helps you create a tasty meal. Enjoy your cooking adventure!](https://lisadishes.com/wp-content/uploads/2025/06/3f88263e-0bb3-4354-aed0-29de2832b421.webp)
Get ready to enjoy a warm bowl of One-Pot Taco Soup! This recipe is simple and packed with flavor. You
![- 4 cups fresh spinach, washed and dried - 2 cups strawberries, hulled and sliced - 1/4 cup red onion, thinly sliced - 1/2 cup goat cheese, crumbled - 1/4 cup walnuts, chopped - 3 tablespoons balsamic vinegar - 2 tablespoons honey - 1 tablespoon olive oil - Salt and pepper to taste When you make a Strawberry Spinach Salad, fresh produce is key. Start with four cups of fresh spinach. The spinach gives the salad a bright and healthy base. Next, add two cups of strawberries. Choose ripe, juicy strawberries for the best flavor. They bring sweetness and color to the dish. Don't forget the red onion! Use a quarter cup, sliced thin. The onion adds a nice crunch and a slight zing. Now, let's talk about cheese and nuts. I love using half a cup of crumbled goat cheese. It adds creaminess and richness. If you're not a fan of goat cheese, feta is a great option too. For a crunchy texture, sprinkle a quarter cup of chopped walnuts on top. They add a lovely nutty flavor. Finally, we need a dressing to tie everything together. Mix three tablespoons of balsamic vinegar with two tablespoons of honey for sweetness. Add one tablespoon of olive oil for richness. Season with salt and pepper to taste. This dressing brings all the flavors together perfectly. For the full recipe, you can check out the details in the article. Enjoy your fresh and flavorful Strawberry Spinach Salad! 1. In a large salad bowl, place the fresh spinach as the base of your salad. This gives a vibrant green color and a healthy crunch. 2. Add the sliced strawberries and red onion over the spinach. The sweet strawberries and sharp onion create a great mix of flavors. 3. Sprinkle the crumbled goat cheese and chopped walnuts evenly on top. The goat cheese adds creaminess while walnuts bring a nice crunch. 4. In a small bowl, whisk together the balsamic vinegar, honey, olive oil, salt, and pepper until well combined. This dressing ties all the flavors together in a tangy way. 5. Drizzle the dressing over the salad and gently toss to combine, being careful not to crush the strawberries. This keeps everything fresh and intact. 6. Taste and adjust seasoning if necessary, adding more salt or a drizzle of honey if desired. You want a balance of tart and sweet. For the complete recipe, refer to the [Full Recipe]. To make your salad sing, use ripe strawberries. They add natural sweetness. You can also try adding other fruits or veggies. Fresh blueberries or sliced apples work great. Toss in some cucumbers for crunch. It’s all about finding what you love! How you serve food matters. A large, shallow bowl makes the salad look fancy. This way, everyone can see the bright colors. For an extra touch, garnish with more strawberries and walnuts. It adds flair and makes it more inviting. Want to save time? Prepare the ingredients in advance. Wash and slice the strawberries and onions. Keep them in the fridge. When you’re ready to eat, just assemble the salad. This keeps your greens fresh and crisp, making meal time a breeze. For the full recipe, check out the Strawberry Spinach Delight. {{image_2}} You can boost your salad with protein. Grilled chicken adds a savory touch. Shrimp also pairs well with strawberries. If you're vegetarian, chickpeas are a great choice. They add a nice texture and flavor. Dressing can change the entire salad. Swap honey for maple syrup for a vegan twist. This adds a unique sweetness. You can also try different vinegars. Apple cider or red wine vinegar can bring new flavors. Feel free to add more ingredients. Avocado gives the salad a creamy texture. It also adds healthy fats. Other nuts like pecans or almonds can provide a nice crunch. These additions make the salad even more enjoyable. For the full recipe, check out the complete instructions above! To keep your salad fresh, store it in an airtight container in the refrigerator. This helps prevent wilting and keeps flavors intact. I recommend using the salad within 1-2 days for the best taste and texture. Do not freeze the assembled salad. It can lose its crispness. Instead, store the dressing separately. If you need to freeze, consider only strawberries or nuts, but this is not ideal for the best salad experience. To enjoy day-old salad, add fresh spinach and drizzle some extra dressing. This quick fix revives the flavors and freshness, making it almost as good as the first serving. You can enjoy this delightful dish time and again! For the full recipe, check out the Strawberry Spinach Delight. Baby spinach is preferred for its tender leaves and mild flavor. It adds a soft crunch that feels nice in your mouth. The taste of baby spinach does not overpower the other ingredients. You can also use regular spinach, but it may be tougher. Choose baby spinach for a more pleasant salad experience. Yes, by omitting cheese and using a plant-based sweetener. You can skip the goat cheese and use avocado for creaminess. For the dressing, replace honey with maple syrup or agave nectar. This way, you keep the salad fresh and tasty while making it vegan-friendly. Keep the dressing in a sealed jar in the fridge for up to one week. This helps keep it fresh and tasty. Just shake it well before using. If it thickens, you can add a bit of water to reach your desired consistency. Enjoy it on other salads too! This blog post covered a tasty strawberry spinach salad. We looked at fresh ingredients like spinach, strawberries, goat cheese, and walnuts. Then, I walked you through easy steps to make it. I shared tips to boost flavor and make the salad look great. You can also mix it up with proteins or different dressings. Remember, serve it fresh or store leftovers properly. Enjoy your healthy creation! It’s not just food; it’s good for you.](https://lisadishes.com/wp-content/uploads/2025/06/4bc74ab1-106f-4153-a876-5cb24b2670e4.webp)
Looking for a refreshing dish that bursts with flavor? Try this Strawberry Spinach Salad! Packed with vibrant colors and delicious
![To make this dish, gather these items: - 2 cups cooked jasmine rice (preferably day-old) - 1 cup cooked chicken, shredded or diced - 1 cup mixed frozen vegetables (peas, carrots, corn) - 3 green onions, sliced - 2 eggs, beaten - 3 tablespoons soy sauce - 1 tablespoon sesame oil - 2 teaspoons garlic, minced - 1 teaspoon ginger, minced - Salt and pepper to taste - Fresh cilantro or parsley for garnish (optional) You can swap some ingredients if needed: - Use brown rice for a healthier option. - Try tofu or shrimp instead of chicken for a different protein. - Swap sesame oil with olive oil if you prefer. - Any frozen veggies work well, like bell peppers or broccoli. - For a dairy-free version, skip the eggs or use a vegan substitute. Choosing the right rice is key for great fried rice: - Use jasmine rice for a fragrant base. - Day-old rice is best; it’s drier and won’t clump. - If using fresh rice, spread it on a tray to cool. - Avoid sticky rice; it won’t fry well. - Rinse rice before cooking to remove excess starch. Now, you have all you need to start cooking your easy chicken fried rice. For the full recipe, check the instructions provided. Enjoy your cooking! To make easy chicken fried rice, start with your ingredients ready. You will need day-old rice for the best texture. First, heat a large skillet or wok on medium-high heat. Add sesame oil and let it warm up. Next, toss in the minced garlic and ginger. Stir them for 30 seconds to wake up their flavors. Then, add the mixed frozen vegetables. Cook these for about 2-3 minutes until they are warm and just tender. Now, push the veggies to one side of the skillet. Pour the beaten eggs on the other side. Scramble the eggs until they are fully cooked. Once the eggs are done, mix in the cooked chicken and jasmine rice. Make sure to combine everything well. Drizzle the soy sauce over the mixture. Stir it all together to coat the rice and chicken evenly. Add the sliced green onions, and season with salt and pepper to taste. Stir-fry for another 2-3 minutes until everything is hot and mixed well. Finally, remove from heat. If you like, garnish with fresh cilantro or parsley before serving. I recommend watching a quick video on making chicken fried rice. Seeing the steps can help you get the timing right. It's easy to follow along with visuals, and you can pick up tips from the video that may not be in the recipe. - Prep Time: 10 minutes - Total Time: 20 minutes - Cooking Time: About 10 minutes This recipe serves four. You can easily adjust it for more or less. Enjoy your tasty meal! If you're looking for the full recipe, check out the Full Recipe. To make great chicken fried rice, start with cold rice. Day-old rice works best. It stays firm and does not clump. Use a hot skillet or wok for the best results. Heat the pan before adding oil. This helps cook the food evenly. When adding ingredients, do it in stages. This gives each item time to cook well. One common mistake is using fresh rice. It can be too sticky. Another mistake is not heating the pan enough. This can lead to soggy rice. Avoid adding too much soy sauce. It can overpower the other flavors. Also, don't skip the garlic and ginger. They add great taste to the dish. You can boost flavor with a few simple tips. Try adding a splash of rice vinegar. It adds a nice tang. You can also use oyster sauce for a richer taste. Fresh herbs like cilantro brighten the dish. Squeeze a bit of lime juice on top for freshness. For a spicy kick, add some chili flakes or sriracha. This makes the dish even more exciting. For the full recipe, check out the instructions above! {{image_2}} You can boost your chicken fried rice with more veggies. Add broccoli, bell peppers, or spinach. These vegetables add color and texture. They also pack in vitamins. You can use fresh or frozen vegetables. Just chop them up small so they cook fast. Mix them in with the frozen veggies for a tasty dish. Want to spice things up? Try adding chili sauce or red pepper flakes. This gives your meal a nice kick. If you prefer milder flavors, skip the heat. You can also add a splash of lime juice for a zesty touch. Experimenting with flavors keeps your dish exciting. Each time you make it, you can try something new! Not in the mood for chicken? You can switch it up! Use shrimp, tofu, or beef instead. Each protein brings its own flavor and texture. Cook your chosen protein first, then add it to the rice. This way, everything blends well. You can even make a veggie version by leaving out the protein altogether. This keeps it light and fresh. For the full recipe, check out the [Full Recipe]. To keep your chicken fried rice fresh, transfer it to an airtight container. Let it cool first, then seal it tight. Store it in the fridge for up to three days. If you want it to last longer, consider freezing it. Just make sure to use a freezer-safe container or bag. When reheating, I find that the best method is using a skillet. Heat it on medium. Add a splash of water or a bit of oil. This helps steam the rice and keeps it moist. Stir often to avoid burning. You can also use a microwave, but add a damp paper towel on top to trap steam. To freeze chicken fried rice, portion it into freezer bags. Remove as much air as possible before sealing. Label the bags with the date. You can freeze it for up to three months. When ready to eat, thaw it overnight in the fridge. Reheat it well before serving. This keeps the flavors fresh and tasty. For the complete recipe, refer to the Full Recipe section. You can use coconut aminos or tamari as great soy sauce substitutes. These options bring a similar taste without the soy. You can also try adding a bit of vinegar for tang. If you want to get creative, mix in some broth for added flavor. You can also season with salt, pepper, and spices. This way, you get a tasty dish without soy sauce. Yes, you can use brown rice, but it will change the texture. Brown rice is chewier and takes longer to cook. Make sure it is cooked beforehand for best results. Use day-old brown rice to avoid clumping. The flavor will be nuttier compared to jasmine rice. This can add a nice twist to your chicken fried rice. Some easy sides include egg rolls, spring rolls, or a fresh salad. You can also serve it with steamed broccoli or bok choy. A simple cucumber salad adds a nice crunch too. If you want more protein, consider serving grilled shrimp or chicken skewers. These sides complement the flavors in chicken fried rice nicely. For the full recipe, check out the earlier section. This blog post guides you through making easy chicken fried rice. You learned about key ingredients, helpful substitutions, and tips for selecting rice. The step-by-step cooking instructions simplify the process. We discussed tips for perfecting your dish and avoiding common mistakes. Options for tasty variations were also shared. Finally, you discovered how to store and reheat leftovers. Now, you can create your own delicious chicken fried rice. Use the tips and tricks to make it great every time. Enjoy your cooking adventures!](https://lisadishes.com/wp-content/uploads/2025/06/52880c3f-983c-4cd4-a4c8-c5ef99d071c6.webp)
Looking for a quick and tasty meal? You’re in the right place! This Easy Chicken Fried Rice is packed with

Are you ready for a snack that’s both quick and full of flavor? Garlic Parmesan Knots are just the treat

Are you ready to spice up your meal prep with a dish that’s both tasty and easy? Teriyaki Salmon Bowls
