Skip to content
DisclaimerTerms Of UseGDPR PolicyCookie Policy

Lisa Dishes

  • Home
  • Drinks
  • Appetizers
  • Dinner
  • Dessert
  • About
  • Contact
  • Privacy Policy
DisclaimerTerms Of UseGDPR PolicyCookie Policy

lisa

- 2 cups cooked chicken breast, shredded - 1 cup mixed greens (spinach, arugula, romaine) - 1/2 cup orange segments (fresh or canned) - 1/2 cup cucumber, diced - 1/4 cup red bell pepper, chopped - 3 tablespoons olive oil - 2 tablespoons fresh lemon juice - 1 tablespoon honey - Salt and pepper to taste - 1/4 cup red onion, thinly sliced - 1/4 cup feta cheese, crumbled - 1/4 cup walnuts, roughly chopped This chicken salad recipe is simple and quick. You can use leftover chicken for speed. The main ingredients are fresh and colorful. The mixed greens add a nice crunch. The orange segments give a sweet kick. Cucumber and red bell pepper add great texture. For the dressing, I recommend using good olive oil. Fresh lemon juice brightens the flavors. Honey adds a touch of sweetness. Don’t forget salt and pepper to taste. You can adjust these to your liking. Optional toppings make your salad special. Red onion adds a nice bite. Feta cheese brings creaminess. Walnuts give a satisfying crunch. You can find the full recipe for this zesty citrus chicken salad in the main article. Enjoy your time in the kitchen! - Combine shredded chicken and vegetables in a bowl. - Make the dressing and whisk ingredients together. Start by grabbing a big mixing bowl. Add your 2 cups of shredded chicken. Next, toss in 1 cup of mixed greens, 1/2 cup of orange segments, 1/2 cup of diced cucumber, 1/4 cup of chopped red bell pepper, and 1/4 cup of crumbled feta cheese. Mix these well to blend all the fresh flavors. Now, for the dressing, take a small bowl. In it, whisk together 3 tablespoons of olive oil, 2 tablespoons of fresh lemon juice, 1 tablespoon of honey, and a pinch of salt and pepper. Whisk until the ingredients combine smoothly. - Toss salad mixture gently. - Pour dressing over the salad mixture. With your salad mixture ready, toss it gently. This helps keep the greens intact. Next, pour the dressing over the salad. Toss again lightly until every piece is coated with the zesty dressing. - Let sit for flavor melding. - Add toppings before serving. Now, let the salad sit for about 10 minutes. This step allows all the flavors to meld together. Just before serving, sprinkle 1/4 cup of chopped walnuts on top. This adds a delightful crunch to your salad. Enjoy your healthy and tasty meal! For the full recipe, check out the detailed instructions. - Use leftover or rotisserie chicken for convenience. - To quickly shred chicken, use two forks. Pull apart the chicken into small pieces. - Add fresh herbs like basil or dill to boost flavor. - Prepare the dressing in advance. Store it in a jar in the fridge for up to a week. - Serve the salad on a bed of greens for a pretty plate. - Pair it with crusty bread or a light soup for a full meal. {{image_2}} If you need gluten-free options, swap regular dressing for a gluten-free brand. You can replace mixed greens with lettuce or cabbage for a crunchy base. For dairy-free choices, skip feta cheese or use a dairy-free cheese alternative. If you have nut allergies, leave out walnuts or use seeds like pumpkin seeds instead. When it comes to mixed greens, you can use kale or even coleslaw mix. These add different textures and flavors. For protein choices, try shredded turkey or even chickpeas for a vegetarian version. Each option gives the salad a fresh twist. In summer, add ripe tomatoes or fresh berries for sweetness. These fruits brighten the dish and enhance taste. In winter, consider using roasted root veggies like sweet potatoes or butternut squash. These ingredients add warmth and heartiness to your salad. To keep your chicken salad fresh, store it in an airtight container. This helps prevent moisture loss and keeps it tasty. Make sure to cool it down before sealing. Your chicken salad will last in the fridge for about 3 to 4 days. If you notice any change in smell or color, toss it out. You can freeze chicken salad, but be careful. The texture may change after thawing. To freeze, place the salad in a freezer-safe container. Leave some space at the top, as the salad can expand. When ready to eat, thaw it in the fridge overnight. For serving, mix the thawed salad well. You may want to add fresh ingredients like veggies or herbs for better taste. Chicken salad makes a great choice for easy lunches. You can prepare it ahead of time and pack it for work or school. Use clear, airtight containers to see the salad easily. Divide your salad into portions to simplify your meals. This way, you have quick, healthy options ready to go. You can also pair it with whole grain bread or crackers for a complete meal. For more ideas, check out the Full Recipe. Chicken salad can last about 3 to 4 days in the fridge. Store it in a tightly sealed container. Always check for signs of spoilage before eating. If it smells bad or looks off, throw it away. To keep it fresh, only mix in dressing when ready to eat. This helps maintain texture and taste. Yes, you can use canned chicken. Canned chicken is convenient and saves time. It can be a quick option for busy days. However, it may lack the flavor and texture of fresh chicken. Always drain and rinse it well. This helps reduce excess sodium and improves taste. You can add many tasty ingredients to enhance your chicken salad. Here are some ideas: - Fresh herbs like dill or parsley - Sliced grapes for sweetness - Diced apples for crunch - Chopped celery for extra texture - Avocado for creaminess Feel free to mix and match to create a unique flavor profile! For the full recipe, check the Zesty Citrus Chicken Salad section. This chicken salad recipe is simple and tasty. We covered key ingredients like chicken, greens, and fresh veggies. We also discussed making a delicious dressing and optional toppings for extra flavor. Remember, you can adjust the recipe to fit your needs. Use leftovers, swap ingredients, or try different seasonings. Enjoy this recipe as a healthy meal that adapts to any season. Your kitchen can become a place of creativity and flavor!

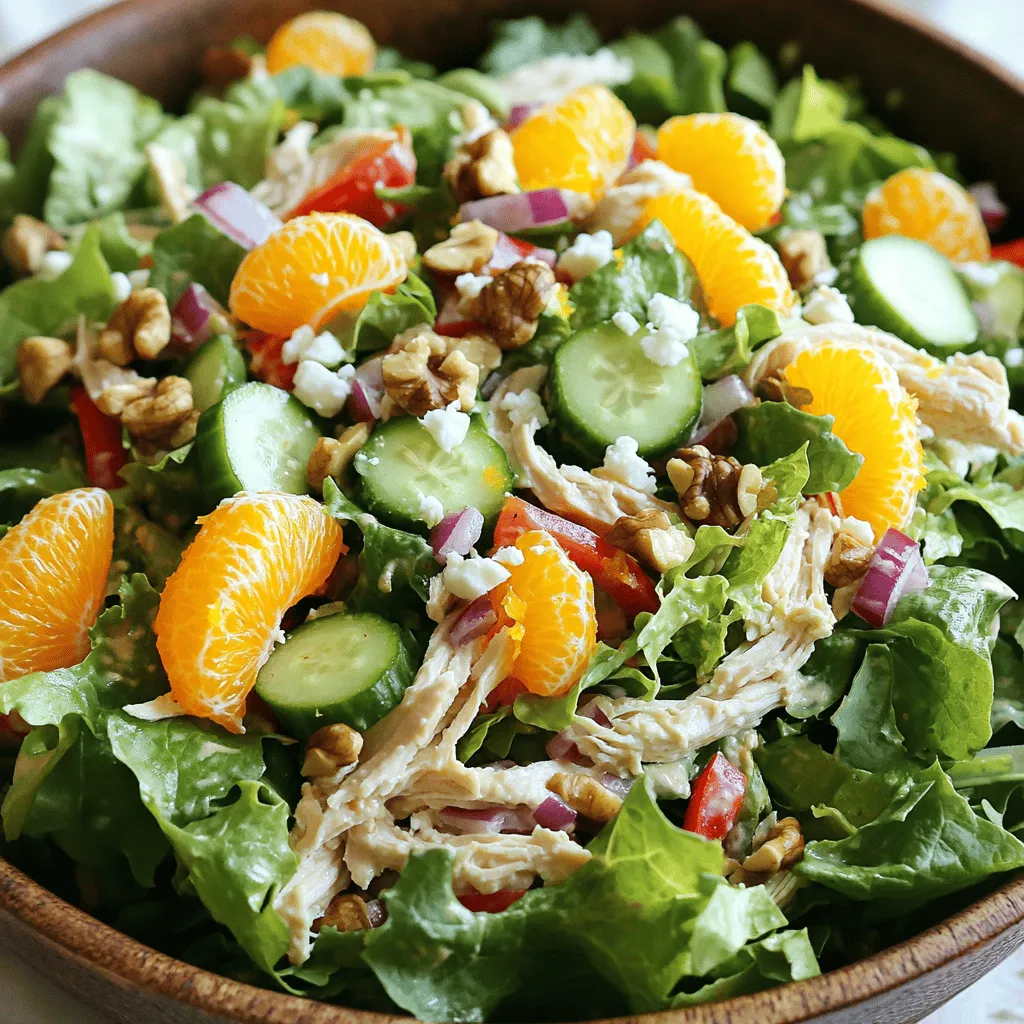
Easy Chicken Salad Tasty and Quick Meal Idea

Looking for a quick and tasty meal? My Easy Chicken Salad is perfect for busy days! With just a few

- 1 lb baby carrots (or regular carrots, cut into sticks) - 2 tablespoons olive oil - 1 tablespoon honey - 1 teaspoon smoked paprika - 1 teaspoon ground cumin - 1/2 teaspoon cayenne pepper (adjust for spice level) - Salt and pepper to taste - Fresh parsley, chopped for garnish - 1 tablespoon sesame seeds (optional) You need fresh ingredients to make this dish pop. I love using baby carrots. They are sweet and tender. If you can’t find them, regular carrots work just as well. Just cut them into sticks. For the base, olive oil adds richness. Honey brings a nice sweetness. It pairs perfectly with the spices. Speaking of spices, smoked paprika adds depth. Ground cumin gives an earthy note. If you like heat, cayenne pepper is your friend. You can adjust this spice to match your taste. Don’t forget to season with salt and pepper. They enhance all the flavors. For garnish, fresh parsley brightens the dish. Sesame seeds can add a nice crunch. For the full recipe, follow the instructions closely to enjoy these oven-roasted carrots. - Preheat your oven to 425°F (220°C). - In a large bowl, combine the olive oil, honey, smoked paprika, cumin, cayenne pepper, salt, and pepper. Mix well to create a marinade. First, getting the temperature right is key. A hot oven makes the carrots tender and gives them a nice caramelized look. The marinade is where the magic happens. Each spice adds a unique flavor, making the carrots taste amazing. - Toss baby carrots in the marinade until fully coated. Add the baby carrots to your bowl. Make sure to coat each carrot well. You want every bit of carrot to soak in that flavorful mix. This step ensures each bite bursts with taste. - Line a baking sheet with parchment paper and spread carrots evenly. - Roast in the oven for 25-30 minutes, stirring halfway through. Next, prepare your baking sheet. Parchment paper helps with easy cleanup. Spread the carrots out in a single layer. This allows them to roast evenly. Roasting for 25-30 minutes lets the flavors deepen. Stir halfway through to ensure all sides get that lovely golden color. These steps, from prep to roasting, give you the best oven-roasted carrots. For a full recipe, check the details above! To make your carrots tender and sweet, choose baby carrots or cut regular carrots into sticks. They can roast evenly this way. Coat them well with olive oil and spices. This helps them caramelize in the oven. Stir the carrots halfway through roasting. This step ensures they cook evenly and get that nice brown color. Spices can make your roasted carrots pop. Try adding thyme or rosemary for a fresh taste. A pinch of garlic powder also adds great flavor. For a sweet touch, drizzle honey over the carrots before serving. This makes them even more delicious. If you want some crunch, sprinkle sesame seeds on top. This adds texture and flavor to your dish. Remember, you can find the full recipe above for more details! {{image_2}} You can change up this recipe by using other root veggies. Try parsnips, sweet potatoes, or beets. Each of these adds a unique flavor. You can also mix in seasonal veggies. Zucchini, bell peppers, or even Brussels sprouts work well. This way, you get a colorful, tasty dish. To make the recipe vegan, simply swap honey for maple syrup or agave nectar. This keeps the sweetness without using animal products. For gluten-free needs, this recipe is already safe since it has no gluten ingredients. You can also adjust spice levels. If you want less heat, leave out the cayenne pepper. Want more spice? Add extra to suit your taste. Enjoy the flavors in a way that fits your diet! To store your roasted carrots, let them cool first. Place them in an airtight container. Glass or plastic containers work well. You can store them in the fridge for about 3 to 5 days. If you want to keep them longer, consider freezing them. Just make sure to use a freezer-safe bag or container. They can last up to 3 months in the freezer. To reheat oven-roasted carrots, preheat your oven to 350°F (175°C). Place the carrots on a baking sheet. Cover them with foil to keep moisture in. Heat for about 10 to 15 minutes, or until warmed through. You can also use a microwave. Just place carrots in a bowl and cover. Heat for about 1 to 2 minutes. This method can make them soft. To keep their texture, I recommend the oven method. Enjoy your tasty leftovers just like they were fresh! Yes, you can use frozen carrots. However, fresh carrots give better taste and texture. Frozen carrots may lose some crunch when roasted. If you choose frozen, be sure to thaw and dry them first. This will help avoid excess moisture and ensure a great roast. To add heat, increase the cayenne pepper. Start with a little more and taste as you go. You can also add crushed red pepper flakes for a different spice profile. For a unique twist, try adding a dash of hot sauce to the marinade. This will give your oven-roasted carrots a nice kick. Oven-roasted carrots are very versatile. They go well with grilled chicken, fish, or pork. You can serve them alongside quinoa or rice for a hearty meal. They also make a great side for a fresh salad. The sweet and spicy flavors complement many dishes, so feel free to get creative! For the full recipe, check the earlier sections. Oven-roasted carrots are easy and tasty. You learned how to make them with simple ingredients like carrots, olive oil, and honey. I shared tips for the perfect roast and ways to spice it up. You can also swap in different veggies or make the dish vegan. Remember, leftovers are easy to store and reheat well. Enjoy this versatile side dish at your next meal! It will impress everyone at your table.

Oven-Roasted Carrots Simple and Flavorful Recipe

Looking for a tasty side dish that’s easy to make? Oven-roasted carrots are your answer! I love how simple it

To make a quick veggie omelette, gather these main ingredients: - 3 large eggs - 1/4 cup milk (or plant-based milk) - 1/2 cup chopped bell peppers (red and green) - 1/2 cup chopped spinach - 1/4 cup finely chopped onion - Salt and pepper to taste - 1 tablespoon olive oil or butter These ingredients provide a tasty base for your omelette. The eggs and milk give it a fluffy texture. The veggies add color and flavor. You can customize your omelette with these optional ingredients: - Mushrooms - Zucchini - Tomatoes - Kale - Avocado Feel free to mix and match. Adding different veggies makes each omelette unique. Try what you like best! Cheese adds a creamy touch to your omelette. Here are some great options: - Cheddar - Feta - Mozzarella - Goat cheese Each cheese brings its own flavor. Choose one you enjoy, or even mix a few. This small change can elevate your dish! For the full recipe, check out the details above. Enjoy your tasty and simple morning meal! Start with three large eggs. Crack them into a medium bowl. Add 1/4 cup of milk. Whisk the eggs and milk together until it looks frothy. Season with salt and pepper to taste. This mix is your omelette base. Heat a non-stick skillet over medium heat. Add 1 tablespoon of olive oil or butter. Make sure it coats the bottom well. Next, add 1/4 cup of finely chopped onion and 1/2 cup of bell peppers. Sauté for about 2-3 minutes. You want them to soften but not brown. Then, add 1/2 cup of chopped spinach. Cook it for another minute until it wilts. Pour your egg mixture over the cooked veggies. Tilt the pan so the eggs spread evenly. Cook for 3-4 minutes. Watch for the edges to set. Use a spatula to lift the edges. Let the raw egg flow underneath. When the top is still slightly runny, sprinkle 1/4 cup of your favorite cheese over one half. Carefully fold the other half over the cheese. Cook for another 1-2 minutes until fully set. Slide the omelette onto a plate, garnish with fresh herbs, and serve right away. You can find the Full Recipe for more details. To make a fluffy omelette, start with fresh eggs. Fresh eggs whip better. Whisk them well with milk. The milk adds creaminess and air. This makes your omelette light. Use a non-stick skillet to avoid sticking. Make sure your skillet is hot before adding eggs. This helps cook the omelette evenly. When picking veggies, look for bright colors. Fresh bell peppers should feel firm. Spinach should be crisp and green. Smell the herbs; they should smell strong and fresh. If they smell dull, they are old. Always wash your veggies before cooking. This removes dirt and germs. Cook your omelette on medium heat. Too high heat can burn the bottom. Always use enough oil or butter to coat the pan. This helps with heat flow. If you see edges cooking fast, lower the heat. Gently lift the edges to let raw egg flow. This ensures even cooking throughout the omelette. For more details, check the Full Recipe. {{image_2}} You can change the flavor and color of your veggie omelette by adding different vegetables. Try mushrooms, zucchini, or tomatoes. Each adds its own unique taste and texture. I love using broccoli for a crunchy bite. You can also mix in artichokes or kale for a twist. Just remember to chop them small so they cook evenly. Seasoning can take your omelette to the next level. Try adding garlic powder, onion powder, or smoked paprika. These spices bring warmth and depth. Fresh herbs like basil or dill can add bright flavors. You can also add a pinch of chili flakes for heat. Don't be afraid to play with flavors until you find your favorite mix. To make your omelette more filling, consider adding protein. Diced ham, cooked bacon, or crumbled sausage work well. You can also add black beans or tofu for a plant-based option. These add-ins boost nutrition and keep you full longer. Just be sure to balance the flavors so everything works together well. For the full recipe, check out the Quick Veggie Omelette! You might have leftover omelette after a tasty breakfast. Store it in an airtight container. Place a paper towel inside the container to absorb extra moisture. This helps keep the omelette fresh. Store it in the fridge for up to three days. When you want to enjoy your leftover omelette, reheating it right is key. The best way is to use a skillet. Heat it over low heat. Cover the skillet with a lid. This keeps the omelette moist. Heat for about 3-5 minutes until warm. You can also use a microwave. Place the omelette on a microwave-safe plate. Cover it with a damp paper towel. Heat for 30 seconds, then check. If it needs more time, heat in 10-second bursts. Freezing omelettes is a great way to save time later. Let the omelette cool completely first. Wrap each portion tightly in plastic wrap. Then, place it in a freezer-safe bag. Make sure to remove as much air as possible. You can freeze omelettes for up to three months. When you’re ready to eat, thaw it overnight in the fridge. Reheat it as mentioned earlier for a quick meal. It takes about 15 minutes to make a quick veggie omelette. You will spend 5 minutes prepping and 10 minutes cooking. This means you can enjoy a warm breakfast in no time. Yes, you can make a veggie omelette without eggs. Some good substitutes are chickpea flour or silken tofu. These options still allow you to enjoy the same tasty flavors. Good side dishes to serve with an omelette include toast, fruit, or a salad. You can also try roasted potatoes or yogurt for a full meal. These sides help add variety and nutrition to your meal. For the full recipe, check the details above. This blog post covered the essentials for making a quick veggie omelette. We explored key ingredients, step-by-step cooking, and helpful tips for fluffiness. You can customize with various veggies and proteins, plus learn how to store leftovers. Embrace the joy of cooking and make a tasty omelette today. With fresh ingredients and simple steps, you can enjoy a healthy meal anytime. Cooking is fun, and this recipe proves it!

Quick Veggie Omelette Tasty and Simple Morning Meal

Start your morning right with a Quick Veggie Omelette that’s both tasty and simple! With just a few fresh ingredients,

To make your simple egg muffins, gather these items: - 6 large eggs - 1/2 cup milk (dairy or non-dairy) - 1 cup spinach, chopped - 1/2 cup bell peppers, diced (any color) - 1/2 cup cherry tomatoes, halved - 1/2 cup cheese (cheddar, feta, or mozzarella) - 1/4 teaspoon salt - 1/4 teaspoon black pepper - 1/2 teaspoon garlic powder - Cooking spray or muffin liners You can swap ingredients based on your taste or what you have at home. - Instead of spinach, try kale or Swiss chard. - Use zucchini or mushrooms in place of bell peppers. - If you don't have cheese, leave it out or use nutritional yeast for flavor. - For a creamier texture, add sour cream or Greek yogurt. These simple egg muffins are not just tasty; they are also good for you. - Eggs provide high-quality protein and essential vitamins. - Spinach adds iron, calcium, and fiber to your meal. - Bell peppers are rich in vitamins A and C, helping your immune system. - Tomatoes are packed with antioxidants that support heart health. - Cheese gives you calcium for strong bones. Making simple egg muffins is a great way to enjoy healthy food. You can find the full recipe above to get started on this easy breakfast option. Start by preheating your oven to 375°F (190°C). This is a key step. While your oven heats, grab a muffin tin. Grease it with cooking spray or use muffin liners. Both methods work well. This helps the muffins come out easily after baking. In a large bowl, whisk together 6 large eggs and 1/2 cup of milk. Mix until smooth. Next, add 1 cup of chopped spinach, 1/2 cup of diced bell peppers, and 1/2 cup of halved cherry tomatoes. Throw in 1/2 cup of your favorite cheese, 1/4 teaspoon of salt, 1/4 teaspoon of black pepper, and 1/2 teaspoon of garlic powder. Stir until everything is well combined. This mixture is packed with flavor and nutrition. Pour the egg mixture into the prepared muffin tin. Fill each cup about 3/4 full. Place the tin in the preheated oven and bake for 18 to 20 minutes. Check for doneness with a toothpick. If it comes out clean, the muffins are ready. Once baked, remove them from the oven. Let the muffins cool for a few minutes before taking them out of the tin. This cooling time helps them firm up and makes them easier to handle. You can find the full recipe for these egg muffins if you want more details. Enjoy making these tasty treats! To make the best egg muffins, use fresh eggs. Fresh eggs taste better and hold together well. Whisk the eggs and milk well to create a fluffy texture. Fill each muffin cup about three-quarters full. This allows room for the muffins to rise. Keep an eye on the baking time. Muffins may bake faster in different ovens. Check them at 18 minutes. A toothpick should come out clean when they are done. You can easily change the flavors. Try adding cooked bacon or sausage for protein. If you love spice, add jalapeños or hot sauce. For a sweet touch, mix in diced apples or berries. You can swap out spinach for kale or broccoli. The key is to balance flavors and colors. Use different cheeses like goat or pepper jack for new tastes. Presentation makes your muffins more appealing. Arrange them on a bright platter or cake stand. You can garnish with fresh herbs like parsley or chives for color. Serve with a side of salsa or avocado for extra flavor. If you want, use small toothpicks for easy serving at parties. Enjoy them warm or store for later meals. Remember, these egg muffins are great for busy mornings! {{image_2}} You can easily make these muffins vegetarian. Just skip the cheese or use a plant-based cheese. Add more veggies like zucchini or mushrooms. You can also try adding herbs like basil or cilantro for fresh flavor. This makes the muffins colorful and tasty. If you want extra protein, add cooked bacon or sausage. You can also mix in beans or lentils. These options boost the protein without changing the taste much. For a heartier bite, consider adding cooked quinoa to the mix. It keeps the muffins filling and healthy. Using seasonal veggies can add variety to your egg muffins. In the spring, try asparagus or peas. In the fall, use butternut squash or kale. These swaps not only change the flavor but also keep your meals fresh. Always feel free to experiment! Each season brings unique tastes to enjoy. For the full recipe, check the section above. To keep your egg muffins fresh, store them in an airtight container. Place parchment paper between layers to avoid sticking. Refrigerate them within two hours of baking. They will stay good for up to five days in the fridge. If you want to keep them longer, freezing is a great option. Reheating is simple! You can use the microwave or the oven. For the microwave, place one muffin on a plate and heat for 30 seconds. Check if it's warm enough. If not, heat for an extra 10 seconds. For the oven, wrap the muffins in foil and heat at 350°F (175°C) for about 10-15 minutes. This keeps them soft. To freeze, let the muffins cool completely. Wrap each one in plastic wrap and place them in a freezer bag. They can last up to three months in the freezer. To thaw, take a muffin out and leave it in the fridge overnight. For a quick option, you can also reheat it straight from the freezer in the microwave. Enjoy your egg muffins anytime! Simple Egg Muffins can last up to five days in the fridge. Store them in an airtight container. This keeps them fresh and prevents odors. I recommend letting them cool first before storing. If you want to enjoy them longer, consider freezing them. Yes, you can make Simple Egg Muffins ahead of time! They are great for meal prep. You can bake a batch on the weekend and enjoy them all week. Just cool and store them in the fridge after baking. Reheat them in the microwave for a quick breakfast. For a dairy-free option, you can use plant-based milk. Almond milk or oat milk works well. You can also skip the cheese or use a dairy-free cheese. Nutritional yeast adds a cheesy flavor without dairy. These swaps keep your muffins tasty and healthy. Check out the Full Recipe for more delicious ideas! You learned how to make tasty egg muffins, exploring key ingredients and steps. We covered essential tips, flavor variations, and storage info. These muffins are simple and fun to customize. They fit into many diets and save time. Keep trying new ingredients to make each batch unique. Enjoy your cooking journey! These muffins can be your go-to snack. Remember, making food can be both easy and enjoyable.

Simple Egg Muffins Easy Healthy Breakfast Option

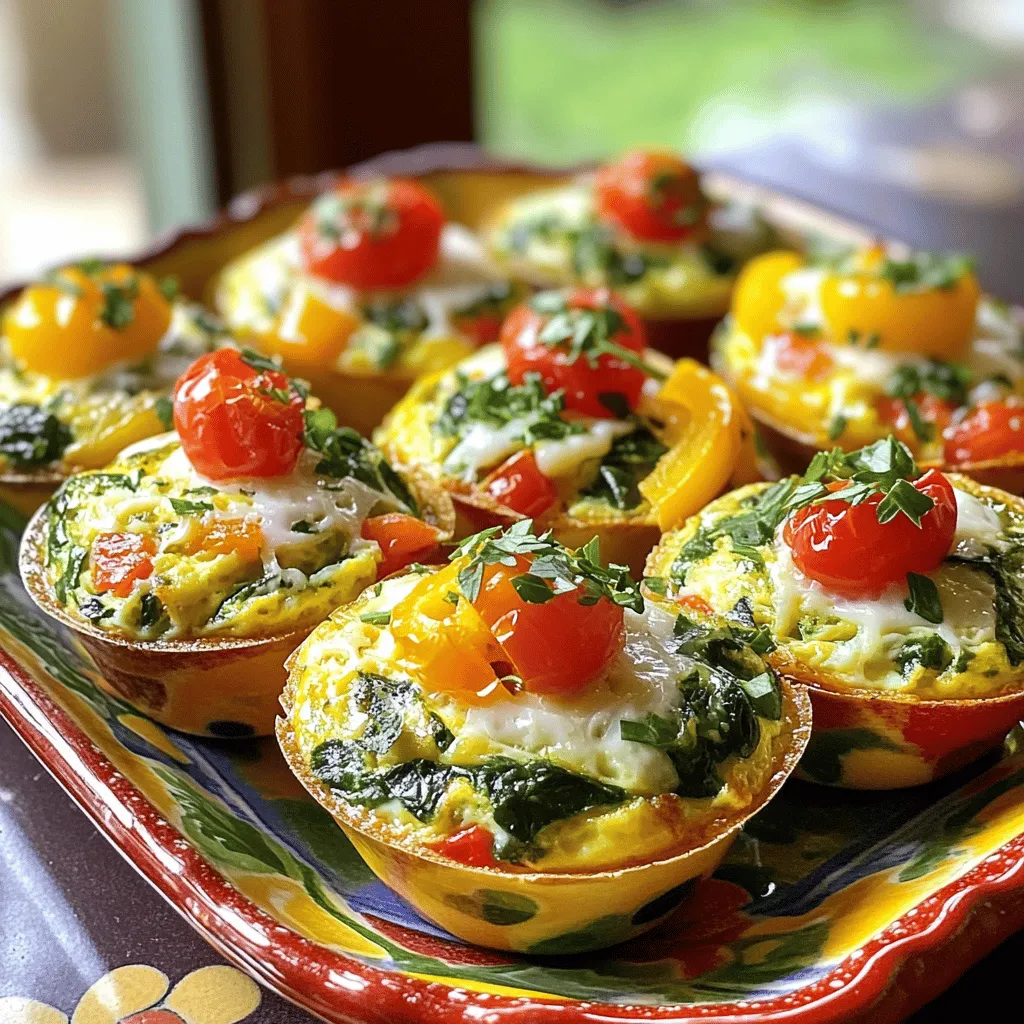
Looking for a quick and healthy breakfast? Simple Egg Muffins make mornings easier. You can whip them up in no

- 8 slices of day-old brioche or challah bread - 6 large eggs - 2 cups whole milk - 1/2 cup heavy cream - 1/4 cup maple syrup - 1 tablespoon vanilla extract - 1 teaspoon ground cinnamon - 1/4 teaspoon nutmeg - 1/2 cup chopped pecans - Powdered sugar for dusting - Fresh berries for serving I recommend using day-old brioche or challah bread. It holds the egg mixture well. Fresh bread can get too soggy. The eggs, milk, and cream create a rich base. This mix makes the casserole creamy and soft. Flavor enhancers add depth. Maple syrup gives sweetness. Vanilla extract adds warmth. Cinnamon and nutmeg bring spice. They work together to create a cozy taste. Optional add-ins let you customize your dish. Chopped pecans add crunch and flavor. You can dust the casserole with powdered sugar for a sweet touch. Fresh berries on top give a pop of color and freshness. For the full recipe, check the section above. First, preheat your oven to 350°F (175°C). This helps the casserole cook evenly. Next, grab a 9x13 inch baking dish. Grease it with butter or non-stick spray. This will stop the casserole from sticking. Now, in a large bowl, whisk together six large eggs and two cups of whole milk. Add in half a cup of heavy cream, a quarter cup of maple syrup, one tablespoon of vanilla extract, one teaspoon of ground cinnamon, a pinch of salt, and a quarter teaspoon of nutmeg. Mix well until everything blends together. Next, take eight slices of day-old brioche or challah bread. Cut them into cubes. Add these cubes to your egg mixture. Gently fold the bread into the mixture. Make sure all the pieces get coated. If you want to add some crunch, toss in half a cup of chopped pecans. This step is optional but adds great flavor. Pour the mixture into the prepared baking dish. Spread it out evenly so it cooks well. Cover it with foil and let it sit in the fridge. You can wait at least 30 minutes or even overnight for better flavor. When you’re ready, bake the casserole covered for 25 minutes. After that, take off the foil and bake for another 15 to 20 minutes. You’ll know it’s done when the top is golden brown and the center is set. Once it cools for a few minutes, you can dust it with powdered sugar. Serve it warm with fresh berries on top. Enjoy this easy French toast casserole! Check out the Full Recipe for more details. Using day-old bread is key for this dish. Fresh bread can turn mushy. Day-old bread soaks up the egg mix well. It gives the casserole a nice, fluffy texture. Soaking time is also important. Let the bread sit in the egg mix for at least 30 minutes. If you can, soak it overnight. This enhances the flavor and ensures a richer taste. You can top your French toast casserole with many fun things. Fresh berries are a great choice. They add color and a burst of flavor. You might also like whipped cream or a dusting of powdered sugar. Pair your casserole with drinks like coffee or hot chocolate. A sweet tea also works well for brunch. These drinks make the meal even better. For this recipe, use a 9x13 inch baking dish. This size fits all the ingredients nicely and bakes evenly. Some essential tools you will need include a whisk and mixing bowls. A spatula is great for folding in the bread. These tools make preparation fast and easy. For the full recipe, check out the Decadent French Toast Casserole section. {{image_2}} You can make this dish fit your needs. For a dairy-free option, use almond milk instead of whole milk. Coconut cream works well in place of heavy cream. If you need gluten-free choices, try gluten-free bread. Look for brands that have good texture and taste. Adding chocolate chips makes the casserole extra fun. Just fold in about a cup before baking. You can also add seasonal fruits like apples or berries. This gives a fresh taste and bright colors to your dish. If you want a sweeter dish, add more maple syrup. This turns your casserole into a dessert-style treat. Serve it at brunch with whipped cream or ice cream. Guests will love this twist on a classic dish. To keep your French toast casserole fresh, store it in the fridge. Use an airtight container. This keeps moisture in and prevents drying out. You can also cover it tightly with plastic wrap or aluminum foil. Always let it cool before sealing it up. You have two main ways to reheat this dish: the oven or the microwave. The oven gives you a nice texture. Preheat it to 350°F (175°C) and heat for about 15-20 minutes. Cover it with foil to keep it soft. The microwave is quicker but may make it soggy. Heat in short bursts, about 30 seconds, stirring in between. Yes, you can freeze French toast casserole! Just make sure it's fully cooled first. Wrap it well in plastic wrap and then in foil. This can help prevent freezer burn. When you’re ready to eat, thaw it overnight in the fridge. To reheat from frozen, bake at 350°F (175°C) for about 45-60 minutes. Cover it with foil for the first half, then uncover to crisp it up. For more details, check the Full Recipe. Yes, you can prepare this casserole the night before. This method has great benefits. Soaking the bread overnight lets it absorb more of the egg mixture. This makes for a richer flavor. The bread becomes soft and custardy. Your casserole will be moist and tasty. Just remember to cover it well in the fridge. To check if the casserole is done, look for a few signs. The top should be golden brown. You can insert a knife in the center. If it comes out clean, it’s ready. If the center is wet, bake a few more minutes. This ensures that your casserole is fully cooked. Absolutely! You can use many types of bread for this recipe. Brioche and challah work best for their softness. However, you can try sourdough or whole wheat bread too. Each type brings its own flavor and texture. Have fun experimenting to find your favorite combination! This blog post guided you through making a delicious French toast casserole. We explored main ingredients and flavor enhancers to elevate your dish. You learned step-by-step instructions to prepare, bake, and serve this tasty treat. I shared tips for the best texture and storage options. With ideas on variations, you can personalize your casserole to fit any meal. Enjoy your creations and remember, cooking is all about making it your own!

Easy French Toast Casserole Quick and Tasty Dish

Are you craving a delicious, easy breakfast that will impress your family? Look no further! My Easy French Toast Casserole

For a simple grilled cheese sandwich, you need a few key ingredients. Here’s what you will use: - Sourdough bread - Unsalted butter - Garlic - Fresh thyme and rosemary - Cheddar and mozzarella cheese - Salt and pepper These ingredients come together to create a delicious and comforting meal. Sourdough bread gives a nice crunch and flavor. Unsalted butter adds richness, while garlic brings a tasty punch. Fresh thyme and rosemary add a lovely herbal note that makes this sandwich extra special. Cheddar cheese provides sharpness, and mozzarella adds a gooey texture. Salt and pepper enhance all the flavors. This mix makes a great base for your grilled cheese. You can also check the Full Recipe for more details on making this dish. To start, I mix up a simple garlic herb spread. In a small bowl, I take 2 tablespoons of softened unsalted butter. I add 1 clove of minced garlic, 1 teaspoon of fresh thyme leaves, and 1 teaspoon of finely chopped fresh rosemary. A pinch of salt and pepper goes in, too. I stir everything until it’s well mixed. This spread adds a nice flavor to our grilled cheese. Next, I heat a non-stick skillet over medium heat. While that warms up, I spread the garlic herb mixture generously on one side of each slice of sourdough bread. I place one slice in the skillet, herb-side down. Then, I layer 1 cup of shredded sharp cheddar cheese and 1/2 cup of shredded mozzarella cheese on top. I cover it with the second slice of bread, herb-side up. I cook the sandwich for about 3-4 minutes until the bottom is golden brown and the cheese begins to melt. Then, I carefully flip the sandwich and cook for another 3-4 minutes. I want both sides to be golden and the cheese melted. Once done, I remove the sandwich from the skillet. I let it cool for a minute before slicing it in half. For a little extra flavor, I might sprinkle some red pepper flakes on top before serving. This adds a fun kick to the dish. Enjoy your simple grilled cheese sandwich! For the full recipe, check the recipe list above. To make your grilled cheese just right, heat your skillet to medium. This helps the bread toast evenly. Use unsalted butter for a rich flavor. Spread it thick on each slice. This keeps the bread moist and adds a nice crunch. Flip the sandwich carefully, so it doesn't fall apart. A spatula works best for this. Different cheeses melt at different rates. Cheddar melts fast, while mozzarella takes a bit longer. If you use a cheese that melts slowly, cook the sandwich a little longer. Watch for the cheese to get gooey and bubbly. If the bread browns too fast, lower the heat. You can add fun flavors to your grilled cheese! Try adding sliced tomatoes or spinach for freshness. A sprinkle of red pepper flakes adds heat. Want a bold twist? Mix in some pesto or mustard. These small changes can turn a simple sandwich into a gourmet treat. For the full recipe, check out the Ultimate Garlic Herb Grilled Cheese. {{image_2}} You can switch up the bread for your grilled cheese. Try using white bread for a classic taste. Whole wheat adds a nice nutty flavor. Rye bread gives it a unique twist. For a gourmet touch, use brioche or ciabatta. Each bread type brings its own texture and taste. Choose what you love best! While cheddar is a favorite, mix cheeses for fun. Gouda melts smoothly and adds richness. Swiss cheese gives a nutty flavor. Pepper jack brings heat, perfect for spice lovers. Try mixing mozzarella with cheddar for a gooey delight. Don’t be afraid to experiment with cheese blends! You can make your grilled cheese even better with extras. Add sliced tomatoes for freshness. Spinach adds color and nutrition. For a savory kick, try crispy bacon. You can even spread a bit of pesto for herbs. These add-ins make your sandwich exciting and tasty. Get creative with your choices! If you have leftover grilled cheese, store it right. Place the sandwich in a sealed container. You can keep it in the fridge for up to three days. To keep it fresh, wrap it in foil or plastic wrap. This helps to prevent it from drying out. When you want to eat your leftover sandwich, heat it up well. The best way is to use a skillet. Place it on medium heat. Cook for about 3-4 minutes on each side. This warms the sandwich and keeps it crispy. You can also use a microwave. If you do, put a paper towel on top. This will help keep the bread from getting too soggy. Freezing is a great option if you want to save your sandwich for later. Wrap each sandwich tightly in plastic wrap or foil. Place them in a freezer bag to prevent freezer burn. You can freeze them for up to three months. To reheat, just thaw in the fridge overnight. Then, follow the reheating instructions above to enjoy your tasty treat again. For the full recipe, check out the Ultimate Garlic Herb Grilled Cheese. To make your grilled cheese crispy, use enough butter. Spread it on the bread. You want a nice, even layer. Use medium heat when cooking. This helps the bread brown slowly and evenly. Flip the sandwich gently to keep the bread intact. Cooking longer can help, but watch out for burning. Yes, you can use many kinds of cheese. Cheddar and mozzarella are classics. Try gouda or pepper jack for a twist. Each cheese gives a unique taste and melt. Mix cheeses for more flavor. Just remember to use cheese that melts well. You can tell your sandwich is done by color and smell. Look for a nice golden brown on both sides. The cheese should be melting inside. You can press the sandwich gently. If it feels soft and gooey, it’s ready. Let it cool for a minute before you slice it. Enjoy your meal! For the full recipe, check out the Ultimate Garlic Herb Grilled Cheese! In this post, I shared how to make a tasty garlic herb grilled cheese. We covered each ingredient, from sourdough bread to savory cheeses. I provided step-by-step instructions for preparation and cooking, along with tips for perfect grilling. I also shared fun variations and storage tips to keep your sandwich fresh. Grilled cheese is simple yet delicious. With the right ingredients and techniques, you can create a meal that delights. Enjoy experimenting with flavors and making it your own!

Simple Grilled Cheese Sandwich Quick and Tasty Recipe

Craving a quick and tasty treat? Let me introduce you to the simple grilled cheese sandwich! With just a few

For this recipe, I love using white fish. Cod, tilapia, or haddock work great. These fish have mild flavors and cook well. They stay tender and flaky inside while getting crispy outside. Breadcrumbs make the fish crunchy. I recommend panko breadcrumbs for extra crispiness. Panko is lighter and airier than regular breadcrumbs. This gives your fish a great texture. You can also use regular breadcrumbs if you have them on hand. Seasoning is key to flavor. Here’s what you need: - 1 teaspoon garlic powder - 1 teaspoon onion powder - 1/2 teaspoon paprika - 1/2 teaspoon dried oregano - 1/2 teaspoon salt - 1/4 teaspoon black pepper These spices add depth and taste to the fish. Also, you’ll need: - 2 large eggs - 2 tablespoons Dijon mustard - 1 tablespoon lemon juice The Dijon mustard helps the breadcrumbs stick. The lemon juice brightens the flavor. Each element makes this dish simple yet delicious. For the full recipe, check out the full recipe section in this article. First, set your oven to 425°F (220°C). This temperature helps the fish become crispy. While the oven heats, line a baking sheet with parchment paper. This step keeps the fish from sticking and makes clean-up easy. Next, grab a large bowl. In it, combine the breadcrumbs with the grated Parmesan cheese. Add the garlic powder, onion powder, paprika, oregano, salt, and black pepper. Mix everything well until you see a uniform blend. This mixture adds a big burst of flavor to your fish. Now, take another bowl and whisk the eggs, Dijon mustard, and lemon juice together. Dip each fish filet into this egg mixture. Let any extra egg drip off. Then, coat the fish in your breadcrumb mix. Press gently on the crumbs to help them stick. Place the coated filets on the prepared baking sheet. This step makes sure each piece is covered nicely. Check out the Full Recipe to see how to bake the fish perfectly! To get your fish super crispy, start with dry filets. Pat them with a paper towel. This removes extra moisture. Use panko breadcrumbs for a crunchier texture. They create a nice, airy layer. Press the crumbs onto the fish firmly. This helps them stick during baking. A final drizzle of oil or spray gives extra crispiness. Bake the fish at 425°F (220°C). This high heat creates a perfect golden crust. Cook the filets for 15 to 20 minutes. Check them after 15 minutes. The fish should flake easily with a fork when done. Don’t open the oven door too early. This can let heat escape and affect cooking. Use a baking sheet lined with parchment paper. This prevents sticking and makes cleanup easy. A wire rack on top of the baking sheet helps air circulate. If you don’t have one, it’s okay! Just place the fish directly on the parchment. A spatula makes transferring the fish easy after baking. For best results, use a good-quality oven. This ensures even cooking and browning. For the full recipe, check the recipe section above. {{image_2}} You can mix up the flavors in your crispy oven-baked fish. Try adding herbs like dill or parsley for a fresh twist. For a spicy kick, add cayenne pepper or crushed red pepper flakes. You can also swap the lemon juice for lime juice for a different zest. A splash of soy sauce can bring a savory touch. Experiment with different spices to find your favorite flavor blend. Bread your fish using crushed cornflakes or nuts for a crunchier texture. You can also use seasoned flour instead of breadcrumbs. If you want a gluten-free option, try using almond flour or ground oats. Each method gives a unique taste and texture. Don't be afraid to try new ideas and find what you love best. Pair your crispy oven-baked fish with fresh sides for a complete meal. A simple salad with greens and a lemon vinaigrette works well. Roasted vegetables or steamed broccoli add color and nutrients. For a heartier side, serve it with rice or quinoa. You can also serve your fish with sweet potato fries for a fun twist. These sides will complement the fish and make your meal more satisfying. For the full recipe, check out the complete details. Storing leftovers is easy. Place any uneaten fish in an airtight container. Keep the container in the fridge. Enjoy the fish within two days for the best taste. To reheat, use the oven for best results. Preheat your oven to 350°F (175°C). Place the fish on a baking sheet. Heat for about 10 minutes, until warm. This keeps the fish crispy. You can also use a microwave, but it may not stay crispy. You can freeze the fish if you need to store it longer. Wrap each filet tightly in plastic wrap. Then, place the wrapped fish in a freezer bag. Squeeze out the air to avoid freezer burn. Use within three months for the best flavor. When ready to eat, thaw it in the fridge overnight. Reheat as mentioned above for crispy results. The best fish for oven baking are white fish filets. I like cod, tilapia, or haddock. These fish have a mild taste and firm texture. They hold up well when baked. You can also try salmon or trout for a richer flavor. Just choose fish that feels fresh. Check for clear eyes and a mild scent. To make your fish extra crispy, use panko breadcrumbs. They create a light, crunchy coating. You can also heat the oven to a high temperature. This helps crisp the coating quickly. Don't forget to spray or drizzle oil on the fish before baking. This adds moisture and enhances crispiness. For even more crunch, you can double-coat the fish. Dip it in the egg mixture twice, then coat it in breadcrumbs twice. Baking fish usually takes 15 to 20 minutes. It depends on the thickness of the filets. Fish is done when it flakes easily with a fork. The coating should be golden and crispy. Check it around the 15-minute mark to avoid overcooking. If you want a precise time, refer to the Full Recipe for guidance. You've learned how to prepare delicious baked fish. We covered fish selection, breadcrumb types, and key seasonings. I provided step-by-step instructions, tips for crispiness, and alternative cooking methods. You can even store leftovers or try fun variations. Remember, cooking should be fun and simple. Enjoy experimenting with new flavors and techniques. Happy cooking!

Crispy Oven-Baked Fish Simple and Flavorful Dish

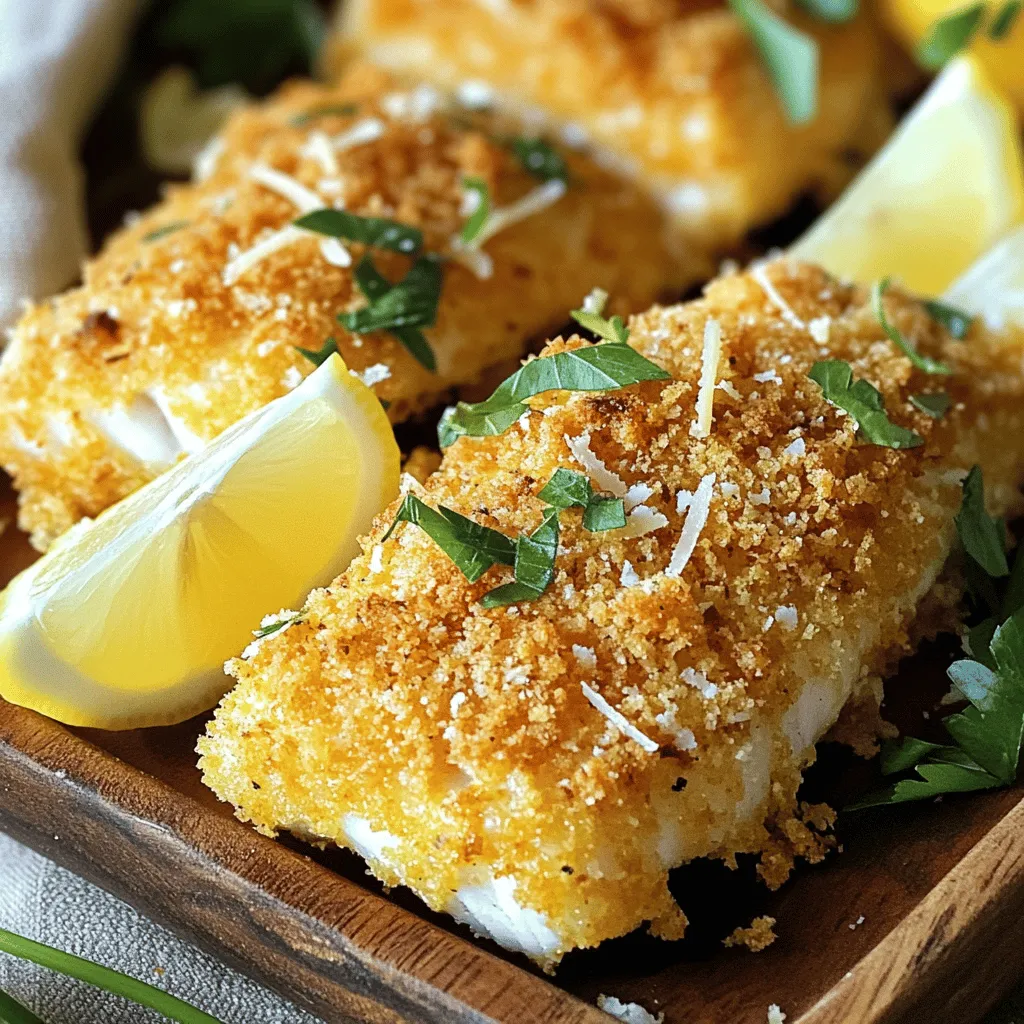
Looking for a simple and tasty dish? You’re in the right place! This Crispy Oven-Baked Fish is easy to make

To make Garlic Parmesan Zoodles, you need a few fresh and simple ingredients. Here’s what you’ll need: - 4 medium zucchini, spiralized into zoodles - 3 tablespoons olive oil - 4 cloves garlic, minced - 1/2 teaspoon red pepper flakes (optional) - 1/2 cup grated Parmesan cheese - Salt and pepper to taste - 2 tablespoons fresh parsley, chopped (for garnish) These ingredients come together to create a dish that bursts with flavor while being healthy. The zucchini serves as a great low-carb alternative to pasta. The garlic adds a wonderful aroma, and the Parmesan cheese brings creaminess. The red pepper flakes, if you choose to add them, give a slight kick that balances the flavors beautifully. And don’t forget the fresh parsley; it brightens the dish and adds color. For a detailed guide on how to prepare this dish, check the Full Recipe. With these ingredients, you can create a delightful meal that’s quick and easy to make! Spiralizing the zucchini To start, grab your zucchini. Use a spiralizer or a julienne peeler. Create long, noodle-like strands. Aim for about four medium zucchinis. Set the zoodles aside once done. Sautéing garlic Next, take a large skillet and heat three tablespoons of olive oil. Place it over medium heat. When the oil gets hot, add four minced garlic cloves. Sauté for about 30 seconds. Watch closely so it doesn’t burn. You want it fragrant but not dark. Cooking the zoodles Now, add the zoodles to your skillet. If you like heat, sprinkle in a half teaspoon of red pepper flakes. Toss the zoodles to coat them in the garlic oil. Cook for about three to four minutes. Stir occasionally, so they stay tender but crunchy. Adding red pepper flakes If you chose to use them, the red pepper flakes add a nice kick. They give the dish a bit of warmth. Mix them in right after adding the zoodles to the skillet. Incorporating Parmesan cheese Remove the skillet from heat. Add half a cup of grated Parmesan cheese. Toss the zoodles until they are evenly coated. The cheese will melt and stick to the zoodles nicely. Seasoning with salt and pepper Taste your zoodles. Add salt and pepper to your liking. This step is key for balancing all the flavors. Adjust as needed for your taste buds. Garnishing with parsley To make it look fresh, chop two tablespoons of parsley. Sprinkle this on top of your zoodles. It adds a pop of color and brightness. Plating options You can serve the zoodles in a bowl or on a plate. Consider adding a drizzle of olive oil for shine. Pair it with grilled chicken or shrimp for a full meal. Enjoy your Garlic Parmesan Zoodles hot! For the full recipe, check out the earlier section. To make perfect zoodles, you must avoid sogginess. Start with fresh zucchini. Choose firm ones without soft spots. Spiralize them right before you cook for the best texture. If you cut them too early, they can release water and become mushy. For cooking time, aim for 3-4 minutes. This keeps them tender yet crunchy. Stir them gently to avoid breaking the strands. Adding herbs and spices can elevate your zoodles. Fresh basil or oregano pairs well with garlic. For a kick, try adding red pepper flakes. You can also mix in lemon zest for brightness. If you're looking for cheese alternatives, try nutritional yeast for a vegan option. You can also use Pecorino Romano for a sharper flavor. A good spiralizer is key to making zoodles. I recommend a handheld spiralizer or a countertop model. Both work well and are easy to clean. Other useful kitchen gadgets include a sharp knife for prepping vegetables and a large skillet for cooking. A good set of measuring spoons helps you get the right amounts for the recipe. Don’t forget to check out the Full Recipe for all the steps to make this dish! {{image_2}} You can swap zucchini for other veggies. Try using carrots or sweet potatoes. They also spiralize well. You can make zoodles from cucumbers too. Each option adds a new flavor. For cheese, Parmesan is classic, but feel free to experiment. Try pecorino or nutritional yeast for a unique twist. These options can change the dish’s taste. If you're on a low-carb plan, zoodles fit right in. They are a great pasta substitute. You can enjoy a tasty meal without the carbs. For vegan or dairy-free dishes, skip the cheese. Use nutritional yeast for a cheesy flavor. You can also add creamy avocado for richness. This keeps the dish delicious and plant-based. Garlic Parmesan zoodles pair well with proteins. Try grilled chicken or shrimp for a filling meal. These proteins add great taste and texture. You can also serve zoodles as a side dish. They go well with steaks or fish. This adds color and nutrition to your plate. For more ideas, check out the Full Recipe for the perfect Garlic Parmesan Zoodles! After you make Garlic Parmesan Zoodles, store them in the fridge. Use an airtight container. This keeps the zoodles fresh for about three days. If you want to freeze them, do so right after cooking. Place zoodles in a freezer bag, remove excess air, and seal tightly. They last up to three months in the freezer. However, freezing may change their texture. When it's time to enjoy your leftovers, I recommend reheating them in a skillet. Add a splash of olive oil over medium heat. Stir gently for about two to three minutes. This method helps keep the zoodles crunchy. You can also use the microwave, but be careful not to overheat. Heat in short bursts of 30 seconds, stirring in between. This way, the zoodles stay tender without getting mushy. Garlic Parmesan Zoodles last about three days in the fridge. After this, they may lose flavor and texture. Signs of spoilage include a sour smell and a slimy texture. If you see these signs, it’s best to discard them. Always trust your senses when it comes to food safety. Zoodles are noodles made from zucchini. They are a great low-carb option for pasta lovers. Zoodles are light and refreshing, offering a great way to enjoy veggies. You get added nutrients like vitamins A and C. They are also very hydrating, which is perfect for a healthy meal. You can cook them quickly, making them a fast choice for dinner. Plus, they soak up flavors well, especially when paired with garlic and Parmesan. Yes, you can meal prep Garlic Parmesan Zoodles! Start by spiralizing your zucchini and storing it in the fridge. Keep it in an airtight container to maintain freshness. Cooked zoodles can last for about three days. You can also prepare the sauce ahead of time. Just mix the garlic, olive oil, and cheese separately. When ready to eat, toss everything together in a pan for a quick meal. This makes it easy to enjoy a healthy dish all week long. You don’t need a spiralizer to make zoodles. You can use a simple vegetable peeler or a julienne peeler. Just peel the zucchini into long strips, creating thin noodles. A box grater works too; shred the zucchini into noodle-like pieces. Another option is to slice the zucchini thinly and stack the slices, then cut them into strips. These methods give you tasty zoodles without needing special tools. Garlic Parmesan Zoodles pair well with many dishes. You can serve them with grilled chicken or shrimp for protein. A side salad adds freshness and crunch. Want more flavor? Try adding sun-dried tomatoes or olives. For a heartier meal, serve them with marinara sauce or pesto. You can even enjoy zoodles as a side dish with steak or fish. The options are endless! For the full recipe, check the details above. In this post, we explored how to make tasty Garlic Parmesan Zoodles. From ingredient lists to step-by-step instructions, you learned how to spiralize zucchini, sauté garlic, and mix in the flavors. We also shared tips to perfect your zoodles and variations to keep it fun and fresh. Remember, you can store leftovers and enjoy zoodles again later. Cooking should be easy and enjoyable. I hope you feel ready to try this dish yourself!

Garlic Parmesan Zoodles Flavorful and Healthy Recipe

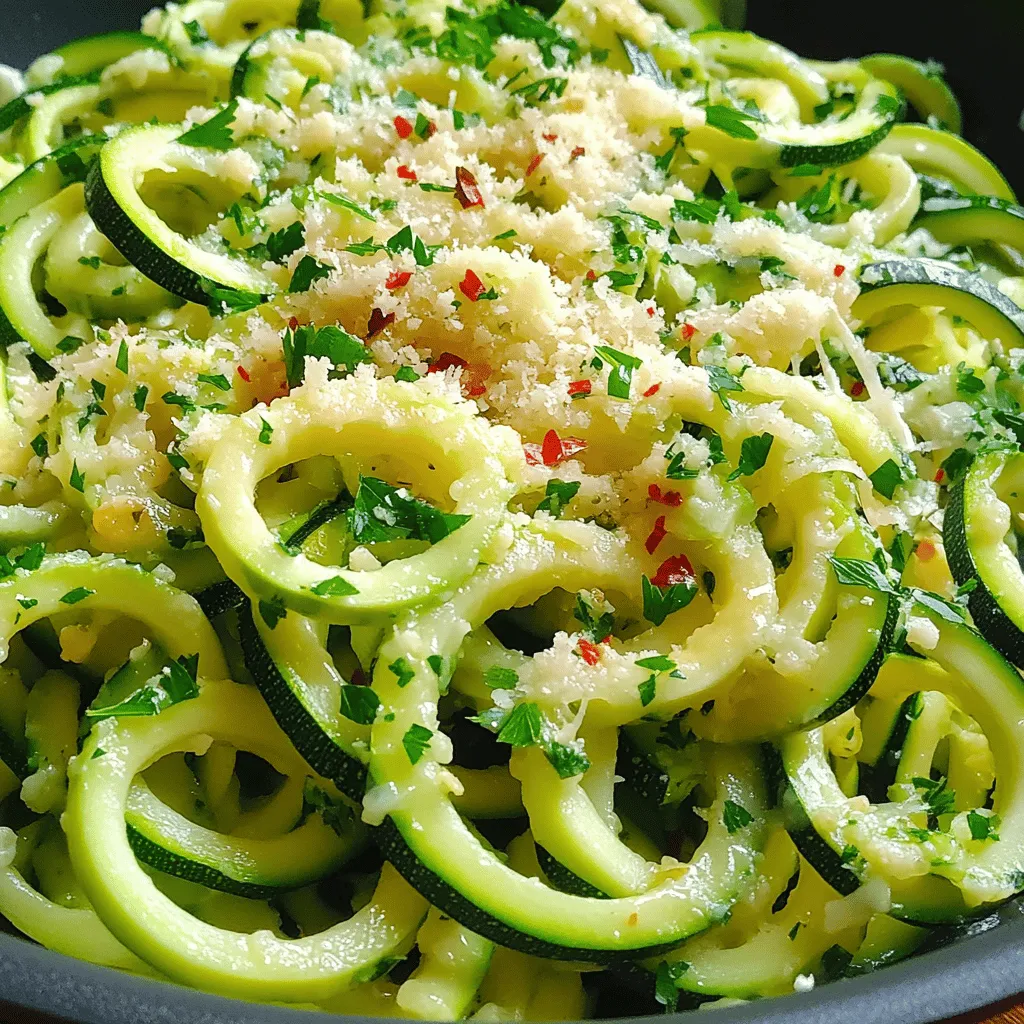
Are you ready to elevate your dinner with a dish that’s both tasty and healthy? Garlic Parmesan Zoodles are the

- 1 pound of baby carrots (or sliced regular carrots) - 3 tablespoons pure maple syrup - 2 tablespoons unsalted butter - 1 tablespoon olive oil - 1 teaspoon cinnamon - 1/2 teaspoon salt - 1/4 teaspoon black pepper - Fresh parsley or thyme for garnish You need simple, fresh ingredients to make maple glazed carrots. I love using baby carrots for their sweet taste and tender bite. If you can't find them, sliced regular carrots work perfectly too. Maple syrup adds a natural sweetness, while butter and olive oil create a rich glaze. Cinnamon, salt, and black pepper bring balance to the dish. Fresh herbs like parsley or thyme add a pop of color and flavor. When you gather these ingredients, you're set for a delightful side dish. Each bite will burst with flavor and warmth. You can find the full recipe within this article, so let’s get cooking! - Preheat your oven to 400°F (200°C). - In a large mixing bowl, combine maple syrup, melted butter, olive oil, cinnamon, salt, and black pepper. Whisk until smooth. This simple mix brings a warm flavor. - Toss baby carrots in the maple glaze until fully coated. Make sure each carrot gets a nice layer. This step is key for flavor. - Spread the glazed carrots on a parchment-lined baking sheet. Lay them out in a single layer for even cooking. - Roast for 20-25 minutes, stirring halfway through. This helps them cook evenly and caramelize. The sweet aroma will fill your kitchen! You might want your carrots sweeter or less sweet. To change the sweetness, try these ideas: - Add more maple syrup for extra sweetness. - Use less maple syrup if you prefer a milder taste. - Mix in a pinch of brown sugar for a deeper flavor. - Taste the glaze before adding the carrots. Adjust as needed. Even cooking helps get the best flavor. Here are some tips: - Cut carrots into similar sizes. This helps them cook at the same rate. - Spread the carrots out on the baking sheet. They should not touch each other. - Stir the carrots halfway through roasting. This helps them caramelize evenly. - If you can, use a dark baking sheet. It helps the carrots roast better. You can add more flavors to your carrots. Here are some great ideas: - Sprinkle some garlic powder for a savory touch. - Try adding a pinch of nutmeg for warmth. - Fresh herbs like thyme or rosemary work well. - Toasted nuts like pecans or walnuts add texture and taste. - A dash of cayenne pepper gives a nice kick if you like heat. For the complete recipe, check out the Maple-Glazed Carrots Delight! {{image_2}} You can mix in other veggies for a tasty twist. Sweet potatoes add a nice texture. Brussels sprouts work well, too. Try parsnips for a unique flavor. Just cut them into similar sizes for even cooking. Toss them in the maple glaze just like the carrots. Roasting is not the only way to cook them. You can sauté the carrots on the stovetop. Heat olive oil in a pan, add the carrots, and pour in the glaze. Cook for about 10 minutes until tender. Grilling is also a fun option. Place the glazed carrots on skewers and grill them for a smoky flavor. To make this dish vegan, swap the butter for coconut oil or vegan margarine. Ensure your maple syrup is pure and not mixed with other sweeteners. For a gluten-free version, this recipe is already safe. Just check any added ingredients for gluten. Enjoy this maple glazed treat in many ways! To store leftover maple glazed carrots, let them cool first. Place them in an airtight container. Store in the fridge for up to four days. This keeps them fresh and tasty. If you want to enjoy them later, make sure they are well sealed. When you reheat, avoid the microwave if possible. Instead, use the oven for best results. Preheat your oven to 350°F (175°C). Place the carrots on a baking sheet. Warm them for about 10 minutes. This method keeps the flavor and adds a nice texture. You can freeze maple glazed carrots, but they may change in texture. Start by letting them cool completely. Place them in a freezer-safe bag. Remove as much air as possible before sealing. They can last up to three months. To thaw, place them in the fridge overnight before reheating. This helps keep their taste bright and lovely. Yes, you can use regular carrots. Just slice them into even pieces. Aim for about 1-inch lengths. This helps them cook evenly. Baby carrots are sweet and tender, but regular carrots work great too. They add a lovely crunch to the dish. To make these carrots vegan, replace the butter with vegan margarine or coconut oil. Both options give a nice richness. You can also skip the butter entirely and use a splash more olive oil. The maple syrup stays the same, keeping that sweet flavor intact. These carrots pair well with many main dishes. Try serving them with roasted chicken or grilled salmon. They also complement vegetarian meals like quinoa or lentil dishes. The sweetness of the carrots balances savory flavors. They add color and flair to your plate. You can find the complete recipe in "Maple-Glazed Carrots Delight 🥕." It includes all the steps and tips for making these tasty carrots. This recipe for maple-glazed carrots is simple and full of flavor. You can prep them in no time and roast them to perfection. Remember, you can adjust the sweetness and mix in other veggies to suit your taste. Store leftovers correctly to keep them fresh, or even freeze them for later. For more tips, check the FAQs. Enjoy your tasty carrots and share them with friends!

Maple Glazed Carrots Flavorful and Simple Side Dish

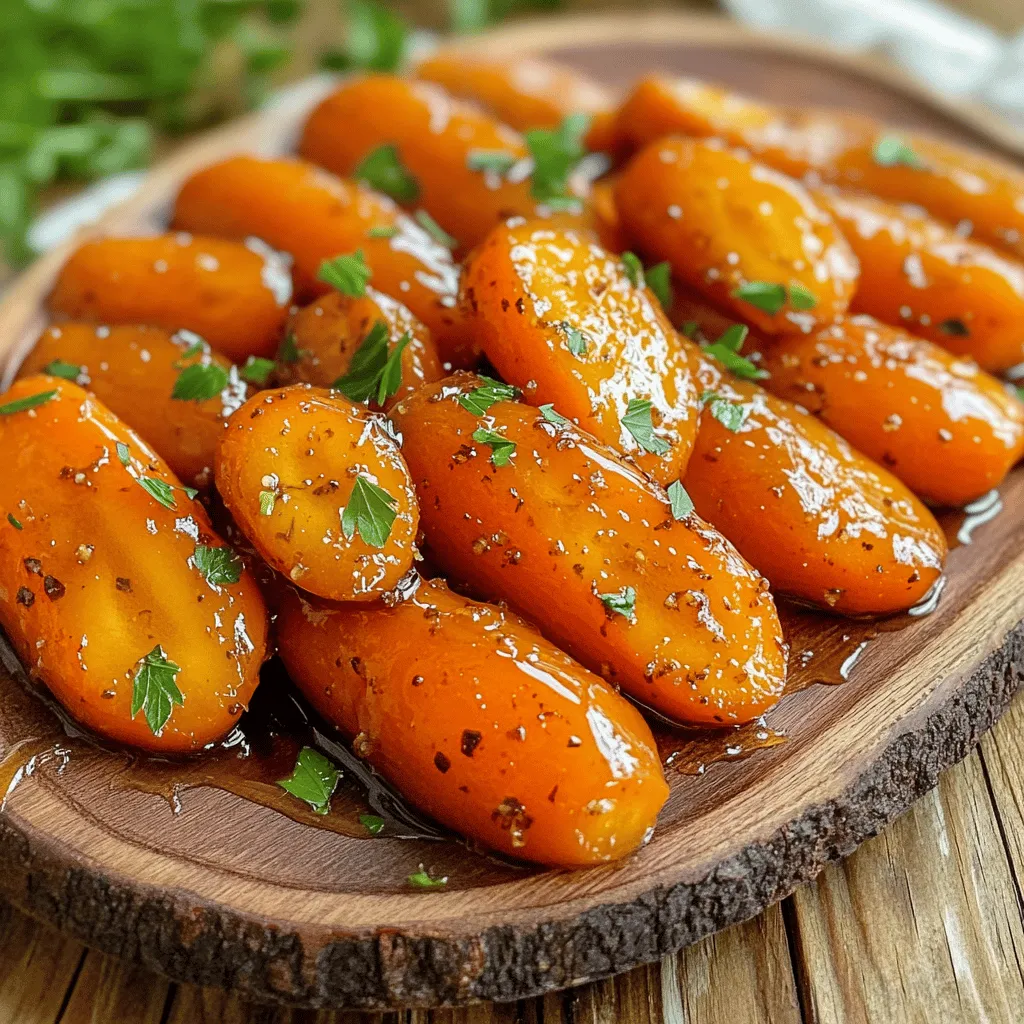
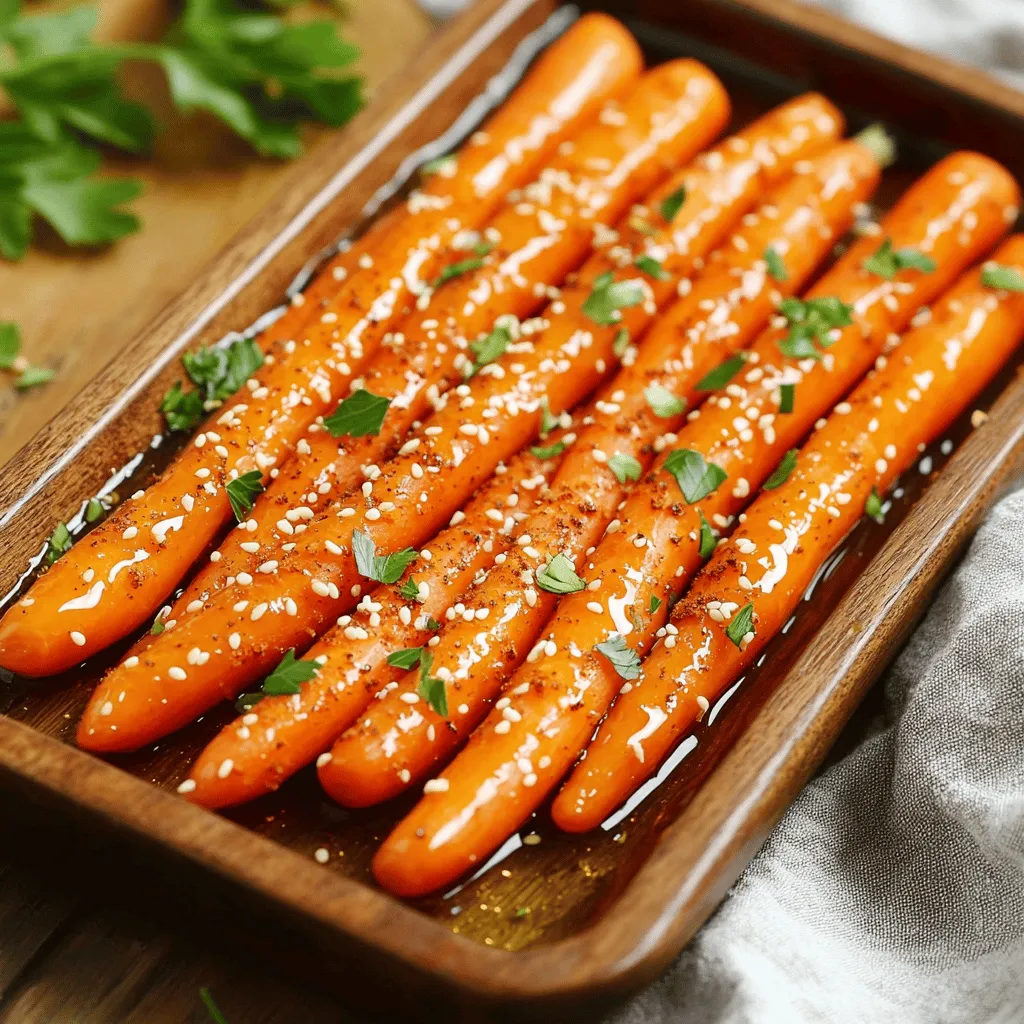
Looking for a tasty side dish that’s easy to make? Maple Glazed Carrots are your answer! This dish combines sweet

To make a great pesto pasta salad, you need good ingredients. Here’s what I recommend: - Types of Pasta Recommended: I love using fusilli pasta. Its spiral shape holds the pesto well. You can also use rotini or penne if you like. Just pick a pasta that cooks al dente. - Fresh vs. Store-Bought Pesto Options: Fresh pesto tastes the best. You can make it with basil, pine nuts, and Parmesan cheese. It’s simple! Just blend those together and add olive oil. If you’re short on time, store-bought pesto works too. Just look for a brand with natural ingredients. You can find the full recipe for this tasty salad below. This will help you gather all the ingredients you need. To cook the pasta, I use a large pot. Start by filling it with water. Add a good amount of salt to the water. This helps flavor the pasta. Bring the water to a boil. Once boiling, add 12 oz of fusilli pasta. Cook it according to the package instructions. Usually, this takes about 8-10 minutes. You want the pasta to be al dente, which means it's firm but not hard. After cooking, drain the pasta in a colander. Rinse it under cold water to stop the cooking process. This step cools the pasta and helps keep it from sticking together. For the pesto, you need a food processor. This tool makes blending easy. Start by adding 1 cup of fresh basil leaves. Then, add 1/4 cup of pine nuts and 1/2 cup of grated Parmesan cheese. Add a pinch of salt to enhance the flavor. Pulse the mixture until it's finely chopped. While the processor runs, slowly pour in 1/2 cup of olive oil. This makes the pesto creamy. Taste the pesto and adjust the seasoning. You can add more salt or cheese if you like. In a large mixing bowl, combine the cooled pasta with other ingredients. Add 1 cup of halved cherry tomatoes, 1/2 cup of diced yellow bell pepper, and 1/2 cup of diced cucumber. Then, add 3/4 cup of crumbled feta cheese. Now, it's time to mix! Add the pesto to the bowl. Use a large spoon to gently toss everything together. This ensures each piece of pasta and vegetable gets coated in the tasty pesto. Finally, squeeze the juice of 1 lemon over the salad. This brightens the flavors. Mix again to blend everything well. Let the salad chill in the fridge for at least 30 minutes. This helps all the flavors meld together. Enjoy your delicious Pesto Pasta Salad! For the complete recipe, check the Full Recipe. How to Toast Pine Nuts Toasting pine nuts adds depth to their flavor. Start by placing them in a dry pan over medium heat. Stir them frequently for about 3 to 5 minutes. They should turn golden brown and smell nutty. Don’t walk away; they can burn quickly! Once toasted, let them cool before adding them to your salad. Alternatives for Parmesan and Feta If you want to switch things up, try different cheeses. For Parmesan, use Pecorino Romano for a stronger taste. If you need a dairy-free option, nutritional yeast gives a cheesy flavor. For feta, goat cheese works well for creaminess. You can also use ricotta for a lighter touch! Ideal Pairings for Pesto Pasta Salad Pesto pasta salad pairs well with grilled chicken or shrimp. You can also serve it with crusty bread for a complete meal. A light white wine, like Sauvignon Blanc, makes a refreshing drink alongside it. Garnishes for a Stunning Presentation To make your salad look fancy, add a sprinkle of fresh basil on top. Cherry tomatoes can add a pop of color. You can also drizzle a bit of olive oil before serving. For a crunchy touch, add extra toasted pine nuts on the top. For the full recipe, check out the Pesto Pasta Salad Delight 🥗! {{image_2}} Pesto is not just one flavor. You can use many different herbs. The classic is basil pesto. It has a fresh, herby taste. You blend basil leaves, garlic, pine nuts, cheese, and olive oil. This mix gives a bright green sauce. Spinach pesto is another great choice. It uses spinach instead of basil. Spinach adds a mild flavor, making it kid-friendly. You can mix spinach with nuts and cheese. This way, you still get that rich taste. If you follow a vegan diet, you have options too. You can make vegan pesto by swapping cheese for nutritional yeast. This gives a nutty flavor without dairy. Just blend your favorite greens, nuts, garlic, and olive oil. You can make pesto pasta salad even better with extra ingredients. Adding proteins is a great way to do this. Chicken, shrimp, or tofu can make the salad more filling. Grilled chicken adds a nice smoky taste. Shrimp brings a sweet flavor, while tofu is great for plant-based diets. Seasonal vegetables also enhance your salad. Try adding cherry tomatoes, zucchini, or bell peppers. These veggies bring color and crunch. You can use whatever is fresh and in season. This keeps the salad vibrant and tasty. Feel free to explore different flavors. Your pesto pasta salad can be unique each time. Check out the Full Recipe for more ideas! To keep your pesto pasta salad fresh, store it in the fridge. Use an airtight container to prevent any odors from other foods. This helps maintain its bright color and flavor. You can enjoy it cold or at room temperature. I recommend eating it within three days for the best taste. If you want to save some for later, you can freeze it. However, the texture may change once thawed. To freeze, place the salad in a freezer-safe bag. Remove as much air as possible before sealing. You can freeze it for up to two months. When ready to eat, thaw it in the fridge overnight. Pesto pasta salad lasts about three to five days in the fridge. Always check for freshness before eating. If it sits too long, it may spoil. Watch for these signs of spoilage: - Off smell or sour odor - Change in color or texture - Mold spots or slimy pasta If you see any of these signs, discard the salad immediately. Enjoy your pesto pasta salad safely! For the full recipe, check out the Pesto Pasta Salad Delight. To make homemade pesto, you need simple ingredients. Gather fresh basil, pine nuts, Parmesan cheese, and olive oil. You can add salt for taste. 1. Start by adding basil leaves, pine nuts, and cheese to a food processor. 2. Pulse the mix until it’s finely chopped. 3. While the processor runs, slowly pour in the olive oil. 4. Keep blending until it’s smooth. Adjust salt if needed. This fresh pesto adds a bright flavor to your pesto pasta salad. Yes, you can use different pasta shapes! While fusilli works great, you can try rotini, farfalle, or penne. Each shape holds the pesto well. Choose a shape that you enjoy or have on hand. It adds a fun twist to your dish. Yes, it can be gluten-free! Just pick gluten-free pasta made from rice or quinoa. These options work well in your salad. Be sure to check that your pesto is gluten-free too. This way, everyone can enjoy the salad without worry. Absolutely! Making this salad ahead of time is smart. You can prepare it a day before your event. Just store it in an airtight container in the fridge. This lets the flavors blend nicely. When ready to serve, give it a quick toss. Enjoy your easy and tasty pesto pasta salad! For the full recipe, check out Pesto Pasta Salad Delight. This blog post covered how to make a delightful pesto pasta salad. We explored key ingredients, ideal pasta types, and whether to choose fresh or store-bought pesto. I shared tips for cooking pasta perfectly and making tasty pesto. You learned how to combine the salad for even flavor and texture, plus options to enhance it with nuts or cheese. Finally, I discussed storage tips and answered common questions. Enjoy making this dish! It’s simple and lets you get creative. Your meals can be fresh, tasty, and healthy!

Pesto Pasta Salad Flavorful and Easy to Make

Looking for a quick, tasty dish that impresses? Join me as I guide you through making a flavorful Pesto Pasta

Older posts
Newer posts
← Previous Page1 … Page11 Page12 Page13 … Page55 Next →

dsad

© 2025 Lisa Dishes • Built with GeneratePress

Our Policies

  • Copyright Policy
  • Cookie Policy
  • GDPR Policy
  • Privacy Policy
  • Disclaimer
  • Terms Of Use

More Information

  • Home
  • About
  • Contact
  • Appetizers
  • Dessert
  • Dinner
  • Drinks
©2025, Lisa Dishes About Back To Top